Attachments
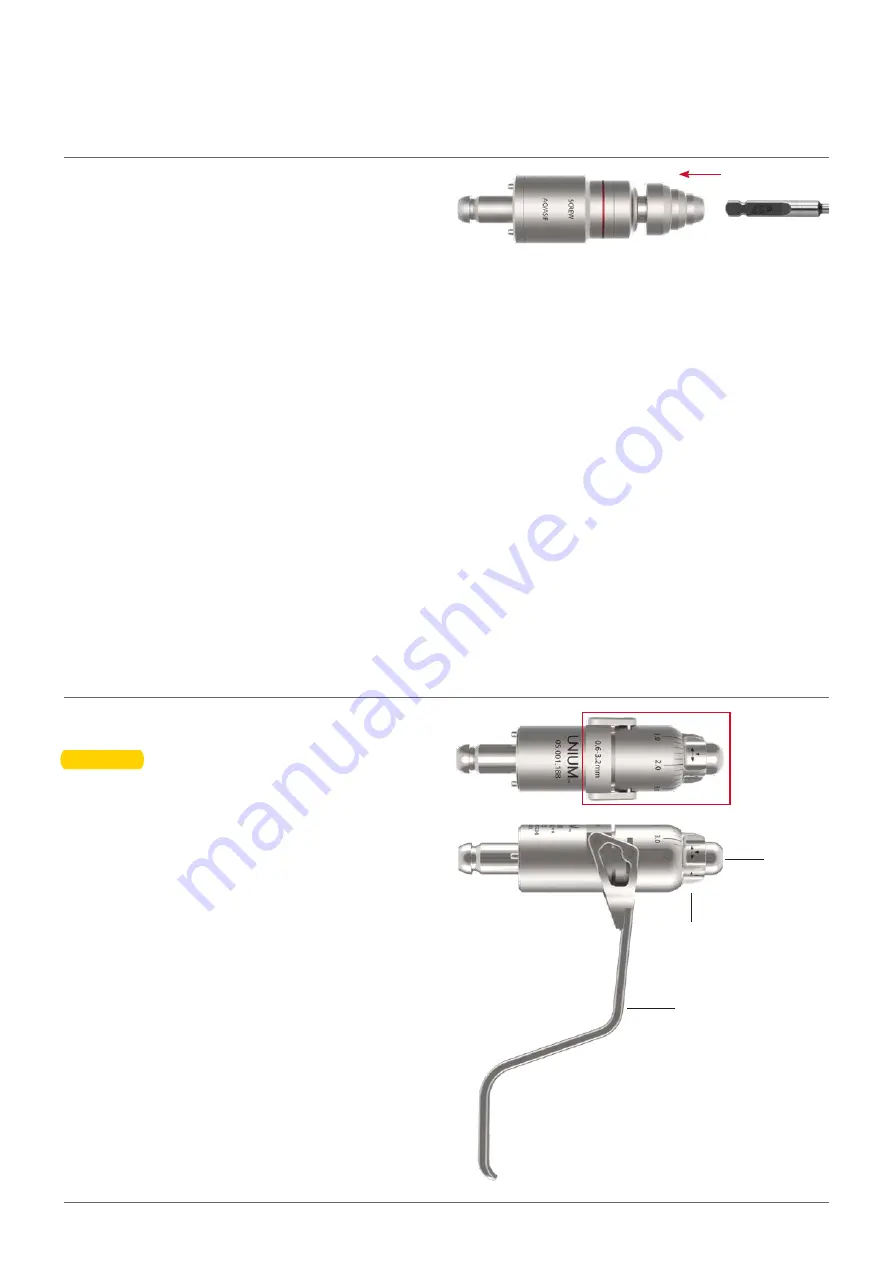
Screw Attachment and Quick Coupling
for Kirschner Wires
Screw Attachment, 340 rpm
Inserting and Removing the Cutting Tools
To connect the cutting tool, insert it into the attachment
by applying a light pressure while rotating it slightly until it
locks in place.
To disconnect, pull the coupling sleeve back and remove
the cutting tool.
▲ WARNINGS:
•
Never fully insert screws with the handpiece.
The last turns or locking should always be done
manually.
•
Always use an appropriate torque limiting attachment
when putting locking screws into a locking plate.
▲ Precaution:
It is also possible to use the AO/ASIF Quick Coupling drill
attachment (05.001.250) to insert screws. However, the
Screw Attachment (05.001.251) has a lower speed and a
higher torque and is therefore more suitable. Screws with
a large diameter may not be able to be inserted with the
AO/ASIF Quick Coupling drill attachment as the torque
may not be sufficient.
AO/ASIF Quick Coupling (05.001.251)
2
1
Quick Coupling for Kirschner Wires, 1,700 rpm
Kirschner Wires of any length with a diameter of
0.6–3.2 mm can be used with the quick coupling for
Kirschner Wires.
1. Adjust the Kirschner Wire diameter according to the
markings on the adjusting sleeve (1). Slightly press the
adjusting sleeve axially against the handpiece and
rotate the sleeve.
2. Apply a slight amount of pressure to insert the
Kirschner Wire from the front into the cannulation (2).
The wire is then held in place.
3. Adjust the working length by pulling or pushing on the
wire.
4. To clamp the wire in place, pull the tension lever (3)
towards the handpiece with your little finger and ring
finger. The clamping force can be changed by pulling
and releasing the tension lever.
5. Insert the wire into the bone.
6. To adjust the grip on the wire, reduce the clamping
force and slide the attachment along the wire to the
desired length. Reclamp the wire by pulling on the
tension lever.
3
Quick Coupling for Kirschner Wires (05.001.188)
20
Instruction for Use • UNIUM
™


