220
Climate control
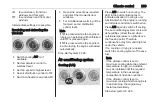
To activate a desired preset memory
number select P1, P2 or P3, then
select On and confirm.
When a program is activated P and
Y
will be displayed together.
To deactivate a preset memory,
select P1, P2 or P3, then select Off
and confirm.
Heating stops automatically
5 minutes after the programmed
departure time.
Note
The remote control system features
a temperature sensor which
calculates the runtime according to
the ambient temperature and the
desired heating level (ECO or
HIGH). The system starts
automatically between
5 and 60 minutes prior to the
programmed departure time.
Set time and weekday
Þ
If the vehicle battery is disconnected
or its voltage is too low, the unit will
need to be reset.
● Select
F
in the menu bar and
confirm.
● Select
Þ
in the menu bar and
confirm.
● Adjust using
k
or
l
to change
the hour and confirm.
● Adjust using
k
or
l
to change
the minutes and confirm.
● Press
d
to exit.
● Select
F
in the menu bar and
confirm.
● Select Mo in the menu bar and
confirm.
● Adjust using
k
or
l
to change
the weekday and confirm.
● Press
d
to exit.
Heating level
The preferred heating level for
programmed departure times can be
set to either ECO or HIGH.
● Select
Y
in the menu bar and
confirm.
● Select ECO or HIGH and confirm.
● Press
d
to exit.
Operation (Type B)
Heating
Y
or Ventilation
x
Select the operating mode
Y
or
x
, if
necessary.
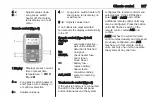
● Press
l
three times.
● Press
Y
and OFF
simultaneously,
Y
or
x
flashes.
● Adjust using
k
or
l
to select
Y
or
x
.
● Press
Y
and OFF simultaneously
to confirm.
To switch on, press
Y
for 1 second.
The predetermined heating duration,
e.g. 30, is displayed. The factory
setting is 30 minutes.
The heating duration can be set in
increments of 10 minutes. Due to the
power consumption, note the heating
duration.
● Press
l
four times.
● Press
Y
and OFF
simultaneously,
Y
/
x
flashes.
● Adjust using
k
or
l
to select the
desired heating duration.
● Press
Y
and OFF simultaneously
to confirm.
Summary of Contents for Movano
Page 1: ...Owner s Manual ...
Page 2: ......
Page 4: ...2 Introduction Introduction ...
Page 7: ...Introduction 5 ...
Page 13: ...In brief 11 Instrument panel overview ...
Page 15: ...In brief 13 ...
Page 98: ...96 Instruments and controls Control indicators in the instrument cluster ...
Page 124: ...122 Infotainment system Control elements overview Radio 15 USB ...
Page 126: ...124 Infotainment system NAVI 50 IntelliLink ...
Page 128: ...126 Infotainment system NAVI 80 IntelliLink ...
Page 324: ...322 Customer information ...


