83
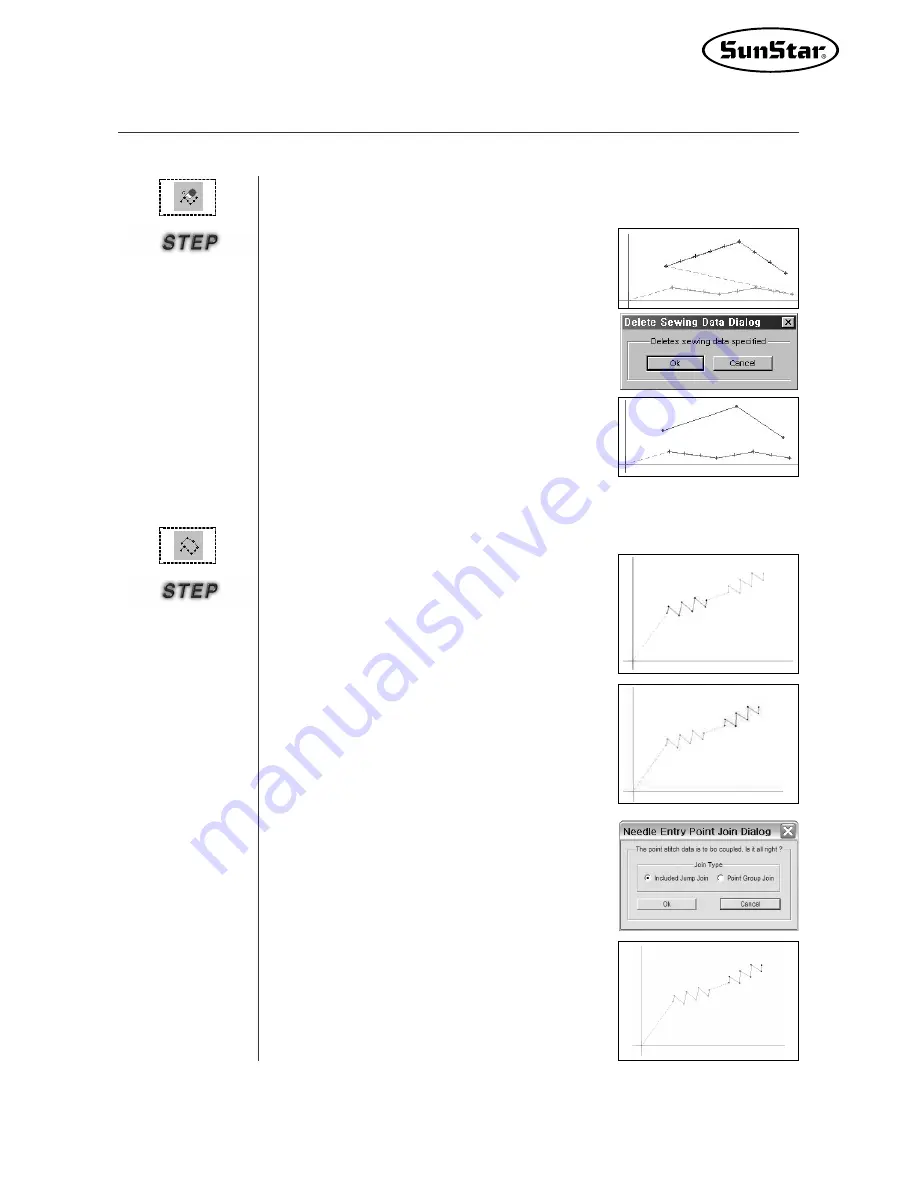
Delete the selected sewing data.
·
·
Sewing Data Deletion
①
Select sewing data delete button.
②
Select sewing data, then the selected sewing
data displays in red.
③
Click the mouse
’
s right button to create the
new dialog box.
④
Click
“
OK
”
to the selected sewing data.
⑤
Up to jump data are automatically deleted as
the sewing data are deleted.
⑥
There are 2 kinds of method to join two groups
of point stitches. The first one is “Included Jump
Join”, and the other one is “Point Group Join”.
⑥-1
Select “Incuded Jump Join”, and click “OK”
button. After that you can find that jump
stitches between two groups of point stitches.
·
·
Point Stitching Join
①
Select “
Point Stitching Join
”.
②
Select first Point Stitching Data.
③
Click the mouse
’
s right button.
The message saying that the following sewing
data should be selected shall be displayed in
the state bar.
④
Select second Point Stitching Data.
⑤
Click the mouse
’
s right button. At this time,Point
Join Dialog is created.
■
■
Sewing Edit Tool
Summary of Contents for SSP-WE/3.5
Page 1: ...SSP WE 3 5 IInstruction M Manual SSP WE 3 5 MEE 070418 ...
Page 2: ......
Page 6: ...6 Before Using Check the followings prior to setting up the program and components ...
Page 18: ...18 Configuration of Program Function ...
Page 31: ...31 Data Configuration ...
Page 37: ...37 Create Data ...
Page 103: ...103 Circle point setting Cross point setting ...
Page 142: ...142 ...
Page 147: ...147 ...


