70
Editing Sewing Data
This is performed identical with how to edit configuration data. There are
three edit methods like configuration data. The following figure shows
sewing data edit buttons.
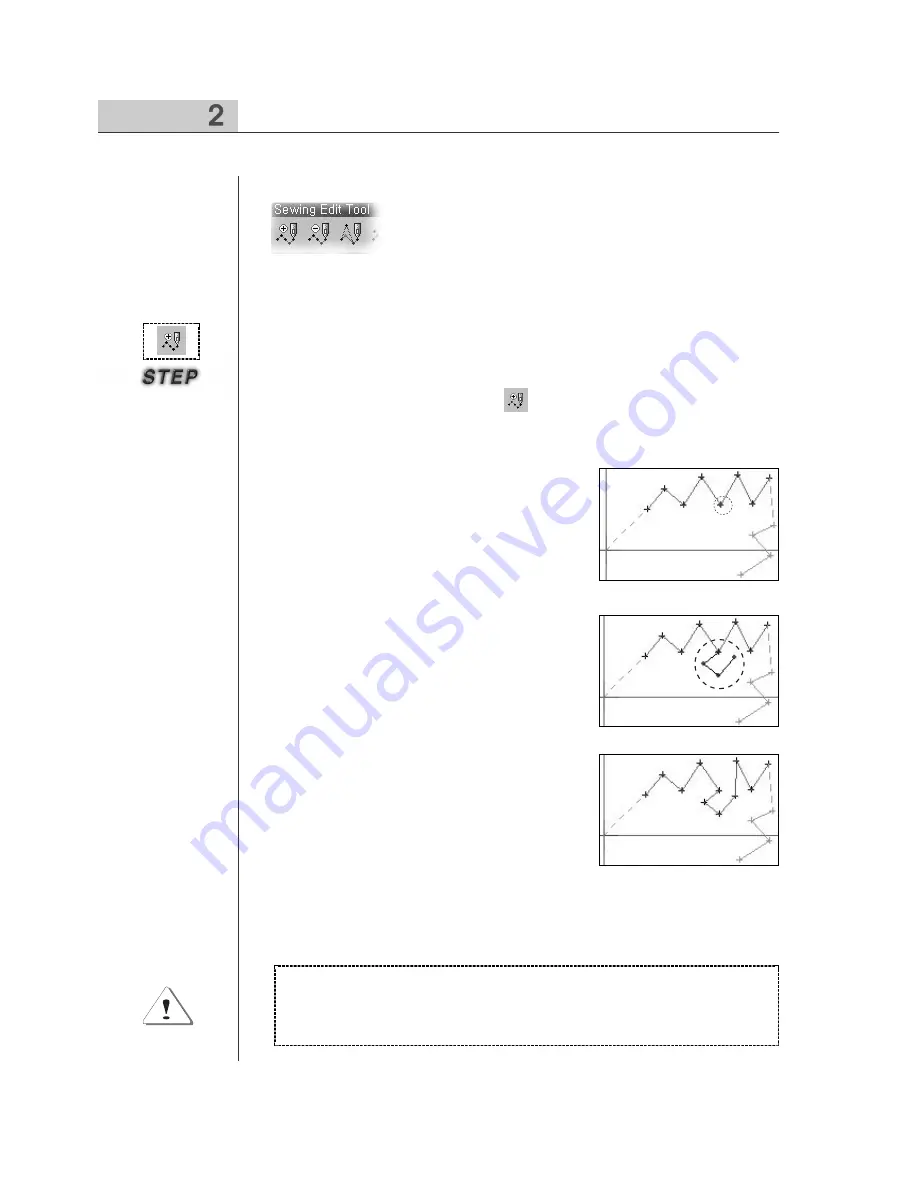
The following figure shows in phase how to input stitching with the sewing data
inputted by Point Stitching.
①
Select
“
Needle Entry Point Edition
Button
”
to edit in the tool bar.
②
Use the mouse
’
s left button to select the sewing
data joint to be added. The figure shows that the
5th joint of Point Stitching is selected, which
displays in blue.
③
Move the mouse point at the place to add, and
continuously click its left button. You can find that
input data is added based on the initially selected
joint.
④
Click the mouse
’
s right button to terminate. At
this time, you can find that the last point inputted
to add is automatically connected with the next
point of the existing configuration data point.
In case of editing sewing data including configuration data, you must
know well about the followings. If configuration data is changed after
editing sewing data, you must find that sewing data is created again
complying with the changed shape of configuration data.
■
■
Editing with Keyboard Direction Key
■
■
Editing by Keyboard Input Value
No description is for two above methods.
·
·
Needle Entry Point Edition
■
■
Editing with the mouse point
Summary of Contents for SSP-WE/3.5
Page 1: ...SSP WE 3 5 IInstruction M Manual SSP WE 3 5 MEE 070418 ...
Page 2: ......
Page 6: ...6 Before Using Check the followings prior to setting up the program and components ...
Page 18: ...18 Configuration of Program Function ...
Page 31: ...31 Data Configuration ...
Page 37: ...37 Create Data ...
Page 103: ...103 Circle point setting Cross point setting ...
Page 142: ...142 ...
Page 147: ...147 ...


