Instruction Manual
93
number to distinguish it from the rest and so it can be correlated with the record in the rundowns.csv file.
4.4.1 Analyzing Traces
The Trace menu screen in Alpha Toolbox makes it easy to view, print, analyze, export for sharing, and import
saved trace files.
4.4.1.1
Screen Controls
The left side of the screen has three types of content. The Rundown button lists the fastening cycles stored in the
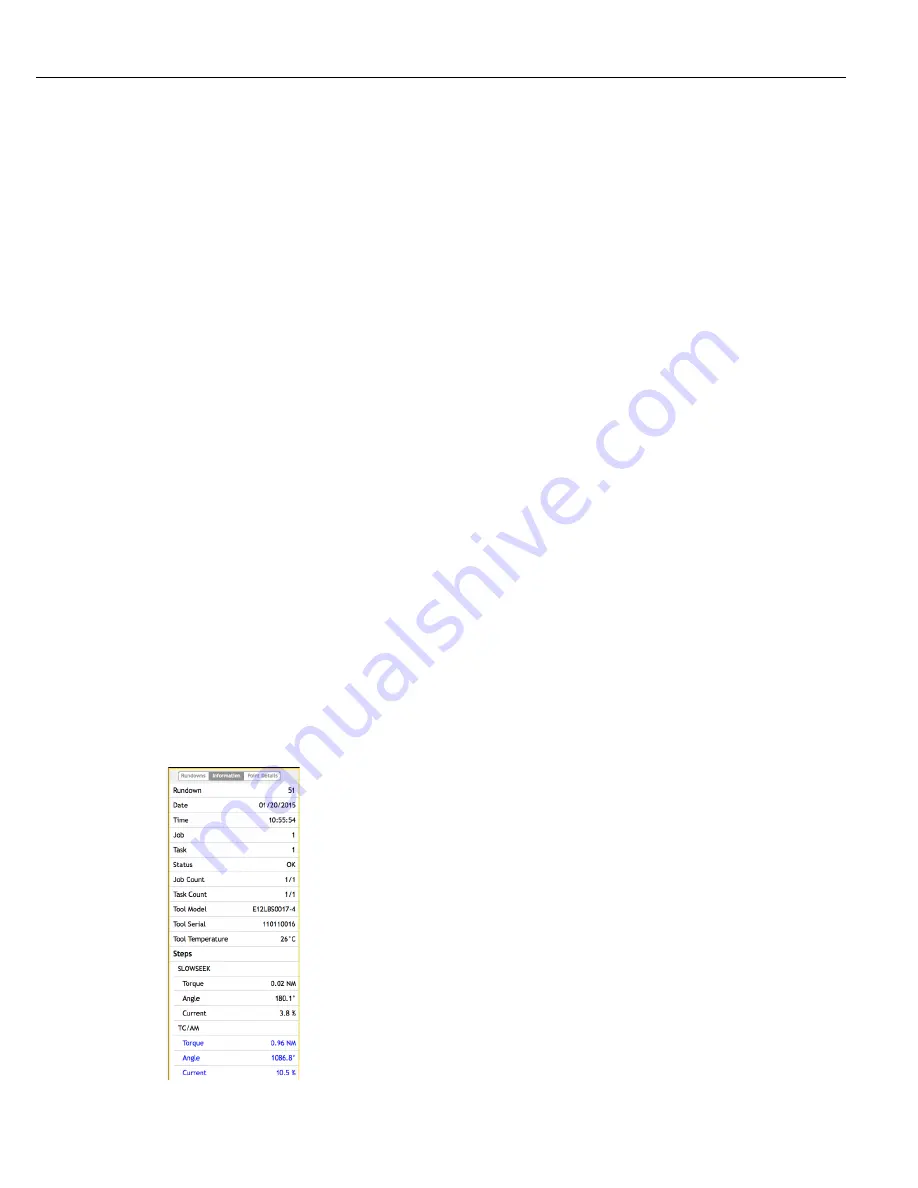
controller. The Information button shows detailed step by step information about the selected fastening cycle. The
Point Details button displays details about a point on the trace graph where the mouse is hovering.
4.4.1.1.1
Rundowns
There is a trace file for each fastening cycle. Each fastening cycles is represented by a controller run screen with
a miniature trace box. The trace box contains an actual representation of the trace for the fastening cycle. The
trace in the box will change depending on the values chosen for the X, Y1 and Y2 axes. See section “2.7 Display”
on page 15 for a description on the other elements of the run screen.
The run screen background can be green, red or blue. Green indicates the fastening cycle status is OK. Red
indicates the fastening Cycle status of NOK. Blue indicates the fastening cycle selected for display on the right of
the Trace screen, Information, Point Details, print or export.
The most recent fastening cycle will always be at the top of the list. A scroll bar is provided to view older fastening
cycles. Click on the torque value in the run screen to select the fastening cycle. The trace will draw on the right
of the Trace screen. If the top most fastening cycle is selected any new fastening cycle will pop into the top of the
list and be selected automatically. If a different fastening cycle is selected any new fastening cycle will pop into
the top of the list but will not be selected automatically.
Click on the miniature trace box to lock the trace for viewing. More than one trace may be locked. Each locked
trace will draw on the right and overlay on top of each other. They will be represented by dotted lines rather than
a solid line.
Selected and locked fastening cycles will move down the list as new ones come into the list. Use the scroll bar to
view or unlock older traces.
4.4.1.1.2
Information
Click on the Information button to display information about the selected fastening cycle. The left side of the
Trace screen will change to display this information.
Summary of Contents for QB Expert
Page 8: ......
Page 23: ...Introduction Instruction Manual 15 ...
Page 24: ......
Page 36: ......
Page 37: ...3 QB Expert Alpha Controller Programming SETUP Area SERVICE Area ANALYZE Area ...
Page 94: ......
Page 109: ...Instruction Manual 101 ...
Page 110: ......
Page 123: ...Instruction Manual 115 Tool Operation ...
Page 124: ......
Page 132: ...Input and Output Connector QB Expert Alpha Controller 124 Inputs example ...
Page 133: ...Controller Connections Instruction Manual 125 Outputs Sourcing example ...
Page 157: ...Controller Connections Instruction Manual 149 ...
Page 158: ...MODBUS TCP QB Expert Alpha Controller 150 ...
Page 175: ...Embedded PLC Instruction Manual 167 ...
Page 176: ......
Page 183: ...Multiple Spindle Instruction Manual 175 ...
Page 184: ... QB Expert Alpha Controller 176 ...
Page 201: ...Instruction Manual 193 Maintenance ...
Page 202: ...QB Expert Alpha Controller 194 ...
Page 203: ...10 QB Expert Alpha Controller Appendix A Torsion Compensation Angle Validation ...
Page 206: ......
Page 207: ...11 QB Expert Alpha Controller Glossary ...
Page 210: ......


