Read and understand this manual prior to operating or servicing this product.
A.0500.251 – IM-TL/13.00 EN (08/2009)
Instruction Manual
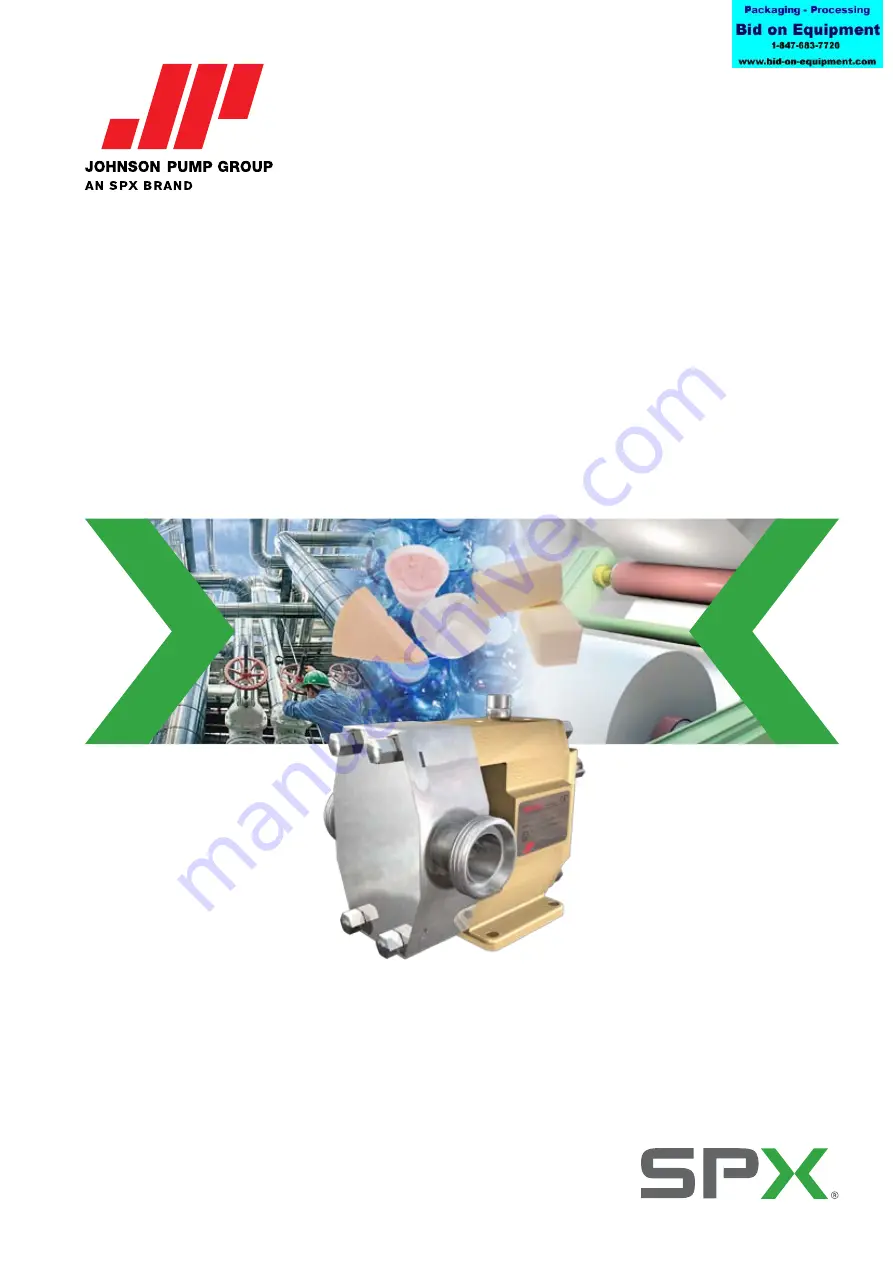
TopLobe
Rotary Lobe Pumps
Page 1: ...Read and understand this manual prior to operating or servicing this product A 0500 251 IM TL 13 00 EN 08 2009 Instruction Manual TopLobe Rotary Lobe Pumps...
Page 2: ...0139 TL3 0953 TL2 0074 TL4 0535 TL2 0234 TL4 2316 TL2 0301 TL4 3497 are in conformity with EC s Machinery Directive 98 37 EC Annex I Manufacturer Declaration as per EC s Machinery Directive 98 37 EC...
Page 3: ...6 2 3 System design and installation 17 2 3 1 Installations with CIP systems Cleaning In Place 19 2 3 2 Installations with SIP systems Sterilising In Place 19 2 4 Start 19 2 5 Shutdown 20 2 6 Routine...
Page 4: ...Single mechanical seal general 48 4 7 5 2 Single mechanical seal 49 4 7 5 3 Lip seal 49 4 7 5 4 O ring seal 50 4 7 5 5 Double mechanical seal 50 4 7 6 Rotor and pump cover assembly 51 5 0 Special too...
Page 5: ...M74 D60 TL4 0535 TL4 2316 and TL4 3497 77 8 3 3 Double mechanical seal M74 D61 TL2 0234 TL2 0301 TL3 0677 TL3 0953 78 8 4 O ring kit for double mechanical seal 79 9 0 Single and Double O ring seal 80...
Page 6: ...valve function 101 12 2 6 Setting and operating Air loaded air lifted safety relief valves 102 13 0 Disassembly Assembly 104 13 1 Spring loaded valves 104 13 1 1 Disassembly 104 13 1 2 Assembly 104 13...
Page 7: ...eipt storage and handling 1 2 1 Receipt storage Check the consignement for damage immediately on arrival In case of damage clearly mark upon the carrier s paperwork with a brief description of the dam...
Page 8: ...mp system or the drive to prevent the pump from exceeding maximum allowable pressure The safeguard system must be configured to handle reverse flow where applicable Do not operate the pump with a clos...
Page 9: ...necessary personal protection against noise must be used See the curves for sound levels in Section 3 6 Avoid any contact with hot parts of the pumps or drive units which may cause personal injury If...
Page 10: ...injury The pump unit must be mounted on a level surface and either be bolted to the foundation or be fitted with rubber clad feet The pipe connections to the pump must be stress free mounted securely...
Page 11: ...ing themselves on the rotating shaft shaft coupling The pump unit is supplied with factory mounted guards with certified maximum gaps in accordance with standard EN 294 1992 Warning The coupling guard...
Page 12: ...50 TL3 0677 0 677 50 50 80 TL3 0953 0 953 80 80 100 TL4 0535 0 535 50 50 80 TL4 2316 2 316 100 TL4 3497 3 497 150 5 Connection type 01 Hygienic threaded connection to DIN 11851 DIN 405 02 PN16 flanges...
Page 13: ...shing DW2 Double mechanical seal SiC to SiC to Carbon DB2 Double mechanical seal Carbon to SiC to Carbon O1 Single O ring seal DO2 Double O ring seal with flushing 9 Feet 1 Horizontal 2 Vertical for t...
Page 14: ...please contact your local distributor quoting the pump model and serial number This information is stated on the nameplate which is attached to the pump gearbox If the nameplate is damaged or missing...
Page 15: ...General performance The maximum capacity and pressure of the pumps is shown in the curve below this will give an overview of the application field The curves show the extreme limits but for many appli...
Page 16: ...nciple Liquid is drawn into the pump as the rotors disengage forming cavities The liquid is transported in the cavity of the rotors around the periferi of the rotor case Liquid is pressured out from t...
Page 17: ...damage to the pump 4 For positive displacement pumps as TopLobe it is recommended to install some safeguards for example a Built on safety relief valves b External pressure relief valve system for re...
Page 18: ...r for handling flammable or explosive media special consideration must be given not only regarding the security of the drive unit enclosure but also for the materials used both in couplings and guards...
Page 19: ...check that it is set correctly It is considered good practice to set the relief valve lower than the system design pressure After commissioning the relief valve should be reset to the required settin...
Page 20: ...e these factors can indicate bearing failure Control the quality of the oil Change the oil if contaminated with water etc Check that the valves are completely open on both inlet and outlet and that th...
Page 21: ...line Expel gas from suction line pump chamber Insufficient static suction head Raise product level to increase static suction head Product viscosity too high Decrease pump speed increase product temp...
Page 22: ...the cover The heat is transferred to the rotor case via the contact faces between cover and rotor case The heating cooling channels in the pump cover together with the flush holes of the shaft seal a...
Page 23: ...0 16 0 21 0 32 0 025 0 065 0 04 0 04 0 03 TL1 0139 0 125 0 125 0 16 0 21 0 32 0 025 0 065 0 04 0 04 0 03 TL2 0074 0 125 0 125 0 17 0 22 0 36 0 025 0 065 0 06 0 05 0 04 TL2 0234 0 150 0 150 0 16 0 16 0...
Page 24: ...re filled with oil therefore this table must be used to select recommended oil Oil changing Oil level must be checked with the pump static First change After 150 hours of operation thereafter every 30...
Page 25: ...I 329 L x x x x 0051 Lay shaft x x x x 0060 Gearbox GG20 EN 1561 0 6020 A278 30 x x x x 0070 Foot GG20 EN 1561 0 6020 A278 30 x x x x 0120 Gearbox cover GG20 EN 1561 0 6020 A278 30 x x x x 0121 Bearin...
Page 26: ...2 11 83 11 105 219 93 TL2 0074 210 78 140 216 140 78 204 227 50 8 27 24 55 8 313 110 132 11 98 11 120 261 109 TL2 0234 210 78 140 216 140 78 204 227 50 8 27 24 49 9 313 110 132 11 98 11 120 255 109 TL...
Page 27: ...11 98 11 66 120 261 TL2 0234 210 48 5 216 140 31 227 50 8 27 24 49 9 313 110 132 11 98 11 66 120 255 TL2 0301 210 48 5 216 140 31 227 50 8 27 24 55 9 325 110 132 11 98 11 66 120 261 TL3 0234 280 70 2...
Page 28: ...11 98 11 66 120 261 TL2 0234 210 48 5 183 140 31 227 50 8 27 24 82 9 313 110 132 11 98 11 66 120 255 TL2 0301 210 48 5 183 140 31 227 50 8 27 24 88 9 325 110 132 11 98 11 66 120 261 TL3 0234 280 70 24...
Page 29: ...0139 89 121 TL2 0074 98 130 TL2 0234 98 130 TL2 0301 98 130 TL3 0234 124 156 TL3 0677 124 156 TL3 0953 134 166 TL4 0535 159 191 TL4 2316 159 189 TL4 3497 159 189 3 4 4 1 Standard pump Dimensions in m...
Page 30: ...1145 GAS THREAD DS 722 NPT THREAD ISO 2852 SMS 3017 DIN 32676 Clamp connections d2 d1 d2 d1 d2 d1 d2 d1 d2 d1 d2 d1 3 b b b 4 8 b b d2 d1 d2 d1 d2 d1 d2 d1 b b A 0500 251 IM TL 13 00 EN 08 2009 3 4 5...
Page 31: ...d 60x1 6 Rd 70x1 6 Rd 98x1 6 Rd 70x1 6 Rd 132x1 6 d1 22 6 35 5 22 6 35 5 48 5 35 5 48 5 72 48 5 97 6 b 11 15 11 15 15 15 15 19 15 25 GAS THREAD d2 R 1 R 1 1 2 R 1 R 1 1 2 R 2 R 1 1 2 R 2 R 3 R 2 R 4 R...
Page 32: ...I Class 150 79 4 98 4 98 4 120 7 120 7 152 4 190 5 241 3 ANSI Class 300 88 9 88 9 114 3 127 ad PN16 115 150 150 165 165 200 220 285 PN25 115 115 150 165 ANSI Class 150 108 127 127 152 4 152 4 190 5 22...
Page 33: ...ndard Vertical pump mounting Pump type weight weight TL1 0039 17 17 TL1 0100 17 17 TL1 0139 18 18 TL2 0074 27 27 5 TL2 0234 27 27 5 TL2 0301 28 28 5 TL3 0234 69 71 5 TL3 0677 70 72 5 TL3 0953 72 74 5...
Page 34: ...4 82 80 78 76 74 90 88 86 84 82 80 A 0500 251 IM TL 13 00 EN 08 2009 3 6 Sound level Differential pressure bar TL1 Max rpm TL2 Max rpm Differential pressure bar TL3 Max rpm TL4 Max rpm Differential pr...
Page 35: ...driven 8 mm x Hexagon key Socket driven 10 mm x x x x Hexagon key Socket driven 17 mm x Hexagon key Socket driven 19 mm x Hexagon key Socket driven 20 mm x x x x Hexagon key Socket driven 24 mm x x x...
Page 36: ...iable for accidents and damage caused by non compliance with the guidelines Always work in a clean surrounding Keep all highly sensitive parts such as seals bearings etc in their original packaging as...
Page 37: ...rew M 8X 16 M 8 8 20 6 M 8X 16 M 8 8 20 6 0525 Screw M 8X 30 M 8 8 20 6 M 8X 30 M 8 8 20 6 0540 Cap nut M 6 M DIN917 A4 8 5 M 6 M DIN917 A4 8 5 TL3 TL4 Pos Description Dimension Torque Dimension Torqu...
Page 38: ...permit removing pump cover 0030 with aid of e g a screwdriver Check the O ring 0801 3 Lock rotors 0020 against rotation by putting a block of soft material between them 4 Unscrew retainer 0250 counter...
Page 39: ...l seal 6 Remove the rotating part of the seal 0081 from each shaft sleeve 4 6 2 2 Lip Seal 1 Unscrew the cap nuts 0540 from the stud bolts 0550 2 Remove the seal cover 0090 by pushing from the rear en...
Page 40: ...mechanical seal 6 Take care not to loose the springs of the rotating part TL2 0074 TL2 0234 TL2 0301 TL3 0234 TL3 0677 TL3 0953 TL4 0535 TL4 2316 TL4 3497 7 Removethesecondstationarypart 0087 oftheme...
Page 41: ...r 0120 Grooves are provided along the circumference to permit removing cover with aid of e g a screwdriver Pay attention to the bearings 0701 lip seal 0880 and O ring 0181 TL1 TL2 5 Untighten the scre...
Page 42: ...lock the locking washer 0630 by bending the tooth straight 13 Unlock the locking nut 0620 14 Remove the locking washer and spacer sleeve 0170 from the shaft The bearing 0700 can now be removed from th...
Page 43: ...25 and or 0530 and the foot 0070 Pay attention to O ring 0185 4 7 Assembly See also section 4 2 General instructions section 4 3 O rings and lip seals and 4 5 Tightening torque for nuts and screws 4 7...
Page 44: ...bearing ring Pay attention to position of drive shaft Be sure not to damage the seals 0885 Continue with point 7 For TL4 with taper roller bearing 1 Position the lip seals 0885 inside the gearbox 2 H...
Page 45: ...with locking elements 0651 and pressure flange 0172 on the drive shaft 13 Position the shafts by turning the drive shaft manually as shown in fig Shaft posittion Put the shaft sleeves and rotors on th...
Page 46: ...described for the lay shaft 15 Check the clearances between the rotors after tightening the locking elements See section 3 1 for Rotor clearances Only TL3 16 Put the circlips 0660 on the shaft TL3 an...
Page 47: ...ingofthegears no heavypoints bymeasuringaxialrunoutof the gears max 0 05 mm 22 If the gears cannot be turned smoothly remove the gearbox cover and re adjust the gears 23 Secure the gearbox cover with...
Page 48: ...over Ensure that the V seals are pushed properly against the back of flushing cover 4 7 5 Seal assembly 4 7 5 1 Single mechanical seal general 1 Put O ring 0083 in the rotating part 0081 of the seal P...
Page 49: ...s 0080 with O rings 0082 in the seal cover 0090 Take care not to damage the O rings 6 Position the seal cover with O ring 0802 in the rotor case and secure it with cap nuts 0540 on the stud bolts 0550...
Page 50: ...he driver 3 Place the stationary parts of the mechanical seal 0087 with O ring 0086 into the flushing cover 0101 Check that the O ring 0086 does not come out on the gearbox side 4 Place both stationar...
Page 51: ...dium pressure TL2 0074 TL3 0234 TL2 0234 TL2 0301 TL3 0677 TL3 0953 TL4 0535 TL4 2316 TL4 3497 A 0500 251 IM TL 13 00 EN 08 2009 4 7 6 Rotor and pump cover assembly 1 Place the shims 0171 in chamber i...
Page 52: ...s 0 05 mm 6 Reassemble the shim 0171 and rotors 0020 put the O ring 0800 on the retainer and tighten the retainer on TL4 use Loctite 243 clockwise with specified torque 7 Assemble and adjust the secon...
Page 53: ...s in mm 5 0 Special tools 5 1 General There are a number of special tools available to facilitate assembly of the pumps By using these tools the risk of damaging sealing element is reduced and the tim...
Page 54: ...into the gearbox cover see section 4 7 2 Pump type Art No A B C D E F G H I J TL1 3 95608 11 150 1 0 1 0 5 10 19 6 0 1 34 5 0 1 40 25 15 100 TL2 3 95609 11 150 0 5 10 24 6 0 2 45 25 15 100 TL3 3 9561...
Page 55: ...see section 4 7 3 Pump type Art No A B C D E F TL1 3 95632 11 19 1 0 03 20 0 1 0 45 x45 45 90 15 0 2 TL2 3 95633 11 24 1 0 03 25 0 1 0 45 x45 55 90 20 0 2 TL3 3 95634 11 38 1 0 03 40 0 1 0 95 x45 85...
Page 56: ...455 0456 0880 0120 0181 0701 ext 0560 0850 0920 0855 0865 0860 0565 0885 0870 0875 0185 0525 0530 0915 0121 0510 0170 0630 0620 0190 0651 0651 0172 0520 0660 0701 int 0905 0900 0100 0910 0060 0070 052...
Page 57: ...pacer sleeve TL1 TL2 only 0171 2 Shim x x 0172 2 Pressure flange TL1 TL2 only 0175 1 Support ring spring 0190 1 Gear set x 0200 1 Valve head 0210 1 Baseplate 0220 1 Cylinder 0230 1 Piston 0240 1 Cover...
Page 58: ...x 0701 2 Cylinder Bearing TL4 only x 0750 1 Spring 0850 1 Air breather x 0860 1 Oil level glass 0870 1 Drain plug 0900 1 Name plate 0905 6 Rivet 0910 3 Plastic plug TL1 TL2 TL3 4 Plastic plug TL4 0915...
Page 59: ...ee O ring kit for hydraulic part with without safety relief valve 0804 2 O ring see O ring kit for hydraulic part with without safety relief valve 1 Retainer tool 3 94550 11 3 94550 11 Nos Pos pump De...
Page 60: ...3 94413 11 3 94428 11 3 94460 12 0180 1 O ring 0 2173 865 0 2173 940 0 2173 947 0 2173 866 0512 4 Screw 0 0254 345 0 0254 346 0 0254 362 0 0254 362 0540 2 Cap nut 0 0205 782 4 Cap nut 0 0205 782 0 020...
Page 61: ...it for quench flush Nos Pos pump Description TL1 TL2 TL3 TL4 Service kit for quench flush 3 01948 21 3 01949 21 3 01950 21 3 01951 21 0180 1 O ring 0 2173 865 0 2173 940 0 2173 947 0 2173 866 0881 2 V...
Page 62: ...73 549 0 2173 557 0802 1 O ring 0 2173 533 0 2173 531 0 2173 550 0 2173 558 0804 2 O ring 0 2173 536 0 2173 543 0 2173 540 0 2173 513 O ring kit PTFE 3 01819 13 3 01822 13 3 01825 13 3 01828 13 0800 2...
Page 63: ...3 536 0 2173 543 0 2173 543 0 2173 540 0 2173 540 0 2173 513 0 2173 513 0807 1 O ring 0 2173 503 0 2173 537 0 2173 544 0 2173 510 0 2173 551 0 2173 519 0 2173 519 0 2173 528 O ring kit PTFE 3 01819 23...
Page 64: ...30 21 3 14031 21 3 14032 21 3 14033 21 3 14034 21 Nos Pos pump Description TL3 0234 TL3 0677 TL3 0953 TL4 0535 TL4 2316 TL4 3497 0010 1 Rotor case 3 14040 11 3 14041 11 3 14042 11 3 14048 11 3 14049 1...
Page 65: ...0185 0525 0530 0060 0900 0905 0915 0070 0525 0660 0701 0520 0172 0651 0651 0620 0190 0170 0630 0510 0121 0700 0611 0050 0051 0120 0181 0880 0455 0456 0515 extern intern 0936 0936 TL3 TL4 0652 A 0500...
Page 66: ...l 0 0251 325 0560 2 Pin 0 0490 102 0 0490 102 0 0490 103 0 0490 139 0565 2 Pin 0 0490 102 0 0490 102 0 0490 103 0 0490 139 0611 1 Key 0 0502 025 0 0502 036 0 0502 052 0 0502 089 0620 2 Locking nut 0 0...
Page 67: ...hread connections Foot Vertical for flanges Nos Pos pump Description TL1 TL2 TL3 TL4 0070 1 Foot horizontal 3 14051 11 3 14052 11 3 14053 11 3 14057 11 0070 1 Foot vertical thread connection 3 14054 1...
Page 68: ...1 1 O ring 0 2172 902 0 2172 906 0 2172 623 0 2172 632 0185 1 O ring 0 2172 929 0 2172 541 0 2172 541 0 2172 541 0611 1 Key 0 0502 025 0 0502 036 0 0502 052 0 0502 089 0855 1 Sealing ring 3 94962 11 3...
Page 69: ...Seal faces are available in two different material combinations Enclosed spring outside of pumped medium can be flushed Low pressure quench or flushing is possible if the pump is equipped with the flu...
Page 70: ...TL3 TL4 0090 Seal cover X 2 CrNiMo 17 13 2 EN 10088 3 1 4404 AISI 316L x x x x 0095 Positioning plate X 2 CrNiMoN 27 5 EN 10088 3 1 4460 AISI 329 L x x 0101 Flush cover X 2 CrNiMo 17 13 2 EN 10088 3...
Page 71: ...8 974 0936 2 Pin 0 0490 641 0 0490 641 0 0490 641 Common parts for single mechanical seal Single mechanical seal complete Nos Pos pump Description TL1 TL2 TL3 TL4 0100 2 Single mech seal Sic Sic FPM 3...
Page 72: ...ingle mech seal Sic C EPDM FDA 3 94497 22 3 94500 22 3 94503 22 3 94556 22 Nos TL1 0100 TL2 0234 TL3 0677 TL4 2316 Pos pump Description TL1 0039 TL1 0139 TL2 0074 TL2 0301 TL3 0234 TL3 0953 TL4 0535 T...
Page 73: ...83 2 O ring 0 2173 043 0 2173 080 0 2173 086 0 2173 145 O ring kit EPDM FDA 3 01803 16 3 01804 16 3 01805 16 3 01806 16 0082 4 O ring 0 2173 538 0 2173 545 0 2173 552 0 2173 559 0083 2 O ring 0 2173 5...
Page 74: ...faces reduced seal faces so called knife edge seals are available on demand Quenched of flushed pressurized or unpressurized Technical data Materials DW2 SiC Q1 SiC Q1 and SiC Q1 Carbon B atmospheric...
Page 75: ...os Description material description DIN W nr USA TL1 TL2 TL3 TL4 0090 Seal cover X 2 CrNiMo 17 13 2 EN 100808 3 1 4404 AISI 316L x x x x 0095 Positioning plate X 2 CrNiMoN 27 5 EN 10088 3 1 4460 AISI...
Page 76: ...0490 084 0933 2 Plug 0 0603 001 0 0603 001 0934 2 Plastic plug 3 94615 11 3 94615 11 0935 2 Sealing ring 4A3483 113 4A3483 113 0936 2 Pin 0 0490 641 0 0490 641 Nos Pos pump Description TL2 0074 TL3 02...
Page 77: ...hemraz 3 94564 16 0100 2 Double mech seal Sic Sic C Chemraz 3 94564 13 0100 2 Double mech seal C Sic C Kalrez 3 94564 20 0100 2 Double mech seal Sic Sic C Kalrez 33 94564 18 0100 2 Double mech seal C...
Page 78: ...Double mech seal Sic Sic C PTFE 3 94925 17 3 94927 17 0100 2 Double mech seal C Sic C Chemraz 3 94925 16 3 94927 16 0100 2 Double mech seal Sic Sic C Chemraz 3 94925 13 3 94927 13 0100 2 Double mech s...
Page 79: ...546 0 2173 562 0 2173 553 0 2173 564 0 2173 560 0086 2 O ring 0 2173 548 0 2173 508 0 2173 555 0 2173 512 0 2173 510 O ring kit PTFE 3 01812 13 3 01812 23 3 01813 13 3 01813 23 3 01837 13 0082a 2 O ri...
Page 80: ...rrangement quenched or flushed pressurised or unpressurised Technical data Materials of O rings Fluorocarbon FPM EPDM E EPDM FDA E1 i e certified food quality PTFE lined T Perfluor Chemraz C Perfluor...
Page 81: ...plate 3 94410 11 3 94425 11 0097 2 Support ring 3 94672 11 3 94673 11 3 94674 11 3 94675 11 0130 2 Shaft sleeve 3 94490 12 3 94395 12 3 94486 12 3 94412 12 3 94492 12 3 94427 12 3 94597 12 3 94459 12...
Page 82: ...sleeve 3 94490 12 3 94395 12 3 94486 12 3 94412 12 3 94492 12 3 94427 12 3 94597 12 3 94459 12 0180 1 O ring 0 2173 865 0 2173 940 0 2173 947 0 2173 866 0182 1 O ring 0 2173 940 0 2173 947 0183 4 O ri...
Page 83: ...933 16 3 01934 16 3 01935 16 0082 4 O ring 0 2173 538 0 2173 545 0 2173 552 0 2173 559 0183 2 O ring 0 2173 541 0 2173 546 0 2173 556 0 2173 560 O ring kit PTFE 3 01932 13 3 01933 13 3 01934 13 3 0193...
Page 84: ...3 01934 16 3 01935 16 0082 4 O ring 0 2173 538 0 2173 545 0 2173 552 0 2173 559 0183 4 O ring 0 2173 541 0 2173 546 0 2173 556 0 2173 560 O ring kit PTFE 3 01936 13 3 01937 13 3 01938 13 3 01939 13 00...
Page 85: ...tungsten carbide Suitable for two directions of rotation Low pressure quench or flushing possible if the pump is equipped with the flush cover including extra lip seals Technical data Materials of O...
Page 86: ...11 3 94424 14 0095 1 Positioning plate 3 94410 11 3 94425 11 0096 2 Support ring for lip seal 3 94493 11 3 94484 11 0130 2 Shaft sleeve 3 94490 12 3 94395 12 3 94486 12 3 94412 12 3 94492 12 3 94427...
Page 87: ...84 2 O ring seal with without flushing 0090 1 Seal cover 3 94456 11 0096 2 Support ring for lip seal 3 94593 11 0130 2 Shaft sleeve 3 94597 12 3 94459 12 0540 6 Cap nut 0 0205 783 0550 6 Stud bolt 3 9...
Page 88: ...92 12 3 94427 12 0180 1 O ring 0 2173 865 0 2173 940 0 2173 947 0182 1 O ring 0 2173 940 0 2173 947 0512 4 Screw 0 0254 345 0 0254 346 0 0254 362 0540 2 Cap nut 0 0205 782 4 Cap nut 0 0205 782 0 0205...
Page 89: ...Flush cover 3 94460 12 0130 2 Shaft sleeve 3 94597 12 3 94459 12 0180 1 O ring 0 2173 866 0512 4 Screw 0 0254 362 0540 6 Cap nut 0 0205 783 0553 6 Stud bolt 0 0012 604 0561 2 Pin 0 0490 102 0881 2 V...
Page 90: ...g 0 2173 099 0895 2 Lip seal 3 94589 11 O ring kit PTFE 3 01931 13 0082 2 O ring 0 2173 817 0084 2 O ring 0 2173 967 0895 2 Lip seal 3 94589 11 Pos 0084 in O ring kit PTFE is of FPM Spare part kits fo...
Page 91: ...reversible but to facilitate venting we advise to bring the outlet on top level Maximum differential pressure over seal faces pressure of quench flush medium Single mechanical seal O ring seal Hard li...
Page 92: ...servoir to provide unpressurised buffer fluid Reservoir Valve Section A A Section A A C Seal plan 53 Pressurised double seal Use a pressurised external reservoir to supply clean fluid to the seal cham...
Page 93: ...pressurised buffer fluid Reservoir Valve 11 1 2 Pump connections in vertical position A Seal plan 54 circulation or plan 64 through flow Use a pressurised external barrier fluid reservoir or system to...
Page 94: ...Seal plan 53 Pressurised double seal Use a pressurised external barrier fluid reservoir to supply clean fluid to the seal cham ber Reservoir pressure is greater than the sealing chamber process pressu...
Page 95: ...seal are positioned in such a way that the required thermal effects on the built on safety relief valve rotor case and shaft seal are the best The pressure rating at the ports of the pump cover for he...
Page 96: ...ressure of the pump becomes higher than the valve settings the valve head will open Due to the large size of the valve head the full capacity of the pump can pass through the valve from the discharge...
Page 97: ...is acting directly on the valve head By turning the spring adjusting screw B the compression of the spring is modified and the opening pressure of the safety relief valve can be adjusted To turn the...
Page 98: ...safety relief valve can be adjusted To turn the spring adjusting screw B the retainer tool delivered with the pump must be used Fig 4 shows the safety relief valve completely clo sed The valve head A...
Page 99: ...e maximum spring setting is reached the valve is blocked While doing this check on the pressure gauge that the pressure does not rise above the maximum allowable pressure of the pump Plastic plug Reta...
Page 100: ...the valve slowly counter clockwise until the discharge pressure is starting to drop away Check the proper setting of the valve by slowly opening and closing the discharge valve The set pressure of th...
Page 101: ...set much lower than the opening pressure of the valve Indications of control pressures can be found on page 103 See table Fig 9 is showing the design of the air loaded air lifted safety relief valve w...
Page 102: ...d Operate the adjusting valve slowly to decrease the control pressure of the valve until the discharge pressure is starting to drop away Check the proper setting of the valve by slowly opening and clo...
Page 103: ...4 1 4 6 22 4 3 4 8 Note Since the control pressure is depending on the nature of the pumped medium the values given in the table below must be interpreted as guidelines TL3 0234 TL3 0677 TL3 0953 TL4...
Page 104: ...0750 is fully released and the screws can be removed If the cylinder does not stay in place first make sure that the spring will be released 4 All components can now be removed from the cylinder 0220...
Page 105: ...ews can be removed If the cylinder does not stay in place first make sure that the spring will be released 4 All components can now be removed from the cylinder 0220 and from the pump cover 0032 13 2...
Page 106: ...0 251 IM TL 13 00 EN 08 2009 13 3 Air loaded air lifted valves 13 3 1 Disassembly 1 Remove screws 0523 2 All parts can now be removed from the cylinder 0220 13 3 2 Assembly 1 If disassembled place the...
Page 107: ...s and weights 14 1 Safety relief valves with heating cooling jacket Dimension table see next page Horizontal mounting Vertical mounting Jacket Jacket Relief valve Spring loaded with jacket Relief valv...
Page 108: ...jacket 300 48 170 48 325 spring loaded 300 48 170 48 444 spring loaded air lifted 300 48 170 348 5 48 501 air loaded air lifted 300 48 170 348 5 375 48 404 TL3 0234 jacket 372 64 5 242 5 77 401 spring...
Page 109: ...ing 3 94622 12 3 94623 12 3 94598 12 3 94599 12 3 94637 12 3 94638 12 0175 1 Support ring spring 3 94627 11 3 94604 11 3 94642 11 0200 1 Valve head 3 94624 11 3 94625 11 3 94601 11 3 94602 11 3 94639...
Page 110: ...1 3 94639 11 3 94640 11 0210 1 Baseplate 3 94628 11 3 94605 11 3 94643 11 0220 1 Cylinder 3 94869 11 3 94606 11 3 94644 11 0230 1 Piston 3 94630 11 3 94607 11 3 94645 11 0240 1 Cover spring loaded air...
Page 111: ...12 3 94599 12 3 94637 12 3 94638 12 0175 1 Support ring 3 94626 11 3 94603 11 3 94641 11 0200 1 Valve head 3 94624 11 3 94625 11 3 94601 11 3 94602 11 3 94639 11 3 94640 11 0210 1 Baseplate 3 94628 1...
Page 112: ...11 3 94654 11 1 Pump cover valve for heating 3 94653 12 3 94654 12 0175 1 Support ring 3 94657 11 0200 1 Valve head 3 94655 11 3 94656 11 0210 1 Baseplate 3 94658 11 0220 1 Cylinder 3 94659 11 0230 1...