Chapter 2
Location and Function of Parts
2-9
3
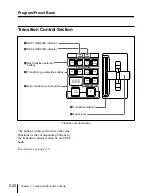
Next transition selection buttons
These buttons determine what the next
transition will apply to.
BKGD: Next transition is a background
transition.
KEY 1: Next transition will insert or
remove key 1. If key 1 is currently
inserted it will be removed, and vice
versa.
KEY 2: Next transition will insert or
remove key 2. If key 2 is currently
inserted it will be removed, and vice
versa.
KEY PRIOR (priority): Next transition
will interchange the priority
relationship between key 1 and key 2.
More than one of these four buttons can be
lit simultaneously.
4
Transition type selection buttons
Press one of these buttons, turning it on, to
determine the type of the next transition.
MIX: In a background transition, the
new video (bus A) fades in as the old
video (bus B) fades out. The new
video level is increased from 0% to
100% as the old video is reduced
from 100% to 0%, in such a way that
the overall signal level is always
100%.
In a key transition, the key fades in
(for insertion) or out (for removal).
NAM (non-additive mix): The old
background and new background
video signals are compared, and the
higher one is used as the output.
The old video is reduced from 100%
to 0% over the second half of the
transition, and the new video level is
increased from 0% to 100% over the
first half, all the while combining the
two signals by non-additive mixing.
You can also use this button as a
programmable button.
For details, see “Changing switcher
functions (OPERATION MODE
menu)” (page 14-57).
SUPER MIX: The old video is reduced
from 100% to 0% over the second
half of the transition, and the new
video level is increased from 0% to
100% over the first half, all the while
combining the two signals by
(ordinary) mixing.
It is also possible to set the video
levels at the mid-point of the
transition to any value between 0 and
100%, by using the BKGD/TRANS
menu for the M/E bank.
You can also use this button as a
programmable button.
For details, see “Changing switcher
functions (OPERATION MODE
menu)” (page 14-57).
WIPE: The transition executed will be a
wipe, using the settings in the wipe
setting menu for the M/E bank.
DME 1: The transition will be a wipe-
like effect, using the effects provided
by DME channel 1. This requires at
least one DME-7000 or other Digital
Multi Effects unit to be connected to
the switcher system.
To carry out a dual DME wipe using
the effects provided by two DME
channels, press this button and the
DME 2 button simultaneously,
turning them on.
You can use a setup operation to
make this button select DME 3
instead.
Summary of Contents for DVS-7250
Page 10: ......
Page 30: ......
Page 66: ......
Page 67: ...Menu Organization 3 2 Basic Menu Operations 3 6 Chapter 3 Basic Menu Operations ...
Page 274: ......
Page 328: ......
Page 364: ......
Page 488: ......
Page 495: ...Appendixes A 3 Enhanced Wipes 21 23 24 26 27 29 49 300 301 302 303 304 POLYGON ...
Page 534: ......
Page 542: ...Sony Corporation B P Company BZS 7061A WW A AE0 600 01 1 1999 ...


