Chapter 9
Registers
9-17
4
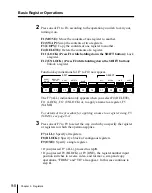
Press F6 (TO CH), to select the destination DME channel.
• If in step
2
you selected F1 (EFFECT) or F2 (SNAPSHOT), proceed to
step
5
.
• If in step
2
you selected F3 (SETUP), skip to step
8
.
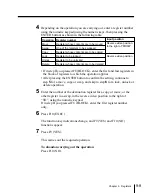
5
Depending on how you wish to select the register or registers to be
copied, press one of F7 to F9.
F7 (ALL): Specify all registers.
F8 (BLOCK): Specify a block of registers.
F9 (ONE): Specify a single register.
• If you pressed F7 (ALL), skip to step
8
.
• If you pressed F8 (BLOCK) or F9 (ONE), the register number input
area switches to reverse video, and “FROM” and “TO” are displayed.
In this case proceed to step
6
.
6
Enter the source register number in the position to the right of “FROM,”
using the numeric keypad, then press the ENTER button.
If in step
5
you pressed the F8 (BLOCK) button, first enter the number of
the first register in the block (the reverse video area moves to the right of
the “(—), then enter the last register number.
7
Enter the destination register number in the reverse video area to the
right of “TO”.
If in step
5
you pressed the F8 (BLOCK) button, enter the number of the
first destination register.
8
Press F10 (EXEC).
The function key indications change, and F9 (YES) and F10 (NO)
functions appear.
9
To carry out the copy, press F9 (YES).
To cancel the copy, press F10 (NO).
Summary of Contents for DVS-7250
Page 10: ......
Page 30: ......
Page 66: ......
Page 67: ...Menu Organization 3 2 Basic Menu Operations 3 6 Chapter 3 Basic Menu Operations ...
Page 274: ......
Page 328: ......
Page 364: ......
Page 488: ......
Page 495: ...Appendixes A 3 Enhanced Wipes 21 23 24 26 27 29 49 300 301 302 303 304 POLYGON ...
Page 534: ......
Page 542: ...Sony Corporation B P Company BZS 7061A WW A AE0 600 01 1 1999 ...


