Configuration
47
Siemens Building Technologies
SISTORE AX4_EN.doc
Fire & Security Products
09.2004
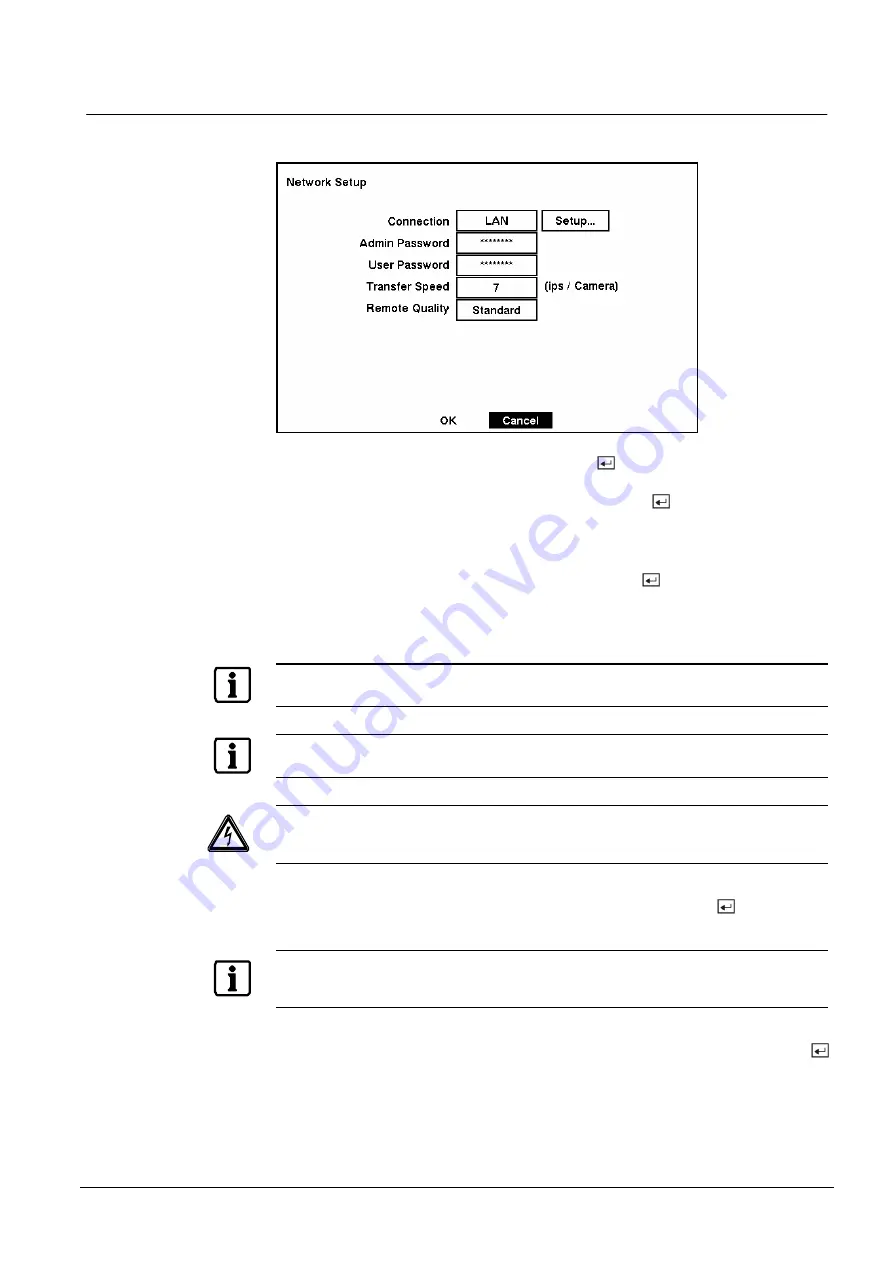
3.10 Network Setup Screen
In the Network Setup screen you can set up the DV R for LAN and modem
connections.
Fig. 62
Network Setup screen.
Highlight the box beside Connection. Press the
button to toggle between LAN
and Modem.
Highlight the box beside Admin Password and press the
button. A virtual
keyboard appears. You will first be asked to enter the current password. Then you
can enter a new password; you will be asked to confirm the new password before it
is accepted.
Highlight the box beside User Password and press the
button. A virtual
keyboard appears. You will first be asked to enter the current password. Then you
can enter a new password; you will be asked to confirm the new password before it
is accepted.
NOTE:
These passwords are for network use. They are different from the Admin and User pas swords for the
DVR itself.
NOTE:
The passwords are case sensitive. The factory default password for both Administrator and User is
12345678
.
CAUTION:
Write the password down and keep it in a safe place. Once the password has been reset, the default
will no longer work. If the password is forgotten, the unit must be reset using the
Factory Reset Button
and all data settings will be lost.
The transfer speed is the number of images that can be trans ferred per second for
each camera. Highlight the box beside Transfer Speed, press the
button, and
adjust the number.
NOTE:
The maximum transfer speed over a LAN is
30
images per second (
25
ips for PAL) when the
resolution is set to
Standard
. However, when set to
High,
the transfer speed will be decreased to
15
images per second (
12.5
ips for PAL).
You can program the image quality for transferring to the RAS (Remote
Administration System). Highlight the box beside Remote Quality and press the
button. The image quality can be selectable from Very High, High, Standard and
Low.


