background image

Commissioning (software) 


4.4 Additional information on configuring the SINAMICS Integrated 


SIMOTION D410 

96


Commissioning Manual, 02/2012 

Synchronizing the SINAMICS clock 

Proceed as follows to convert the SINAMICS clock to UTC format and to synchronize this 

with the SIMOTION clock:    
1.


In the project navigator, call the context menu of the SIMOTION D410. 

2.


Select the "Properties" entry in the context menu. 

3.


Select the "Perform time synchronization with SINAMICS drive units" option in the 

"Settings" tab of the "Properties - D410" dialog box. 


Note 
This setting is automatically activated for new projects from V4.2 and applies for all drive 

units connected to the SIMOTION D410. The SINAMICS clock is automatically 

synchronized with the SIMOTION clock for all drive units with configured message 

frame 39x. 

The first time synchronization is performed after the SIMOTION D control unit has reached 

the RUN operating state.  
To compensate for deviations between the SIMOTION and SINAMICS clocks, the time of 

day is automatically resynchronized at regular intervals. 
Via the system variable _driveStates.allClocksSynchronized on the device, the user program 

can query whether the automatic time synchronization is activated (=YES) or deactivated 

(=NO).  
Before the first synchronization, alarms and messages are stored with the time stamp valid 

in the SINAMICS at this time, all subsequent alarms and messages with the synchronized 

time. 
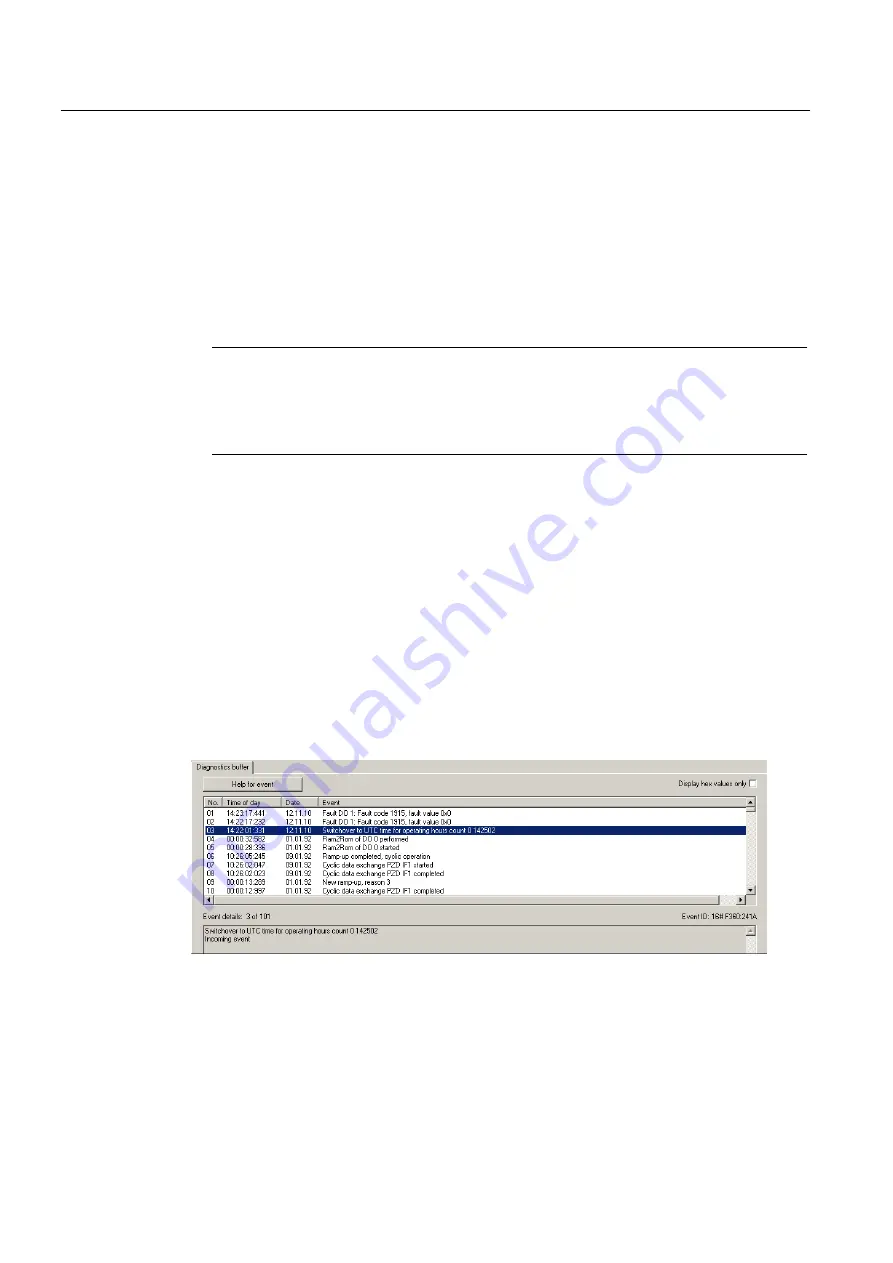
The first time synchronization after switching on is entered with the status of the operating 

hours counter and the time (UTC time, synchronized with SIMOTION) in the diagnostics 

buffer of the drive (e.g. SINAMICS Integrated).  


Figure 4-15  Diagnostics buffer entry, time synchronization 

Summary of Contents for SIMOTION D410

Page 1: ...___________ ___________________ SIMOTION SIMOTION D410 Commissioning Manual Valid for SIMOTION D410 DP and D410 PN 02 2012 Preface Description 1 Commissioning hardware 2 Parameter assignment addressing 3 Commissioning software 4 Maintenance and service 5 Diagnostics data 6 Configuring drive related I Os without symbolic assignment A Standards and approvals B ESD guidelines C ...

Page 2: ...fic task in accordance with the relevant documentation in particular its warning notices and safety instructions Qualified personnel are those who based on their training and experience are capable of identifying risks and avoiding potential hazards when working with these products systems Proper use of Siemens products Note the following WARNING Siemens products may only be used for the applicati...

Page 3: ...rdware This section describes how to start up the device and what you must take into account Configuring SIMOTION D410 This section describes how to integrate SIMOTION D410 in a project and how to configure the interfaces Commissioning software This section describes how to configure a plant and how to test the drives and axes you configured Maintenance and service This section describes how to re...

Page 4: ... Click the following link to find information on the the following topics Ordering documentation overview of documentation Additional links to download documents Using documentation online find and search in manuals information http www siemens com motioncontrol docu Please send any questions about the technical documentation e g suggestions for improvement corrections to the following e mail addr...

Page 5: ...ant agent in the plastic used for the housing does not contain halogens Identification of plastic materials in accordance with ISO 11469 Less material used because the unit is smaller and with fewer components thanks to integration in ASICs The disposal of the products described in this manual should be performed in compliance with the valid national regulations The products can be largely recycle...

Page 6: ...MOTION Utilities Applications are included in the SIMOTION SCOUT scope of delivery and along with FAQs they also contain free utilities such as calculation tools optimization tools etc as well as application examples ready to apply solutions such as winders cross cutters or handling The latest FAQs for SIMOTION under http support automation siemens com WW view de 10805436 133000 SIMOTION SCOUT onl...

Page 7: ...ring the communication 45 3 2 1 Creating a SIMOTION project and inserting a SIMOTION D410 45 3 2 2 Configuring the properties of the PROFINET interface 48 3 2 3 Configuring the PROFIBUS PG PC interface only for D410 DP 49 3 2 4 Configuring the Ethernet PG PC interface only for D410 PN 50 3 2 5 Representation in HW Config 52 3 3 Configuring the PROFIBUS DP interface only D410 DP 53 3 3 1 General in...

Page 8: ...tting DP Slave properties 91 4 4 2 Using vector drives 93 4 4 3 Set time of day 94 4 4 4 SINAMICS diagnostic buffer 97 4 4 5 Acyclic communication with the drive 98 4 4 6 Control properties and performance features 100 4 4 7 Current controller cycle clocks 125 µs use of output cams and measuring inputs 100 4 5 Testing the configured drive using the drive control panel 101 4 6 Creating and testing ...

Page 9: ...eleting data 150 4 16 1 Overview of data deletion 150 4 16 2 Resetting the memory of SIMOTION D410 150 4 16 3 Deleting user data from the CompactFlash Card 153 4 16 4 Restoring the default settings of SINAMICS Integrated 153 4 16 5 Restoring the default settings of SIMOTION D410 154 4 17 System shutdown 155 4 18 Configuring Safety Integrated functions 155 5 Maintenance and service 161 5 1 Overview...

Page 10: ... 5 5 6 Card reader for CF cards 196 6 Diagnostics data 197 6 1 Diagnostics by means of LED displays 197 6 2 Diagnostic data and non volatile SIMOTION data 201 6 2 1 Overview 201 6 2 2 Backup of diagnostic data and non volatile SIMOTION data 201 6 2 2 1 Diagnostic data 201 6 2 2 2 Non volatile SIMOTION data retain data 202 6 2 2 3 Procedure for backing up during operation 202 6 2 2 4 Procedure for ...

Page 11: ...MOTION D410 Commissioning Manual 02 2012 11 C ESD guidelines 221 C 1 ESD definition 221 C 2 Electrostatic charging of individuals 222 C 3 Basic measures for protection against discharge of static electricity 223 Index 225 ...

Page 12: ...Table of contents SIMOTION D410 12 Commissioning Manual 02 2012 ...

Page 13: ...erized by integrated data management configuration and communication for all products and systems Thus an extensive toolbox of automation modules is also available for SIMOTION D410 Application Combining a power module with SIMOTION D410 forms a compact single drive for machine and plant engineering Applications include Machine concepts with central drive e g pressing printing and packaging machin...

Page 14: ...DSSURDFK RI 7KH IXVLRQ RI PRWLRQ FRQWURO 3 DQG WHFKQRORJ IXQFWLRQV 3 IXQFWLRQDOLW 7HFKQRORJ IXQFWLRQV H J K GUDXOLFV WHPSHUDWXUH FRQWURO HWF H J SRVLWLRQLQJ V QFKUR QRXV RSHUDWLRQ HWF 6 027 21 0RWLRQ RQWURO Figure 1 1 System solution SIMOTION can be used with all machines with motion control tasks The focus is on a simple and flexible solution to a wide variety of motion control tasks In order to ...

Page 15: ...er needed Simple standardized and transparent programming and diagnostics for the complete machine 1 2 System components Overview SIMOTION D410 communicates with the components of the automation landscape via the following interfaces PROFIBUS DP SIMOTION D410 DP only PROFINET SIMOTION D410 PN only DRIVE CLiQ DRIVE Component Link with IQ Power Module Interface PM IF SIMOTION D features a SINAMICS I...

Page 16: ...t output cams The measuring sockets can output any analog signals The DRIVE CLiQ interface permits a fast connection to the SINAMICS drive components System software The system software is delivered separately on a CompactFlash Card not included in the scope of delivery Note An additional license is not required for the real axis technology Power supply PS provides the electronic power supply for ...

Page 17: ...MATIC ET 200M Modular I O system for control cabinet installation and high channel densities SIMATIC ET 200S Finely scalable I O system for control cabinet installation and particularly time critical applications including motor starters safety technology and individual grouping of load groups SIMATIC ET 200pro Modular I O system with IP65 IP67 rating for machine related applications with no contr...

Page 18: ...n in a rugged SINAMICS S120 booksize compact format with technology functions direct connection of the I O channels on the module or separately via wiring modules SIMATIC ET 200M Modular I O system for control cabinet installation and high channel densities SIMATIC ET 200S Finely scalable I O system for control cabinet installation and particularly time critical applications including motor starte...

Page 19: ... and IRT real time classes may be connected to SIMOTION D410 These modules are integrated using the GSD file PROFIBUS or GSDML file PROFINET provided by the relevant device manufacturer Note Please note that in isolated cases additional boundary conditions must be fulfilled in order to integrate a module into SIMOTION For example driver modules in the form of function blocks are required for some ...

Page 20: ...es terminal expansion via DRIVE CLiQ additional analog and digital I Os TM41 terminal module enables terminal expansion analog and digital inputs outputs and encoder simulation via DRIVE CLiQ The TM41 can be connected to a real axis It is important to note that exactly one real axis can be configured on the D410 TM54F terminal module enables terminal expansion secure digital inputs digital outputs...

Page 21: ...XWSXWV 5 6 7 EXWWRQ 6LGH W SH SODWH GLVSOD V 5 9 L4 LQWHUIDFH QFRGHU LQWHUIDFH 7 77 66 6HUYLFH DQG RSHUDWLQJ PRGH VZLWFKHV 3 VZLWFKHV 7 7 7 0 0HDVXULQJ VRFNHWV 0 VFUHZ RQ VKLHOG FRQQHFWLRQ 6HULDO LQWHUIDFH QR IXQFWLRQ 7 SH SODWH 0RGH VHOHFWRU VZLWFK VHWWLQJV 6 21 21 21 2 6 21 21 2 2 6 21 2 2 2 26 581 6723B8 6723 05 6 23 LQWHUIDFH QR IXQFWLRQ Figure 1 2 Location of interfaces and front elements in ...

Page 22: ...S DP Power Module Interface PM IF 8 pin direct connector to connect to a blocksize power module Encoder interface HTL TTL SSI X23 15 pin SUB D socket for connecting HTL TTL and SSI encoders EP terminals temperature sensor connection X120 8 pin Mini Combicon for connecting Safety Integrated input terminals or for connecting temperature sensing via KTY or PTC Power supply connection X124 4 pin screw...

Page 23: ...OHYHO 7 SH GHVLJQDWLRQ 6SDFH IRU DSSURYDOV LGHQWLILFDWLRQV DU FRGH 0 1R 8 DU FRGH 2UGHU QXPEHU 0 1R 3 8 3 8 6DFK 1U 6DFK 1U 9HUVLRQ 9HUVLRQ 3 3 Figure 1 4 SIMOTION D410 DP nameplate example Note The contents of the individual nameplate fields on the current module may differ from those described in this Manual e g updated product status space for approvals and identifications etc ...

Page 24: ...WURQLF SRZHU VXSSO RPSDFW ODVK DUG 3 WHUPLQDOV WHPSHUDWXUH VHQVRU FRQQHFWLRQ LJLWDO LQSXWV RXWSXWV 5 6 7 EXWWRQ 6LGH W SH SODWH GLVSOD V 5 9 L4 LQWHUIDFH QFRGHU LQWHUIDFH 7 77 66 6HUYLFH DQG RSHUDWLQJ PRGH VZLWFKHV 3 VZLWFKHV 7 7 7 0 0HDVXULQJ VRFNHWV 6HULDO LQWHUIDFH QR IXQFWLRQ 7 SH SODWH 0RGH VHOHFWRU VZLWFK VHWWLQJV 6 21 21 21 2 6 21 21 2 2 6 21 2 2 2 26 581 6723B8 6723 05 6 23 LQWHUIDFH QR IX...

Page 25: ...t to PROFINET Power Module Interface PM IF 8 pin direct connector to connect to a blocksize power module Encoder interface HTL TTL SSI X23 15 pin SUB D socket for connecting HTL TTL and SSI encoders EP terminals temperature sensor connection X120 8 pin Mini Combicon for connecting Safety Integrated input terminals or for connecting temperature sensing via KTY or PTC Power supply connection X124 4 ...

Page 26: ...ate fields on the current module may differ from those described in this Manual e g updated product status space for approvals and identifications etc 1 5 The CompactFlash card CompactFlash Card The following figure shows you all the information included on the nameplate of the CompactFlash Card CF card VHULDO QXPEHU RPSDFW ODVK DUG LVW RI WKH RSWLRQV LFHQVHV RQ RPSDFW ODVK FDUG RQ GHOLYHU 0DUNLQJ...

Page 27: ...DA license license no longer required as of SIMOTION V4 2 J00 SIMOTION IT Virtual Machine license for Java applications Safety functions Fxx License for SINAMICS Safety Integrated Extended Functions e g F01 1 license for safety functions 1 6 Licensing SIMOTION D410 licensing SIMOTION D410 is a modular drive system for single axis applications D410 contains the motion control technology functions f...

Page 28: ...ove and below the components must be observed The ventilation openings may not be covered by connecting cables WARNING Safe problem free operation of the SIMOTION D control unit assumes proper transportation storage setup and installation as well as careful operation and maintenance In addition to the danger and warning information provided in the technical customer documentation the applicable na...

Page 29: ... SIMOTION D410 Manual With the PROFINET interface of SIMOTION D410 PN X200 or X201 connector using a twisted pair cable For information on communication via PROFINET refer to section Configuring PROFINET only for D410 PN Page 59 System requirements System requirements for hardware commissioning The programming device must be equipped with a PROFIBUS or Ethernet adapter The programming device PC mu...

Page 30: ...ompactFlash Card may only be inserted or removed when the system is in a de energized state The SIMOTION D410 is in a de energized state when all the LEDs are OFF Procedure Insert the CompactFlash Card as follows 1 The insertion direction of the CompactFlash Card is identified by an arrow on the card and a matching arrow on the slot Align the arrows when inserting the CompactFlash Card 2 Gently pu...

Page 31: ...P power supplies in special circumstances the SIMOTION D410 can also be supplied using the PM340 Power Module refer to section Power Supply in the SIMOTION D410 Manual Switch on the power supply after having checked off all items of the checklist CAUTION It is imperative to prevent the external 24 VDC power supply to SIMOTION D410 from being interrupted for a duration longer than 3 ms Operation of...

Page 32: ...e note of the messages and alarms in the SIMOTION SCOUT detail window An FW update on the SIMOTION D410 is signaled by the RDY LED flashing yellow while on the DRIVE CLiQ components TM SMC etc it is signaled by the RDY LED flashing red green FW update running RDY LED flashes slowly 0 5 Hz FW update complete RDY LED flashes quickly 2 Hz Go offline once all the FW updates are complete then switch th...

Page 33: ...UDPHWHUV 3 SDUDPHWHUV EVROXWH HQFRGHU RIIVHW RPSDFW ODVK DUG 5 0 WR 520 VWDUWXS VWDUWXS VWDUWXS RZQORDG Figure 2 2 SIMOTION D410 memory model As a result the SIMOTION Kernel D410 firmware contains the functions required for virtually all applications and essentially acts as a PLC featuring an IEC 61131 3 compliant command set as well as system functions for controlling various components such as i...

Page 34: ...net mask router address DP parameters PROFIBUS DP address baud rate Diagnostics buffer Retain variables Variables in the interface or implementation section of a unit declared with VAR_GLOBAL RETAIN Global device variables set with the RETAIN attribute Retain TO Absolute encoder offset DCC blocks SAV blocks and user defined blocks with retain behavior SAV SAVE blocks for the non volatile data back...

Page 35: ...SIMOTION D410 can use the addresses defined in these data to go online The IP and DP parameters on the CompactFlash Card are also written to non volatile memory during startup The IP and DP parameters in non volatile data is retained and used by the SIMOTION device if the system is restarted with a CompactFlash Card which does not contain any configuration data Thus the SIMOTION device can continu...

Page 36: ...WHO RQILJ GDWD LQ 581 6 VWHP YDULDEOHV RZQORDG 8SORDG ORDG PHPRU Figure 2 3 Configuration data and system variables on volatile memory Further information about memory management for SIMOTION is available in the SIMOTION SCOUT Basic Functions Function Manual CompactFlash Card The CompactFlash Card contains the following data SIMOTION kernel Technology packages TP User data units configuration data...

Page 37: ...ter the download Copy RAM to ROM The Copy RAM to ROM command is used on the ES to save the following data to the CompactFlash Card Technology packages and user data units configuration data parameter assignments task configuration from the volatile SIMOTION data area Current values are copied to the volatile SIMOTION data area depending on the settings in SIMOTION SCOUT Note The Copy RAM to ROM me...

Page 38: ... to be copied to the RAM and configuration data loaded to the PG with Copy RAM to ROM using the option Transfer current values to RAM with copy RAM to ROM Note The Copy current data to RAM command does not transfer the values of the system variables to the RAM memory This means that Save to memory card Copy RAM to ROM or Save in the engineering project Load CPU drive unit to PG is not possible In ...

Page 39: ...xt time the unit is switched on even if there is a power failure during backup An already existing backup file is renamed to PMEMORY BAK before a new backup file is generated If the save operation to the new backup file fails e g because the capacity of the CompactFlash Card is insufficient this backup copy of the backup file is used the next time an attempt is made to restore the non volatile SIM...

Page 40: ...10 with the non volatile SIMOTION data The PROFIBUS address in non volatile data is therefore valid for example 2 The non volatile SIMOTION data is invalid and there is no backup file PMEMORY XML and no backup copy of the backup file PMEMORY BAK SIMOTION D410 copies the factory defaults to its non volatile SIMOTION data and restarts using this data The default PROFIBUS address is valid in this cas...

Page 41: ...n about how to read out the contents of the diagnostic buffer Evaluating via system variables The system variables in the device persistentDataPowerMonitoring structure indicate the state of the non volatile SIMOTION data Table 2 5 Status of the non volatile SIMOTION data System variable Designation Status Updating rtcFailure as of V4 3 Indicates that the clock contents RTC are invalid clock must ...

Page 42: ...ta in the SIMOTION device is used FROM_FILE 2 Non volatile SIMOTION data is restored from the backup file FROM_BACKUP 3 Non volatile SIMOTION data is restored from the backup copy of the backup file INVALID 4 Data in the non volatile SIMOTION data and in the backup file backup copy of backup file is invalid or non existent deleted The SIMOTION device has copied the default settings to the non vola...

Page 43: ...e clock RTC are backed up via SuperCap A battery can be used as an option to extend the backup time batteryexisting can be used to query whether a battery is available Example D4x5 OPTIONAL_RTC 1 A battery is not required for the backup of the retain data Only the real time clock RTC is backed up via SuperCap A battery can be used as an option to extend the backup time of the real time clock batte...

Page 44: ...ed for operation of the device fanexisting can be used to query whether a fan is available Examples D410 D445 D445 1 D445 2 DP PN D455 2 DP PN OPTIONAL Fan can be used optionally fanexisting can be used to query whether a fan is available Examples D425 D435 fannecessary 1 NOT_MANDATORY Fan is not required for operation of the device SINGLE A single fan is present Examples D410 D4x5 REDUNDANT Doubl...

Page 45: ...how to install SIMOTION SCOUT on your programming device PC refer to the SIMOTION SCOUT Configuration Manual 3 2 Creating a project and configuring the communication 3 2 1 Creating a SIMOTION project and inserting a SIMOTION D410 Procedure Proceed as follows in order to create a project in SIMOTION SCOUT and to insert a SIMOTION D410 1 Select the Project New menu command 2 Enter a name for your pr...

Page 46: ...e Insert SIMOTION device dialog box select the device its version and the SIMOTION version 5 If required make further settings SINAMICS for SIMOTION D410 always set SINAMICS S120 Integrated SINAMICS version Select the SINAMICS Integrated version if several drive versions are available for a SIMOTION version 6 The Open HW Config option allows you to select whether HW Config is opened in the next st...

Page 47: ...A CPU must be replaced in HW Config for this purpose Please note that separate SIMOTION D firmware is available for PROFINET versions V2 1 and V2 2 The required firmware can be found on the SCOUT DVD as well as at Internet address http support automation siemens com WW view en 31045047 Mixed operation of the PROFINET V2 1 and V2 2 synchronization processes is not possible in a network Additional r...

Page 48: ...thernet interface dialog box Figure 3 2 Properties of the Ethernet interface Program the following parameters in the Properties Ethernet Interface dialog box 1 Click New The New Subnet Industrial Ethernet dialog box opens Rename the new subnet or accept the default name by clicking OK 2 Select the new Ethernet subnet which is now displayed in the Properties Ethernet Interface dialog box 3 Define y...

Page 49: ...sfied you can configure the interface for the PG PC connection in the Interface selection D410 dialog box Procedure Proceed as follows to configure the PROFIBUS DP interface 1 In the Interface Selection D410 dialog box select the entry PROFIBUS DP MPI X21 as the interface selection Figure 3 3 Selecting a PROFIBUS interface 2 Select the interface parameter assignment that you would like to use to g...

Page 50: ...ing online can be found In the online help via the Contents tab at Diagnostics Overview of service and diagnostics options Part III Go online Insert device and connect to target system Go online offline On the Internet at Internet address http support automation siemens com WW view en 22016709 In SIMOTION Utilities Applications FAQ Online connections to SIMOTION devices SIMOTION Utilities Applicat...

Page 51: ...Config is opened automatically if parameterized An Ethernet subnet is created automatically The PG PC is now connected to the SIMOTION D410 via Ethernet You can configure and parameterize your system Note Please make sure that the PG PC and SIMOTION D410 are located in the same subnet and that S7 online access has been activated PG PC connection must be yellow and bold in NetPro Inserting a furthe...

Page 52: ...ernet at Internet address http support automation siemens com WW view en 22016709 In SIMOTION Utilities Applications FAQ Online connections to SIMOTION devices SIMOTION Utilities Applications is part of the scope of delivery of SIMOTION SCOUT 3 2 5 Representation in HW Config Representation in HW Config The SIMOTION D410 is represented in HW Config Figure 3 5 Image of a SIMOTION D410 PN in HW Conf...

Page 53: ...us node Components representing a bus master determine the data traffic on the bus and are therefore also referred to as active bus nodes Slaves passive bus nodes These devices may only receive acknowledge and return messages to the master if requested by the master Examples SINAMICS drives I O modules Note If a SIMOTION D410 DP is operated as a passive PROFIBUS I slave the display measuring funct...

Page 54: ... each device on your programming device PC in HW Config Certain PROFIBUS DP slaves are equipped with an address switch Note The PROFIBUS addresses set at the devices using these switches must correspond with the address settings in HW Config Recommendation for PROFIBUS addresses Reserve PROFIBUS address 0 for a service programming device and 1 for a service HMI device which are connected to the su...

Page 55: ...10 is always equidistant Here the SIMOTION D410 is the master and the SINAMICS Integrated drive is the slave 3 3 4 Creating a new PROFIBUS DP subnet The SIMOTION D410 device is networked using SIMOTION SCOUT Set up your user specific bus parameters for the PROFIBUS interface when you configure the network Note The actions outlined below only need to be taken if you have not selected an interface w...

Page 56: ...rid 0 125 ms The PROFIBUS DP interface of the SIMOTION D410 DP supports operation at a DP cycle time 2 ms at an interval of 0 125 ms SINAMICS Integrated always runs in isochronous mode The cyclic tasks of SIMOTION are therefore always in synchronism with SINAMICS Integrated The set DP cycle of SINAMICS Integrated is displayed as Bus data cycle in the System Clocks D410 dialog box in SIMOTION SCOUT...

Page 57: ...ON D410 DP Rules for synchronizing the system clocks You must conform to the following rules when setting the DP cycle and SINAMICS clocks 1 The DP cycle must be an integer multiple of the current controller cycle Error A01902 2 is reported in the drive if this rule is violated 2 The master application cycle Tmapc which corresponds to the servo cycle must be an integer multiple of the speed contro...

Page 58: ... Expert list of SIMOTION SCOUT select the Control_Unit from SINAMICS_Integrated in the Project Navigator and then open the Expert List by selecting the Expert command from the shortcut menu Example A default value of 4 ms is set at the SINAMICS setpoint channel If the DP cycle is to be set to 3 ms the fact that an integer multiple value is required means that you will need to set 3 ms or 6 ms for ...

Page 59: ...tion System Manual 3 4 Configuring PROFINET only for D410 PN 3 4 1 General information about PROFINET communication Overview PROFINET is an open component based industrial communication system using Ethernet IEC 61158 for distributed automation systems The PROFINET interface supports operation of SIMOTION D410 PN as IO controller and or as intelligent device PROFINET distinguishes between the cont...

Page 60: ...munication System Manual Initializing SIMOTION D410 SIMOTION D410 must be assigned an IP address and a device name in order to enable downloading of the project This is performed online on the SIMOTION device using the so called node initialization To perform the node initialization the programming device PC must be connected with the SIMOTION D410 PN SIMOTION SCOUT must be open 1 Click the Reacha...

Page 61: ...he IP address of SIMOTION D410 PN can be viewed in SIMOTION SCOUT as follows 1 Establish an online connection to the SIMOTION D410 2 Right click the SIMOTION device in SIMOTION SCOUT 3 Select the Target device Device Diagnostics command from the shortcut menu The address is displayed as follows for example Figure 3 6 Reading the IP address As an alternative you can determine the IP address as foll...

Page 62: ... as follows 1 Open your project in SIMOTION SCOUT 2 Open HW Config Double click the PROFINET interface to open the Properties dialog box 3 Click Properties The Properties Ethernet Interface dialog box opens 4 Click New The New Subnet Industrial Ethernet dialog box opens Rename the new subnet or accept the default name by clicking OK 5 Select the new Ethernet subnet which is now displayed in the Pr...

Page 63: ...r in the I O system synchronized data traffic takes place 2 X Internal The D410 is the SYNC slave in the I O system synchronized data traffic takes place 2 X External Internal as substitute value IRT communication No synchronized data traffic 2 X Internal 1 If the PROFINET send cycle forms the basis for the SIMOTION system clocks the SINAMICS Integrated DP cycle and the servo cycle are equal 2 Syn...

Page 64: ...FINET send cycle Table 3 5 Possible factors for setting the system clocks Servo cycle DP cycle send cycle IPO cycle Servo cycle IPO2 cycle IPO cycle 1 4 8 1 6 2 64 The minimum servo cycle length that can be set is 2 ms 3 4 4 Rules for SIMOTION D410 PN Rules for using the PROFINET send cycle If the PROFINET send cycle is the basis for the cycles ensure that the DP cycle of the SINAMICS Integrated a...

Page 65: ... to the send cycle violates this rule you must also change the SINAMICS cycles In order to change the cycles in the Expert list of SIMOTION SCOUT select the Control_Unit from SINAMICS_Integrated in the Project Navigator and then open the Expert List by selecting the Expert command from the shortcut menu Example A default value of 4 ms is set at the SINAMICS setpoint channel If the send cycle is to...

Page 66: ...Parameter assignment addressing 3 4 Configuring PROFINET only for D410 PN SIMOTION D410 66 Commissioning Manual 02 2012 ...

Page 67: ... TO and I Os This simplifies the configuration of the technological relationships including the communication between controller and drive By means of symbolic assignment Only compatible assignment partners are listed for selection in an assignment dialog Communication between axis and drive is set up automatically by the engineering system and the required PROFIdrive axis message frames as well a...

Page 68: ...endent configuration of the axis on the SIMOTION side and the drive on the SINAMICS side This means for example that a programmer can use technology objects TO axis for example to make all the necessary configuration settings for the PLC and motion control functions and load them to the device drive know how is not required the drive can be separately configured and optimized by a drive expert and...

Page 69: ...y can be converted to symbolic assignment and must be evaluated on a case by case basis since project revisions may be necessary Especially in cases where message frames have been freely configured e g for TB30 TM15 DI DO TM31 extensive revision can be expected CAUTION If symbolic assignment is activated retrospectively for a project in which message frames have already been configured and interco...

Page 70: ...The onboard I Os of a SIMOTION D of a SINAMICS S110 S120 Control Unit and selected terminal modules can be interconnected symbolically Table 4 1 Control units that support a symbolic assignment Module Supports symbolic assignment SIMOTION D SIMOTION D410 2 SIMOTION D410 SIMOTION D4x5 2 SIMOTION D4x5 As of SIMOTION V4 3 As of SIMOTION V4 2 As of SIMOTION V4 2 As of SIMOTION V4 2 Controller Extensio...

Page 71: ... Testing the configured drive using the drive control panel Page 101 3 For information on creating an axis refer to the section titled Overview of SIMOTION Engineering Page 103 4 For information on testing a configured axis refer to the section titled Testing an axis with the axis control panel Page 111 5 Set up addresses and message frames for details refer to section Setting up addresses and mes...

Page 72: ... SINAMICS Integrated Load CPU drive unit to PG The unit s configuration is only loaded to the PG selected in the project tree Thus the function needs to be performed separately for each D410 and SINAMICS Integrated Copy RAM to ROM Copying from RAM to ROM is only performed for the device selected in the project tree Thus the function needs to be performed separately for each D410 and SINAMICS Integ...

Page 73: ...10 to the project You configured the communication between the programming device PC and SIMOTION D410 Procedure Steps involved in offline configuring For details regarding calling up the Drive Wizard refer to section Accessing the drive wizard Page 74 For configuring components refer to section Configuring the components Page 74 Downloading the project to SIMOTION D410 by means of the following o...

Page 74: ...NAMICS S120 Power Module for example Note Take note of all the necessary safety instructions and rules governing connections which can be found in the latest SINAMICS S120 documentation on the SIMOTION SCOUT DVD Procedure Select the SINAMICS_Integrated Configure drive unit drive element in the Project Navigator to open the Drive Wizard You can configure the following components Power unit e g SINA...

Page 75: ...ioning Manual 02 2012 75 1 Enter a drive name in the Drive Properties dialog box and select the drive type servo or vector Figure 4 1 Drive properties 2 You can select the function modules and the control mode in the Open loop Control Structure dialog box Figure 4 2 Control loop structure ...

Page 76: ...In the Power unit supplementary data select the component added to the power unit The selection of the component depends on the construction type D410 DP with D410 PN The SIMOTION D410 snapped directly onto the PM340 power module CUA31 or CUA32 The CUA3x snapped directly onto the PM340 The D410 is mounted individually on a mounting plate The D410 is connected to the CUA3x using a DRIVE CLiQ cable ...

Page 77: ...Or by automatically identifying the motor motor with DRIVE CLiQ interface Figure 4 5 Selecting a motor Note Motors with DRIVE CLiQ interface have an integrated encoder evaluation that is connected to the power module via a fully digital communication interface DRIVE CLiQ In this way motor encoder and temperature signals as well as electronic rating plate data such as unique ID numbers rated data v...

Page 78: ...al 02 2012 6 Select a motor holding brake if installed Figure 4 6 Selecting a motor holding brake 7 If you are using a motor that is not equipped with a DRIVE CLiQ interface select the encoder order number in the Encoder Selection via Motor Order Number dialog box Figure 4 7 Selecting a motor encoder 1 ...

Page 79: ...oder is identified automatically It is not necessary to enter encoder data in such cases the box for selecting Encoder 1 is grayed out and therefore inactive The communication for the control of the SINAMICS drive is configured in the following dialog box We recommend that the communications settings are performed automatically by the engineering system You can also perform the settings for the pr...

Page 80: ...Commissioning software 4 2 Configuring the system in offline mode SIMOTION D410 80 Commissioning Manual 02 2012 Figure 4 9 Configuring the process data exchange ...

Page 81: ...ther editing Figure 4 10 Finishing the drive The configured drive is displayed in the Project Navigator An overview of your configured SINAMICS components is available in the SINAMICS_Integrated Topology dialog Refer also to If you configure the message frames for the infeed and drive manually you can find detailed information on the respective message frame types in the following Motion Control T...

Page 82: ... SINAMICS Integrated is not possible if HW Config is not loaded at the time you initially connect to the target system Download the data to HW Config in order to enable online access to SINAMICS Integrated During the Download to target system process SIMOTION SCOUT automatically attempts to establish an online connection to SINAMICS Integrated 4 2 5 Loading a project created offline to the Compact...

Page 83: ...ct incl sources and additional data Overview In the case of SIMOTION V4 1 SP2 and higher it is possible to download additional data e g sources to the target device when saving a project to the CompactFlash Card or downloading to the SIMOTION D410 These data are required for Online object comparison e g additional properties Various detailed comparisons e g ST source file comparison Synchronizatio...

Page 84: ...ws to archive the SIMOTION project on the CompactFlash Card 1 Open SIMOTION SCOUT and select the Project Archive menu command 2 In the Archive dialog box select the SIMOTION project and save it to your drive PG PC 3 Open the project 4 Go online to SIMOTION D410 5 In the project navigator select the SIMOTION D410 and select the Target system Load Save archived project to card menu command 6 In the ...

Page 85: ...nts without DRIVE CLiQ connection must be edited in offline mode You may need to edit DRIVE CLiQ components which were detected in the course of automatic configuration for example adding encoder data if using SMC modules Prerequisites for online configuration You created a project in SIMOTION SCOUT and added a SIMOTION D410 to the project You configured the communication between the the programmi...

Page 86: ...lect the SIMOTION D410 device in the Project Navigator 4 Use the Download CPU drive unit to target device function to download the SIMOTION D410 device to the target device The connection to SINAMICS Integrated is activated automatically You can now run the automatic configuration at SINAMICS Integrated For details refer to the section titled Starting automatic configuration Page 86 Additional ref...

Page 87: ...ration command in the Project Navigator Figure 4 11 Starting automatic configuration 2 Click the Configure button 3 If the drive unit is not in the Initial commissioning state the factory settings are restored after acknowledging a prompt 4 The drive object types can now be selected via a further dialog box Figure 4 12 Selecting the drive object type 5 Select whether a servo or vector type drive o...

Page 88: ...n dialog box by the following message State of the drive unit Automatic FW update of DRIVE CLiQ components An FW update on the SIMOTION D410 is indicated by the RDY LED flashing yellow while on the DRIVE CLiQ components TM SMC etc it is indicated by the RDY LED flashing red green FW update running RDY LED flashes slowly 0 5 Hz FW update complete RDY LED flashes quickly 2 Hz Go offline once all the...

Page 89: ...ator with the downloaded DRIVE CLiQ components You must then If required reconfigure SINAMICS components e g components without a DRIVE CLiQ interface such as an encoder connected to the onboard encoder interface Assign the TO axis to Drive See also Editing SINAMICS components Page 89 4 3 4 Editing SINAMICS components Prerequisites You have uploaded all connected DRIVE CLiQ components to the user ...

Page 90: ...configurations you must download the configuration to the SINAMICS Integrated 1 Save and compile the project 2 Go online to SIMOTION D410 3 To download the project execute Download project to the target system The data must also be saved on the CompactFlash Card to ensure that the project is retained in the event of a power failure The following options are available Perform the Copy RAM to ROM fu...

Page 91: ...he SINAMICS Integrated enables you to display and if required change the properties of the DP slave on the Clock synchronization tab Possible changes include Synchronize drive to the equidistant DP cycle The SINAMICS Integrated of a SIMOTION D410 can only be operated isochronously For this reason this option cannot be deactivated Changing the master application cycle TMAPC The master application c...

Page 92: ... on the type of device used This means that particularly in the case of vector drives the DP cycle must be checked and changed if necessary refer to the section titled Using vector drives Page 93 Note After TDP has been changed on the PROFIBUS master the drive system must be switched on POWER ON Changing the TI and TO times A change to TI TO is required in the case of vector drives for example whe...

Page 93: ...with cycle reduction i e servo cycle DP cycle 5 Use the Target system Load Download project to target system menu command to download the parameterization to the SIMOTION D410 6 After the download has successfully completed you should determine the current and speed controller cycles of the drive from the drive s expert list because the cycle clocks are set in the SINAMICS drive unit after a proje...

Page 94: ...imes are preassigned in a way that enables isochronous operation with a control system Output cams measuring inputs with vector drives With vector drives the cycle clock ratios current controller cycle clock speed controller cycle clock sampling time of the inputs outputs etc depend on the number of vector drives or with chassis units also on the device type used Note the information in Section Cu...

Page 95: ...ff As a result the drive displays the system runtime from 00 00 00 on 01 01 1992 in both the alarm window in SIMOTION SCOUT and the diagnostic buffer for entries If faults and warnings need to be time stamped on the basis of a time of day Time stamp operating hours needs to be changed to Time stamp UTC format as described below Prerequisites A message frame 39x is required for the time synchroniza...

Page 96: ... all drive units with configured message frame 39x The first time synchronization is performed after the SIMOTION D control unit has reached the RUN operating state To compensate for deviations between the SIMOTION and SINAMICS clocks the time of day is automatically resynchronized at regular intervals Via the system variable _driveStates allClocksSynchronized on the device the user program can qu...

Page 97: ...nsideration when setting the SIMOTION time Time date to be set is after Time date on SINAMICS Time and date are corrected on the SINAMICS Time date to be set is before Time date on SINAMICS The SINAMICS clock must be stopped until the SINAMICS Time date has caught up with Time date to be set Adopting this procedure ensures that the sequence of SINAMICS diagnostic buffer entries remains the same ev...

Page 98: ... particular this is used for reading and writing drive parameters e g error codes warnings controller parameters motor data etc As a result data can be transferred on an acyclic as opposed to cyclic basis when required Acyclic reading and writing of parameters for PROFIdrive drives is based on the DP V1 services read data set and write data set The acyclic DP V1 services are transferred while cycl...

Page 99: ..._readDriveParameter _writeDriveParameter etc but also expands the range of functions for frequently required tasks e g the reading of faults and alarms from the drive unit SIMOTION Utilities Applications is provided as part of the SIMOTION SCOUT scope of delivery The functions available in the DP V1 library include Buffer management coordination of a number of parallel DP V1 services StartUp funct...

Page 100: ...example using a PC or PDA via Ethernet Wireless access is also possible in conjunction with WLAN The CU parameter p0972 cannot be used on the SIMOTION D410 NOTICE With the SIMOTION D410 the drive must not be RESET using the expert list of the Control Unit in parameter p0972 drive unit RESET Doing so will lead to a SIMOTION D410 malfunction at which the RDY RUN STOP and SF BF LEDs will glow red In ...

Page 101: ...ked up on the CompactFlash Card 2 Perform an upload to the PG Target system Load Load CPU drive unit to PG 3 This transfers the parameter calculations of the drive to the PG The cycle clock ratios are then known in the engineering system 4 Go offline 5 Generate the configuration information Fast IO configuration again To do this select the SIMOTION CPU in the project tree and right click to open t...

Page 102: ...es not pose any risk to persons Testing the drive using the drive control panel 1 Change to the configured drive in the Project Navigator and open the drive control panel by selecting Commissioning Control panel The drive control panel opens in the detail view Figure 4 16 Drive control panel 2 To display the control range and axis diagnostics click the Show hide control range and Show hide diagnos...

Page 103: ...The current motor speed is displayed in Actual 8 Click Drive Off to stop the drive after you completed the test 9 Deactivate the enable and click the Give up control priority button to deactivate control by the PG PC 4 6 Creating and testing an axis 4 6 1 Overview of SIMOTION Engineering Performing engineering with SIMOTION SCOUT The SIMOTION SCOUT Engineering Software is used to add axes to your ...

Page 104: ...tuator The TO axis processes the motion control commands from the user program e g MCC and coordinates the interface to the drives It executes control and motion commands and indicates statuses and actual values When running through the axis wizard the basic settings are made for the axis and the TO axis interconnected to a drive e g SINAMICS Integrated The following additional options are availab...

Page 105: ... an axis SIMOTION D410 Commissioning Manual 02 2012 105 Inserting an axis 1 In the project navigator double click the entry Axis Insert Axis This will access the axis wizard Set the required technology and then click OK Figure 4 19 Inserting an axis ...

Page 106: ...Commissioning software 4 6 Creating and testing an axis SIMOTION D410 106 Commissioning Manual 02 2012 2 Set an axis type and if required configure the units Figure 4 20 Defining the axis type ...

Page 107: ...gured drive Define assignment later The axis is to be assigned to a drive at a later point in time This means that a programmer can use technology objects TO axis for example to make all the necessary configuration settings for the PLC and motion control functions and load them to the device drive know how is not required The drives to be separately configured and optimized by a drive expert and T...

Page 108: ...set up manually This corresponds to the previous method of configuring the drive and axis which was available in SCOUT versions V4 2 This method is necessary e g for drive units which do not support symbolic assignment such as SINAMICS S120 with FW version 2 6 2 MASTERDRIVES SIMODRIVE etc The address list in the All addresses view provides an overview of the assignments to all interfaces of the TO...

Page 109: ...so extended and interconnections in the drive created automatically depending on the selected TO technology e g SINAMICS Safety Integrated 2 Click Finish to confirm the Summary window The configured real axis is displayed in the project navigator Figure 4 22 Axis wizard summary Note During system power up reference variables as well as drive and encoder data of the SINAMICS are automatically taken...

Page 110: ...e to edit the input field containing the symbolic name directly Safety data block SIDB and technology data block TDB The activation of The technology data block for the cyclic exchange of technology data e g actual torque value and The safety data block to support the SINAMICS Safety Integrated extended functions by the TO can be performed in the configuration dialog box of the TO axis Change butt...

Page 111: ...axis control panel Axis control panel The axis control panel is used exclusively for testing axes You can use the axis control panel for the following tasks for example Testing all system components before the axis movement is controlled by a program Testing as to whether you can move the axis using the axis control panel if a fault is detected Moving the axes for tuning purposes controller tuning...

Page 112: ... is displayed Figure 4 23 Axis control panel 2 To display the control range and axis diagnostics click the Show hide control range and Show hide diagnostics area buttons 3 Click Assume control priority If the CPU is in RUN mode confirm the notice that appears with Yes to set the controller to STOPU mode Note In order to move the axis from the PG PC you must assume control priority However by press...

Page 113: ...e axis click the Position controlled traversing of the axis button 8 Enter a velocity and close the dialog box by clicking OK 9 Click the Start motion button to traverse the axis You can monitor the traversing motion under velocity and position Use Stop motion to stop axis movement again 10 Click Set reset enables to remove the enable Confirm the Remove Axis Enable dialog box with OK 11 Click the ...

Page 114: ...em refer to section Setting up communication for symbolic assignment Page 114 in the absence of symbolic assignment addresses must be determined manually refer to section Message frame configuration Page 115 4 7 1 Setting up communication for symbolic assignment You can set up communication for symbolic assignment using the following methods via the SCOUT menu in the menu call Project Set up commu...

Page 115: ...matic address adaptation for a drive object should be activated deactivated PROFIdrive message frames should be configured for drive objects the addresses should be set up Message frames should be extended manually Procedure Proceed as follows In the project navigator open the Communication Message frame configuration entry under SINAMICS_Integrated The SINAMICS Integrated Message Frame Configurat...

Page 116: ...Commissioning software 4 7 Setting up addresses and message frames SIMOTION D410 116 Commissioning Manual 02 2012 Figure 4 25 Message frame configuration ...

Page 117: ...s to be adapted by the system in the case of address offsets for example Address offsets can occur for example if a message frame is extended and the adjacent addresses are already occupied by other message frames With TM15 TM17 High Feature Automatic PROFIdrive message frame setting Automatic message frame extension and Automatic address adaptation cannot be deactivated by design since for these ...

Page 118: ...ssage frame that you have extended to include supplementary data You are using a message frame for which one of the two message frame lengths is too long The drive project cannot process this entry 4 8 Integrating additional encoders optional 4 8 1 General information SIMOTION D410 provides the option of integrating and configuring further encoders in addition to the motor encoder The following en...

Page 119: ...VE CLiQ or the onboard encoder interface must be configured for the drive SINAMICS Integrated and SIMOTION Configure this additional encoder on drive side SINAMICS Integrated and in SIMOTION 1 For information on configuring further encoders on the drive refer to section Configuring additional encoders on the drive Page 119 2 For connecting further encoders using PROFIBUS PROFINET refer to section ...

Page 120: ...US PROFINET Additional encoders for encoder integration can also be connected via PROFIBUS or PROFINET The following options are available Encoder interconnection using a PROFIdrive message frame encoder with message frame types 81 and 83 Encoder interface as a direct value in the I O area Additional references Detailed information is contained in the SIMOTION TO Axis Electric Hydraulic External E...

Page 121: ... message frame Only components suitable for the data type of the I O variable are displayed If no data type is specified at the I O variable this is determined via the assignment partner after the selection Figure 4 27 Assignment of I O variables to the PROFIdrive message frame 4 9 2 Assignment to drive parameters I O variables from the address list can be assigned to drive parameters using the as...

Page 122: ... 122 Commissioning Manual 02 2012 Procedure 1 Open the assignment dialog box from the address list view of all addresses The assignment dialog opens with the corresponding assignment partners 2 Click the button in the parameter selection line to open the parameter list Figure 4 28 Assignment dialog for drive parameters ...

Page 123: ... of I O variables PROFIdrive message frame drive parameters SIMOTION D410 Commissioning Manual 02 2012 123 3 Select the desired signal source e g DO drive Then select the required parameter Figure 4 29 Dialog box for the DO and parameter selection ...

Page 124: ... parameters BICO_IW parameter number WORD Input All CO parameters BICO source BICO_QW parameter number WORD Output All CI parameters BICO sink BICO_ID parameter number DWORD Input All CO parameters BICO source BICO_QD parameter number DWORD Output All CI parameters BICO sink Syntax of the assignment names A number of parameters separated by periods are specified for outputs SINAMICS side received ...

Page 125: ... automatically Message frames must be set manually either predefined message frame e g 39x or free message frame configuration BICO interconnections The required BICO interconnections are performed automatically I Os are interconnected to message frame With predefined message frames e g 39x the BICO interconnections are made automatically With free message frame configuration with BICO the interco...

Page 126: ...tion of a DI DO as digital output 2 Configuring technology objects and I O variables Page 129 The access of technology objects and I O variables to I Os is configured The configuration is performed symbolically whereby only function compatible I O channels are offered for selection Example For the TO measuringInput only symbolic assignments of the type MI measuring input are offered for selection ...

Page 127: ...U320 2 X 1 X On the drive unit CU As of SINAMICS V2 6 2 As of SINAMICS V4 4 As of SINAMICS V2 6 2 As of SINAMICS V4 3 TB30 TM15 DI DO TM31 X 1 X On the drive unit TB30 or TM Yes TM41 X 1 X On the drive unit TM41 Yes 2 TM15 TM17 High Feature X On the drive unit TM15 or TM17 Yes TMC1x80 PN X On the TMC HW Config Yes 1 I Os are originally assigned to a SINAMICS drive unit and can be assigned to SIMOT...

Page 128: ...l X121 are originally assigned to the drive unit The configuration is therefore performed via the drive unit SINAMICS_Integrated Control_Unit Inputs outputs The properties of the I O channel can be configured in the parameterization dialog box With the bidirectional digital inputs outputs for example an I O channel can be parameterized as input or output Inverted BICO interconnected use as drive I...

Page 129: ...ready been configured and interconnected these can be changed together with the BICO interconnections For this reason make a backup copy of your project before activating the symbolic assignment TB30 TM15 DI DO and TM31 are especially affected here Refer also to section Symbolic assignment adaptation Page 67 4 10 1 3 Configuring TMC I O terminals The functionality of the I O channels is configured...

Page 130: ... input measuring can be performed simultaneously on several axes or external encoders with one measuring input Detailed information can be found in the SIMOTION Motion Control Output Cams and Measuring Inputs Function Manual A detailed comparison of local and global measuring inputs as well as an overview of which modules support local or global measuring inputs can be found in Chapter Configuring...

Page 131: ...an be found in the SIMOTION Output Cams and Measuring Inputs Function Manual 4 11 2 Configuring local measuring inputs Local measuring inputs are drive related measuring inputs The configuration is performed via drive parameters For further details see Configuring drive related I Os without symbolic assignment Page 213 in the Appendix SIMOTION Output Cams and Measuring Inputs Function Manual ...

Page 132: ...a resolution with respect to time servo cycle clock Supported hardware SIMOTION D410 terminal X121 SIMOTION D4x5 terminal X122 X132 SIMOTION C240 C240 PN terminal X1 Standard digital output DO The output cam calculations are performed in the processing cycle IPO or IPO2 cycle or in the servo cycle The actual cam output is performed in the servo cycle The resolution with respect to time of the cam ...

Page 133: ...tput For this purpose click assign to open the assignment dialog box and select a free i e not yet used I O Note Only those I Os that have the appropriate functionality DO_xx channel name terminal number are displayed If no suitable I Os are displayed you must first configure the I Os I O must be configured as DO Figure 4 33 Configuring an output cam for SIMOTION D410 Detailed information on the c...

Page 134: ...ed via the address list Components that support a symbolic assignment can be configured without I O addresses In the assignment dialog the preferential links are displayed as assignment targets e g DI_0 DI 0 X121 1 The assignment is carried out by directly selecting the corresponding terminal signal Components that do not support symbolic assignment e g standard PROFIBUS I O are configured via I O...

Page 135: ...e If you do need replacement values however proceed as follows 1 Assign a digital input e g SINAMICS_Integrated Control_Unit DI_0 DI 0 X121 1 to an input variable of the BOOL type e g My_sensor 2 Create a global variable e g All_inputs at least data type WORD e g SINAMICS_Integrated Control_Unit DI_0_15 3 Configure the substitute value The appropriate bit of the substitute value must then contain ...

Page 136: ...uring systems These are installed in the control cabinet directly at the machine Several encoders can be connected to the same hub Note The SIMOTION D410 has precisely one DRIVE CLiQ interface You can use the DMC20 DME20 to evaluate the motor encoder and an additional encoder by means of SMx Hot plugging is the option for changing motor components while in operation These components are connected ...

Page 137: ...ncoder A track B track R track The resolution of the encoder signal can be specified in the configuration Configuring the TM41 involves the following steps Configuring TM41 at SINAMICS Integrated Configuring TM41 using the Axis Wizard Note The digital I Os and the analog input can be interconnected using BICO configuration in the same way as a TM31 The TM41 encoder interface incremental encoder re...

Page 138: ... automatic controller setting wizard that can be used for drive controller optimization In the Automatic Controller Setting screen form you can automatically set the speed controller and the DSC dynamic servo control position controller for SINAMICS drive units The necessary steps for this calculation can be controlled using this screen form The calculated parameter values for the speed controller...

Page 139: ...tled Measuring functions trace and function generator Page 142 and Manual speed controller optimization Page 143 4 14 2 Automatic speed controller setting Features Automatic speed controller setting has the following features Attenuation of resonances in the speed controlled system Automatic setting of the gain factor Kp and the reset time Tn of the speed controller The speed setpoint filter and t...

Page 140: ...rive unit and the drive for which you want to perform automatic DSC position controller setting The steps required for this calculation can be performed via this screen form The calculated Kv value is displayed and can then be accepted online in the configuration data of the axis that is assigned to the drive Prerequisites In addition to the general prerequisites for automatic controller setting t...

Page 141: ...rform the steps either in automatic mode or as individual steps 6 Select the axis data sets to which the Kv factor is to be transferred 7 Click Accept values to transfer the calculated Kv factor to the axis data sets 8 Disable the drive by clicking the Drive OFF button 9 Give up the control priority of the programming device PC 10 Save the online parameters You can now transfer the parameters that...

Page 142: ... drives to be analyzed The function generator and trace recorder are used The control loop is supplied with the function generator signal at a specific point e g speed setpoint and the signal is recorded by the trace recorder at another point e g speed actual value KDQQHO KDQQHO KDQQHO KDQQHO QBVHW QBDFW LBDFW LBVHW QBVHW LBDFW QBDFW 7UDFH UHFRUGHU XQFWLRQ JHQHUDWRU 6SHHG FRQWUROOHU XUUHQW FRQWURO...

Page 143: ... controlled system excitation at current setpoint filter Additional references For additional information about drive optimization consult the SINAMICS S120 Commissioning Manual More detailed information on trace and measuring functions as well as on the function generator can be found in the SIMOTION SCOUT online help 4 14 5 Manual speed controller optimization Prerequisite You have already creat...

Page 144: ...set Ramp up time and Measuring time Four channels can be recorded Depending on the measuring function certain channels are preassigned Figure 4 37 Speed controller measuring function 5 Download the changes to the drive by clicking Download Parameter Assignment Starting the measuring function 1 Click Assume control priority to assume control priority Read the notice that appears and click Accept to...

Page 145: ... 145 3 Click Start measuring function to start the measuring function The axis is moved during measurement For this reason a safety message that allows the process to be canceled is displayed 4 The signals recorded are represented on the Timing Diagram tab Figure 4 38 Timing diagram before parameterization ...

Page 146: ...ize the transient response 1 Under the corresponding drive Servo_1 for example in the project navigator use the menu command Open Loop Closed Loop Control Speed Controller to display the Speed Controller with Encoder dialog window 2 Enter an appropriate value in the P gain field and the Reset time field CAUTION The values entered take immediate effect Figure 4 39 Entering the P gain ...

Page 147: ... 147 3 For verification purposes perform the measurement again 4 With the modified parameters the controller demonstrates a much better transient response If necessary you can continue changing the value until the transient response has reached its optimum level Figure 4 40 Measurement with modified P gain ...

Page 148: ...latile data area of SIMOTION D410 Configuration data Programs Parameterization Technology packages The hardware configuration of SIMOTION D410 and the retain variables are also saved to the nonvolatile SIMOTION data area Note Using the menu Target system Load Load project to target system loads all of the project data to the target system Target system Load Load CPU drive unit to target device onl...

Page 149: ...tFlash Card You have the following options for backing up the current values of retain variables to the CompactFlash Card In the user program Use the _savePersistentMemoryData system function for this purpose Using a switch position SIMOTION D410 service selector switches or IT DIAG For information on this refer to the section titled Diagnostic data and non volatile SIMOTION data Page 201 With the...

Page 150: ...m RAM on the SIMOTION D410 and non volatile SIMOTION data in the FRAM with the exception of the communication configuration baud rates network addresses etc Data on the CompactFlash Card is retained if you reset the memory Reset the memory on SIMOTION D410 if You want to undo changes made to user data programs configuration data parameter assignments which you have not backed up by means of the Co...

Page 151: ...EMORY BAK is written back to non volatile data after memory reset Users can therefore force the restoration of non volatile SIMOTION data by means of memory reset This also includes the absolute encoder position Licenses The technology packages and user data configuration data programs parameter assignments you previously backed up to a CompactFlash Card by means of the Copy RAM to ROM command are...

Page 152: ...RGH VHOHFWRU VZLWFK 6 WR 6 6HUYLFH VHOHFWRU VZLWFK 6 WR 6 21 Figure 4 41 MRES switch position 2 Set switch 1 to ON STOP mode once the RUN STOP LED permanently lights up yellow 3 Within 3 seconds set the switch back to MRES operating mode by setting switch S1 to OFF again The memory reset is performed the RUN STOP LED flashes yellow quickly 4 Wait until the D410 has completed the memory reset RUN S...

Page 153: ...ncluding the SINAMICS configuration data You can still go online to SIMOTION D410 at your programming device PC All licenses on the CompactFlash Card are retained Deleting user data 1 Open the project you want to edit in SIMOTION SCOUT 2 Go online to SIMOTION D410 3 Select SIMOTION D410 in the Project Navigator and then select the Delete user data on card option from the Target system menu 4 Confi...

Page 154: ...ompactFlash Card is set to the factory settings All licenses on the CompactFlash Card are retained Restoring the default settings using the DIL switch 1 The power supply is shut down 2 Select the MRES operating mode by Setting mode selector switches S1 to S3 to OFF AND Using the service selector switches to ensure that no service functions are selected S4 to S7 OFF See figure below 6ZLWFK VHWWLQJ ...

Page 155: ...rated safety functions of SINAMICS S120 provide highly effective practical protection for personnel and machinery The following Safety Integrated functions are currently available for SIMOTION D410 on the basis of the SINAMICS FW V2 6 2 Safety Integrated Basic Functions No encoder and no license are required for Safety Integrated Basic functions The following Safety Integrated Basic functions are ...

Page 156: ...p SOS Reliable monitoring of the standstill Safely Limited Speed SLS Safe monitoring of the configured speed limit Safe Speed Monitor SSM Safe feedback message if the speed has undershot the configured limit value 1 For SBC if you are using a SIMOTION D410 in conjunction with a PM340 Power Module you also require a Safe Brake Relay which is supported from V4 1 SP4 Note Details on the Safety Integr...

Page 157: ...tored Further information about support of the SINAMICS Safety Integrated functions on the Axis TO can be found in the TO Axis Electric Hydraulic External Encoder Function Manual Hardware required Where safety functions are controlled via the TM54F or via PROFIBUS PROFINET with PROFIsafe at the very least the following hardware versions must be used SIMOTION D410 DP 6AU1410 0AA00 0AA0 product vers...

Page 158: ...Isafe Topologies The section below lists the topologies that may potentially be used with the SIMOTION D410 In each case the description specifies whether the control of Safety Integrated functions is routed through to the drives SIMATIC F CPU master connected via PROFIBUS with PROFIsafe to the SIMOTION D410 DP I slave Routing to the SINAMICS Integrated drive of the D410 DP SIMATIC F CPU controlle...

Page 159: ... the servo cycle clocks used are too small the Control Unit will be over utilized which can lead to limitations in communication and the ability of engineering to respond e g axis control panel Additional references Additional information on configuring Safety Integrated functions can be found in The SINAMICS S120 Safety Integrated Function Manual The TO Axis Electric Hydraulic External Encoder Fu...

Page 160: ...Commissioning software 4 18 Configuring Safety Integrated functions SIMOTION D410 160 Commissioning Manual 02 2012 ...

Page 161: ... SIMOTION device in your existing project Creating backup copies project CF Page 172 Backing up user data backup variables Page 172 Upgrading a user project to the new SCOUT version Page 175 Platform replacement via XML export import Page 176 Preparing for a device replacement Page 177 Replacing a device in HW Config Page 178 Upgrading technology packages Page 179 Upgrading the device version of S...

Page 162: ...in data option of downgrading no license key handling etc We would therefore recommend using this method for firmware and project updates Please also observe the information on handling the CompactFlash Card Replacing the CompactFlash Card Page 193 Writing to a CompactFlash card Page 194 Formatting the CompactFlash Card Page 195 Bootloader on the CompactFlash card Page 195 Recommended method of ha...

Page 163: ... SINAMICS versions for a device If another SIMOTION controller is to be used then the procedure depends on whether a device or a platform replacement is required Examples of upgrade scenarios are listed in the following overview table They are shown in the columns The lines list the principle measures that have to be performed Whether the measure has to be performed in a specific case must be deci...

Page 164: ...SRUW LPSRUW 8SJUDGLQJ D XVHU SURMHFW WR WKH QHZ 6 287 YHUVLRQ RQO DV QHHGHG RQO DV QHHGHG DFN XS XVHU GDWD EDFN XS YDULDEOHV UHDWH EDFN XS FRS 3URMHFW DPSOHV 3ODWIRUP UHSODFHPHQW YLD 0 H SRUW LPSRUW HYLFH UHSODFHPHQW YLD RQILJ 6 1 0 6 YHUVLRQ 6HUYLFH SDFN RU KRWIL YHUVLRQ 0DLQ YHUVLRQ FWLRQ PHDVXUH 8SJUDGLQJ D SURMHFW RQO DV QHHGHG 0HPRU FDUG WDUJHW KDUGZDUH 3URMHFW 6 027 21 6 287 5HSODFHPHQW RI W...

Page 165: ...emory of SIMOTION D410 Page 150 Control via an operating mode switch setting MR This is available on all SIMOTION platforms Deleting and restoring non volatile SIMOTION data Refer to section Deleting restoring non volatile SIMOTION data Page 207 Control via a service switch This is available only on SIMOTION D NOTICE When the operating mode switch is set to switch position MR switching the power O...

Page 166: ...e PROFIBUS DP interface X21 or PROFINET interface X200 and X201 connectors 5 If necessary disconnect the digital I O cable connectors at interface X121 6 Disconnect the plug of any encoder connected to the X23 encoder interface 7 Remove the SIMOTION D410 module from the power module or from the mounting panel depending on the type of assembly see the Installation chapter in the SIMOTION D410 Manua...

Page 167: ...ON data Page 201 Note Non volatile SIMOTION data that is not backed up to the CompactFlash Card will be lost if a spare part is installed in the event of a module defect For example failing to back up the current values of the retain variables will result in them being lost and reset to their initial values If an absolute encoder overflow occurs after _savePersistentMemoryData the actual position ...

Page 168: ...d hardware versions are not automatically transferred The setting p9901 1 enables the spare parts components replacement without tool support to be carried out The new serial number of the spare part is automatically transferred from the actual topology to the reference topology and saved in the non volatile memory In order for this to occur the components that have been replaced must be of the sa...

Page 169: ...led by the RDY LED flashing yellow while on the DRIVE CLiQ components TM SMC etc it is signaled by the RDY LED flashing red green FW update running RDY LED flashes slowly 0 5 Hz FW update complete RDY LED flashes quickly 2 Hz Go offline once all the FW updates are complete then switch the 24 V supply for the upgraded downgraded initialization components off on The update function can be deactivate...

Page 170: ...and accessories in the SIMOTION D410 Manual CAUTION The fan of the SIMOTION D410 module may only be replaced by qualified technical personnel and strictly in accordance with ESD guidelines The module must be in a de energized state Use a flat bladed screwdriver with an extremely thin blade be careful not to damage the plastic enclosure Observe ESD guidelines refer to the section titled ESD guideli...

Page 171: ... position of the fan cables to ensure that they do not become jammed when the plastic enclosure is replaced 8 Replace the plastic enclosure and re engage all 7 snap hooks 5 2 5 Replacing the CompactFlash card If spare parts are being used you must seek the assistance of the Technical Support Center in order to convert the license key code of the defective CompactFlash Card to that of the new Compa...

Page 172: ...n be found in Service and maintenance in section Overview Page 161 5 3 2 Creating backup copies project CF Prerequisite Before adapting the project it is essential that you create the following backup copies A backup copy of the project and a backup copy of the CompactFlash Card contents refer to Saving the CompactFlash Card data Page 188 5 3 3 Backing up user data backup variables Overview With t...

Page 173: ...mpactFlash Card Note When performing an upgrade with a firmware version that is V4 1 this function is only required for backing up and restoring unit data sets that have been created using _saveUnitDataSet Retain and unit data saved with _exportUnitDataSet remain valid even after a version upgrade SIMOTION retain data can also be easily backed up to a memory card without the use of SIMOTION SCOUT ...

Page 174: ... project should be opened write protected Confirm this prompt with Yes open write protected Figure 5 5 Prompt as to whether the project should be opened as write protected Open write protected means The project remains consistent The data is the same in the controller and in the project Diagnostic functions status trace etc can be executed directly The project does not have to be loaded to the con...

Page 175: ...operation etc Procedure 1 When opening the project a window appears with a message that the project to be opened was created with another SCOUT version as well as a prompt as to whether the upgrade should be performed Confirm the prompt with OK Figure 5 6 Prompt as to whether the project should be upgraded 2 After the conversion another prompt appears as to whether the project should be opened wri...

Page 176: ...a an XML export import The following devices can be interchanged via a platform replacement Replacement between SIMOTION C P and D e g C240 D445 2 DP PN Replacement between D410 and D4x5 D4x5 2 e g D410 D445 2 DP PN Replacement between SIMOTION D SINAMICS S120 Integrated SIMOTION D SINAMICS SM150 Integrated Platform replacement during project downgrades It is not possible to downgrade to a lower S...

Page 177: ...of the original platform into the new device To do this right click the new device and select Expert Import object in the context menu 6 Select the location where the XML export data is to be stored and start the import Confirm the prompt to continue with the import Confirm the message with regard to the import of a non compatible type with OK 5 3 6 Preparing for a device replacement Overview The ...

Page 178: ...e device replacement these must always be reconfigured If necessary the existing PROFIBUS field devices should be replaced with PROFINET field devices or vice versa 5 3 7 Replacing a device in HW Config Procedure 1 Double click the SIMOTION device to be replaced in the project navigator in SIMOTION SCOUT HW Config opens 2 Open the SIMOTION Drive Based folder in the hardware catalog Note SIMOTION D...

Page 179: ...on Save and Compile 6 Close HW Config Note From SIMOTION SCOUT V4 2 when modules are replaced the following actions are performed automatically by the engineering system as necessary Update of the technology packages TPs Automatic upgrade of the SINAMICS Integrated The updated data is transferred to the project and the entire project saved If the module hardware changes e g the D410 DP is replaced...

Page 180: ...ection of TP product versions available for the same TP version During device replacement in HW Config the TP version is automatically updated If the TP version is changed and more than one version of the new TP version is available the latest version is automatically installed If another version is preferred this must be installed manually e g selection of V4 1 5 3 During platform replacement XML...

Page 181: ...duct version has been loaded to a CPU Loading technology packages to the target device Technology packages are only loaded to the target device if no technology package has been loaded so far or if Load to file system is executed If a technology package version changes the technology package must be explicitly reloaded to the target device To do this proceed as follows 1 Select Download project to...

Page 182: ...D410 is automatically upgraded During the module replacement in HW Config the SIMOTION and the SINAMICS version is always determined by selection of a D410 module If a SINAMICS S120 control unit is connected via PROFIBUS or PROFINET the SINAMICS version can be selected independently of the SINAMICS Integrated version Procedure To upgrade a SINAMICS drive unit 1 Right click the relevant device e g ...

Page 183: ...he dialog box with OK Note Please also observe the notes on device dependencies in the SIMOTION SCOUT online help 5 3 11 Save project compile and check consistency Procedure 1 Execute Save and recompile all Project Save and recompile all menu 2 Then perform a consistency check Project Check consistency menu 3 If error messages occur correct these and repeat the operation Note Note the difference b...

Page 184: ...mentation supplied on the SIMOTION SCOUT DVD at 1_Important German Kompatibilität and on the Internet at Internet address http support automation siemens com WW view en 18857317 See also Bootloader on the CompactFlash card Page 195 5 4 2 Update preparatory measures Upgrading SIMOTION D410 The actions described in this section also apply to downgrading to an older version Various options are availa...

Page 185: ...tibility list as well as at Internet address http support automation siemens com WW view en 18857317 NOTICE The upgrade operation deletes all project data and parameters from the CompactFlash Card Prerequisite project updates You have updated your project and if necessary adapted the device type and device version For details refer to the section titled Adapting a project Upgrading the project Rep...

Page 186: ...ation restored You can upgrade either a single SIMOTION device or multiple devices from one or more SIMOTION projects It is possible to upgrade parts of a configuration only e g Technology Packages only firmware only project only etc Upgrade data is created by the application engineer at the machine manufacturer s premises using SIMOTION SCOUT The upgrade data can then be handled flexibly dependin...

Page 187: ...ade procedure has been completed successfully the SF BF LED goes out The device then starts up automatically in the upgraded configuration SF BF LED display then depends on the operating mode of the device If the upgrade procedure was not successful the SF BF LED flickers red 10 Hz Downgrading If the upgrade has not been successful for example the machine is not behaving as desired the upgrade can...

Page 188: ...ice selector switch to OFF and switch the D410 on again If the restoration was otherwise successful the D410 starts up with the restored configuration Additional references Detailed information on upgrading devices can be found in the Upgrading SIMOTION Devices Operating Instructions 5 4 5 Update via CompactFlash Card 5 4 5 1 Backup of the CF card data Backing up licenses retain data and user data...

Page 189: ...om the boot sector to the KEYS directory while the SIMOTION device is starting up The license key can be changed at any time by relicensing for example When the device is next started up the license key will be saved in the boot sector again If you should lose the license key you can access it again via the Web License Manager on the Internet at Internet address http www siemens com automation lic...

Page 190: ...UnitDataSet remain valid even after a version upgrade 5 4 5 2 Update via CF card Procedure The following procedure describes how to perform the upgrade 1 Switch off the power supply to the D410 2 Remove the CompactFlash Card from SIMOTION D410 and insert it into the CompactFlash Card adaptor of your PC 3 Open Windows Explorer The CompactFlash Card must be visible as removable data volume Windows E...

Page 191: ...e resulting firmware version combinations are always functional Note The components firmware is automatically updated depending on the FW version on the SINAMICS components and on the CompactFlash Card During an FW update please take note of the messages and alarms in the SIMOTION SCOUT detail window An FW update on the SIMOTION D410 is signaled by the RDY LED flashing yellow while on the DRIVE CL...

Page 192: ...nfigured for a firmware update to take place The firmware cannot be updated if the components are not programmed You can also update the firmware by means of the Expert list Refer to the SINAMICS S120 Commissioning Manual for a description of this procedure 5 4 5 4 Downloading the project to the target system Once all the changes required for upgrading your project have been made you must download...

Page 193: ... SIMOTION CompactFlash Card 5 5 1 Replacing the CompactFlash Card Prerequisite Note Always power down the unit before you insert or remove the CompactFlash Card The SIMOTION D410 is in a de energized state when all the LEDs are OFF Procedure How to replace the CompactFlash Card 1 Shut down the power supply 2 Remove the CompactFlash Card from the plug in slot on the SIMOTION D410 To do this grasp t...

Page 194: ...The CompactFlash Card can be used as storage volume for technology and user data programs configuration data and parameters from the volatile data area Proceed as follows 1 Establish the connection between the SIMOTION D410 and the PG PC refer to section Creating a SIMOTION project and inserting a SIMOTION D410 Page 45 2 Select the Copy RAM to ROM command in SIMOTION SCOUT to write the data to you...

Page 195: ...bootloader A bootloader may need to be written in the following situations When a new bootloader is required for the SIMOTION D410 firmware version being used When a new bootloader is required for the used SIMOTION D410 hardware version When the bootloader is defective The bootloader version can be fetched using SIMOTION SCOUT device diagnostics If this is not possible because of the following rea...

Page 196: ... writing process from the application may trigger one or more writing processes on the CompactFlash Card Therefore we recommend you adopt a conservative approach in terms of the number of writing processes In other words do not perform more than 100 000 write access instances from the user program over the estimated service life of the application Switching off the SIMOTION D Control Unit during w...

Page 197: ...1 6723 287 9 GLVSOD V 2SHUDWLQJ PRGHV RI 6 027 21 LQFO 6 1 0 6 QWHJUDWHG 8VHU SURJUDP LV UXQQLQJ OHFWURQLF SRZHU VXSSO IRU PHDVXULQJ V VWHP URXS HUURU EXV IDXOW Figure 6 1 LED displays on the D410 device Legend of the LED states Table 6 1 Legend of the LED states Symbol Meaning 1 LED on 0 LED off 0 5 1 LED flashes at 0 5 Hz 2 1 LED flashes at 2 Hz Λ LED flickers x The LED display is irrelevant to ...

Page 198: ...llow x x Fault event to which the user program SIMOTION cannot respond or firmware error at the PROFINET interface The following actions may be required to rectify the fault Power OFF ON Check of the CompactFlash Card Re commissioning Replacement of SIMOTION D410 Λ red Λ red x Λ red The following statuses are signaled A warning is present on the SINAMICS Integrated This state can occur for example...

Page 199: ...d devices is necessary 2 1 yellow x x x Transition from STOP STOPU to RUN x 2 1 green x x STOP STOPU x 1 yellow x x RUN x 1 green x x Transition from RUN to STOP STOPU STOP to STOPU STOPU to STOP x 2 1 yellow x x Memory reset requested by SIMOTION D410 or by means of mode selector switch x 0 5 1 yellow x x Memory reset in progress x 0 x 0 Memory reset completed x 1 yellow x x Firmware download to ...

Page 200: ...ICS Integrated The table below lists the display states and their meaning Table 6 3 LED display OUT 5V Status Meaning 0 Electronic power supply is missing or outside the valid tolerance range Power supply 5 V Use of an encoder with 5 V power supply 1 yellow Electronics power supply for measuring system available Power supply 5 V Caution Always ensure that you can operate the encoder on the 24 V po...

Page 201: ...tent for diagnostic purposes refer to the section titled Diagnostics via websites Page 206 Restore backed up non volatile SIMOTION data retain data see section Deleting restoring non volatile SIMOTION data Page 207 6 2 2 Backup of diagnostic data and non volatile SIMOTION data 6 2 2 1 Diagnostic data Following a fault on a SIMOTION device diagnostic data e g diagnostic buffer content up to date co...

Page 202: ... data non volatile SIMOTION data retain data is also saved on the CompactFlash Card You can use these in situations where the non volatile SIMOTION data has not been saved on the CompactFlash Card using the _savePersistentMemoryData system function and you wish to restore the non volatile SIMOTION data after a CPU has been replaced Note While the non volatile SIMOTION data are stored as a PMEMORY ...

Page 203: ...ata and non volatile SIMOTION data are backed up to the CompactFlash Card The backup process is indicated on the SIMOTION D410 by the status LEDs as follows Backup in progress RUN STOP LED flickers yellow Backup complete RUN STOP LED flickers green 3 Once the backup is complete switch off the SIMOTION D410 4 Remove the CompactFlash Card and reset the service selector switch to its original setting...

Page 204: ...gress RUN STOP LED flickers yellow Backup complete RUN STOP LED flickers green 4 Once the backup is complete switch off the D410 5 Remove the CompactFlash Card and reset the service selector switch to its original setting INI file in the main CompactFlash Card directory 1 Use a text editor such as Notepad to create a file called simotion ini 2 Add the following text DIAG_FILES 1 You must use a tex...

Page 205: ...r in a simple text format Numerical values no specific plain text A text editor is used for evaluation purposes PMEMORY XML Non volatile SIMOTION data retain data You can restore the backed up non volatile SIMOTION data via an operator action after a CPU has been replaced See section Deleting restoring non volatile SIMOTION data Page 207 TOALARMS TXT Text file containing the pending TO alarms Only...

Page 206: ...ON HMI SYSLOG DIAG directory you can specify HTML files whose status is to be stored on the CompactFlash Card when diagnostic data are created during operation For example devinfo mcs must be entered for the devinfo htm website Since the sites in question are stored together with their most up to date contents this enables the latest status information regarding the SIMOTION device as well as the ...

Page 207: ...directory on the CompactFlash Card must contain the FILES path specification If you have created subfolders e g myfolder in the FILES directory these must also appear in the path Only 1 file name may be used per line Empty lines are not permitted an empty line will be interpreted as the end of the list No distinction is made between upper case and lower case letters It does not matter whether you ...

Page 208: ...en restored If the PMEMORY XML backup file is contained in the USER SIMOTION directory on the CompactFlash Card it will be restored rather than the PMEMORY XML file in the directory USER SIMOTION HMI SYSLOG DIAG saved with backup via diagnostic data and non volatile SIMOTION data The following priority sequence governs the restore USER SIMOTION PMEMORY XML USER SIMOTION PMEMORY BAK USER SIMOTION H...

Page 209: ...ally available browser Additionally you have the option of creating your own websites and incorporating service and diagnostic information You can also use IT DIAG to back up diagnostic data and non volatile SIMOTION data IT DIAG is opened by entering the IP address of the SIMOTION device in the address bar of the browser e g http 169 254 11 22 This opens the IT DIAG start screen To back up diagno...

Page 210: ...cture Get diagarchive This button is used to save the ZIP archive to connected programming devices PCs Delete all diagfiles This button is used to delete all data stored in the USER SIMOTION HMI SYSLOG DIAG directory the directory itself is not removed however You can find diagnostic data and non volatile SIMOTION data on the CompactFlash Card in the directory USER SIMOTION HMI SYSLOG DIAG Additio...

Page 211: ...requires a license SIMOTION IT DIAG and SIMOTION IT OPC XML functionality In addition to customized websites the option of performing firmware and project updates IT DIAG provides comprehensive device and diagnostic information that can be called up using a standard PC with Internet Explorer Additional references For detailed information refer to the SIMOTION IT Ethernet Based HMI and Diagnostic F...

Page 212: ...Diagnostics data 6 3 Additional service and diagnostics options SIMOTION D410 212 Commissioning Manual 02 2012 ...

Page 213: ...nputs in the appendix there in the section Configuring local measuring inputs Page 215 Additional references Further information and programming examples for configuring drive related I Os without symbolic assignment can be found at Internet address http support automation siemens com WW view en 29063656 in the SIMOTION Utilities Applications SIMOTION Utilities Applications is provided as part of ...

Page 214: ...epending on the hardware of the control unit and is performed during the configuration of the measuring input TO using the measuring input number The assignment of inputs is not fixed depending on the hardware and is performed during the configuration of the TO measuringInput by means of symbolic assignment or the hardware address Measuring input TO setting Single measurement 1 Yes Yes Measuring i...

Page 215: ...suring input x x x x 8 0 Can be configured as a global measuring input x x x x 8 8 x x A 3 Configuring local measuring inputs Properties Local measuring inputs are always permanently assigned to an axis drive They are configured separately for each drive The drive and the probe input must always be located on the same control unit The measurement results are transferred using the axis message fram...

Page 216: ...DO 9 or DI DO 10 or DI DO 11 DI DO 9 or DI DO 10 or DI DO 11 or DI DO 13 or DI DO 14 or DI DO 15 Since a maximum of three encoders can be assigned to a drive the index 0 2 specifies whether the measurement applies to encoder 1 2 or 3 The following must be taken into account Two Measuring Input TOs can be configured per Axis TO or External Encoder TO Only one Measuring Input TO can be active on an ...

Page 217: ... Federal Communications Commission Radio Frequency Interference Statement This equipment has been tested and found to comply with the limits for a Class A digital device pursuant to Part 15 of the FCC Rules These limits are designed to provide reasonable protection against harmful interference when the equipment is operated in a commercial environment This equipment generates uses and can radiate ...

Page 218: ...product standard for variable speed electric drives EN 61800 3 of category C2 or the limit value class A Group 1 to EN55011 By implementing appropriate additional measures the limit values according to category C2 or limit value class A Group 1 are observed For this purpose additional measures such as the use of an additional RFI suppression filter EMC filter may be necessary In addition measures ...

Page 219: ...or the SINAMICS S120 CU310 control unit with regard to EMC For more information on this topic also refer to Catalog PM21 as well as the SINAMICS Function Manuals B 3 Safety of electronic controllers Introduction The following remarks relate to fundamental criteria and apply irrespective of the type of controller and the manufacturer Risk A higher degree of safety standard applies to all applicatio...

Page 220: ...es cellular phones in the immediate vicinity of the controller External influences damage 2 Exceptional temperatures as well as emissions of light noise particles or gas caused by for example Component malfunctions Software errors Operating and or ambient conditions not within the scope of the specification External influences damage 3 Hazardous shock voltages caused by for example Component malfu...

Page 221: ...onally to refer to electrostatic sensitive devices Electrostatic sensitive devices are identified by the following symbol Figure C 1 Symbol for identification of electrostatic sensitive devices CAUTION Electrostatic sensitive devices can be irreparably damaged by voltages that are far lower than anything a person can perceive These voltages occur if you touch a component or the electrical connecti...

Page 222: ...ronment can accumulate an electrostatic charge This figure indicates the maximum electrostatic charges that can accumulate on an operator when he comes into contact with the indicated materials These values comply with the specifications in IEC 801 2 9ROWDJH LQ N9 N9 5HODWLYH DLU KXPLGLW LQ 6 QWKHWLF PDWHULDO RRO QWL VWDWLF PDWHULDO H J ZRRG RU FRQFUHWH Figure C 2 Electrostatic voltage that can ac...

Page 223: ...vents the accumulation of static electricity Avoid direct contact You should only touch ESD components if unavoidable for example during maintenance work When you touch modules make sure that you do not touch either the pins on the modules or the printed conductors If you follow these instructions electrostatic discharge cannot reach or damage sensitive components If you have to take measurements ...

Page 224: ...ESD guidelines C 3 Basic measures for protection against discharge of static electricity SIMOTION D410 224 Commissioning Manual 02 2012 ...

Page 225: ...matic configuration 86 Comparing a project 83 Configuring a second encoder 118 Configuring components 75 Configuring the TM41 138 Control properties 100 Controller optimization 142 Creating a DMC20 136 Creating a DME20 136 D410 29 Download project to target system 82 90 Downloading additional data 83 Downloading project to CompactFlash Card 82 Downloading SIMOTION user data 148 Downloading sources...

Page 226: ...onformity 218 Device name Changing 62 Configuring 62 Diagnostic data Backing up 201 209 Backing up during operation 202 Backing up during startup 203 Backing up using IT DIAG 209 Data storage 205 Diagnostics 197 IT DIAG 211 LED display 198 SIMOTION Task Profiler 210 Via websites 206 Diagnostics buffer SINAMICS 97 Diagnostics buffer entry Non volatile SIMOTION data 40 Distributed I O 17 DMC20 Creat...

Page 227: ...10 52 I I O Configuration 125 Configuration with symbolic assignment 125 Configuration without symbolic assignment 125 CU3xx 129 symbolic assignment 125 Terminal X121 128 I O integration 19 I O terminals Configuration 127 I O variables Configuration 134 Substitute values 135 symbolic assignment 121 Integrated drive 74 Interface Ethernet 48 PG PC 49 50 PROFIBUS DP 49 55 PROFINET 48 Interface X21 MP...

Page 228: ...5 Online configuration 85 Overview 85 Operating hours counter 94 Fan 171 Operating mode 197 Output cam Configuring the SIMOTION D410 133 Overview Diagnostic data 201 Upgrading and downgrading 184 P PG PC Interface 50 PG PC Establish the online connection 86 PG PC interface Configuring 49 Inserting a device 50 Platform replacement 176 Position controller DSC 138 Power supply D410 31 Power up 40 Pro...

Page 229: ...oning 71 HW Config Memory model Memory reset 150 Node initialization Offline configuration Removing modules Replacing a device in HW Config Replacing the device Replacing the module Reset Startup Time of day Upgrade options used modules Versions 14 SIMOTION Task Profiler 210 SIMOTION user data Downloading 148 Saving 148 SINAMICS clock Synchronizing 96 SINAMICS Integrated Isochronous operation 91 M...

Page 230: ... PN 25 U UL certification 217 Unit data Backing up 172 Upgrading Automatic 169 D410 device update tool 186 Library 183 Overview 163 SINAMICS components 182 Technology packages 180 Upgrading firmware 192 User data Deleting from the CompactFlash Card 153 User memory CompactFlash Card 36 Copy RAM to ROM 37 Downloading 37 Non volatile data 34 39 Properties 37 Volatile data 35 User memory concept 33 V ...

Reviews: