4-71
3
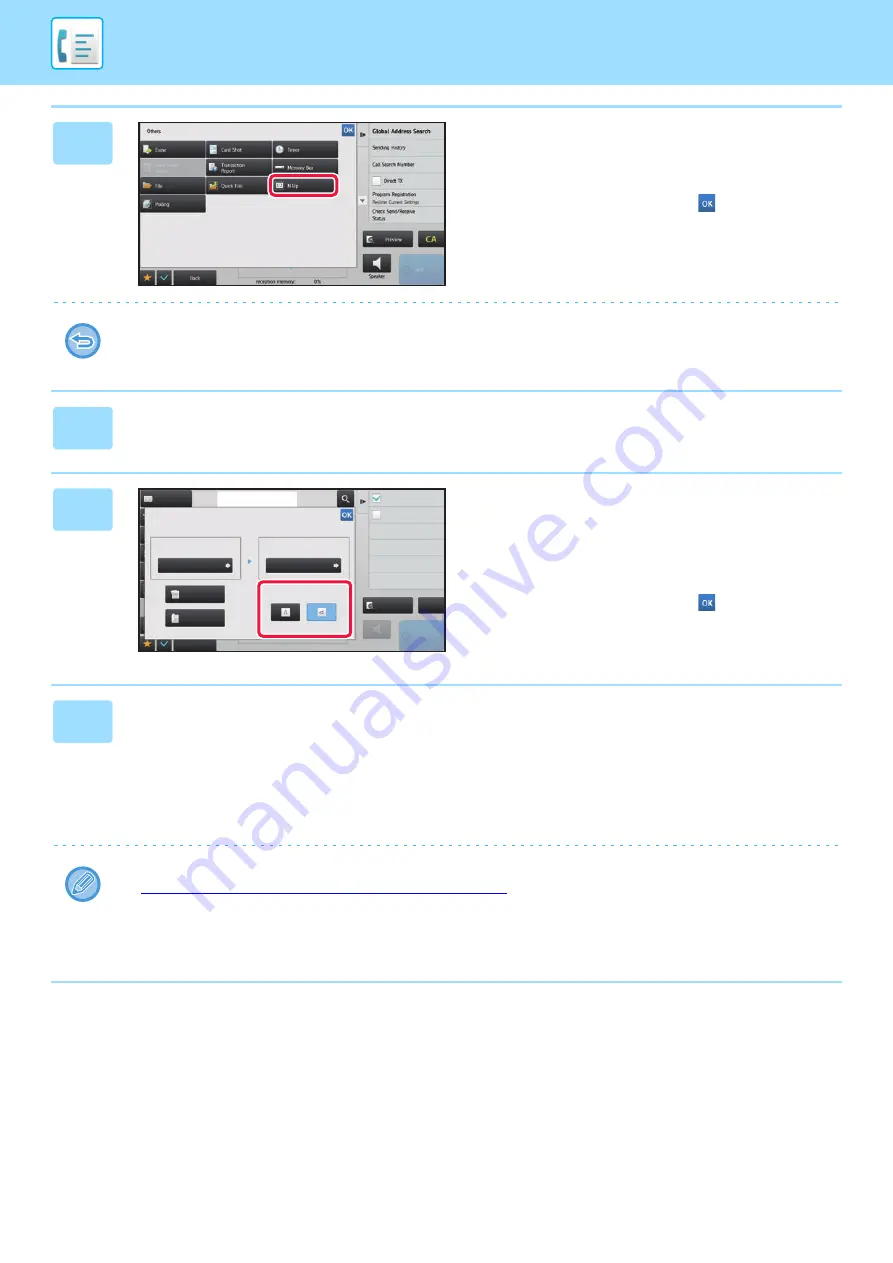
Tap the [Others] key, and tap the
[N-Up] key.
A checkmark appears on the icon.
After the settings are completed, tap
.
To cancel the N-Up setting
Tap the [N-Up] key to uncheck it.
4
Tap the [Original] key.
5
Tap the [Image Orientation] key with
the same orientation as the placed
original.
If this setting is not correct, a suitable image may not be
transmitted.
After the settings are completed, tap
.
6
Tap the [Start] key to start scanning of the original.
• If you inserted the original pages in the document feeder tray, all pages are scanned.
A beep will sound to indicate that scanning and transmission have ended.
• When you place the original on the document glass, scan each page one at a time.
When scanning finishes, place the next original and tap the [Start] key. Repeat the procedure until all pages have
been scanned and then tap the [Read-End] key.
A beep will sound to indicate that scanning and transmission have ended.
• You can tap the [Preview] key to check a preview of the image before sending a fax. For more information, see
CHECKING THE IMAGE TO BE TRANSMITTED (page 4-27)
".
• If you tap the [Change Setting] key on the scan confirmation screen, you can change the exposure, resolution, scan
size, and send size.
(However, when scanning each even-numbered page of the original, only the exposure can be changed.)
Others
Address
Fax Number
reception memory
100%
Speaker
Start
Put Multiple Pages in A Page
Slow Scan Mode
Scan Thin Paper Original
Original
2-Sided
Tablet
2-Sided
Booklet
Auto
Scan Size
Send Size
Image Orientation
70%
CA
Address Book
Preview
8½x11
8½x11
N-Up
Summary of Contents for MX-B355W
Page 836: ...2017L US1 ...


