Sharp MX-3050N User Manual Download Page 177

2-18

COPIER

BASIC PROCEDURE FOR MAKING COPIES

USING THE DOCUMENT GLASS FOR 2-SIDED 

COPYING

5

Tap the [Preview] key.

6

Tap the [Colour Start] or [B/W Start] key to start copying.

Dual-side copy helps to save paper.

To change the default 2-sided copy mode:

In "Settings (administrator)", select [System Settings] 

 [Copy Settings] 

 [Initial Status Settings] 

 [2-Sided Copy].

1

Place the original on the document glass.

DOCUMENT GLASS (page 1-79)

2

Tap the [2-Sided Copy] key.

COPYING SEQUENCE (page 2-7)
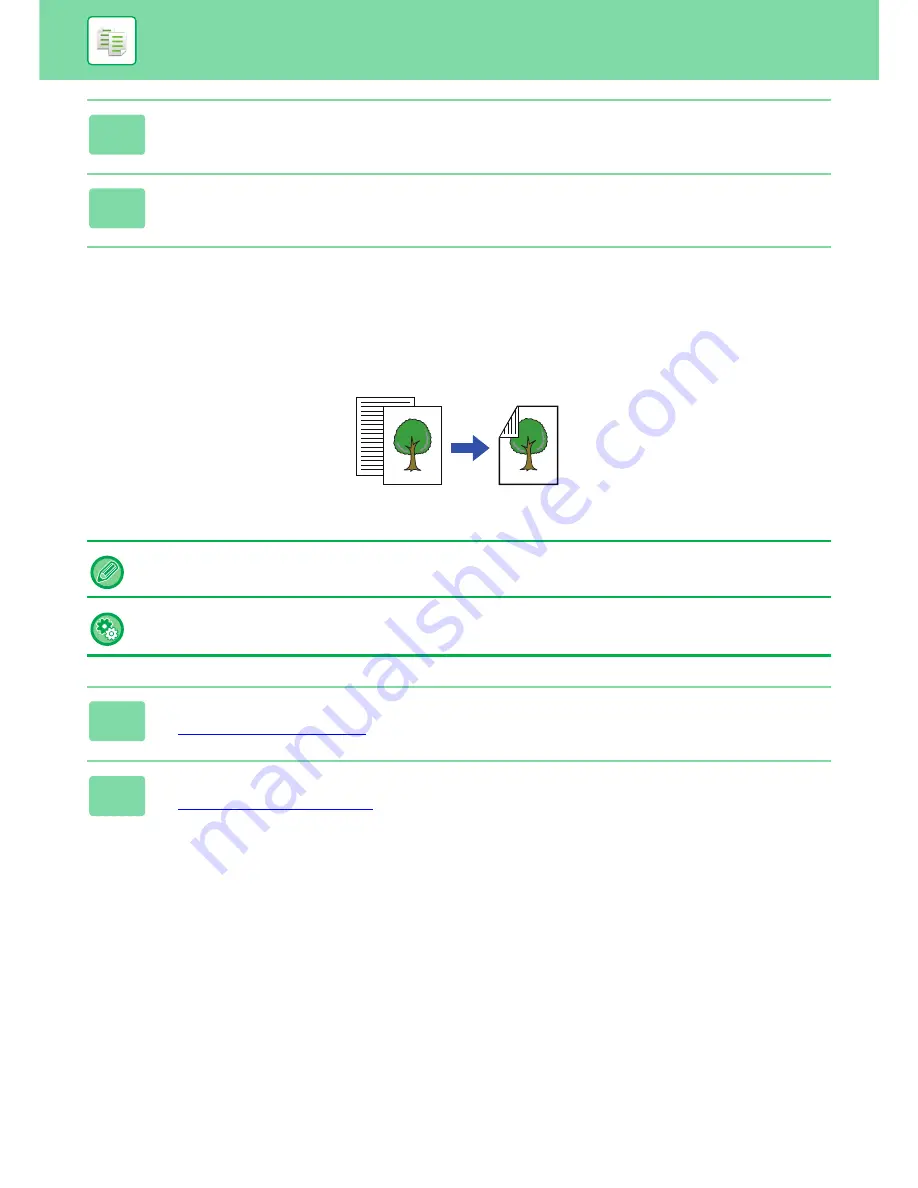
Originals

copy

Automatic 2-sided copying of 1-sided originals

Summary of Contents for MX-3050N

Page 1: ...unction SCANNER INTERNET FAX Using the scan Internet fax function DOCUMENT FILING Storing jobs as files on the hard drive SYSTEM SETTINGS Configuring settings to make the machine easier to use Click to jump to the table of contents of the desired chapter User s Manual DIGITAL FULL COLOUR MULTIFUNCTIONAL SYSTEM MODEL MX 3050N MX 3060N MX 3070N MX 3550N MX 3560N MX 3570N MX 4050N MX 4060N MX 4070N ...

Page 2: ...e page button Displays the previous page 3 Forward one page button Displays the next page 4 Return to previously displayed page button Displays the page that was displayed before the current page 5 Title button Displays the page of the title indicated by the button 6 Contents button Displays the contents of each chapter For example if the current page is part of the printer chapter the table of co...

Page 3: ...ntact your dealer or nearest authorised service representative Aside from instances provided for by law SHARP is not responsible for failures occurring during the use of the product or its options or failures due to incorrect operation of the product and its options or other failures or for any damage that occurs due to use of the product Warning Reproduction adaptation or translation of the conte...

Page 4: ...TERING A NEW BILLING CODE 1 44 EDITING OR DELETING THE REGISTERED BILLING CODE 1 47 CLOUD LINK 1 50 BEFORE USING THE CLOUD LINK FUNCTION 1 50 UPLOADING SCANNED DATA TO A CLOUD SERVICE 1 51 PRINTING DATA IN A CLOUD SERVICE 1 51 REMOTE OPERATION OF THE MACHINE 1 53 UNIVERSAL DESIGN IN THE MACHINE 1 54 UNIVERSAL DESIGN RELATED TO OPERATION 1 54 UNIVERSAL DESIGN RELATED TO VISION 1 55 UNIVERSAL DESIGN...

Page 5: ...CE 1 111 FINISHER LARGE STACKER 1 113 PART NAMES 1 113 HOW TO STAPLE MANUALLY 1 114 SUPPLIES 1 115 FINISHER LARGE STACKER MAINTENANCE 1 115 SADDLE STITCH FINISHER 1 117 PART NAMES 1 117 SUPPLIES 1 118 SADDLE STITCH FINISHER MAINTENANCE 1 118 SADDLE STITCH FINISHER LARGE STACKER 1 121 PART NAMES 1 121 HOW TO STAPLE MANUALLY 1 122 SUPPLIES 1 123 SADDLE STITCH FINISHER LARGE STACKER MAINTENANCE 1 123...

Page 6: ...wer button Power Save button indicator error indicator Home Screen button main power button data notification indicator and touch panel Use the touch panel to operate each of these functions OPERATION PANEL page 1 8 6 Exit tray unit right tray 1 Set this tray as the output tray if needed 7 Keyboard 1 Use this as a substitute for the soft keyboard displayed on the touch panel When not being used it...

Page 7: ...holes in output paper You can also perform stapling manually FINISHER LARGE STACKER page 1 113 18 Punch module 1 This is used to punch holes in output Requires an inner finisher finisher finisher large stacker saddle stitch finisher or saddle stitch finisher large stacker 19 Front cover Open this cover to switch the main power switch to On or Off to replace a toner cartridge TURNING ON THE POWER p...

Page 8: ...elt 6 Right side cover Open this cover to remove a paper misfeed 7 Paper reversing section cover This unit is used for reversing paper when 2 sided printing is performed Open this cover to remove a paper misfeed 8 Waste toner box release button Press this button when you need to release the waste toner box lock to replace the waste toner box or clean the laser unit CLEANING THE LASER UNIT page 1 1...

Page 9: ...help ensure that the original is scanned correctly Adjust the guides to the width of the original 4 Document feeder tray Place the original Place the original with the print side facing up AUTOMATIC DOCUMENT FEEDER page 1 77 5 Original exit tray The original is discharged to this tray after scanning 6 Original size detector This unit detects the size of an original placed on the document glass DOC...

Page 10: ...he machine is used on a network Use a shielded LAN cable 2 Extension phone socket TEL When the fax function of the machine is used an extension phone can be connected to this socket 3 Telephone line socket LINE When the fax function of the machine is used the telephone line is connected to this socket 4 Power plug Optional 1 4 2 3 ...

Page 11: ...ATOR page 1 9 4 Main power indicator This lamp lights up when the machine s main power switch is in the position Blinks green during the time that the Power button does not operate immediately after the main power switch is switched on TURNING ON THE POWER page 1 10 5 Power button Use this button to turn the machine s power on and off TURNING ON THE POWER page 1 10 6 Power Save button indicator Us...

Page 12: ... almost out of toner Job in progress such as paper feeding or output Ready state or other state where jobs can be accepted An original has been placed in the document feeder Blinks Errors that stop machine operation such as misfeeds and out of toner A fax is being received When the job separator upper tray or exit tray unit right tray is used for output this blinks until the output is removed To s...

Page 13: ...ation panel and then turn the main power switch to the position In a sudden case of main power outage turn the power for the machine back on and then turn it off in the correct order If the machine is left for a long time with the main power having been turned off prior to the Power button being turned off abnormal noises degraded image quality or other problems may result Turn off both the Power ...

Page 14: ...Double tapping Touch the screen twice Use this operation to enlarge the image in the preview Flicking Flick the panel to scroll a preview image quickly Pinch Touch the screen with two fingers and move them toward each other This is used to reduce the browser and preview display Dragging Drag slide your finger touching the panel in a random direction to replace a page in the original during preview...

Page 15: ... The item scrolls up or down Slider sliding A Slide the knob from side to side Others Margin Shift Off Right Left Down 10 10 0 50 mm 0 50 mm Fit Back Face to Front Face Value Back Preview Start A3 Side 1 Side 2 Colour Start CA B W A B B E C D C Preview Speaker Start W ABC Address All Frequent Use Narrow Down All Category All Sending History Call by Search Number Print Individual List Call Search N...

Page 16: ...e image is also enlarged Preview Start CA Original Others Auto Direct Entry Inch AB Custom Size Image Orientation No of copies Skip Blank Page in Original Copy Ratio Enlarge Reduce Copy Blank Page Skip Background Adjustment 2 Sided Copy Colour Mode A3 A5 216 x 343 B5R B4 A5R A4 A3 B5 A4R 216 x 340 Colour Start B W A Start Send as well as print Scan Original Again Without change Settings Store Data...

Page 17: ...tion Guide Enlarge Display Mode Settings Total Count Brightness Adjustment Easy Copy Easy Scan HDD File retrieve Sharp OSA LINE PRINTER Job Status Job Status CLOUD PORTAL Tap a mode to change to that mode Changing mode from the mode display page 1 16 Select shortcut keys for modes or functions Changing mode from the Home screen page 1 16 Use these keys to select functions that make the machine eas...

Page 18: ...ists A data security kit is installed Received data exists Connecting to the access point Level 4 Received confidential fax data exists Connecting to the access point Level 3 Received data is held Connecting to the access point Level 2 Received preview data exists Connecting to the access point Level 1 OSA communication is in progress Not connected to the access point Enlarge display mode is enabl...

Page 19: ... Detail LINE PRINTER Easy Copy Easy Scan HDD File retrieve Sharp OSA Job Status B W Off CA Preview Auto Set Original A4 Address Fax Number Address Book History Global Address Search Scan to HDD USB Detail LINE PRINTER Easy Copy Easy Scan HDD File retrieve Sharp OSA Job Status Start Colour Start B W Tap on the mode display CA Preview Auto Set Original A4 Address Fax Number Detail LINE PRINTER Easy ...

Page 20: ...esult is not rotated This reduces the image This displays preview images of respective pages This displays the scroll bar for enlargement reduction operations Moving the slider to the left reduces the image and moving the slider to the right enlarges the image This displays thumbnails of preview images This enlarges the image This displays pages in a 3D view The display position of an image can be...

Page 21: ...age by dragging a page to To undo the deletion tap To redo the deletion tap 3 Tap the Edit End key 5 Edit End Move the Page Rotate 180 Degrees Specify Chapter Inserts Insert Blank Page Delete the Page Erase Specified Original Area Erase Specified Range 2 3 4 5 1 5 Edit End Cancel and Return Select the location to move 2 1 3 4 5 4 Edit End Move the Page Rotate 180 Degrees Insert Blank Page Delete t...

Page 22: ...n also move the page by tapping Move the Page on the action panel and then tap of the destination 3 Tap the Edit End key 1 In the preview screen tap to switch to edit mode 2 Tap the page you want to rotate and drag or to rotate the page You can also rotate the page by tapping Rotate 180 Degrees or Rotate 90 Degrees on the action panel 3 Tap the Edit End key 6 Edit End 4 5 3 2 1 6 Edit End 4 5 3 2 ...

Page 23: ...tch to edit mode 2 Tap the page you want to set chapter inserts 3 Tap is displayed on the page You can also set chapter inserts by tapping Specify Chapter Inserts on the action panel To cancel the Chapter Inserts setting Tap displayed on the page or select the page and tap Cancel Chapter Inserts of Selected Page on the action panel 4 Tap the Edit End key 6 Edit End 4 5 3 2 1 6 Edit End 4 5 3 2 1 ...

Page 24: ... can also insert a blank page by tapping Insert Blank Page on the action panel 3 Tap the Edit End key 1 In the preview screen tap to switch to edit mode 2 Tap Erase Specified Range on the action panel 4 Edit End 4 5 3 2 1 Cancel and Return Select the location to insert blank page 6 Edit End Move the Page Rotate 180 Degrees Insert Blank Page Specify Chapter Inserts Delete the Page Erase Specified O...

Page 25: ...Start Point Width X Y 53 31 31 97 Height Start Point Width Specify Range2 Specify Range3 Specify Range4 Erase Specified Range Apply This Erase Position to This Page Reverse Erase Range Apply This Erase Position to All Pages Erase Specified Range Exit Specify Range2 Erase Range1 Specify Range3 Specify Range4 Start 1 6 Colour Mode Copies Full Colour Paper Select Auto Exposure Auto Original Auto A4 2...

Page 26: ...ncelled key Tap to stop copying printing or transmission CA key Tap to cancel all settings and restore the initial status in each mode On the address screen you can enter characters other than numbers and a different key layout is provided You can also move the cursor by using the and keys Tap the C key to delete one character to the left of the cursor In copy mode B W Start and Colour Start keys ...

Page 27: ...large display mode part of the text on the action panel may not be displayed To display the whole text long touch the partially hidden key or slide the tab of the action panel to the left To always display the action panel In Settings administrator select System Settings Common Settings Operation Settings Condition Settings Display Action Panel as default Favourite can be used in normal mode 1 Tap...

Page 28: ...User Control Authority Group List in Settings administrator To edit favourites tap and then tap Edit Favorite on the action panel Start Colour Start Preview Colour Mode Full Colour Paper Select Auto Exposure Auto Original Auto A4 2 Sided Copy 1 Sided 1 Sided Sort Group Auto Copy Ratio 100 Others Plain Send as well as print Call Eco Program Store Data in Folder File Store Data Temporarily Quick Fil...

Page 29: ...1 28 AS SOON AS THE REMOTE JOB IS FINISHED ENTER AUTO POWER SHUT OFF MODE The machine returns from Auto Power Shut Off and enters Auto Power Shut Off mode as soon as printing is completed 1 29 ECO SCAN The machine is operated with the fusing unit turned off for non printing operations that do not use the fusing unit such as fax and image transmission 1 29 POWER ON OFF SCHEDULE SETTING Use this fun...

Page 30: ... when the Power Save button is pressed while it is blinking A message appears 15 seconds before Auto Power Shut Off Mode is entered To close the message and continue normal operation tap the Continue button The message appears again 15 seconds before the end of the extension of normal operation time If no action is taken within 15 seconds after the message appears the machine enters auto power shu...

Page 31: ...O RECOMMENDATION FUNCTION DISPLAY Shows recommended copy print settings for copy document filing reprint and direct print Copying When you change to copy mode normal mode the settings recommended for copy mode appear Recommended settings 2 Sided Copy N Up B W Copy and Image Orientation Document filing print When you tap the Change Setting to Print in the action panel on the file list screen of doc...

Page 32: ...ing unit turned off To set As soon as the remote job is finished enter Auto power shut off mode In Settings administrator select System Settings Energy Save Eco Setting As soon as the remote job is finished enter Auto power shut off mode To set Eco scan Settings administrator select System Settings Energy Save Eco Setting Eco Scan Setting 1 0 0 H 0 Printed Sleep mode Print Sleep mode Fusing unit i...

Page 33: ...many print jobs or other special operation on a certain day you can specify the day as a Specific Date and define an energy saving pattern only for that day Setting Power ON OFF Scheduling Function In Settings select System Settings Energy Save Power ON OFF Schedule Setting To specify operation for the specific date Settings administrator select System Settings Energy Save Specific Date Operation ...

Page 34: ... depending on the installation site and environment ambient temperature etc The motion sensor may not operate correctly in the conditions below An object is in front of the motion sensor There are scratches or dirt on the motion sensor cover The motion sensor is directly exposed to sunlight or air flow The motion sensor is damaged There is a source of heat such as a heater nearby An object is movi...

Page 35: ...gin methods AUTHENTICATION BY USER NUMBER page 1 32 AUTHENTICATION BY LOGIN NAME PASSWORD page 1 34 AUTHENTICATION BY USER NUMBER The following procedure is used to log in using a user number received from the administrator of the machine When starting the machine the login screen appears When controlled by user number If A Warning when Login Fails is enabled in the system settings the operation p...

Page 36: ...dministrator select System Settings Common Settings Operation Settings Condition Settings Message Time Setting When the user number is an 8 digit number this step is not necessary Login takes place automatically after the user number is entered 3 When you have finished using the machine and are ready to log out tap Logout 1 4 7 5 8 6 9 2 0 3 C User Authentication Enter your user number CA Admin Lo...

Page 37: ...w Contact the machine administrator to check the login name password assigned to you To release the operation panel lock In Settings Web version select User Control Default Settings to release the lock To set A Warning when Login Fails In Settings administrator select User Control Default Settings A Warning when Login Fails To store a user name In Settings administrator select User Control User Li...

Page 38: ...tication is by LDAP server and you have different passwords stored in User List and in the LDAP server use the password stored in the LDAP server To have the user name and password registered In Settings administrator select User Control User List When registering the LDAP server change the information for Auth to as required When selecting from the User List screen The LDAP server you are connect...

Page 39: ... tap Logout User Authentication Enter login name and password Login Name Password Login Locally CA OK Select from List Auth to Exposure Address Book Auto Original Mixed Size Orig Resolution Super Fine Job Build Original Count Slow Scan Mode Address Fax Number Others Preview Speaker Start Scan Size Auto Auto reception memory A4 A4 100 100 Send Size Sending History Check Send Receive Status Call Sea...

Page 40: ...hentication destination to Active Directory in Settings administrator User Control Default Settings Authentication Server Settings Registering the machine in an AD domain When you join an AD domain the machine is registered as a printer in the AD domain Enter the machine information in setting mode Device name of the machine In Settings administrator select System Settings Network Settings Network...

Page 41: ...rm AD domain authentication You must always enter your password when you perform authentication using an IC card Enable Settings administrator User Control Default Settings Use IC Card for Authentication Disable Settings administrator User Control Default Settings Cache Password for Authentication If you change your password on the Active Directory server your initially entered password informatio...

Page 42: ...ctory The logged in user s Home Directory property that is set in the AD domain can be used to set the print folder for printing to the Home Directory Shared folder When the user taps Select File from Network Folder to Print on the action panel in document filing and then taps Refer to Folders on Network the folder that appears is the user s Home Directory E Mail Scan to E Mail myself A logged in ...

Page 43: ...tem Settings System Control Job Log Job Log Operation and click Save button to download the job logs Then sum up the data by classifying and arranging the stored job logs Type Description Main Code Used to categorize the results of the executed print and send jobs to enable efficient management For example you can assign a code by customer and collect cost information by customer from job logs Cod...

Page 44: ...Settings then set Use Billing Code to Enable To retain the specified billing code at the time of mode transition Select Settings administrator User Control Billing Code Administration Settings then set the Remember Billing Code Between Modes check box to This eliminates the need to enter billing codes at each mode transition You can assign billing codes to reprinting resending of target files and ...

Page 45: ...l The detail window is displayed Check the details then tap 4 Tap the Select from List key of the sub code The sub code list is displayed Perform the procedure shown in steps 2 and 3 then specify the sub code 5 Tap the OK key To clear the value of the specified billing code Tap the CA key Enter the billing code again CA Cancel and Return Main Code Main Code Name MAIN001 Company 1 MAIN002 Company 2...

Page 46: ... then enter the sub code Specify the code using up to 32 single byte characters 3 Tap the OK key To clear the value of the specified billing code Tap the CA key Enter the billing code again Billing Code Main Code Sub Code AAAA AAAA Select from List Select from List Bypass Billing Code OK CA Please enter Billing Code Billing Code Main Code Sub Code AAAA AAAA Select from List Select from List Bypass...

Page 47: ...a sub code in Sub Code List A total of up to 2000 main and sub codes can be registered To register a user group In Settings administrator select User Control Organization Group List 1 When the billing code entry window is displayed tap Select from List of the main code To register a new sub code tap the Select from List key of the sub code The subsequent steps are the same as the main code 2 Tap A...

Page 48: ...ublic address Limits the share range of billing code to be registered only to the specified group Up to eight groups can be specified as a public destination For details on how to specify a public destination refer to Shared range of billing code page 1 44 The public destination of a billing code is not displayed if user authentication is not performed The mode is automatically set to Public to Al...

Page 49: ... Next Billing Code Execute steps 4 to 7 to register the main code To cancel the registration Tap Cancel and Return on the action panel This cancels all the registered billing codes and returns the screen to the previous window 9 Tap End Registration on the action panel This finalizes the registration and returns the screen to the previous window Tap to finish the registration procedure To return t...

Page 50: ...code The subsequent steps are the same as the main code 2 Tap Add Edit Billing Code on the action panel 3 Tap and select the main code to be edited then tap Edit on the action panel To return to the billing code selection window Tap Billing Code Please enter Billing Code Main Code Sub Code AAAA AAAA Select from List Select from List Bypass Billing Code OK CA CA Cancel and Return Main Code Main Cod...

Page 51: ...5 Tap End Registration on the action panel This finalizes the registration and returns the screen to the previous window Tap to finish the registration procedure To return to the billing code entry window Tap the CA key CA Public to All Main Code Registration Cancel and Return End Registration Register Next Billing Code Main Code Main Code Name Available to Specify target public address AAAA AAAA ...

Page 52: ...lection window Tap 4 When the confirmation message appears tap the Delete key Billing Code Please enter Billing Code Main Code Sub Code AAAA AAAA Select from List Select from List Bypass Billing Code OK CA CA Cancel and Return Main Code Main Code Name MAIN001 Company 1 MAIN002 Company 2 MAIN003 Company 3 MAIN004 Company 4 MAIN005 Company 5 MAIN006 Company 6 MAIN007 Company 7 MAIN008 Company 8 Add ...

Page 53: ...figure settings for connection of the machine to the Internet proxy settings etc as required for your network environment In addition you must configure the following settings on the machine in order to use the OneDrive for Business Link and SharePoint Online Link functions Configure these settings in Settings administrator System Settings Network Settings Cloud Connect Set the cloud link icon in ...

Page 54: ...user account for ID password authentication 2 Enter your user account information for the cloud service A screen for selecting tasks appears 3 Tap the Scan a document key The scan settings screen appears Specify a File Name Address and Upload Data Scan Settings When using SharePoint Online you can upload to Shared Documents 4 Execute Scan or Preview 1 Tap Google Drive OneDrive or SharePoint Online...

Page 55: ...egarding the continuity or connection stability of the Cloud Link function With the exception of instances provided for by law we bear absolutely no responsibility for any damages or loss suffered by the customer due to the above DirectOffice is a product of CSR Imaging US LP DirectOffice is a trademark of CSR Imaging US LP registered in the United States and other countries used with permission 3...

Page 56: ...e on the operation panel of the machine to permit the connection When the machine is connected to a VNC application software appears on the system bar of the machine s touch panel If you wish to disconnect exit the VNC application software or tap Use the operation panel in the same way as you would on the machine However you cannot enter values in series by continuously clicking the key Start Colo...

Page 57: ... administrator select System Settings Common Settings Operation Settings Condition Settings Key Operation Setting Time for Accepting Key Entry This setting determines how long a key in the touch panel must be tapped until the key input is registered The time can be set from 0 to 2 seconds in increments of 0 5 seconds By lengthening the time setting key input can be prevented when a key is tapped a...

Page 58: ...unds when changing settings When moving through copy ratio or exposure settings the user is alerted by an audible sound at the default setting copy ratio 100 exposure 3 In Settings administrator select System Settings Common Settings Operation Settings Condition Settings Keys Touch Sound and Make Key Touch Sound at Default Setting Keys Touch Sound Controls the key touch sound level or turns the so...

Page 59: ...r of the items in the home screen so that the items you use most frequently appear first To change the order of the items in the home screen change in Settings administrator System Settings Home Screen Settings Condition Settings Home Button Home Screen Settings page 7 77 Customizing the home screen intuitive and easy to use design A flat icon design is used to make the screen intuitive and easy t...

Page 60: ...s so that the pages are not mixed together PART NAMES AND FUNCTION page 1 3 Darkened output tray colour Output tray colours are darkened to make it easy to distinguish the tray to which a job has been output On right side of operation panel Located on the right side of the operation panel this allows smooth removal of paper without interfering with the output tray Simple toner replacement Automati...

Page 61: ... it is used for an authentication process is recorded 8 Number of Card Issuance The number of times the card has been issued is written in an SSFC IC card is recorded 9 Main Code Main Code is recorded 10 Sub Code Sub Code is recorded 11 Starting Date Time The date and time the job was started are recorded 12 Completing Date Time The date and time the job was completed are recorded 13 Black White T...

Page 62: ...Sender Name Sender name of an image send job is recorded 36 Sender Address Sender address of an image send job is recorded 37 Transmission Type Transmission type of an image send job is recorded 38 Administrative Serial Number Administrative serial number of an image send job is recorded 39 Broadcast number Broadcast number of an image send job is recorded 40 Entry order Reservation order for broa...

Page 63: ...nal Count Number of scanned original sheets is recorded 56 Paper Size For a print job the paper size is recorded For a send job the transmitted paper size is recorded For a Scan to HDD job the paper size of the stored file is recorded 57 Paper Type The paper type used for printing is recorded 58 Paper Property The paper property specified in Paper Type is recorded 59 Duplex Setup The duplex settin...

Page 64: ... 2 x 11 SRA3 A3W A3 SRA4 B4 12 x 18 11 x 17 8 1 2 x 14 8 1 2 x 13 Paper set in the landscape orientation Paper set in the portrait orientation Can be placed only in the landscape orientation Tray 1 Tray 2 when a stand 550 2x550 3x550 550 2100 sheet paper drawer is installed Tray 3 when a stand 550 2100 sheet paper drawer is installed Tray 5 when a large capacity tray is installed Tray 4 when a sta...

Page 65: ...can be rubbed off or machine failure The use of non recommended paper may result in misfeeds or poor image quality Before using non recommended paper check whether printing can be performed properly Plain Paper Sharp standard paper 80 g m2 20 lbs For paper specifications see the specifications in the Start Guide Non Sharp standard plain paper 60 g m2 to 105 g m2 16 lbs to 28 lbs Heavy paper Heavy ...

Page 66: ... 7 115 Recycled paper coloured paper and pre punched paper must meet the same specifications as plain paper Before using any paper consult the dealer or nearest authorised service representative Tray 1 Tray 2 1 Tray 3 2 Tray 4 3 Tray 3 Tray 4 4 Tray 5 5 Bypass tray Plain Paper Permitted Permitted Permitted Permitted Permitted Heavy Paper 1 6 Permitted Permitted Permitted Permitted Heavy Paper 2 6 ...

Page 67: ... paper as thick as 300 g m2 110 lbs cover over Irregularly shaped paper Stapled paper Damp paper Curled paper Paper whose print side or reverse side has been already printed on by another printer or multifunction device Paper with a wave like pattern due to moisture absorption Paper with creases Paper with dust Non recommended paper Iron on transfer paper Perforated paper Tray In normal status Wit...

Page 68: ...wn on the tray To check the type and size of paper In Settings select System Settings Common Settings Paper Settings Paper Tray Settings 1 Pull out the paper tray Gently pull the tray out until it stops To load paper go to step 3 To load a different size of paper go to the next step Pull the handle until the lock is released 2 Adjust guide plates A and B to match the longitudinal and transversal d...

Page 69: ...per into the tray Load the paper with the print side facing up The stack must not be higher than the indicator line maximum of 550 sheets 5 Gently push the paper tray into the machine Push the tray firmly all the way into the machine slowly 1 Remove the control plate auxiliary block 2 Attach the control plate auxiliary block that was removed in step 1 Control plate auxiliary block ...

Page 70: ...ettings in Settings An incorrect setting may cause print failure printing on paper of an incorrect size or type or paper misfeeds To check the type and size of paper In Settings select System Settings Common Settings Paper Settings Paper Tray Settings Do not place heavy objects on the tray or press down on the tray 1 Tray 3 Tray 4 Pull out the paper tray Gently pull the tray out until it stops Pul...

Page 71: ...y Load the paper with the print side facing up The stack must not be higher than the indicator line maximum of 1200 sheets for tray 3 or maximum of 900 sheets for tray 4 4 Tray 3 Tray 4 Gently push the paper tray into the machine Push the tray firmly all the way into the machine slowly ...

Page 72: ...rent type from the paper previously loaded be sure to check the settings in Settings To check the paper type loaded in the tray Check in Settings System Settings Common Settings Paper Settings Paper Tray Settings When the tray is open do not place heavy objects on the tray or press down on the tray 1 Open the top cover 2 Fan the paper Fan the paper well before loading it If the paper is not fanned...

Page 73: ...1 70 BEFORE USING THE MACHINE LOADING PAPER 4 Gently close the cover ...

Page 74: ...ng plain paper other than Sharp standard paper or special media other than SHARP recommended transparency film glossy paper or when printing on the reverse side of paper that has been printed on one side load paper one sheet at a time Loading more than one sheet at a time will cause misfeeds Before loading paper straighten any curling in the paper When adding paper remove any paper remaining in th...

Page 75: ...copied on Place the front side facing down Fold the flap and make a sharp crease at the fold Use SHARP recommended transparency film When loading multiple sheets of transparency film into the bypass tray fan the sheets several times before loading When printing on transparency film remove each sheet as it is printed and output from the machine Allowing sheets to stack in the output tray may result...

Page 76: ...less than three layers Print quality is not guaranteed on envelopes having peel off flaps for sealing the envelopes Important points when using embossed paper label sheets The effect of asperity surfaces of embossed paper may affect the print quality depending on the type of embossed paper For more information consult the dealer or nearest authorised service representative Some labels may have to ...

Page 77: ...per Adjust the bypass tray guides so that they slightly contact the loaded paper For Letter Head and Pre Printed set the paper with the print side up However when Disabling of Duplex is enabled set the print side in the same orientation as in the regular mode facing down Do not forcefully push in paper that you are loading This may cause misfeeds If the bypass tray guides are set wider than the pa...

Page 78: ...tional long paper feeding tray to the bypass tray are explained below 1 Extend the auxiliary guide of the long paper feeding tray 2 Pull out the extension guide of the bypass tray 3 Attach the long paper feeding tray onto the extension guide of the bypass tray 4 Replace the extension guide of the bypass tray ...

Page 79: ...ND STATUS OF THE ORIGINAL Place the original in the automatic document feeder Depending the type and status of the original use the document glass Follow the instructions to select the method for placing the original To place it in the automatic document feeder see AUTOMATIC DOCUMENT FEEDER page 1 77 HOW TO PLACE THE ORIGINAL ...

Page 80: ...oiled Do not use the following originals Incorrect original size detection original misfeeds and smudges may result Transparency film or other transparent material for backup copy tracing paper carbon paper thermal paper or originals printed with thermal transfer ink ribbon should not be fed through the document feeder Originals to be fed through the feeder should not be damaged crumpled folded lo...

Page 81: ...ongitudinal 5 1 2 transversal Standard size Maximum size that can be automatically detected 297 mm longitudinal 420 mm transversal or A3 11 longitudinal 17 transversal A3W 12 18 cannot be used Non standard size Maximum size that can be specified manually Copy mode 297 mm longitudinal 432 mm transversal 11 5 8 longitudinal 17 transversal image send mode 297 mm longitudinal 1000 mm transversal 11 lo...

Page 82: ...riginal size Standard size 297 mm longitudinal x 420 mm transversal or A3 11 longitudinal x 17 transversal Non standard size 297 mm longitudinal x 432 mm transversal 11 5 8 longitudinal x 17 transversal 1 Open the automatic document feeder 2 Load the paper with the print side facing down Place the original face down and align the top left corner of the original with back left at the tip of the mar...

Page 83: ...left open parts outside of the original will be copied in black causing excessive use of toner When closing open the automatic document feeder all the way and then close it If originals have damp spots due to correction fluid ink or paste up glue wait until the originals are dry before making copies Otherwise the interior of the machine or the document glass may be soiled ...

Page 84: ...l Job Queue or Complete key as desired STOPPING DELETING A JOB PRIORITY PROCESSING AND CHECKING THE STATUS The background of the job status display changes as follows Green Job in progress Yellow Warming up waiting Red Waiting for error clearing To prohibit the display and changing of job information of other users when user authentication is enabled Select Settings administrator User Control Defa...

Page 85: ...ed an encrypted PDF file by direct print enter the password from here to print the file PRINTING AN ENCRYPTED PDF FILE page 3 87 Job Queue list Lists jobs in progress and in the queue for copying printing from a computer and printing of received fax This list also displays jobs in progress and in the queue for sending fax data or sending image data converted on the machine The jobs move to the Com...

Page 86: ...ws you to confirm that you do want to stop the job tap the Cancel key If the machine runs out of paper during a copy or print job you can cancel the job from the job status screen To delete more than one job operate the check box for Enter Plural Selection Mode on the action panel so that it looks like Printing of a received fax or Internet fax cannot be stopped A job set for transfer in FORWARDIN...

Page 87: ...ob will be preferentially transmitted between destinations of the broadcast transmission or serial polling jobs However if the priority job is a broadcast transmission job or a serial polling job it will be executed after the fax job in progress is completed Print Scan Fax Internet Fax Spool Complete Job Queue Check Details of Selected Job Change Job Priority Stop Delete Enter Plural Selection Mod...

Page 88: ... the selected job down one position key Moves the selected job to the bottom of the queue Scanner job with a timer setting When a scanner job with a timer setting is selected tapping the order change keys moves the job as follows key The timer setting is cancelled and the job moves to the position after the job in progress second from top key The timer setting is cancelled and the job moves to the...

Page 89: ...o check 2 Tap the Job Queue key 3 Tap the job whose contents you wish to check and then tap Check Details of Selected Job on the action panel Different job contents appear in different modes For information on the icons displayed on the job keys or the messages displayed in Status see READING THE JOB LIST page 1 88 Job Job Queue Copy Paper Empty Progress Sets Status Job Queue Complete Spool 0050 0...

Page 90: ... on the icons displayed on the job keys or the messages displayed in Status see READING THE JOB LIST page 1 88 Job Queue Complete Spool Internet Fax Fax Scan Priority Change Job Queue Copy Paper Empty 0001 0001 Progress Sets Status Job Print 1 2 Job Complete Set Time Number of PrintsStatus Job Queue Complete Spool Check Details of Selected Job Send Change Setting to Print Back Copy Copy Copy Copy ...

Page 91: ...ppears in a multi mode broadcast job Print job RGB CMYK Copy job Scan to E mail job Scan to FTP job Scan to Network Folder job Scan to Desktop job Fax transmission job Fax reception job PC Fax transmission job Internet fax transmission job Including Direct SMTP PC I Fax transmission job Scan to HDD file print job Internet fax reception job Including Direct SMTP Broadcast job Inbound routing job Ta...

Page 92: ...ing an extension telephone Stopped The job has been stopped Toner Empty Toner Empty Paper Empty Paper Empty Paper Jam Paper jam Waiting Waiting Warming up Warming up Limit Having reached the account limit Error An error occurred while the job was being executed Display Status Waiting The job is waiting to be executed Retry Mode The job is being retried due to a communication error or other problem...

Page 93: ...cast transmission serial polling or inbound routing operation If transmission to 3 destinations was successful out of a total of 5 003 005 OK will appear No Response An error occurred because there was no response from the destination Busy An error occurred because the other party was busy Report Wait Transmission confirmation was enabled but transmission confirmation was not received within the s...

Page 94: ...stored for Contacts and Group The address book can store up to 6000 addresses One Contacts can store up to 500 addresses One Group can store up to 500 addresses When the Address Book key is tapped on the e mail base screen groups and contacts having e mail addresses are displayed If user authentication is enabled registered contacts can be shared within a specified group or stored as personal cont...

Page 95: ...ist The narrowed down condition is displayed under the Category key Preview Sending History Call Search Number Global Address Search Start Speaker A D G J M P T W Add New Direct TX Send Same Image as Fax Address Frequent Use Fax Narrow Down All Category Sort Address BBB AAA CCC CCC DDD DDD ABC CA One touch keys of Contacts One touch keys of Group Frequent Use key Category key Narrow Down key Previ...

Page 96: ...st in ascending order descending order or in the order of search numbers The display is switched in the order of Sort Up Sort Down Search Number Order Preview Sending History Print Individual List Call Search Number Start Speaker A W Add New Direct TX Send Same Image as Fax Address Frequent Use Fax Narrow Down All Category Sort Address BBB CCC AAA CCC ABC All E mail FTP Desktop Network Folder Inte...

Page 97: ...UBLICIZING CONTACTS AND GROUPS page 1 102 3 Tap Fax Number E mail Address Internet Fax Address or Direct SMTP Address to enter the address and tap Select the checkbox to set that address as the preferred over the others if two or more addresses are stored for Contacts FTP Desktop and Network Folder addresses can be registered from Address Book in Settings Web version 4 Tap the Register key The fir...

Page 98: ...ng If user authentication is enabled the tab for address publication setting appears Setting address publication enables stored Contacts and Group to be shared within a specified group or stored as personal contacts that only you are allowed to access SETTING THE SCOPE FOR PUBLICIZING CONTACTS AND GROUPS page 1 102 3 Tap the Global Search key 4 Select the server from the list of servers If an auth...

Page 99: ...y To check address information select the address and tap the Confirm Registered Information key 7 Tap the Register key The first address of each address type is set as the default address If no address has the checkbox next to it selected a confirmation screen will appear asking you if you want to select a default address Cancel and Return Search Start Enter Initials Enter Initial and press Enter...

Page 100: ... is enabled the tab for address publication setting appears Setting address publication enables stored Contacts and Group to be shared within a specified group or stored as personal contacts that only you are allowed to access SETTING THE SCOPE FOR PUBLICIZING CONTACTS AND GROUPS page 1 102 To register a category name In Settings Web version select Address Book Category Setting 4 Tap the Register ...

Page 101: ...mail Address Internet Fax Address or Direct SMTP Address 4 In the contact list tap the Contacts that includes the address you want to add to the Group and tap Display Registered Information on the action panel Name Initial Category 0 Number of Addresses Search Number Name Required Fax Number E mail Address Internet Fax Address Add Contacts 6 Also Register for Frequent Use 0 Switch to Group Registr...

Page 102: ... registered in the Group and then tap the key You can select more than one address 6 Repeat steps 3 through 5 to register addresses After address registration is completed tap key 7 Tap the Register key Preview Start Registered Address Info 2 CCC 123 test test com CA ...

Page 103: ...a time If you have logged in as the administrator you can delete all addresses stored in the address book by using the Delete All that appears on the action panel 2 Editing a Contacts or Group You can change basic information such as names and categories and also you can add addresses STORING ADDRESSES THROUGH DIRECT ENTRY page 1 94 STORING ADDRESSES THROUGH GLOBAL ADDRESS SEARCH page 1 95 STORING...

Page 104: ...dress at a time To check address information tap the Detail key You cannot edit or delete an address for a job in a job queue 3 Edit an address After editing tap the Register key You can only edit addresses in the network folder on the edit screen The Add New screen cannot be displayed Name CCC Initial CCC Category 0 Number of Addresses Search Number Add Contacts 5 Global Search Also Register for ...

Page 105: ...ed as Personal Contacts in the user s address book User Group Publication of Contacts and Group is limited to the specified group Up to eight groups per Contacts or Group can be set as the publicity scope 1 In the address registration screen tap Restrict Public Address of The Contacts on the action panel 2 Tap the Designate Public Address key 3 Tap User or Group and specify who the address is made...

Page 106: ... select User Control User Control User List User Registration The transmission history is deleted in normal mode 1 Tap the history you want to delete 2 In the transmission log screen tap Delete the Selected History on the action panel 3 The message Delete the selected history will appear tap the Delete key The selected transmission log is deleted 1 In the transmission log screen tap Delete All His...

Page 107: ...000 sheets of paper can be loaded into the tray Long paper feeding tray MX LT10 When using long paper the long paper is loaded in the bypass tray Exit tray unit MX TR19 When a finisher is installed this can be added to the right side of the machine Exit tray cabinet MX TU16 This enables separation of output locations by mode copy printer etc Job separator tray MX TR20 Inner finisher MX FN27 Output...

Page 108: ...and PPTX files without going through a computer Application integration module MX AMX1 The application integration module can be combined with the network scanner function to append a metadata file to a scanned image file Application communication module MX AMX2 This allows the machine to be linked over a network to an external software application External account module MX AMX3 This is required ...

Page 109: ...waste discharged from punching 4 Insertion slot Place the paper that you want to staple in this slot Maximum thickness 4 mm 5 Front cover Open this cover to remove a paper misfeed replace staples remove a staple jam or remove the punch waste box 6 Staple case This holds the staple cartridge Pull the case out to replace the staple cartridge or remove a staple jam 7 Staple case release lever Use thi...

Page 110: ...stapling result 1 Place the paper that you want to staple in the insertion slot When you place the paper the manual staple key blinks green After two seconds elapse stapling automatically starts To staple earlier than the auto staple start time press the manual staple key Manual stapling cannot be executed during execution of a staple job Paper Paper orientation when inserted After stapling ...

Page 111: ...INISHER MAINTENANCE When the staple cartridge runs out of staples a message will appear in the operation panel Follow the operation procedure to replace the staple cartridge Replacement the staple cartridge 1 Open the finisher front cover 2 Lower the staple case release lever and remove the staple case Pull the staple case out to the right 3 Remove the empty staple cartridge from the staple case ...

Page 112: ...e into the staple case as shown Push the staple cartridge in until it clicks into place 5 Push the staple case Push the staple case in until it clicks into place 6 Close the finisher front cover Make a proof copy in staple sort function to verify that stapling takes place correctly ...

Page 113: ... tray is slidable To print on large paper such as A3 paper extend the tray 3 Top cover Open this cover to remove a paper misfeed 4 Front cover Open this cover to replace the staple cartridge or remove a staple jam 3 1 2 4 To install a finisher a paper pass unit and stand 550 2x550 3x550 550 2100 sheet paper drawer are required A finisher cannot be installed simultaneously with an inner finisher fi...

Page 114: ... 5000 staples per cartridge x three cartridges MX SCX1 FINISHER MAINTENANCE When the staple cartridge runs out of staples a message will appear in the operation panel Follow the operation procedure to replace the staple cartridge Replacement the staple cartridge 1 Open the front cover 2 Pull out the staple unit 3 Remove the staple case ...

Page 115: ...ple cartridge into the staple case as shown Push the staple cartridge in until it clicks into place 6 Push the staple case firmly back in Push the staple case in until it clicks into place 7 Replace the staple unit 8 Close the front cover Make a proof copy in staple sort function to verify that stapling takes place correctly ...

Page 116: ... tray 3 Manual staple key Press to execute manual stapling 4 Top cover Open this cover to remove a paper misfeed 5 Insertion slot Place the paper that you want to staple in this slot Maximum thickness 9 mm 6 Front cover Open this cover to replace the staple cartridge or remove a staple jam 3 1 2 4 6 5 To install a finisher large stacker a paper pass unit and stand 550 2x550 3x550 550 2100 sheet pa...

Page 117: ...stapling result 1 Place the paper that you want to staple in the insertion slot When you place the paper the manual staple key blinks green After two seconds elapse stapling automatically starts To staple earlier than the auto staple start time press the manual staple key Manual stapling cannot be executed during execution of a staple job Paper Paper orientation when inserted After stapling ...

Page 118: ... staples per cartridge x three cartridges MX SC11 FINISHER LARGE STACKER MAINTENANCE When the staple cartridge runs out of staples a message will appear in the operation panel Follow the operation procedure to replace the staple cartridge Replacement the staple cartridge 1 Open the front cover 2 Remove the staple case 3 Remove the empty staple cartridge ...

Page 119: ...ge into the staple case Push the staple cartridge in until it clicks into place 5 Push the staple case firmly back in Push the staple case in until it clicks into place 6 Close the front cover Make a proof copy in staple sort function to verify that stapling takes place correctly ...

Page 120: ...led and offset output is delivered to this tray The tray is slidable To print on large paper such as A3 paper extend the tray 3 Top cover Open this cover to remove a paper misfeed 4 Saddle stitch tray Saddle stitched output is delivered to this tray 5 Front cover Open this cover to replace the staple cartridge remove a staple jam or remove a paper misfeed 3 1 2 5 4 To install a saddle stitch finis...

Page 121: ...three cartridges AR SC2 SADDLE STITCH FINISHER MAINTENANCE When the staple cartridge runs out of staples a message will appear in the operation panel Follow the operation procedure to replace the staple cartridge 1 Open the front cover 2 Pull the lever and withdraw the staple unit Pull it slowly out until it stops 3 Lower the staple case release lever and remove the staple case ...

Page 122: ...le case as shown Push the staple cartridge in until it clicks into place After inserting the staple cartridge pull the seal that holds the staples straight out Do not remove the seal from the cartridge before inserting the cartridge into the case 6 Attach the staple case Push the staple case in until it clicks into place 7 Push the staple unit back in ...

Page 123: ...1 120 BEFORE USING THE MACHINE PERIPHERAL DEVICES 8 Close the front cover Make a proof copy in staple sort function to verify that stapling takes place correctly ...

Page 124: ... staple key Press to execute manual stapling 4 Top cover Open this cover to remove a paper misfeed 5 Insertion slot Place the paper that you want to staple in this slot Maximum thickness 9 mm 6 Saddle stitch tray Saddle stitched output is delivered to this tray 7 Front lower cover Open this cover to replace the staple cartridge remove a staple jam or remove a paper misfeed 8 Front upper cover Open...

Page 125: ...stapling result 1 Place the paper that you want to staple in the insertion slot When you place the paper the manual staple key blinks green After two seconds elapse stapling automatically starts To staple earlier than the auto staple start time press the manual staple key Manual stapling cannot be executed during execution of a staple job Paper Paper orientation when inserted After stapling ...

Page 126: ...ge x three cartridges MX SC11 Saddle stitch unit Staple cartridge approx 2000 staples per cartridge x four cartridges MX SC12 SADDLE STITCH FINISHER LARGE STACKER MAINTENANCE When the staple cartridge runs out of staples a message will appear in the operation panel Follow the operation procedure to replace the staple cartridge Replacement the staple cartridge finisher unit 1 Open the front upper c...

Page 127: ... Insert a new staple cartridge into the staple case Push the staple cartridge in until it clicks into place 5 Push the staple case firmly back in Push the staple case in until it clicks into place 6 Close the front upper cover Make a proof copy in staple sort function to verify that stapling takes place correctly ...

Page 128: ...efore starting this procedure remove all output from the output tray of the saddle finisher large stacker Do not replace removed output back in the output tray 1 Open the front upper cover 2 Slowly pull out the front lower cover until it stops 3 Remove the staple case 4 Remove the empty staple cartridge ...

Page 129: ...e case Replace both staple cartridges 6 Push the staple case firmly back in Push the staple case in until it clicks into place 7 Push the front lower cover back in 8 Close the front upper cover Make a test print or copy using the saddle stitch function to verify that stapling takes place correctly ...

Page 130: ...output DISCARDING PUNCH WASTE Punch waste from punched holes is collected in the punch waste box Follow the operation procedure to replace punch waste Inner finisher installed 1 Open the finisher front cover 2 While pressing the lever over to the left slide the finisher to the left until it stops 3 Grasp the punch waste box handle gently pull out the box and discard the punch waste ...

Page 131: ...ERIPHERAL DEVICES 4 Replace the punch waste box If the punch waste box is not replaced properly printing will not be possible to use the punch function 5 Slide the finisher to the right until it stops 6 Close the finisher front cover ...

Page 132: ...isher installed 1 Open the front cover 2 Pull out the punch waste box and discard the punch waste 3 Replace the punch waste box If the punch waste box is not replaced properly printing will not be possible to use the punch function 4 Close the front cover ...

Page 133: ...arge stacker installed 1 Open the front cover 2 Pull out the punch waste box and discard the punch waste 3 Replace the punch waste box If the punch waste box is not replaced properly printing will not be possible to use the punch function 4 Close the front cover ...

Page 134: ...tch finisher installed 1 Open the front cover 2 Pull out the punch waste box and discard the punch waste 3 Replace the punch waste box If the punch waste box is not replaced properly printing will not be possible to use the punch function 4 Close the front cover ...

Page 135: ...isher large stacker installed 1 Open the front cover 2 Pull out the punch waste box and discard the punch waste 3 Replace the punch waste box If the punch waste box is not replaced properly printing will not be possible to use the punch function 4 Close the front cover ...

Page 136: ... Settings administrator select System Settings Sharp OSA Settings Standard Application Settings 1 Tap the Sharp OSA key in the Home screen If no standard applications have been stored the key cannot be tapped 2 Select a standard application If two or more standard applications have been stored the screen for selecting a standard application will appear Tap the standard application that you wish to...

Page 137: ...een The login screen does not appear if the user has already logged in by the normal method Tap the job status display while the login screen is displayed and the Job Status screen appears To return to the previous screen tap a mode select key If login fails If the login screen fails to appear or the application does not operate correctly the machine may also stop operating correctly In that case ...

Page 138: ...ine has started up Only the job result is sent to the external account application External count mode can be used together with the user control function of the machine External count mode can also be used when the user control function is disabled To enable the external count mode In Settings administrator select System Settings Sharp OSA Settings External Accounting Application Settings and ena...

Page 139: ...how to remove misfeeds key in the touch panel When the key is tapped instructions for removing the misfeed will appear Follow the instructions When the misfeed is cleared the message will automatically disappear REMOVING MISFEEDS The fusing unit and paper output area are hot When removing a misfeed do not touch the fusing unit You may burn yourself Check how to remove misfeeds Misfeed has occurred...

Page 140: ...ssary moisten the cloth with water or a small amount of neutral detergent After that wipe with a clean dry cloth Examples of lines in the image Document glass Document backplate sheet MAINTENANCE Do not use a flammable spray to clean the machine If gas from the spray comes in contact with hot electrical components or the fusing unit inside the machine fire or electrical shock may result Do not use...

Page 141: ...ss cleaner be sure to return it to its storage position When using the MX 3070N MX 3570N MX 4070N 1 Open the automatic document feeder and remove the glass cleaner 2 Clean the document scanning area on the document glass with the glass cleaner One scanning area is on the document glass and the other is inside the automatic document feeder 3 Open the scanning area cover on the automatic document fe...

Page 142: ...e MX 3050N MX 3060N MX 3550N MX 3560N MX 4050N MX 4060N 6 Replace the glass cleaner 1 Open the automatic document feeder and remove the glass cleaner 2 Clean the document scanning area on the document glass with the glass cleaner 3 Replace the glass cleaner ...

Page 143: ...charges the photoconductive drum 1 Open the front cover 2 Remove the waste toner box Press the release buttons on the sides of the waste toner box inward and pull out slowly 3 Remove the charger cleaner The charger cleaner is attached to the front cover 1 Pull the right hand side of the charger cleaner to detach it from the hook 2 Put it over the hook to place it on the back side 3 Turn the charge...

Page 144: ... There are a total of 4 places to be cleaned in the machine as shown 6 Replace the charger cleaner in its original position 1 Fit the charger cleaner onto the boss and rotate Hook the end without a handle onto the left hook 2 Put the right hand side of the charger cleaner over the hook to place it on the near side 3 Turn the charger cleaner onto hook 7 Push the waste toner box into the machine Pus...

Page 145: ...ose the front cover If the problem persists after you perform these steps repeat the cleaning procedure going back and forth about 3 times When pulling and pushing the knob to clean the charger pull and push the knob slowly from one end to the other ...

Page 146: ...an the PT charger 1 Open the front cover 2 Remove the waste toner box Press the release buttons on the sides of the waste toner box inward and pull out slowly 3 Clean the PT charger 1 Withdraw the PT charger slowly until you feel resistance 2 Gently push the PT charger cleaner all the way in 3 Repeat 1 and 2 above three times 4 Push the waste toner box into the machine Push in until you hear a cli...

Page 147: ...1 144 BEFORE USING THE MACHINE MAINTENANCE 5 Close the front cover ...

Page 148: ...m a copier but also on prints from a computer The same lines appear on both copies and print jobs If conditions similar to the above occur clean the laser unit as explained below 1 Open the front cover 2 Remove the waste toner box Press the release buttons on the sides of the waste toner box inward and pull out slowly 3 Take out the cleaning tool for the laser unit The cleaning tool is attached to...

Page 149: ...ner box Replacement cleaners are stored on the waste toner box Grasp the end of the cleaner and pull it out of the waste toner box 6 Remove the dirty cleaner from the tip of the cleaning tool 1 Firmly grasp the tool where the cleaner is attached 2 Use your other hand to press down on the hook that secures the cleaner and remove the cleaner Put the removed cleaner back on the waste toner box 7 Atta...

Page 150: ...he tool leave the cleaning surface of the laser unit 3 Repeat step 2 two or three times and then remove the cleaning tool 9 Repeat steps 8 to clean all holes 4 holes in the laser unit The laser unit is cleaned in four locations including the location cleaned in step 8 Clean all holes 10 Replace the cleaning tool 1 Engage the cleaning tool onto the boss and turn it around it and then put the edge t...

Page 151: ...utral detergent CLEANING THE PAPER FEED ROLLER MX 3050N MX 3060N MX 3550N MX 3560N MX 4050N MX 4060N only If lines or other dirt appear on the scanned original when the automatic document feeder is used wipe the surface of the roller with a clean soft cloth moistened with water or a neutral detergent 11 Push the waste toner box into the machine Push in until you hear a click sound indicating that ...

Page 152: ...en this message appears prepare a toner cartridge for replacement indicates the colour of toner cartridge that must be readied If you continue to use the machine the following message will appear when the toner runs out Colours that have run out of toner are indicated in Y Yellow toner M Magenta toner C Cyan toner and Bk Black toner Replace the toner cartridge with a one of the relevant colour 1 O...

Page 153: ... toner cartridge Hold the toner cartridge with both hands as shown and slowly pull it out of the machine Do not attempt to remove a toner cartridge that has not been ejected 3 Take out a new toner cartridge from its package and shake it horizontally five or six times 4 Slowly insert the new toner cartridge on the level A toner cartridge of a different colour cannot be installed Be sure to install ...

Page 154: ...olour printing will no longer be possible If the Y M or C toners run out but a quantity of Bk toner still remains printing is performed in black and white Depending on your conditions of use the colour may become light or the image blurred Be sure to install four toner cartridges Y M C Bk Your service technician will collect used toner cartridges To view the approximate amount of toner remaining i...

Page 155: ...ap the guidance key that appears on the touch panel to view the procedure for replacing the waste toner box When the key is tapped instructions for replacing the waste toner box will appear Follow the instructions When the waste toner box is replaced the message will automatically disappear Do not throw the waste toner box into a fire Toner may fly and cause burns Store the waste toner box out of ...

Page 156: ...AR SV1 Supplies Stamp cartridge 2 in package AR SV1 When using the MX 3070N MX 3570N MX 4070N 1 Open the automatic document feeder 2 Remove the document backplate sheet from the automatic document feeder Remove the sheet slowly Place the removed sheet with the side that was attached face up on the document glass 3 Grasp the tab on the stamp unit and pull the unit out 4 Remove the stamp cartridge A...

Page 157: ...t When the automatic document feeder is closed the document backplate sheet on the document glass attaches to the automatic document feeder 8 Make sure that the document backplate sheet is firmly attached to the automatic document feeder and then close the automatic document feeder If the document backplate sheet is not firmly attached remove the sheet and then close the automatic document feeder ...

Page 158: ...MAINTENANCE When using the MX 3050N MX 3060N MX 3550N MX 3560N MX 4050N MX 4060N 1 Open the document feeder tray 2 Remove the stamp cartridge while pushing it downwards 3 Install a new stamp cartridge 4 Close the document feeder tray ...

Page 159: ...rd Settings Soft Keyboard Template Setting Subject Cancel OK Space Pre Set Select AltGr Keyboard Select Shift Caps Enter Characters Symbols com net org http info biz Displays the entered text Retrieves the stored words Use Settings to store words Tap a key to enter text The key types vary depending on the selected entry mode Switches the key layout Use this to retrieve a previously stored subject ...

Page 160: ...ASS TRAY 2 40 OUTPUT 2 41 SORT GROUP SETTING 2 41 STAPLE SETTINGS 2 42 PUNCH SETTINGS 2 45 FOLD SETTING 2 46 INSERTING SEPARATOR PAGES BETWEEN COPIES OR JOBS 2 47 BATCH COPY FUNCTIONS 2 49 COPYING MULTIPLE ORIGINALS AS A SINGLE PAGE N Up 2 49 COPYING EACH FACING PAGE OF A BOUND DOCUMENT DUAL PAGE COPY 2 51 COPYING BOTH SIDES OF A CARD AS A SINGLE PAGE CARD SHOT 2 52 REPEATING THE SAME IMAGE ON ONE...

Page 161: ...NSERTING COVERS IN COPIES COVERS INSERTS 2 104 INSERTING INSERTION SHEETS IN COPIES COVERS INSERTS 2 112 CHECKING EDITING AND DELETING THE PAGE LAYOUT OF COVERS AND INSERTION SHEETS PAGE LAYOUT 2 116 INSERTING INSERTION SHEETS IN BETWEEN TRANSPARENCY FILMS TRANSPARENCY INSERTS 2 117 FUNCTIONS FOR SPECIFIC USES 2 119 COPYING CAPTIONS ONTO TAB PAPER TAB COPY 2 119 MAKING A POSTER SIZED COPY MULTI PA...

Page 162: ...N Up page 2 49 Card Shot page 2 52 BEFORE USING THE MACHINE AS A COPIER CA Preview Copies B W Staple Punch Copy Ratio 2 Sided Copy Paper Select A4 Tray 1 1 1 Start Colour Start 100 Detail Original A4 Off Select function to be set up Change the function display Starts black and white or colour copying Enter the number of copies Scans the original and shows a preview image PREVIEW SCREEN page 1 17 C...

Page 163: ... Data Temporarily Quick File No of copies Enter the number of copies Displays the functions that can be utilized in copy mode Scans the original and shows a preview image PREVIEW SCREEN page 1 17 Reset all settings Starts black and white or colour copying Indicates the presence or absence of an original and the size of paper loaded in each tray Tap to open the paper select screen Display keys othe...

Page 164: ... A4 Address E mail Address Detail B W Start Colour Start LINE PRINTER Easy Copy Easy Scan HDD File retrieve Sharp OSA Job Status Exposure Address Book Auto Original Mixed Size Orig Resolution Super Fine Job Build Original Count Slow Scan Mode Address Fax Number Sharp OSA LINE PRINTER Job Status Others Preview Speaker Start Scan Size Auto Auto reception memory A4 A4 0 100 Send Size Global Address S...

Page 165: ... TX Send Same Image as Fax Address LINE PRINTER Easy Scan HDD File retrieve Sharp OSA Job Status CA Exposure Address Book Auto Original Mixed Size Orig Resolution Super Fine Job Build Original Count Slow Scan Mode Address Others Preview Speaker Start Auto Auto A4 A4 0 100 Global Address Search Sending History Call Search Number Call Program Call Registered settings Direct TX Send Same Image as Fax...

Page 166: ...you can refer to the following functions for the setting In Easy mode In Normal mode Paper Select page 2 13 2 Sided Copy page 2 17 Copy Ratio page 2 26 Staple Punch page 2 42 page 2 45 Colour Mode page 2 20 Original page 2 33 Exposure page 2 23 N Up page 2 49 Card Shot page 2 52 Colour Mode page 2 20 Original page 2 33 Paper Select page 2 13 2 Sided Copy page 2 17 Copy Ratio page 2 26 Exposure pag...

Page 167: ...d copy COPY PREVIEW page 2 9 In Easy mode In Normal mode Original A4 Detail Staple Punch Copy Ratio 2 Sided Copy Paper Select A4 Tray 1 1 1 100 Off CA Preview B W Start Colour Start Copies Start Colour Start Preview Colour Mode Full Colour Paper Select Auto Exposure Auto Original Auto A4 2 Sided Copy 1 Sided 1 Sided Sort Group Auto Copy Ratio 100 Others Send as well as print Call Eco Program Store...

Page 168: ...E page 6 9 FILE page 6 10 In normal mode While viewing the preview screen you can adjust the exposure or colour and configure the preview in your image You can also drag the preview image to edit it for example changing rotating or deleting an original page COPY COLOUR MODES page 2 20 MANUAL ADJUSTMENT OF EXPOSURE AND ORIGINAL TYPE page 2 23 Original A4 Detail Staple Punch Copy Ratio 2 Sided Copy ...

Page 169: ...e original size is specified manually the specified original size is displayed When you place the original in the automatic document feeder the original icon appears above the automatic document feeder Original A4 Detail Staple Punch Copy Ratio 2 Sided Copy Paper Select A4 Tray 1 1 1 100 Off Preview B W Start Colour Start Copies CA Start Colour Start Preview Colour Mode Full Colour Paper Select Au...

Page 170: ...m 8 1 2 x 13 2 5 A3 A4 A4R A5 B5 B5R 8 1 2 x 11 11 x 17 216 mm x 340 mm 8 1 2 x 13 2 5 A3 A4 A4R A5 B4 B5 B5R AB 5 216 mm x 343 mm 8 1 2 x 13 1 2 A3 A4 A4R A5 B5 B5R 8 1 2 x 11 11 x 17 216 mm x 343 mm 8 1 2 x 13 1 2 A3 A4 A4R A5 B4 B5 B5R Inch 1 11 x 17 8 1 2 x 14 8 1 2 x 11 8 1 2 x 11 R 5 1 2 x 8 1 2 11 x 17 8 1 2 x 14 8 1 2 x 11 8 1 2 x 11 R 5 1 2 x 8 1 2 A3 A4 Inch 2 11 x 17 8 1 2 x 13 216 mm x...

Page 171: ...s Document feeder tray Set the orientation of the image to ensure that the orientation of the placed original is correctly recognized For information on the orientation of the original see Specifying the orientation of the original page 2 33 To set Rotation Copy In Settings administrator select System Settings Copy Settings Condition Settings Rotation Copy Setting The rotation copy function is ava...

Page 172: ...ettings Paper Tray 1 Tap the Paper Select key COPYING SEQUENCE page 2 7 2 Tap the required tray key After the settings are completed tap In Easy mode In Normal mode When the bypass tray is selected specify the paper type and size based on the paper loaded into the bypass tray SPECIFYING A TYPE AND SIZE OF PAPER LOADED ON BYPASS TRAY page 2 40 In normal mode you can also open the Paper Select scree...

Page 173: ...opying and tap the keys for any other settings you want to select Paper Select page 2 13 2 Sided Copy page 2 17 Copy Ratio page 2 26 Staple Punch page 2 42 page 2 45 Colour Mode page 2 20 Original page 2 33 Exposure page 2 23 N Up page 2 49 Card Shot page 2 52 Depending on the size of the placed original there may be cases where the same size of paper as the original is not selected automatically ...

Page 174: ...9 2 Check the paper tray and colour mode you want to use for copying and tap the keys for any other settings you want to select Paper Select page 2 13 2 Sided Copy page 2 17 Copy Ratio page 2 26 Staple Punch page 2 42 page 2 45 Colour Mode page 2 20 Original page 2 33 Exposure page 2 23 N Up page 2 49 Card Shot page 2 52 Original A4 Detail Staple Punch Copy Ratio 2 Sided Copy Paper Select A4 Tray ...

Page 175: ...n making only one set of copies you do not need to specify the number of copies To make two or more sets of copies Tap the number of copies key to specify the number of copies Original A4 Detail Staple Punch Copy Ratio 2 Sided Copy Paper Select A4 Tray 1 1 1 100 Off CA Preview B W Start Colour Start Copies ...

Page 176: ...ut Binding After the settings are completed tap 4 Check the paper tray and colour mode you want to use for copying and tap the keys for any other settings you want to select Tap the Original key and specify the orientation of the original to have the orientation be correctly recognized Specifying the orientation of the original page 2 33 Paper Select page 2 13 Copy Ratio page 2 26 Staple Punch pag...

Page 177: ...opying Dual side copy helps to save paper To change the default 2 sided copy mode In Settings administrator select System Settings Copy Settings Initial Status Settings 2 Sided Copy 1 Place the original on the document glass DOCUMENT GLASS page 1 79 2 Tap the 2 Sided Copy key COPYING SEQUENCE page 2 7 Originals copy Automatic 2 sided copying of 1 sided originals ...

Page 178: ...3 Exposure page 2 23 N Up page 2 49 Card Shot page 2 52 Depending on the size of the placed original there may be cases where the same size of paper as the original is not selected automatically In this event change the paper tray manually 5 Tap the Colour Start or B W Start key 6 Set the next original and tap the Colour Start or B W Start key to scan the original Tap the same key you tapped in st...

Page 179: ...m Settings Copy Settings Initial Status Settings Colour Mode To change the standard to detect Black White and Colour In Settings administrator select System Settings Common Settings Device Control Detect Standard in Auto Colour Mode When the colour mode is set to auto in copy mode the discrimination point for detecting whether originals are colour or black and white can be set to one of 5 levels W...

Page 180: ...lour Extracts reddish parts in an original and changes them to the specified colour 5 Specify the colour to change the extracted colour to After the settings are completed tap the key on the 2 Colour screen and check that the changed setting is displayed at the side of 2 Colour key on the colour mode screen After you have checked it tap Check that the specified colour mode is selected CA Preview B...

Page 181: ...ter you have checked it tap on the Colour Mode screen Start Colour Start Preview Others No of copies Erase Shadow Around Erase 2 Sided Copy Change Size Direction Original CA B W A3 4 Shift Position to Have Margin Margin Shift Put Multiple Pages in A Page N Up Change Auto Full Colour B W 2 Colour Single Colour Red Colour Mode 1 4 3 Start Colour Start Preview Others No of copies 1 Erase Shadow Aroun...

Page 182: ...select the original type depending on the original to be copied or manually adjust the exposure To change the default exposure In Settings administrator select System Settings Copy Settings Initial Status Settings Exposure Type To adjust the exposure level when Auto is used for the copy exposure In Settings administrator select System Settings Image Quality Adjustment Copy Image Quality Density Ad...

Page 183: ...pying the light colour shading and fine text found on most maps Light Original Use this mode for originals with light pencil writing When using a copy or printed page from the machine as an original When using a copy or printed page from the machine as an original tap the Copy of Copy checkbox so that appears Copy of Copy is available when Auto Text Printed Photo or Text Printed Photo is selected ...

Page 184: ...cted for Exposure Original Type 1 to 2 Dark originals such as a newspaper 3 Normal density originals 4 to 5 Originals written in pencil or light coloured text Start Colour Start Preview Others 1 A3 4 Colour Mode Background Adjustment Reduce Toner Consumption Toner Save Erase Shadow Around Erase Change Size Direction Original Exposure Original Type Auto Manual Copy of Copy Text Text Printed Photo T...

Page 185: ... feeder or on the document glass SELECTING THE PAPER TRAY FOR COPYING page 2 13 AUTOMATIC DOCUMENT FEEDER page 1 77 DOCUMENT GLASS page 1 79 2 Tap the Copy Ratio key COPY MODE page 2 3 3 Tap the Auto Image key The reduction or enlargement ratio is automatically selected based on the original size and the selected paper size The automatically selected ratio will appear in the ratio display To cance...

Page 186: ...uction Specifying the paper size Specify the paper sizes of the original and output to automatically obtain the appropriate ratio Specifying the image dimensions Specify the image sizes of the original and output to automatically obtain the appropriate ratio To make a copy with the same ratio between the vertical and horizontal sizes enter either one of the vertical and horizontal sizes When the a...

Page 187: ...eys then adjust it with Up to two frequently used ratio values can be added to the preset ratio key respectively for enlargement and reduction Copy Settings page 7 79 To cancel all settings Tap the CA key 1 Tap the Copy Ratio key COPY MODE page 2 3 2 Specify the original size paper size of the loaded original and the copy size paper size of the copy output After the settings are completed tap To c...

Page 188: ...ect size To cancel all settings Tap the CA key 25 400 Start Colour Start Preview Others Other Ratio by Paper by Size 1 A3 4 2 Sided Copy Background Adjustment Change Paper Feed Tray Paper Select Change Size Direction Original Copy Ratio Slightly Reduce 3 Reduction XY Zoom Auto Image Zoom 70 81 86 141 121 115 100 B4 B5 A3 A4 B5 A5 B4 A4 A4 B5 A3 B4 B5 A4 B4 A3 A5 B5 A4 B4 B5 B4 A4 A3 100 No of copi...

Page 189: ...key which is pre registered with the key which allows you to adjust the ratio in 1 units Specifying the image dimensions Specify the image sizes of the original and output to automatically obtain the appropriate ratio Enter the vertical and horizontal sizes Using the preset ratio key When the automatic document feeder is used the vertical and horizontal ratio selection ranges are both between 25 t...

Page 190: ...vertical ratio in the same way as the X key After the settings are completed tap Check that a paper size suitable for the ratio is selected 1 Tap the Detail key to change to normal mode Changing mode from each mode page 2 5 2 Tap the Copy Ratio key and then tap the XY Zoom key 3 Tap the by Size key Start Colour Start Preview Others 2 Sided Copy Background Adjustment Change Paper Feed Tray Paper Se...

Page 191: ...the numeric keys If you have entered an incorrect size Tap the C key and then enter the correct size To cancel all settings Tap the CA key Start Colour Start Preview 2 Sided Copy Background Adjustment Change Paper Feed Tray Paper Select Change Size Direction Original Others Copy Ratio by Size The copy ratio is calculated from specified sizes Enter the image size and the finished size Copy Ratio Im...

Page 192: ... recognized orientation Specifying the orientation and size of an AB size original Set the orientation and size of the original before scanning the original The original size is set in normal mode 1 Tap the Original key to set the orientation of the original COPY MODE page 2 3 2 Tap the Detail key to change to normal mode Changing mode from each mode page 2 5 3 Tap the Original key 4 Tap the AB ta...

Page 193: ...y After the settings are completed tap Preview Start Original Others Auto Direct Entry Inch AB Custom Size Image Orientation Skip Blank Page in Original Copy Ratio Enlarge Reduce Copy Blank Page Skip Background Adjustment 2 Sided Copy Colour Mode A5 216 x 343 B5R B4 A5R A4 A3 B5 A4R 216 x 340 Colour Start A4 1 No of copies CA B W Preview Start Original Others Auto Direct Entry Inch AB Custom Size ...

Page 194: ...reas displaying width and height sizes respectively and enter the sizes using the numeric keys It is convenient to use to finely adjust the entered size 6 Tap the OK key On the base screen check that the specified size is displayed on the Original key After the settings are completed tap Preview Start Original Others Auto Direct Entry Inch AB Custom Size No of copies Skip Blank Page in Original Co...

Page 195: ... non standard original sizes can be stored The added original sizes will also appear in other modes 1 Tap the Detail key to change to normal mode Changing mode from each mode page 2 5 2 Tap the Original key 3 Tap the Custom Size tab 4 Tap Store Delete Original Size on the action panel Preview Start Original Others Auto Direct Entry Inch AB Custom Size Image Orientation No of copies Skip Blank Page...

Page 196: ...dded properly After you have checked it tap To cancel the operation Tap the CA key Preview Start Store Delete Select the size key to store delete the custom original size Others Skip Blank Page in Original Copy Ratio Enlarge Reduce Copy Blank Page Skip Background Adjustment 2 Sided Copy Colour Mode Colour Start 1 No of copies CA B W Original Preview Start CA Store Delete Select the size key to sto...

Page 197: ...etrieve After selecting the key of the original size tap the key On the base screen check that the specified size is displayed on the Original key To cancel the operation Tap the CA key Preview Start Original Others Auto Direct Entry Inch AB Custom Size Image Orientation No of copies Skip Blank Page in Original Copy Ratio Enlarge Reduce Copy Blank Page Skip Background Adjustment 2 Sided Copy Colou...

Page 198: ...TRAY FOR COPYING page 2 13 3 To select more detailed settings tap the Detail key to switch to normal mode Changing mode from each mode page 2 5 4 Tap the Paper Select key 5 Tap the Type and Size key and select the size and type of the paper SPECIFYING A TYPE AND SIZE OF PAPER LOADED ON BYPASS TRAY page 2 40 6 Place the original Place the original in the document feeder tray of the automatic docume...

Page 199: ... automatically Direct Entry key Tap this key to enter a numeric value for the size of the loaded paper After the settings are completed tap To directly enter a paper size Tap the inch key to set a paper size in inches or tap the AB key to set it in millimeters After you have entered the paper size using the key tap the OK key Plain Type and Size A4 Paper Select Type Plain Size Auto AB Auto AB Type...

Page 200: ...Original key and specify the orientation of the original to have the orientation be correctly recognized Specifying the orientation of the original page 2 33 2 Tap the Sort Group key If a finisher or saddle stitch finisher is installed tap the Sort Group key in Others 3 Select the sorting method After the settings are completed tap You can select the offset output checkbox to have each set of outp...

Page 201: ...ed at the preset size regardless of the copy ratio or paper size setting To change the default staple position In Settings administrator select System Settings Copy Settings Initial Status Settings Staple Position An inner finisher finisher finisher large stacker saddle stitch finisher or saddle stitch finisher large stacker is required to use the staple function A saddle stitch finisher or saddle...

Page 202: ...need to change the output tray tap the Output Tray key and select the output destination before selecting stapling If the number of scanned originals exceeds the staple sheet limit a message is displayed Tap Continue or Cancel Continue Continues sorting without stapling Cancel Cancels the staple sort setting CA Preview B W Start Colour Start Copies Staple Punch Staple Off Off Position Punch Previe...

Page 203: ...e output destination before selecting stapling If Booklet is already specified in Others you do not need configure binding edge and cover settings If Booklet is specified in Others the saddle stitch screen appears Confirm the message shown on the screen and tap the On key If you select Settings administrator System Settings Common Settings Device Control then set the Automatic Saddle Stitch check ...

Page 204: ...aper or special media such as transparency film and tab paper You cannot use a paper punch together with the staple and paper folding 1 Tap the Staple Punch key COPY MODE page 2 3 Tap the Original key and specify the orientation of the original to have the orientation be correctly recognized Specifying the orientation of the original page 2 33 2 Select punching and set the position After the setti...

Page 205: ... check the selected folding method in PREVIEW SCREEN page 1 17 1 Tap the Detail key to change to normal mode Changing mode from each mode page 2 5 Tap the Original key and specify the orientation of the original to have the orientation be correctly recognized Specifying the orientation of the original page 2 33 2 Tap the Others key and tap the Fold key 3 Select the folding method After the setting...

Page 206: ...t of two copies Inserting separator pages before and after a job When this function is combined with Sort Group and Staple Punch Sort Group and Staple Punch are not applied to the separator pages This function cannot be used with the saddle stitch or fold function When used in combination with the offset function a separator page is never offset by itself the separator page is always offset togeth...

Page 207: ...ray key to display the tray selection screen Tap the separator page tray in the tray selection screen For more information see SELECTING THE PAPER TRAY FOR COPYING page 2 13 and SPECIFYING A TYPE AND SIZE OF PAPER LOADED ON BYPASS TRAY page 2 40 To cancel the separator page insertion setting Clear the checkmark for separator page insertion mode Preview Start Back N Up Put Multiple Pages in A Page ...

Page 208: ...opying 4 Up copying When inserting a cover sheet select Cover Setting to copy only a front sheet to one page and collectively copy the second and subsequent pages 1 Place the original Place the original in the document feeder tray of the automatic document feeder or on the document glass AUTOMATIC DOCUMENT FEEDER page 1 77 DOCUMENT GLASS page 1 79 When using the document glass to scan multiple ori...

Page 209: ... A line can be inserted between pages arranged on a sheet After the settings are completed tap twice and Back keys in sequence To cancel the N Up setting Tap the Off key To cancel all settings Tap the CA key 7 Tap the Colour Start or B W Start key to start copying Start Colour Start N Up OFF CA Preview Copies 2 Up 4 Up 8 Up 2 Up 4 Up 8 Up B W Preview Start Back Colour Start N Up Select Original Ty...

Page 210: ...l key and specify the orientation of the original to have the orientation be correctly recognized Specifying the orientation of the original page 2 33 2 Tap the Others key and tap the Dual Page Copy key A checkmark appears on the icon After the settings are completed tap the Back key When dual page copy is selected A4 or B5 size paper is automatically selected If you want to use paper in another t...

Page 211: ...l key to change to normal mode Changing mode from each mode page 2 5 2 Select the paper to be used for card shot Set a paper by referring to the SELECTING THE PAPER TRAY FOR COPYING page 2 13 3 Tap the Others key and tap the Card Shot key 4 Tap the On key and specify the original size as required After the settings are completed tap and Back keys in sequence Back Front Example of an A4 8 1 2 x 11 ...

Page 212: ...e checkbox to the original is enlarged or reduced with the ratio appropriate to the original size To cancel the Card Shot settings Tap the Off key 5 Place a card face down on the document glass and tap the Colour Start or B W Start key DOCUMENT GLASS page 1 79 6 Place a card face up on the document glass and tap the Colour Start or B W Start key to scan the reverse side Copy settings cannot be cha...

Page 213: ...nction repeatedly copies on A4 8 1 2 x 11 or A3 11 x 17 papers without changing the copy ratio of the photo size original You can select any of the following five types of original size E L Size Postcard Up to 148 mm x 105 mm 3 x 5 Up to 100 mm x 150 mm 5 x 7 Card Up to 70 mm x 100 mm 2 1 2 x 4 ID Photo Up to 65 mm x 70 mm 2 1 2 x 2 1 2 Card Up to 57 mm x 100 mm 2 1 8 x 2 5 8 Repeat Layout must be...

Page 214: ...PER TRAY FOR COPYING page 2 13 Set so that there are one or more repeat faces 6 Specify the repeat partition line After the settings are completed tap and Back keys in sequence To cancel the Auto Repeat setting Tap the Off key To cancel all settings Tap the CA key Preview Start Back Colour Start Repeat Layout Auto Layout of Repeat Face Based on Original Paper Size and Ratio Others Off Fixed Repeat...

Page 215: ...on the document glass AUTOMATIC DOCUMENT FEEDER page 1 77 DOCUMENT GLASS page 1 79 2 Tap the Detail key to change to normal mode Changing mode from each mode page 2 5 3 Tap the Others key and then tap the Repeat Layout key 4 Tap the Fixed Repeat key 5 Tap the Original and Paper Select keys to select an original size and a paper size respectively SELECTING THE ORIENTATION AND SIZE OF THE ORIGINAL p...

Page 216: ...tap and Back keys in sequence To cancel the fixed repeat setting Tap the Off key To cancel all settings Tap the CA key 8 Tap the Colour Start or B W Start key to start copying 1 Tap the Detail key to change to normal mode Changing mode from each mode page 2 5 2 Tap the Others key and then tap the Repeat Layout key 3 Tap the Photo Repeat key 4 Place the original on the document glass Preview Start ...

Page 217: ...ic calculation result is shown as the copy ratio When you tap the Up to 57x95mm Card key on the Original screen you can select the A4 paper size only To cancel the photo repeat setting Tap the Off key To cancel all settings Tap the CA key 7 Tap the Colour Start or B W Start key to start copying Repeat Number Preview Start Back Colour Start Repeat Layout Auto Layout of Repeat Face Based on Original...

Page 218: ...ET Copies made by Booklet can be folded at the centre to create a booklet This function is convenient for arranging copies into an attractive booklet or pamphlet Booklet copy using 8 original pages Binding side OTHER FUNCTIONS Other functions cannot be selected in easy mode 7 6 5 4 3 2 7 2 5 3 7 5 4 Originals Staple to create a booklet 7 2 7 5 3 5 4 7 2 7 5 3 4 5 Left Binding Right Binding ...

Page 219: ...ice Control Automatic Saddle Stitch This is used to activate Saddle Stitch automatically when Booklet is enabled when a saddle stitch finisher is installed To make pamphlet copies without stapling when the Automatic Saddle Stitch option is ON tap the Staple Sort key Then select Booklet and tap the Off key on the saddle stitch screen 1 Place the original Place the original in the document feeder tr...

Page 220: ...input tray Tap the Paper Tray key to display the tray selection screen Tap the cover input tray on the tray selection screen For more information see SELECTING THE PAPER TRAY FOR COPYING page 2 13 If the cover will be copied on label sheets transparency film and tab paper cannot be used To cancel all settings Tap the CA key 6 Tap the Colour Start or B W Start key to start copying ...

Page 221: ...he first page to the last page The order of copying will be automatically adjusted by the machine Eight or 16 original pages will be copied onto each sheet of paper Blank pages will be automatically produced at the end if the number of original pages is not a multiple of eight 1 Place the original Place the original in the document feeder tray of the automatic document feeder or on the document gl...

Page 222: ...opy on a cover sheet check the Make Copy on Cover Duplex box so that appears If the cover will be copied on label sheets transparency film and tab paper cannot be used To cancel all settings Tap the CA key 6 Tap N Up on the action panel 7 Tap the key of the N Up sheets you wish to use If needed the images will be rotated To cancel the N Up setting Tap the Off key 8 Select the layout Preview Start ...

Page 223: ...heet After the settings are completed tap twice and Back keys in sequence To cancel all settings Tap the CA key 10 Tap the Colour Start or B W Start key to start copying Additional Scan Start CA Back Colour Start N Up Select Original Type to Arrange in 1 Page Others Off 4 Up 8 Up 2 Up Layout Border Original Off B W ...

Page 224: ...t the end if the total number of original pages is not a multiple of four This function can be combined with saddle stitch or fold if a saddle stitch finisher is installed When the book copy function is selected 2 sided copying mode is automatically selected When settings are selected that prevent 2 sided copying the book copy function cannot be used 1 Place the original on the document glass Plac...

Page 225: ...be used This setting is not available when the covers inserts function is disabled in the setting mode 5 Tap the Colour Start or B W Start key to scan the first original page Scanning of the original starts 6 Place the next opened original pages and tap the Colour Start or B W Start key Tap the same key you tapped in step 5 Repeat this step until all original pages have been scanned Scan the remai...

Page 226: ...ass is not available for this function 1 Tap the Others key and tap the Book Divide key 2 Select the binding edge of the pamphlet original Check the preview image displayed in the screen and make sure that the binding edge is correct To cancel the Book Divide setting Tap the Off key To cancel all settings Tap the CA key 3 Tap the Colour Start or B W Start key to start copying Start Back Colour Sta...

Page 227: ...e is blank is scanned blank pages are skipped for 2 sided copying Depending on the original some pages that are not blank may be detected as blank pages and thus not being copied and some pages that are blank may not be detected as blank and thus copied 1 Place the original Place the original in the document feeder tray of the automatic document feeder or on the document glass AUTOMATIC DOCUMENT F...

Page 228: ...C For example if five original sheets that include two blank pages are scanned by duplex scanning A will show 5 B will show 10 and C will show 8 Start Back Colour Start Others Preview Change Size Direction Original 2 Sided Copy Colour Mode Put Multiple Pages in A Page N Up Erase Shadow Around Erase Blank Page Skip Off Skip Blank Page Skip Blank and Back Shadow CA B W Start Colour Start Others Plai...

Page 229: ...e slider to adjust the range to be suppressed After the settings are completed tap and Back keys in sequence To cancel the Background Adjustment setting Tap the Off key Adjust light areas in this way Level makes the background darker makes the background lighter Level Others Background Adjustment Adjust Original Background Darkness Preview Start Colour Start Off On Touch darken background Touch er...

Page 230: ... the original in the document feeder tray of the automatic document feeder or on the document glass AUTOMATIC DOCUMENT FEEDER page 1 77 DOCUMENT GLASS page 1 79 To cancel all settings Tap the CA key 4 Tap the Colour Start or B W Start key to start copying ...

Page 231: ...oth 2 sided printing and staple function are enabled the proof copy will be printed after the job in progress is finished If the End key is tapped to execute printing of the remaining sets while the machine is printing another job the remaining sets will be printed after all previously reserved jobs are completed 1 Tap the Others key and tap the Proof Copy key A checkmark appears on the icon After...

Page 232: ... sets can be set If an incorrect number of copies is set Tap the C key and enter the correct number 5 Tap the Colour Start or B W Start key Make only one set of copies Start Colour Start Colour Mode Full Colour Paper Select Auto Exposure Auto Original Auto A4 2 Sided Copy 1 Sided 1 Sided Sort Group Auto Copy Ratio 100 Others Send as well as print Scan Original Again Without change Settings Store D...

Page 233: ... the number of scanned original sheets not the number of scanned original pages For example when 2 sided copying is performed using one original the number 1 will appear to indicate that one original sheet was scanned not 2 to indicate the front side page and the reverse side page Original Count must be specified before scanning the original 1 Tap the Others key and tap the Original Count key A ch...

Page 234: ...e front side page and the reverse side page If the displayed number of original sheets is different from the actual number of sheets Tap the Cancel key to stop the job 5 Tap the OK key to start copying If this function is combined with Job Build the count result is displayed after the Read End key has been tapped Start Colour Start Colour Mode Full Colour Paper Select Auto Exposure Auto Original A...

Page 235: ...umber can be used for both machines In this situation A saddle stitch finisher is installed in the master machine while not installed in a client machine Tandem Copy is enabled when specifying copies without stapling Tandem Copy is disabled when specifying copies with stapling As shown here if Tandem Copy is enabled using a function provided in the master machine and not provided in a client machi...

Page 236: ...ies sets can be set The specified number of copies are shared between the master and client machines If the number of copies is odd the master machine makes more copies than the client machine If an incorrect number of copies is set Tap the C key and then enter the correct number To cancel all settings Tap the CA key 4 Tap the Colour Start or B W Start key to start copying To cancel Tandem Copy Ta...

Page 237: ...ed eco recommendation settings appear The displayed functions are as follows 2 Sided Copy page 2 17 N Up page 2 49 B W Copy page 2 20 Image Orientation page 2 33 This function does not operate in easy mode To use the eco recommendation function display Settings administrator System Settings Energy Save Eco Setting Eco Recommendation Function Display ...

Page 238: ...case adjust the contrast by selecting the Hidden Pattern Print Setting from the Settings administrator When copying an output sheet with a hidden pattern print the hidden pattern may not emerge depending on settings other than Hidden Pattern Print The hidden pattern may not emerge on copies with certain types of devices or under certain setting conditions used to copy an output sheet with a hidden...

Page 239: ...tents Setting tab The hidden pattern print preview may slightly differ from the actual pattern and exposure as the preview is used for simple pattern colour checking To cancel all settings Tap the CA key 5 Tap the Colour Start or B W Start key to start copying Others Hidden Pattern Print Preview Start Colour Start Off On Function Rev Back A3 Default Settings Print Contents Setting Print Colour Bla...

Page 240: ...ion trace information is printed at the top Trace information is printed at the top or bottom outside an image frame The information added at printing or the preview image of the account job ID and date time are displayed as shown below Account job ID 00000 Date time DD MM YYYY hh mm To configure print settings In Settings administrator select System Settings Security Settings Tracking Information...

Page 241: ...punch holes cut off part of the image The image is moved to allow space for the holes so the image is not cut off 1 1 Rotation copy cannot be used in combination with the margin shift function To change the default margin shift setting In Settings administrator select System Settings Copy Settings Condition Settings Initial Margin Shift Setting 1 Place the original Place the original in the docume...

Page 242: ...value by the numeric keys then adjust it with If you set the Adjust 2nd pg value to 1st checkbox to goes out and you can set sides 1 and 2 separately To cancel the margin shift setting Tap the Off key To cancel all settings Tap the CA key 5 Tap the Colour Start or B W Start key to start copying Others Margin Shift Preview Start Colour Start Back A3 Side 1 Adjust 2nd pg value to 1st Side 2 Change S...

Page 243: ...image where shadows tend to form but does not detect shadows and erase only the shadows When Erase is selected the orientation of the original is automatically set to portrait To change the default erase width setting In Settings administrator select System Settings Copy Settings Condition Settings Erase Width Adjustment The factory default setting is 10 mm 1 2 The changed setting is also applied ...

Page 244: ... of back face checkbox is set to the edge in the same position as on the front side will be erased 4 Specify the erase width Tap the numeric value display indicating the margin shift area on the front side or reverse side and enter the area using the numeric keys After the settings are completed tap and Back keys in sequence To quickly set the area first specify a value close to the desired value ...

Page 245: ...ginal output image is displayed on the page Tap OK When you have finished selecting other settings tap the Back key To cancel the full bleed copy setting Tap the Full Bleed Copy key to uncheck it 2 Place the original AUTOMATIC DOCUMENT FEEDER page 1 77 DOCUMENT GLASS page 1 79 3 Select paper larger than the output image SELECTING THE PAPER TRAY FOR COPYING page 2 13 SPECIFYING A TYPE AND SIZE OF P...

Page 246: ... original When the original size or the paper size is displayed as a special size this function cannot be used This function cannot be used in combination with an enlargement setting If enlargement of 101 or more is selected the enlargement is automatically returned to 100 1 Tap the Others key and tap the Centring key A checkmark appears on the icon After the settings are completed tap the Back ke...

Page 247: ...iginal 1 Copy the original that you want to use for Move Copy Copying is performed without using move copy 2 Measure the movement amount with the top as the starting side of the output copy 3 Tap the Others key and tap the Position Image key Tap the Original key and specify the orientation of the original to have the orientation be correctly recognized Specifying the orientation of the original pa...

Page 248: ... orientation setting the starting side of the original to the top enables measurement of the movement distance in the same way as in the vertical orientation To cancel the Position Image setting Tap the Clear key 5 Place the original Place the original in the document feeder tray of the automatic document feeder or on the document glass AUTOMATIC DOCUMENT FEEDER page 1 77 DOCUMENT GLASS page 1 79 ...

Page 249: ...can be scanned for one job Copying in job build mode You must select Job Build mode before scanning the original If you needed to change all original settings change before scanning the original If the Quick File Folder of document filing mode is full copying in job build mode will be impeded Delete unnecessary files from the Quick File Folder The Job Build mode cannot be combined with other funct...

Page 250: ...ng the copy settings for each set of originals page 2 92 If you tap the Preview key you cannot scan additional pages 5 Repeat until all pages have been scanned and check the preview image in the preview screen To cancel all settings Tap the CA key 6 Tap the Read End key to start copying Indicator line Start Colour Mode Full Colour Paper Select Auto Exposure Auto Original A4 2 Sided Copy 1 Sided 1 ...

Page 251: ...orm the steps below before scanning the next set of originals in step 4 of Copying in job build mode page 2 90 A Separator Page setting cannot be changed for the second and later sets 1 Tap the Change Setting key 2 Change copy settings 3 Place the next set of originals and tap the Start key Repeat this step until all originals have been scanned ...

Page 252: ...nt sizes but have sides that are the same length The originals are inserted in the document feeder tray with the sides that are the same length aligned together on the left A3 and A4 B4 and B5 A4R and A5 11 x 17 and 8 1 2 x 11 8 1 2 x 14 and 8 1 2 x 11 R 8 1 2 x 14 and 5 1 2 x 8 1 2 8 1 2 x 13 and 8 1 2 x 11 R 8 1 2 x 13 and 5 1 2 x 8 1 2 8 1 2 x 11 R and 5 1 2 x 8 1 2 Different Width Use this set...

Page 253: ... settings as the first page 1 Tap the Others key and tap the Mixed Size Original key 2 Tap the Same Width key or the Different Width key as appropriate for the originals After the settings are completed tap and Back keys in sequence To cancel the mixed size original setting Tap the Off key 3 Place the original face up on the document glass Place the original as shown on the Mixed Size Original scr...

Page 254: ...en using the mixed size original function for originals of mixed width open the document feeder cover change the switch position and then scan the originals Switch position A is used for normal scanning and switch position B is used for mixed size original scanning When you have finished using the mixed size original function be sure to return the switch to position A B A ...

Page 255: ... the slow scan mode In Settings administrator select System Settings Common Settings Device Control Original Feeding Mode 1 Tap the Others key and tap the Slow Scan Mode key A checkmark appears on the icon After the settings are completed tap the Back key To cancel slow scan mode Tap the Slow Scan Mode key to clear the checkmark 2 Place the original in the document feeder tray of the automatic doc...

Page 256: ...and document glass After the settings are completed tap and Back keys in sequence 3 Place the original Place the original in the document feeder tray of the automatic document feeder or on the document glass AUTOMATIC DOCUMENT FEEDER page 1 77 DOCUMENT GLASS page 1 79 4 Tap the B W Start key to start copying Others Scan Resolution This setting is applied to B W copy with copy ratio set to 100 Prev...

Page 257: ...ntent that is hidden due to overlapping will not be printed Text will be printed at the preset size regardless of the copy ratio or paper size setting Text will be printed at the preset exposure regardless of the exposure setting Depending on the size of the paper some printed content may be cut off or shifted out of position Combined function name Print operation Margin Shift Together with the im...

Page 258: ...apping the Layout key allows you to check the printing position or detailed settings To cancel the text settings Tap the Cancel All key To cancel all settings Tap the CA key 5 Tap the Colour Start or B W Start key to start copying If you select colour printing tap the Colour Start key Tapping the B W Start key will print the stamp items in black and white even if colour printing is specified If co...

Page 259: ...mp Preview Start Colour Start Back A3 Change Size Direction Original Combine Registered Images Custom Image Prevent Unauthorized Copy Pattern Print Colour Mode 2 Sided Copy Put Multiple Pages in A Page N Up Copies Text Watermark Detail Layout Off Pre Set Text Direct Entry 1 4 5 6 3 2 CA B W Cancel All Others Stamp Pre Set Text Preview Start Colour Start Back A3 Change Size Direction Original Combi...

Page 260: ...akes a stamp copy as normal Job Build Makes a stamp copy as normal Tandem Copy Based on the tandem copy Covers Inserts Based on the custom image setting Separator Page Printing does not take place on separator pages Transparency Inserts Makes a stamp copy as normal N Up Makes a stamp copy by sheet Book Copy Makes a stamp copy as normal Tab Copy Makes a stamp copy as normal regardless of image shif...

Page 261: ...om stamp image is copied with the registered size The size remains unchanged even when the copy ratio is enlarged or reduced A different custom image cannot be specified for each page When you tap the B W Start key a monochrome copy is made even if you have selected a custom stamp If an image runs off of the specified paper depending on the registered size or position the excess will not be copied...

Page 262: ...red green blue cyan magenta or yellow Print Pattern Specify the image watermark print pattern Transparent Makes an original image transparent for stamp copy Overlap Hides a watermark added to an original image for stamp copy Exposure Select the exposure of a watermark from nine levels Print Page Specify a page s for stamp copy First Page or All Pages Print Position Specify a position for stamp cop...

Page 263: ...py modes below 1 sided copying of 1 sided originals To insert insertion sheets see INSERTING INSERTION SHEETS IN COPIES COVERS INSERTS page 2 112 For N Up the layout is based on the first page and excludes covers Setting conditions for each cover Resulting copies Front Cover Back Cover Not copied Not copied Inserts cover sheets at the beginning and end of copies 1 sided copy Not copied Makes a 1 s...

Page 264: ...original page for front cover and also makes a 2 sided copy on the fifth and sixth original pages for back cover 2 sided copy 1 sided copy Makes a 2 sided copy on the first and second original pages for front cover and also makes a 1 sided copy on the sixth original page for back cover 2 sided copy 2 sided copy Makes a 2 sided copy on the first and second original pages for front cover and also ma...

Page 265: ...nning of copies and makes a 2 sided copy on the fifth and sixth original pages for back cover 1 sided copy 1 sided copy Makes a 1 sided copy on the first original page for front cover and also makes a 1 sided copy on the sixth original page for back cover 1 sided copy 2 sided copy Makes a 1 sided copy on the first original page for front cover and also makes a 2 sided copy on the fifth and sixth o...

Page 266: ...opy Not copied Makes a 2 sided copy on the first and second original pages for front cover and inserts a back cover at the end of copies Not copied 1 sided copy Inserts a front cover at the beginning of copies and makes a 1 sided copy on the sixth original page for back cover Not copied 2 sided copy Inserts a front cover at the beginning of copies and makes a 2 sided copy on the fifth and sixth or...

Page 267: ...ded copy on the first and second original pages for front cover and also makes a 1 sided copy on the sixth original page for back cover 2 sided copy 2 sided copy Makes a 2 sided copy on the first and second original pages for front cover and also makes a 2 sided copy on the fifth and sixth original pages for back cover Setting conditions for each cover Resulting copies Front Cover Back Cover 2 3 4...

Page 268: ...at the beginning of copies and makes a 1 sided copy on the sixth original page for back cover The fifth original page is not copied Not copied 2 sided copy Inserts a front cover at the beginning of copies and makes a 2 sided copy on the fifth and sixth original pages for back cover 1 sided copy 1 sided copy Makes a 1 sided copy on the first original page for front cover and also makes a 1 sided co...

Page 269: ...f front and back covers When performing 2 sided copying of 2 sided originals an insertion sheet cannot be inserted between the front and reverse sides of an original This function cannot be used in combination with the saddle stitch function This setting is not available when the Covers Inserts is disabled in Settings 1 Place the original in the document feeder tray of the automatic document feede...

Page 270: ...on tab paper can be inserted To cancel cover sheet insertion Tap the Off key To cancel the front cover back cover and insertion sheet settings at the same time Tap the Cancel All key To cancel all settings Tap the CA key 6 Tap the Colour Start or B W Start key to start copying Others Covers Inserts Preview Start Colour Start Back A3 Change Size Direction Original Colour Mode Put Multiple Pages in ...

Page 271: ...s are inserted into six 1 sided originals or three 2 sided originals using two copy modes 1 sided original copying When inserting covers see INSERTING COVERS IN COPIES COVERS INSERTS page 2 104 Insertion sheet setting conditions Resulting copies Insert an insertion sheet in 1 sided copy mode Insert an insertion sheet in 2 sided copy mode Not copied Inserts an insertion sheet between the second and...

Page 272: ...1 sided or 2 sided copying and select the number of copies and any other desired copy settings When these settings have been completed perform the procedure to select covers inserts The insertion sheet size must be the same as the copy size Up to 100 insertion sheets can be inserted The document glass is not available for this function Take care that two insertion sheets cannot be inserted into th...

Page 273: ...ITING AND DELETING THE PAGE LAYOUT OF COVERS AND INSERTION SHEETS PAGE LAYOUT page 2 116 To cancel insertion sheets Tap the Cancel All key 6 Tap the Change key Others Covers Inserts Preview Start Colour Start Back A3 Change Size Direction Original Colour Mode 2 Sided Copy Staple Register This Function in Favorite Put Multiple Pages in A Page N Up Insert Sheet Back Cover Front Cover Page Layout Pap...

Page 274: ...n tab paper tap the Tab Copy key COPYING CAPTIONS ONTO TAB PAPER TAB COPY page 2 119 When copying on both sides of an insertion sheet you cannot use label sheets transparency films or tab paper for insertion If not copied on tab paper can be inserted To cancel all settings Tap the CA key 8 Tap the Colour Start or B W Start key to start copying Others Covers Inserts Insertion Type A Preview Start C...

Page 275: ... Amend key 4 Change cover or insertion sheet settings For the cover you can change the copy mode You can change the page number you want to insert an insert sheet into After the settings are completed tap the key multiple times to return to the Others screen Then tap the Back key Others Covers Inserts Preview Start Colour Start Back A3 Change Size Direction Original Colour Mode Insert Sheet Back C...

Page 276: ...ed 1 Sided mode can be used The number of copies cannot be selected in this mode Transparency film must be loaded in the bypass tray 1 Place the transparency film face down in the bypass tray and load transparency film sheets After loading the transparency film configure the bypass tray settings MAKING COPIES USING THE BYPASS TRAY page 2 39 2 Place the original Place the original in the document f...

Page 277: ...ncel the transparency inserts setting Tap the Off key To cancel all settings Tap the CA key 5 Tap the Colour Start or B W Start key to start copying Others Preview Start Colour Start Back A3 Off On Also Make Copy on Inserts Transparency Inserts Inserts Paper Tray Tray 1 A4 Bypass Colour Mode Put Multiple Pages in A Page N Up Change Size Direction Original Shift Position to Have Margin Margin Shift...

Page 278: ...copying with a left binding Originals Placing the originals Loading tab paper GHI DEF ABC GHI DEF ABC ABC Prepare originals that match the tab positions The image is shifted by the width of the tab 1 Originals Final image 1 Document feeder tray Insert the originals so that the side with no tab text enters first Side 2 Load the tab paper so that the tab on the first sheet is toward you 1 Document g...

Page 279: ... select System Settings Copy Settings Condition Settings Initial Tab Copy Setting The factory default setting is 10 mm 1 2 1 Tap the Others key and tap the Tab Copy key 2 Tap the On key 1 Originals Final image 1 Document feeder tray Insert the originals so that the side with no tab text enters first Side 2 Load the tab paper so that the tab on the first sheet is away from you 1 Document glass Plac...

Page 280: ... paper into the bypass tray configure the bypass tray settings as explained in MAKING COPIES USING THE BYPASS TRAY page 2 39 The width of the tab paper can be as wide as A4 width 210 mm plus 20 mm or 8 1 2 x 11 paper 8 1 2 plus 5 8 5 Place the original and tap the Preview key Place the original in the document feeder tray of the automatic document feeder or on the document glass AUTOMATIC DOCUMENT...

Page 281: ...be created at the leading and trailing edges of each copy The paper size number of sheets required for the enlarged image and the ratio are automatically selected based on the selected original size and enlargement size The paper size and ratio cannot be selected manually 1 Tap the Others key and tap the Multi Page Enlargement key 2 Select the AB or Inch tab to meet the original size for multi pag...

Page 282: ...ng is cancelled the automatically selected ratio is retained To return the ratio to 100 Tap the Copy Ratio key on the base screen to display the ratio menu and then tap the 100 key 4 Place the original on the document glass based on the orientation displayed on the screen 5 Tap the Colour Start or B W Start key to start copying Others Preview Start Colour Start Back Multi Page Enlargement AB Inch ...

Page 283: ...mage key A checkmark appears on the icon After the settings are completed tap the Back key To cancel the mirror image setting Tap the Mirror Image key to uncheck it 2 Place the original Place the original in the document feeder tray of the automatic document feeder or on the document glass AUTOMATIC DOCUMENT FEEDER page 1 77 DOCUMENT GLASS page 1 79 3 Tap the Colour Start or B W Start key to start...

Page 284: ...inal Type setting for exposure adjustment automatically changes to Text This function is not available in some countries and regions When this function is selected you cannot use the Colour Start key 1 Tap the Others key and tap the B W Reverse key A checkmark appears on the icon After the settings are completed tap the Back key To cancel the B W reverse setting Tap the B W Reverse key to uncheck ...

Page 285: ...adjustment setting Tap the Off key 3 Place the original Place the original in the document feeder tray of the automatic document feeder or on the document glass AUTOMATIC DOCUMENT FEEDER page 1 77 DOCUMENT GLASS page 1 79 To cancel all settings Tap the CA key 4 Tap the Colour Start or B W Start key to start copying Others Preview Start Colour Start Back Quick Image Quality Adjustment Adjust Colour...

Page 286: ...ustment of the first colour is cancelled To cancel the RGB adjust setting Tap the Off key 4 Place the original Place the original in the document feeder tray of the automatic document feeder or on the document glass AUTOMATIC DOCUMENT FEEDER page 1 77 DOCUMENT GLASS page 1 79 To cancel all settings Tap the CA key 5 Tap the Colour Start key to start copying R Red G Green B Blue Others Preview Start...

Page 287: ...ted tap and Back keys in sequence To cancel the sharpness setting Tap the Off key 3 Place the original Place the original in the document feeder tray of the automatic document feeder or on the document glass AUTOMATIC DOCUMENT FEEDER page 1 77 DOCUMENT GLASS page 1 79 To cancel all settings Tap the CA key 4 Tap the Colour Start or B W Start key to start copying Softer Sharper Others Preview Start ...

Page 288: ...hree ranges and you can adjust the density of each range If needed you can also adjust all three density ranges at once Colour Balance must be specified before scanning the original To change the default colour balance setting Change the setting in Settings administrator System Settings Image Quality Adjustment Copy Image Quality Colour Balance Colour or Colour Balance Black White 1 Tap the Others...

Page 289: ...return to their default colour balance values To return all colour balances to defaults Tap the Cancel All key The default settings are the values set in Settings administrator System Settings Image Quality Adjustment Copy Image Quality Colour Balance Colour or Colour Balance Black White 4 Place the original Place the original in the document feeder tray of the automatic document feeder or on the ...

Page 290: ...ghtness setting Tap the Off key 3 Place the original Place the original in the document feeder tray of the automatic document feeder or on the document glass AUTOMATIC DOCUMENT FEEDER page 1 77 DOCUMENT GLASS page 1 79 To cancel all settings Tap the CA key 4 Tap the Colour Start key to start copying Dark Originals Light Others Preview Start Colour Start Back Brightness This setting is only applied...

Page 291: ... sequence To cancel the Intensity setting Tap the Off key 3 Place the original Place the original in the document feeder tray of the automatic document feeder or on the document glass AUTOMATIC DOCUMENT FEEDER page 1 77 DOCUMENT GLASS page 1 79 To cancel all settings Tap the CA key 4 Tap the Colour Start key to start copying Weakening the intensity Originals Strengthening the intensity Others Prev...

Page 292: ...ction or N Up setting If any of these functions are necessary use the automatic document feeder 1 Tap the Interrupt key The interrupt mode screen appears If user authentication is specified Tap the Interrupt key to display the user authentication screen Enter the user name and password to perform user authentication 2 Place the original Place the original in the document feeder tray of the automat...

Page 293: ...FUNCTIONS 4 Tap the Colour Start or B W Start key to start interrupt copying When the interrupt copy job is completed the interrupted job will resume The interrupt copy function does not display the preview of the scanned original ...

Page 294: ...ok ADDRESS BOOK SCREEN page 1 91 After you have selected the recipient tap the Enter Address key You cannot use the soft keyboard to enter an address If you cannot find the recipient in the address book enter it in the address book 4 Place the original Place the original in the document feeder tray of the automatic document feeder or on the document glass AUTOMATIC DOCUMENT FEEDER page 1 77 DOCUME...

Page 295: ...r some settings may be unavailable depending on the function When you use the automatic document feeder you can preview the scanned original by tapping the Preview key 6 Tap the Colour Start or B W Start key to start copying After the copy the transmission starts After the copy you cannot preview the settings before transmission ...

Page 296: ...3 PRIORITY PROCESSING OF A RESERVED JOB page 1 84 CHECKING A RESERVED JOB OR THE JOB IN PROGRESS page 1 86 CHECKING COMPLETED JOBS page 1 87 Start Colour Start Preview Colour Mode Full Colour Paper Select Auto Exposure Auto Original Auto A4 2 Sided Copy 1 Sided 1 Sided Sort Group Auto Copy Ratio 100 Others Plain Send as well as print Call Eco Program Store Data in Folder File Store Data Temporaril...

Page 297: ...h holes for filing Programs cannot be stored in easy mode When a job program is not stored When a job program is stored Set reduction from A3 11 x 17 to A4 8 1 2 x 11 Change the exposure setting Set 2 sided copying Set margins Set punch hole settings Tap the Colour Start or B W Start key Retrieve the stored program Tap the Colour Start or B W Start key Considerable time is required to copy the dra...

Page 298: ... unused key A key with a program stored is displayed in colour Tap a key with no program stored If you do not set a name for the program a serial number will be automatically assigned as the name 4 Set a name for the program and tap the OK key A registration completion message appears Start Colour Start Preview Others A3 4 1 01 02 03 04 05 06 07 08 09 10 Pre Setting Program Program Registration Se...

Page 299: ...istration is completed The number of copies cannot be stored 1 Tap Call Program on the action panel 2 Tap the key of the program you want to retrieve You can select a program key and tap Register in Favorite or Register for Home on the action panel to register a shortcut key for the selected program in the favourite or home screen A program that is already stored cannot be deleted When Settings ad...

Page 300: ...ngs are completed tap Start Colour Start Preview Others 01 03 05 07 08 Pre Setting Program Call Program Registered setting is called when touched 01 03 05 07 08 10 10 09 09 02 04 06 02 04 06 A3 4 1 No of copies Change Name Delete Register in Favorite Register for Home CA B W Start Colour Start Preview Others 01 03 05 07 08 Pre Setting Program Call Program Registered setting is called when touched ...

Page 301: ... IN OUTPUT 3 27 Eco Eco Eco Eco CONVENIENT PRINTING FUNCTIONS CONVENIENT FUNCTIONS FOR CREATING PAMPHLETS AND POSTERS 3 29 CREATE A PAMPHLET BOOKLET SADDLE STITCH 3 29 PRINTING WITH MARGIN SHIFT SETTING MARGIN 3 31 CREATE A LARGE POSTER POSTER PRINTING 3 33 FUNCTIONS TO ADJUST THE SIZE AND ORIENTATION OF THE IMAGE 3 34 ADJUST PRINT POSITION ON ODD AND EVEN PAGES SEPARATELY PRINT POSITION 3 34 ROTA...

Page 302: ...NG THE PRINT AREA ON THE PAPER PRINT AREA 3 71 PRINTING AT AN ENHANCED RESOLUTION SMOOTHING 3 72 CONVENIENT PRINTER FUNCTIONS 3 73 USING TWO MACHINES TO PRINT A LARGE PRINT JOB TANDEM PRINT 3 73 SAVING AND USING PRINT FILES DOCUMENT FILING 3 75 AUTOMATICALLY PRINT ALL STORED DATA 3 77 PRINTING AND SENDING SIMULTANEOUSLY 3 78 PRINTING WITHOUT THE PRINTER DRIVER EXTENSION OF PRINTABLE FILES 3 79 DIR...

Page 303: ...guage developed by Adobe Systems Incorporated If it is desired to use the Windows standard PS printer driver the PPD driver must be used To install the printer driver and configure settings in a Windows environment see the Software Setup Guide The User s Manual mainly uses PCL6 printer driver screens to explain how to print in a Windows environment The printer driver screens may differ slightly de...

Page 304: ... to open the printer driver properties window usually Property or Preferences may vary depending on the application The machine name that normally appears in the Printer menu is MX xxxx xxxx is a sequence of characters that varies depending on the machine model 1 Select Print from the File menu of WordPad 2 Select the printer driver for the machine and click the Preferences button The button that ...

Page 305: ...utton To select settings on other tabs click the desired tab and then select the settings PRINTER DRIVER SETTINGS SCREEN REFERRING TO HELP page 3 6 If an original size larger than the largest paper size that the machine supports is set select the paper size for printing in Output Size If an Output Size different from the Original Size is selected the print image will be adjusted to match the selec...

Page 306: ...ions related to the layout such as two sided printing and booklet Job Handling Set Document Filing and user authentication Inserts Select insertion functions such as covers inserts and tab paper Stamp Select the watermark or stamp function Image Quality Select various image quality settings Detailed Settings Select tandem print and other detailed print settings 2 Favorites Settings configured on e...

Page 307: ...of the size specified in Output Size is automatically selected The factory default setting is plain paper only When Paper Type is set to anything other than Auto Select A tray with the specified type of paper and the size specified in Output Size is used for printing Help can be displayed for a setting by clicking the setting and pressing the F1 key You can click the button in the upper right corn...

Page 308: ...d by factory default is enabled in Settings administrator set the paper type of the bypass tray to Envelope For the types of paper that can be used in the bypass tray see APPLICABLE PAPER TYPES page 1 62 For the procedure for loading paper in the bypass tray see LOADING PAPER INTO THE BYPASS TRAY page 1 71 For more information on the procedure for loading paper see SELECTING THE PAPER page 3 7 It ...

Page 309: ...ver properties window of the application select the printer driver of the machine and click the Preferences button The button that is used to open the printer driver properties window usually Property or Preferences may vary depending on the application 2 Enter your user information 1 Click the Job Handling tab 2 Enter your user information When authentication is performed by login name select Log...

Page 310: ...ing allowing you to check the settings as you save them Deleting saved settings In step 2 of USING SAVED SETTINGS page 3 11 select the user settings that you want to delete and click the Delete button 1 Select the machine s printer driver from the print window of the application and click the Preferences button The button that is used to open the printer driver properties window usually Property o...

Page 311: ...er driver from the print window of the application and click the Preferences button The button that is used to open the printer driver properties window usually Property or Preferences may vary depending on the application 2 Select favorite settings 1 Select the favorite settings you want to use 2 Click the OK button 3 Start printing 1 Right click the Start button and select Control Panel In Windo...

Page 312: ... Printer Properties In Windows Vista click the Organize menu then click Properties 4 Click the Preferences button on the General tab In Windows Vista click the Printing Preferences button on the General tab 5 Configure the settings and click the OK button For explanations of the settings see printer driver Help ...

Page 313: ... may vary depending on the application On the MX 3050N 3550N 4050N the PS3 expansion kit is required to use the machine as a printer in a Mac OS environment 1 Select Page Setup from the File menu and select the printer If the printer drivers appear as a list select the name of the printer driver to be used from the list 2 Select paper settings 1 Make sure that the correct printer is selected 2 Sel...

Page 314: ...rinting 4 Select print settings 1 Make sure that the correct printer is selected 2 Select an item from the menu and configure the settings as needed 3 Click the Print button Special media such as envelopes can also be placed in the bypass tray For the procedure for loading paper in the bypass tray see LOADING PAPER INTO THE BYPASS TRAY page 1 71 When Enable Detected Paper Size in Bypass Tray disab...

Page 315: ...loading paper see SELECTING THE PAPER page 3 14 When using media such as envelopes that can be loaded only in a specific orientation you can rotate the image 180 degrees For more information see ROTATING THE PRINT IMAGE 180 DEGREES ROTATE 180 DEGREES page 3 35 It is recommended that you carry out a test print to check the print result before using an envelope 1 FTP Print Setup 1 Select the envelop...

Page 316: ...he authentication method being used so check with the administrator of the machine before printing The menu used to execute printing may vary depending on the application To prohibit printing by users whose user information is not stored in the machine In Settings administrator select User Control Default Settings Disable Printing by Invalid User 1 In the application select Print from the File men...

Page 317: ...er 5 Enter the user name and job name as necessary User Name Enter your user name using up to 32 characters The entered user name will appear on the touch panel of the machine If you do not enter a user name your PC login name will appear Job Name Enter a job name using up to 32 characters The entered job name will appear as a file name on the touch panel of the machine If you do not enter a job n...

Page 318: ...lack and white data are printed using Y Yellow M Magenta C Cyan and Bk Black toner Black and White All pages are printed in black and white Color data such as images or materials for a presentation is printed using black toner only This mode helps conserve color toner when you do not need to print in color such as when proofreading or checking the layout of a document When Color Mode is set to Aut...

Page 319: ...3 19 PRINTER FREQUENTLY USED FUNCTIONS 1 Select Color 2 Select Color Mode Mac OS 2 1 ...

Page 320: ...550N MX 4050N 1 Click the Image Quality tab 2 Select Print Mode 1 Select Color 2 Select Print Mode 600 dpi This mode is suitable for printing data such as regular text or a table 600 dpi High Quality The print quality of color photos and text are high 1200 dpi Select this mode to print color photos with higher definition and to print fine lines clearly Windows Mac OS 2 1 1 2 ...

Page 321: ...n tab 2 Select the paper orientation 3 Select Long Edge or Short Edge Paper orientation Print results Portrait Long Edge Short Edge Landscape Short Edge Long Edge The pages are printed so that they can be bound at the left or right side The pages are printed so that they can be bound at the top Windows If necessary you can select the method of implementing 2 sided printing Click the Other Settings...

Page 322: ... machine This function is convenient when enlarging a letter or A4 size document to ledger or A3 size to make it easier to view or when printing a document on paper that is different in size from the original document The following example explains how to print a A4 or letter size document on ledger or A3 size paper Mac OS If A0 A1 or A2 size is selected in Original Size A4 or Letter is automatica...

Page 323: ...or printing from Output Size for example A3 If the output size is larger than the original size the printed image will be automatically enlarged 1 Check the paper size for the print image for example A4 2 Select Paper Handling 3 Select Scale to fit paper size 4 Select the actual paper size to be used for printing for example A3 Windows Mac OS 2 1 3 MX xxxx 2 1 3 4 ...

Page 324: ...en the print orientation is landscape 2 Up 2 pages per sheet N Up Pages per sheet Right and Down Down and Right Left and Down Down and Left 4 Up 4 pages per sheet N Up that can be set on the Layout tab can also be set on the Main tab Order can only be set in the Layout tab Note the following when printing multiple pages on one sheet The page orders for 6 Up 8 Up 9 Up and 16 Up are the same as for ...

Page 325: ... cover select the N Up with cover checkbox PCL6 only When 100 N Up is selected for jobs such as N Up copying of two A4 size pages onto one A3 sheet the pages will be printed at the full size of the original If you select Border at this time only the border will be printed 1 Select Layout 2 Select the number of pages per sheet 3 Select the order of the pages 4 If you wish to print borderlines selec...

Page 326: ... check for blank pages before printing 1 Click the Detailed Settings tab 2 Select On in Disable Blank Page Print This function is available in a Windows environment Depending on the state of the original some pages that are not blank may be detected as blank pages and thus not being printed or some pages that are blank may not be detected as blank and thus printed In N Up Print blank pages are not...

Page 327: ... function An inner finisher finisher large stacker or saddle stitch finisher large stacker is required to use the stapleless staple function To use the punch function installing a punch module in the inner finisher finisher finisher large stacker saddle stitch finisher or saddle stitch finisher large stacker The number of holes that can be punched and the spacing between the holes varies depending...

Page 328: ...the punch function select the type of punch in the Punch menu and the punch position in the Position menu 1 Select Printer Features 2 Select Binding Edge 3 Select the staple function or the punch function For the staple function select the number of staples in the Staple menu For the punch function select the type of punch in the Punch menu Windows In addition to the Finishing tab Staple can also ...

Page 329: ...selected the printed image will be enlarged or reduced to fit the size selected in Fit To Paper Size By selecting a paper size that is larger than the print image you can cut off the edges of the paper after making the booklet to create a booklet with no margins When the number of output pages will exceed the number of sheets that can be stapled you can select the Split checkbox to divide the outp...

Page 330: ...ING FUNCTIONS If a saddle stitch finisher is installed 4 Click the Finishing tab 5 Select Saddle Stitch from Staple 1 Select Printer Features 2 Select Binding Edge 3 Select Saddle Stitch 4 Select Booklet or 2 Up Mac OS 5 4 2 3 1 4 ...

Page 331: ... also be used together This is convenient when you wish to staple or punch the output but the binding area overlaps the text By shifting the image the part of the image that is outside the print area will not be printed 1 Click the Layout tab 2 Click the Print Position button 3 Select Margin Shift 4 Select the shift width Select from the Margin Shift menu If you wish to configure another numeric s...

Page 332: ...3 32 PRINTER CONVENIENT PRINTING FUNCTIONS 1 Select Printer Features 2 Select Binding Edge 3 Select Margin Shift Mac OS 2 1 3 ...

Page 333: ...er to create a large poster To enable precise alignment of the edges of the sheets during attachment borderlines can be printed or overlapping edges can be created overlap function 1 Click the Layout tab 2 Select the number of sheets to be used in Poster Printing If you wish to print borderlines and or use the overlap function click the corresponding checkboxes so that the appears This function is...

Page 334: ... This function sets different print positions margins separately for odd and even pages and prints the pages 1 Click the Layout tab 2 Click the Print Position button 3 Select Custom 4 Set the amount of shifting of the print position for odd numbered pages and even numbered pages 5 Click the OK button This function is available in a Windows environment Windows 2 1 3 4 5 ...

Page 335: ... degrees so that it can be printed correctly on paper that can be loaded in only one orientation such as envelopes or paper with punch holes 1 Click the Main tab 2 Select Portrait Rotated or Landscape Rotated in Orientation 1 Select Layout 2 Select the Reverse page orientation checkbox so that appears Windows Mac OS ABCD ABCD 2 1 2 1 ...

Page 336: ...ightly reducing an image 1 Click the Main tab 2 Click the Zoom checkbox so that appears and click the Settings button 3 Enter the percentage By clicking the button you can specify the value in increments of 1 In addition select Upper Left or Center for the base point on the paper 4 Click the OK button When using the PS printer driver Windows you can set the width and length percentages separately ...

Page 337: ...3 37 PRINTER CONVENIENT PRINTING FUNCTIONS 1 Select Page Setup from the File menu and enter the ratio 2 Click the OK button Mac OS MX xxxx 2 1 ...

Page 338: ...th as necessary 1 Click the Image Quality tab 2 Click the Line Width button 3 Set the line thickness and click the OK button This function is available in a Windows environment This function can be used when the PCL6 printer driver is used When printing from an application that processes lines as raster graphics line widths cannot be adjusted Windows The units of line width adjustment can be set t...

Page 339: ...t correctly you can make the lines thicker 1 Click the Detailed Settings tab 2 Click the Other Settings button 3 Select the Thicken Fine Lines checkbox This function is available in a Windows environment This function can be used when the PCL6 printer driver is used Normally this setting is not necessary Windows 2 3 1 ...

Page 340: ...k print or other printing medium 1 Click the Detailed Settings tab 2 If you wish to reverse the image horizontally select Horizontal If you wish to reverse the image vertically select Vertical 1 Select Layout 2 Select the Flip horizontally checkbox In a Windows environment this function is only available when using the PS printer driver Windows Mac OS This function cannot be used in Mac OS X 10 4 ...

Page 341: ...rections even if image editing software is not installed on your computer 1 Click the Image Quality tab 2 Click the Color Adjustment button When using the PS printer driver click the RGB Adjustment button Proceed to step 4 3 To adjust objects text graphics photos individually select the Adjust at each object checkbox and select the object 4 Drag the slide bar or click buttons to adjust the image I...

Page 342: ...CONVENIENT PRINTING FUNCTIONS 1 Select Color 2 Click the Color Adjustment button 3 Select the Color Adjustment checkbox and adjust the color settings Adjust each setting value by dragging the slide bar Mac OS 2 1 3 ...

Page 343: ...e faint and difficult to see when printed in grayscale 1 Click the Image Quality tab 2 Select the Text To Black checkbox and or the Vector To Black checkbox so that appears When Text To Black is selected all text other than white text is printed in black When Vector To Black is selected all vector graphics other than white lines and areas are printed in black Raster data such as bitmap images cann...

Page 344: ...ntent The selections below provide the ability to modify color image processing to suit specific preferences Color matching method Method of color converting RGB colors on the display etc into CMYK colors in the printer Output Profile Select a color profile for the image to be printed CMYK Correction 1 Correct the image to obtain the optimum printing result when printing a CMYK image Screening Sel...

Page 345: ...d by a scanner Colorimetric Data to be printed in colors as viewed on the screen Custom Data to be printed with special settings 3 Click the Advanced Color button and specify the settings To configure color management using the Windows OS ICM set Image Type to Custom in step 2 Then click the Windows ICM checkbox so that the checkmark appears To configure Source Profile and other detailed color man...

Page 346: ...red settings from the menus To select a CMYK Simulation setting select Custom in Image Type select the CMYK Simulation checkbox and then select the desired setting Text Data consisting mostly of text Presentation Data with many photos or illustrations Photo Photo data or data that uses photos CAD Engineering drawing data Scan Data scanned by a scanner Colorimetric Data to be printed in colors as v...

Page 347: ...rk text can be selected from the previously registered text in the list When necessary you can enter text to create an original watermark 1 Click the Stamp tab 2 Select Watermark from Stamp and click the Settings button 3 Select the watermark to be used and click the OK button Click the Edit button to edit the font color and select other detailed settings Windows If you want to create a new waterm...

Page 348: ... Watermarks 2 Click the Watermark checkbox and configure watermark settings Configure detailed watermark settings such as selection of the text and editing of the font and color Adjust the size and angle of the text by dragging the slide bar Mac OS 2 1 ...

Page 349: ...a The size position and angle of the image can be adjusted 1 Click the Stamp tab 2 Select Image Stamp from Stamp and click the Settings button 3 Select the image stamp to be used and click the OK button If an image stamp has already been stored it can be selected from the menu If you have not stored an image stamp click the Image File select the file you wish to use for the image stamp and click t...

Page 350: ... color non transparent stamp image is registered When Custom watermark is selected a single color transparent watermark image is registered This function is available in a Windows environment This function can be used when the PCL6 printer driver is used To prohibit the registration of custom images In Settings administrator select System Settings Common Settings Enable Disable Settings Disabling ...

Page 351: ...he need for complex manipulations Creating an overlay file 1 Open the driver properties window from the application that is used for creating overlay data 2 Click the Stamp tab 3 Click the Settings button 4 Click the New button and specify the name and folder to be used for the overlay file that you wish to create The file will be created when the settings are completed and printing is started Thi...

Page 352: ...nting with an overlay file 2 Click the Stamp tab 3 Select an overlay file A previously created or stored overlay file can be selected from the menu When printing is started a confirmation message will appear The overlay file will not be created until the Yes button is clicked When you click the Open button the existing overlay file is registered 3 2 ...

Page 353: ... You can add the number of copies to the header or footer of the print data You can also set a copies number and print position 1 Click the Stamp tab 2 Click the Copies Stamp button 3 Select the settings and click the OK button This function is available in a Windows environment 2 1 3 ...

Page 354: ... different paper type at specified pages As necessary paper can be inserted as insertion sheets where nothing is printed In a Mac OS environment The front and back covers are printed using paper that is different from the other pages This function can be used for example when you want to print only the front cover and last page on thick paper 1 Click the Inserts tab 2 Select Covers Inserts from In...

Page 355: ... paper type for the front and back covers When Bypass Tray is selected in Paper Tray be sure to select the Paper Type and load that type of paper in the bypass tray When Other Page is selected for Insert Position specify the insert position by directly entering a page number When Printing Method is set to 2 Sided Printing the specified page and the next page after it will be printed on the front a...

Page 356: ... corresponding sheet of inserted paper 1 Click the Inserts tab 2 Select Transparency Inserts and click the Settings button Select the print setting paper tray and paper type for the front and back covers 3 Select the transparency insert settings When the Printed checkbox is selected to set to the same content as that printed on the transparency film is also printed on the insert Select the paper s...

Page 357: ... transparency insert settings When On Printed is selected from Transparency Inserts the same content as that printed on the transparency film is also printed on the insert Select the paper source and type if needed Mac OS Set the paper type of the bypass tray to Transparency and load transparency film into the bypass tray 2 1 3 ...

Page 358: ... Selection and specify the separator page position in Insert Position To add a separator page each time printing of the set number of copies is completed select Per Copies in Insert Position For example if you are printing 10 copies and you select 5 a separator page will be added after the 5th copy and after the 10th copy This function is available in a Windows environment Windows When the bypass ...

Page 359: ...d with a single selection of the print command If plain paper is loaded into tray 1 and recycled paper is loaded into tray 2 as necessary selecting Carbon Copy simultaneously prints one copy for presentation and one copy as a duplicate 1 Click the Inserts tab 2 Select Carbon Copy from Inserts Option and click the Settings button 3 Select the tray for the first copy from Top Copy and then select th...

Page 360: ...w The text will be printed on the tabs Tab Paper Print for PCL6 only Tab sheets are printed while they are inserted between the desired pages Select Tab Paper in Inserts Option on the Inserts tab of the printer driver properties window and enter the text that you want to print on the tabs Specify the detailed settings such as the size of the tabs the starting position the distance between tabs and...

Page 361: ... Print Position button 3 Select Tab Shift 4 Specify the distance of shifting the image by directly entering a value or by clicking the button 5 Click the OK button 6 Select the paper source and type Click the Paper Source tab and select Bypass Tray in Paper Tray and Tab Paper in Paper Type Windows Set the paper type of the bypass tray to Tab Paper and load tab papers into the bypass tray 2 1 3 4 6...

Page 362: ...f tab paper the position of the first tab the distance between tabs and the horizontal and vertical dimensions of the tab can be directly entered or changed using the button In addition select the size of the tab paper from Output Size 4 Select the page settings Specify the pages where you wish to insert tab paper and enter the text that you wish to print on the tabs Also select the font and adjus...

Page 363: ...de of the next sheet even if it would normally be printed on the reverse side of the paper Example When pages 4 and 8 are specified as page settings Back is blank 1 Click the Layout tab 2 Select the 2 Sided Printing For information on the 2 Sided Printing setting see 2 SIDED PRINTING page 3 21 3 Enter the page numbers of the initial pages of the chapters separating the numbers with commas This fun...

Page 364: ...g tab 2 Select Half Fold in Fold and click the Settings button 3 Select the desired folding method This function cannot be used when Common Settings in Settings administrator Device Control Disabling of Duplex is selected When printing data in a pamphlet layout the Booklet function can be used to conveniently fold and staple printed output to create a pamphlet See CREATE A PAMPHLET BOOKLET SADDLE ...

Page 365: ...3 65 PRINTER CONVENIENT PRINTING FUNCTIONS 1 Select Printer Features 2 Select Paper Folding Settings 3 Select the desired folding method Mac OS 2 1 3 ...

Page 366: ... page 1 Click the Stamp tab 2 Click the Settings button 3 Select Page Interleave from the Printing Method 4 Set the overlay data to be inserted and set its insertion position This function is available in a Windows environment This function can be used when the PCL6 printer driver is used Windows You have to create page data to be inserted in advance For the procedure for creating page data see Cr...

Page 367: ...his function prints the same image in tile pattern on a sheet This is useful for producing name cards and stickers 1 Click the Main tab 2 Select the repeat count in N Up This function is available in a Windows environment This function can be used when the PCL6 printer driver is used Windows 2 1 ...

Page 368: ...prevent information from being leaked through unauthorized document copying 1 Click the Stamp tab 2 Click the Hidden Pattern button 3 Configure the settings for hidden pattern printing and click the OK button This function is available in a Windows environment This function can be used when the PCL6 printer driver is used Windows The hidden pattern printing function cannot be used when Print Mode ...

Page 369: ...conditions In Settings administrator select Security Settings Hidden Pattern Print Setting Contrast if this is the case The hidden pattern may not emerge on copies with certain types of devices or under certain setting conditions used to copy an output sheet with a pattern print When the color mode is set to Black and White or when it is set to Automatic and the original is recognized as black and...

Page 370: ...d When you print an original containing JPEG images this function allows you to select whether the images are rendered in the printer driver or the machine 1 Click the Detailed Settings tab 2 Click the Other Settings button 3 Click the Use driver to render JPEGs checkbox so that appears 4 Click the OK button This function is available in a Windows environment When images are rendered in the printe...

Page 371: ...the print area you can print on the full paper size 1 Click the Detailed Settings tab 2 Click the Other Settings button 3 Select Maximum from the Printable Area 4 Click the OK button This function is available in a Windows environment Even when the print area is maximized edges may be cut off Windows 2 1 3 4 ...

Page 372: ...ING Resolution enhancement techniques RETs are used to smoothen the outlines of images The images are printed at a digitally enhanced resolution 1 Click the Image Quality tab 2 Select the Smoothing checkbox so that appears This function is available in a Windows environment Windows 2 1 ...

Page 373: ...ent machine configured in System Settings in Settings administrator Common Settings Device Control Tandem Connection Setting must be registered in the printer driver In a Windows environment this is accomplished automatically by clicking the Auto Configuration button on the Configuration tab of the printer driver In Mac OS 10 4 to 10 8 this is accomplished automatically by clicking the Update butt...

Page 374: ...an be used only when the printer driver has been installed using Custom Installation with LPR Direct Print Specify Address Auto Search selected and with the Yes checkbox selected for Do you want to use Tandem Print function Mac OS To use the tandem print function you must select the protocol to be used as instructed in the message that appears when you add the printer driver in the Printer Setup U...

Page 375: ...e first set of copies you can print the remaining sets from the operation panel of the machine This prevents the occurrence of excessive misprints 1 Click the Job Handling tab 2 Select the function from the Document Filing 3 Select the folder for storing the file in Stored to To enter a password 5 to 8 digit number click the PIN Code checkbox so that the checkmark appears To create a public PDF fo...

Page 376: ...inistrator Document Filing If you have set a password for the custom folder enter the password 5 to 8 digit number in PIN Code on the stored to screen If you have configured to always use the force document filing function in Printing Policy on the Configuration tab you cannot clear the Document Filing checkbox When your network is IPv6 files are stored in the main folder Mac OS When Quick File is...

Page 377: ...r will be printed automatically and then deleted To use the Print All function the following steps are necessary In Settings administrator select User Control Default Settings and enable Automatically print stored jobs after login When executing document filing print in addition to the user authentication information enter the user name stored in the machine in User Name of Default Job ID in the p...

Page 378: ...ddresses click the Add All button To delete an address from the Destination list select the address and click the Delete button If you wish to delete all addresses click the Delete All button 6 Click the OK button The printer driver settings are applied to sending settings Addresses must be stored in advance in the machine For more information see ADDRESS BOOK page 1 91 You must complete the prepa...

Page 379: ...R DRIVER File Type TIFF JPEG PNG PCL PS 1 PDF Encrypt PDF Compact PDF 1 DOCX XLSX PPTX 2 Extension tiff tif jpeg jpg jpe jfif png pcl prn ps prn pdf docx xlsx pptx Even if the print result is black and white the following types of print jobs will be counted as 4 color Y Yellow M Magenta C Cyan and Bk Black print jobs When you want such jobs to be counted as black and white jobs select the black an...

Page 380: ...the FTP server To display a folder or a file in a folder tap this key A total of 100 keys of files and folders can be displayed Tap to move up one folder level When you move down a folder level by tapping a folder key appears Tap this key to return to the file or folder name selection screen Tap to switch to thumbnails Tap the File or Folder Name key to change the order of the files and folders di...

Page 381: ... below 1 Tap the HDD File retrieve key 2 Tap the Select File from USB Memory to Print key on the action panel 3 Tap the key of the file that you wish to print and tap the Change Setting to Print key on the action panel When printing multiple files tap the keys of the files you wish to print and tap the Print key on the action panel The icon appears to the left of keys of files that can be printed ...

Page 382: ...conditions in the file will be given priority 5 Tap the Start key Printing begins after the selected file is transferred 6 Remove the USB memory device from the machine To register a network folder In Settings administrator select System Settings Printer Settings Direct Print Settings Network Folder Administrator rights are required Up to 20 network folders can be registered Printing from a networ...

Page 383: ...ion panel When printing multiple files tap the keys of the files you wish to print and tap Print on the action panel The icon appears to the left of keys of files that can be printed The icon is displayed to the left of keys of folders in the network folder To display a folder or a file in a folder tap this key A total of 100 keys of files and folders can be displayed Tap to move up one folder lev...

Page 384: ...a user name and password check with your server administrator and enter the appropriate user name and password 3 Tap the key of the network folder that you wish to access Access the network folder For the procedure for printing see steps 4 to 6 of Printing a file in the network folder you have configured in the machine s settings page 3 82 Tap the icon and enter a keyword to search for a workgroup...

Page 385: ...E MAIL PRINT If you configure your e mail account in the machine the machine periodically checks your mail server and automatically prints received e mail attachments without using the printer driver If you selected a PS or PCL file that includes print conditions the print conditions in the file will be given priority When user authentication is enabled in the settings of the machine the print fun...

Page 386: ... File is ON When both are ON this is disabled Function Command name Values Copies COPIES 1 to 999 Staple 1 STAPLEOPTION NONE ONE TWO SADDLE STAPLELESS Punch 2 PUNCH OFF ON Collate COLLATE OFF ON 2 sided Print DUPLEX OFF TOP LEFT RIGHT Account Number 3 ACCOUNTNUMBER Number 5 to 8 digits File Format 4 LANGUAGE PCL PCLXL POSTSCRIPT PDF TIFF JPG DOCX XLSX PPTX PNG Paper PAPER Paper that can be used A4...

Page 387: ...tatus display and tap the Print tab 2 Tap the Spool key When the list contains an encrypted PDF file a message is displayed to indicate that an encrypted PDF file exists 3 Tap the print job key for the encrypted PDF file 4 Tap the Enter Password for Encrypt PDF key on the action panel 5 Enter the password 32 characters or less and tap the Yes key PRINTER JOBS To print an encrypted PDF file using t...

Page 388: ...ically when paper is loaded in the machine If paper of the desired size is not immediately available you can use paper that is set in a different tray 1 Tap the job status display 2 Tap the key of the job for which Paper Empty appeared 3 Tap the Reselect Paper key on the action panel 4 Tap the key for the tray containing the paper that you wish to use and tap If you changed to a different paper si...

Page 389: ... Yes Adjust to Paper Size 3 22 Yes Yes No Yes Zoom 3 36 Yes 2 Yes Yes 2 Yes 2 2 Sided 3 21 Yes Yes Yes Yes N Up 3 24 2 4 6 8 9 16 2 4 6 8 9 16 2 4 6 9 16 2 4 6 9 16 Staple 3 3 27 Yes Yes Yes Yes Document Filing 3 75 Yes Yes No Yes Color Mode 3 18 Yes Yes Yes Yes Paper Source Output Size 3 4 Yes Yes Yes Yes Paper Tray 3 7 Yes Yes Yes Yes Paper Type 3 7 Yes Yes Yes Yes Tray Status 3 7 Yes Yes No No ...

Page 390: ...t Filing 3 75 Yes Yes No Yes Create PDF for PC Browsing 3 75 Yes No No No Print and Send 3 78 Yes No No No Notify Job End Yes Yes No No Authentication 3 9 Yes Yes No Yes Inserts Covers Inserts 3 54 Yes Yes Yes 5 Yes 5 Transparency Inserts 3 56 Yes Yes No Yes Carbon Copy 3 59 Yes Yes No No Tab Paper 3 60 Yes No No No Stamp Watermark 3 47 Yes Yes Yes Yes Image Stamp 3 49 Yes Yes No No Overlay 3 51 Y...

Page 391: ...s Yes Yes Yes Image Type 3 44 Yes Yes No Yes Advanced Color 3 44 Yes Yes No Yes Color Adjustment RGB Adjustment 3 41 Yes Yes No No 7 Font Yes Yes No No Line Width 3 38 Yes No No No Detailed Settings Mirror Image 3 40 No Yes Yes Yes 8 PS Error Information No Yes Yes No PS Pass Through No Yes No No Job Compression No Yes No No Tandem Print 3 73 Yes Yes No Yes 9 Disable Blank Page Print 3 26 Yes Yes ...

Page 392: ...indows Vista click the Start button then select Control Panel Printers In Windows 7 click the Start button select Devices and Printers right click the printer driver icon of the machine and click Printer Properties 2 Click View devices and printers in Hardware and Sound In Windows Vista click the printer driver icon of the machine 3 Click Printer Properties In Windows Vista click the Organize menu...

Page 393: ...er the main code and sub code Windows You can click Get Billing Code to get the machine s billing code list and select the billing code from the list If Use Billing Code is set to Disable in Settings administrator Billing Code Setting Administration Settings the entered billing code is disabled and is not recorded in the job log If you have started printing without specifying a billing code a use ...

Page 394: ...Network Settings so that they match the settings in Google Cloud Print IP address subnet mask default gateway IP address of DNS server Proxy server settings Configure the machine settings in the Google Cloud Print settings For the Google Cloud Print settings refer to Google Cloud Print Settings page 7 139 Print settings You can print from an application that supports Google Cloud Print Functions t...

Page 395: ...abled in the Sharp OSA application allow printing by invalid users in the application Configure the machine settings in the Mopria settings For Mopria settings refer to Mopria Settings page 7 140 Print settings You can print using the Mopria plugin Functions that can be enabled from the application are as follows Item Description Copies 1 999 Print Colour Auto Black White Colour Page Select Paper ...

Page 396: ...ATIC DOCUMENT FEEDER FOR FAXING IN DIRECT TX MODE 4 31 USING THE DOCUMENT GLASS FOR TRANSMISSION 4 33 USING THE DOCUMENT GLASS TO SEND A FAX IN DIRECT TX MODE 4 35 TRANSMISSION USING THE SPEAKER 4 37 SENDING THE SAME FAX TO MULTIPLE DESTINATIONS BROADCAST TRANSMISSION 4 38 RESENDING TO UNSUCCESSFUL BROADCAST TRANSMISSION DESTINATIONS 4 40 SENDING A FAX DIRECTLY FROM A COMPUTER PC Fax 4 42 DELETING...

Page 397: ...LING RECEPTION MANUALLY 4 97 SENDER RELATED FEATURES 4 98 ADDING YOUR SENDER INFORMATION TO FAXES FAX OWN NUMBER SENDING 4 98 TEMPORARILY CHANGING THE SENDER INFORMATION OWN NAME SELECT 4 99 ASSUMING A SPECIFIC USAGE 4 101 SPECIFYING THE TIME FOR COMMUNICATION 4 101 CHANGING THE PRINT SETTINGS FOR THE TRANSACTION REPORT TRANSACTION REPORT 4 103 POLLING MEMORY FUNCTIONS 4 105 SENDING A FAX WHEN ANO...

Page 398: ...FTER ANSWERING A CALL ON THE EXTENSION TELEPHONE REMOTE RECEPTION 4 124 MAKING AND RECEIVING PHONE CALLS 4 124 CHECK THE COMMUNICATION STATUS FAX JOBS 4 125 COMPLETED FAX TRANSMISSION RECEPTION JOBS 4 125 CHECKING IMAGE SENDING ACTIVITIES 4 126 PRINTING IMAGE SENDING ACTIVITY REPORTS 4 126 INFORMATION APPEARING IN THE RESULT COLUMN 4 126 ...

Page 399: ... telephone line socket LINE of the machine as shown and insert the other plug into a wall telephone socket Be sure to use the attached telephone line cord In some countries an adapter is required to connect the telephone line cable to the wall telephone socket as shown in the illustration If the connection cable is not properly connected Sending has failed Please check network connection will appe...

Page 400: ...g If the setting is incorrect it may result in dialling failures or cause calls to be made to the wrong destination If you want to set the type of telephone line automatically In Settings administrator select System Settings Image Send Settings Fax Settings Default Settings Dial Mode Setting and tap the Auto Select key If necessary you can set the type of telephone line manually This setting can o...

Page 401: ...RESSES THROUGH DIRECT ENTRY page 1 94 STORING ADDRESSES THROUGH GLOBAL ADDRESS SEARCH page 1 95 STORING ADDRESSES FROM FAX OR IMAGE SEND LOGS page 1 97 STORING GROUPS page 1 98 5 Storing the sender fax number Store a sender name in Sender Name and a fax number in Fax No Be sure to configure this information as it is required for communication To store the sender s name and address In Settings admi...

Page 402: ...on page 4 55 CA Preview Start Original A4 Address Fax Number Address Book Sending History Direct Entry Detail Tap this key to display the numeric keys Change the function display Immediately starts sending a fax Scans the original for preview PREVIEW SCREEN page 1 17 Change to normal mode NORMAL MODE page 4 8 Reset the address and settings Show the size of the placed original 1st screen 2nd screen...

Page 403: ...o reception memory A4 A4 0 100 Send Size Preview Speaker CA Start Space Tap to display the numeric keys Enter Fax No Finds an address Displays functions available in fax mode Scans the original for preview PREVIEW SCREEN page 1 17 Reset the address and settings Immediately starts sending a fax Used to display the address book and enter a destination Used to change fax settings Displays the list of...

Page 404: ...co Program Plain A4 Store Data in Folder File Store Data Temporarily Quick File No of copies LINE PRINTER Sharp OSA Job Status CA B W Easy Scan HDD File retrieve A4 B5 B4 A3 Colour Mode Full Colour Paper Select Auto Exposure Auto Original AutoA4 2 Sided Copy 1 1 Sort Group Auto Copy Ratio 100 Others Start Colour Start Send as well as print Call Eco Program Plain A4 A4 B5 B4 A3 Store Data in Folder...

Page 405: ...touched the PBX Setting is temporarily cancelled and the R key does not appear When the R key is touched before dialling an F code sub address and passcode cannot be used Likewise an one touch key in which an F code subaddress and passcode is stored cannot be used System Settings Administrator PBX Setting This is used to enable PBX Setting Preview Start CA Address Fax Number Exposure Auto Original...

Page 406: ...BOOK page 4 14 USING A TRANSMISSION LOG TO RESEND page 4 20 ENTERING A DESTINATION NUMBER USING THE NUMERIC KEYS page 4 13 RETRIEVING A DESTINATION FROM AN ADDRESS BOOK page 4 14 USING A SEARCH NUMBER TO RETRIEVE A DESTINATION page 4 17 RETRIEVING A DESTINATION FROM A GLOBAL ADDRESS BOOK page 4 18 USING A TRANSMISSION LOG TO RESEND page 4 20 CA Preview Start Original A4 Address Fax Number Address ...

Page 407: ...rt key When you use the automatic document feeder to scan an original you can tap the Preview key and scan to check a preview of the image When the original is placed on the document glass When sending a fax normally memory transmission Repeat the steps for placing and scanning the originals the same number of times as there are originals After scanning all originals tap the Read End key When send...

Page 408: ...s tap and enter the next fax number If you enter an incorrect number tap the C key to delete the number and re enter 1 Tap the Pause key A hyphen is entered when the Pause key is tapped once If you want to enter a pause between digits of the number Enter a pause after the number used to dial out from a PBX for example after 0 or after the country code when dialling an international number The Paus...

Page 409: ...ed in addition to fax destinations an icon indicating the mode appears together with the name of the destination in each one touch key For information on the address book see ADDRESS BOOK page 1 91 For the procedure for storing an address in the address book see STORING ADDRESSES THROUGH DIRECT ENTRY page 1 94 STORING ADDRESSES THROUGH GLOBAL ADDRESS SEARCH page 1 95 STORING ADDRESSES FROM FAX OR ...

Page 410: ...and tap the Delete key To select a destination from the transmission log tap the Sending History key USING A TRANSMISSION LOG TO RESEND page 4 20 To check the entered destinations tap the Address Review key THE SELECTED DESTINATIONS page 4 16 The destination for transmission can be selected by tapping a stored destination In normal mode Tap the one touch key and then tap Display Registered Informa...

Page 411: ...ation After the confirmation is completed tap To confirm detailed information such as the type or name of the specified destination tap the one touch key of the target destination and then tap the Info key If you placed the original on the document glass and tapped the Start key you cannot delete an address when changing settings CA Preview Start Original A4 Address Address Book Direct Entry Detai...

Page 412: ...Individual List on the action panel to print and check the address list When entering search numbers such as 0001 and 0011 0 can be omitted For example to enter 0001 enter 1 and tap Exposure Auto Original Mixed Size Orig Resolution Super Fine Job Build Original Count Slow Scan Mode Others Address Fax Number Sending History Call Search Number Call Program Call Registered settings Direct TX Verifica...

Page 413: ...3 After the settings are completed tap 3 Tap of Item and select an item to be searched from Name Address How to search Enter the search characters maximum of 64 characters The system will look for names starting with the entered letters An asterisk can be used as follows XXX Names beginning with XXX XXX Names that end with XXX XXX Names containing XXX AA XX Names that start with AA and end with XX...

Page 414: ...o check the destination information Tap the one touch key of the target destination and then tap the Info key Tap to close the address information screen When you select the destination and tap the New Registration with Address Book on the action panel the destination can be stored in the address book This is convenient if you have entered a destination directly CA Enter Initials Search Start Spea...

Page 415: ...If numeric keys were tapped during the previous transmission the number may not be redialled correctly The fax addresses below are not stored as addresses for which resend is possible One touch key for a contact in which multiple destinations are stored Group destinations Broadcasting destinations 1 In Easy mode Tap the Sending History key In Normal mode In the base screen or address book screen t...

Page 416: ...k select the address and tap New Registration with Address Book or Additional Registration with Address Book on the action panel You can select an address and tap Delete the Selected History or Delete All Histories on the action panel to delete one or all histories Speaker Start Sending History Delete All Histories Select Address to Send Again AAA AAA 1472580369 3692580147 BBB BBB 2580147369 CCC C...

Page 417: ...econds Example Using chain dialling to dial an international number Addresses that can be selected are addresses that only have one fax address saved After entering the number with the numeric keys tap the Pause key to enter the next number with the numeric keys or tap the Chain Dial key on the action panel to select an address from the address book After selecting the address from the address boo...

Page 418: ...ry USING THE AUTOMATIC DOCUMENT FEEDER FOR TRANSMISSION page 4 30 Storing a fax job If transmission cannot begin immediately because the line is in use all pages will be scanned and stored in memory If you want to attempt to send a fax while another job is in progress you can store the fax job To check the stored fax job display the job status screen FAX JOBS page 4 125 BASIC TRANSMISSION METHODS ...

Page 419: ...the machine will be busy if another fax is being sent received or if the machine is in the busy state Another fax transmission was reserved ahead of your fax One of the following functions is being used for transmission Broadcast transmission F code transmission Timer transmission Dual Page Scan Book Divide N Up Card Shot Job Build Original Count The document glass is being used except when the sp...

Page 420: ...ing rotated Rotation sending is not available for originals with A4R B5 or A5 8 1 2 x 11 or 5 1 2 x 8 1 2 size To cancel the rotation sending setting In Settings administrator select System Settings Image Send Settings Fax Settings Send Settings Rotation Sending Setting If this setting is disabled the original will be transmitted in the orientation in which it is placed Because of this some receiv...

Page 421: ... machine s paper width Reduced size Scaling A3 11 x 17 B4 B4 1 0 8 A3 11 x 17 A4 8 1 2 x 11 A4R 1 0 7 B4 A4 8 1 2 x 11 A4R 1 0 8 To cancel the Auto Reduction Sending setting In Settings select System Settings Image Send Settings Fax Settings Send Settings Auto Reduction Sending Setting If this setting is disabled the image will be sent at full size and part of the image may be cut off Minimum orig...

Page 422: ...l Original Size Detector Setting Selections Sizes detected original sizes DOCUMENT GLASS Document feeder tray automatic document feeder AB 1 A3 A4 A4R A5 B4 B5 B5R 11 x 17 8 1 2 x 14 8 1 2 x 11 A3 A4 A4R A5 B4 B5 B5R AB 2 A3 A4 A4R A5 B5 B5R 216 mm x 330 mm 8 1 2 x 13 A3 A4 A4R A5 B4 B5 B5R 11 x 17 8 1 2 x 11 216 mm x 330 mm 8 1 2 x 13 AB 3 A4 A4R A5 B4 8K 16K 16KR A3 A4 A4R A5 B4 11 x 17 8 1 2 x ...

Page 423: ...ission mode To cancel transmission Do so from the job status screen STOPPING DELETING A JOB IN PROGRESS OR RESERVED page 1 83 To set the number of recall attempts and the interval between attempts when the connection cannot be established because the line is busy or for other reasons In Settings administrator select System Settings Image Send Settings Fax Settings Send Settings Recall in Case of L...

Page 424: ... to the base screen When a fax that was selected from the Sending History has been resent A confirmation screen is displayed based on the method used to specify the destination during the previous transmission After tapping the Speaker key while Fax Dest Confirmation Mode is enabled the destination cannot be specified using the numeric keys one touch key Call Search Number key or Sending History k...

Page 425: ...inal is scanned using the document glass a preview cannot be checked To fax a thick original or other original that cannot be placed in the automatic document feeder open the automatic document feeder and place the original on the document glass If there is a fax job in progress when the transmission operation is performed the fax is transmitted when the job in progress is finished If the memory b...

Page 426: ... in the automatic document feeder open the automatic document feeder and place the original on the document glass The following functions cannot be used with direct transmission Timer Transmission N Up Card Shot Job Build Polling Memory Original Count File Quick File Memory Box Book Divide Poling 2 Sided Scan Search Global Address Book Resending will not take place when a direct transmission is no...

Page 427: ...ansmission If a fax transmission is already in progress when the direct transmission operation is performed the direct transmission will wait until the previous transmission is finished When the previous transmission is completed the direct transmission will begin While the direct transmission is waiting you can only check the job status TYPES OF JOB STATUS SCREENS page 1 81 To cancel scanning the...

Page 428: ...th an object underneath may damage the original size detector plate and prevent correct detection of the document size 1 Place the original on the document glass DOCUMENT GLASS page 1 79 When faxing a multi page original scan each page in order starting from the first page 2 Specify the destination fax number Entering a destination number using the numeric keys page 4 13 Retrieving a destination f...

Page 429: ...e 4 126 If no action is taken for one minute after the confirmation screen is displayed scanning automatically ends and the transmission is reserved The Change Setting key can be tapped if necessary to change the exposure resolution scan size and send size for each original page scanned However when N Up or Card Shot is selected in Others only the exposure can be changed when scanning an even numb...

Page 430: ...pleted the direct transmission will begin While the direct transmission is waiting the job status display can be tapped to display the job status screen No other operations are possible FAX JOBS page 4 125 The Preview key cannot be used for transmission Do not place any objects under the original size detector Closing the automatic document feeder with an object underneath may damage the original ...

Page 431: ... The destination cannot be retrieved from a global address book 5 Tap the Start key to begin transmission When the line has been connected to the destination scanning of the original starts If a fax transmission is already in progress when the direct transmission operation is performed the direct transmission will wait until the previous transmission is finished When the previous transmission is c...

Page 432: ...3 Tap the Speaker key When the connection is established you will hear the dial tone through the machine s speaker Tapping allows you to use the slider or keys to adjust the volume of the speaker 4 Specify the destination fax number Entering a destination number using the numeric keys page 4 13 Retrieving a destination from an address book page 4 14 Using a search number to retrieve a destination ...

Page 433: ...ne touch key is used to dial the number of fax numbers that are dialled is the number of destinations that are stored in the one touch key When a one touch key that has 10 destinations is used 10 fax numbers are dialled When the checkbox of Settings administrator System Settings Image Send Settings Common Settings Default Settings Address Book Default Selection Apply Addresses of Sending Modes Onl...

Page 434: ...resend page 4 20 After entering a destination using the numeric keys if you wish to enter another destination using the numeric keys tap before entering the next destination can be omitted before or after a destination entered using a one touch key If Be sure to press Next Address Key before selecting the next address is enabled in setting mode tap before specifying the next destination 3 Tap the ...

Page 435: ...t a time When scanning finishes place the next original and tap the Start key Repeat the procedure until all pages have been scanned and then tap the Read End key A beep will sound to indicate that scanning and transmission have ended When you use the automatic document feeder to scan an original you can tap the Preview key and scan to check a preview of the image For more information see CHECKING...

Page 436: ...ll return to the document filing resend screen with the unsuccessful destinations entered Perform the document filing resend procedure There is no need to re scan the original If the job was stored in a confidential folder or was stored as confidential file a password entry screen will appear after you tap the Retry key Enter the password Not using document filing You will return to the base scree...

Page 437: ... Image data for transmission will be created and sent as a fax By using the Log Viewer application faxes can be sent using the transmission log displayed in the Log Viewer For the procedures for using this function see the PC Fax driver Help To use the PC Fax function the PC Fax driver must be installed For more information see the Software Setup Guide This function can only be used on a Windows c...

Page 438: ...hers Address Fax Number Sending History Call Search Number Call Program Call Registered settings Direct TX Verification Stamp Send Same Image as Fax Address Scan Size Auto Auto reception memory A4 A4 100 Send Size Speaker Start Address Book CA Preview 100 Start Sending History New Registration with Address Book Additional Registration with Address Book Delete the Selected History Delete All Histor...

Page 439: ...umber Sending History Call Search Number Call Program Call Registered settings Direct TX Verification Stamp Send Same Image as Fax Address Scan Size Auto Auto reception memory A4 A4 100 Send Size Speaker Start Address Book CA Preview 100 Speaker Start Sending History Delete All Histories Select Address to Send Again AAA AAA 1472580369 3692580147 BBB BBB 2580147369 CCC CCC 1234567890 Direct Entry 0...

Page 440: ...ssion has ended 1 Tap the Original key and tap the Book key or Tablet key See the figure on the left to check the binding edge of the original and select the key to be tapped In normal mode tap the 2 Sided Booklet key or 2 Sided Tablet key 2 Tap the Image Orientation key with the same orientation as the placed original If this setting is not correct a suitable image may not be transmitted After th...

Page 441: ...zes page 2 11 When the original size is an inch size or a non standard size or if the size is not detected correctly manually specify the original scan size SPECIFYING THE ORIGINAL SCAN SIZE IN PAPER SIZE page 4 47 SPECIFYING THE ORIGINAL SCAN SIZE USING NUMERIC VALUES page 4 48 Exposure Address Book Auto Original Mixed Size Orig Resolution Super Fine Job Build Original Count Slow Scan Mode Others...

Page 442: ...Long Size key Use the automatic document feeder to scan a long original The maximum width that can be scanned is 1 000 mm 39 3 8 the maximum height is 297 mm 11 5 8 TRANSMITTABLE ORIGINAL SIZES page 4 26 Original Auto 2 Sided Tablet 2 Sided Booklet A4 A4 Auto Scan Size Send Size Image Orientation 100 Address Book Others Address Fax Number Dual Page Scan Divide into 2 Pages N Up Put Multiple Pages ...

Page 443: ...nter the sizes using the numeric keys It is convenient to use to finely adjust the entered size 5 Tap the OK key After the settings are completed tap twice On the base screen check that the specified size is displayed on the Original key To cancel the specified size settings Tap the Auto key Original Auto 2 Sided Tablet 2 Sided Booklet A4 A4 Auto Scan Size Send Size Image Orientation 100 Others Ad...

Page 444: ...p to 12 non standard original sizes can be stored The added original sizes will also appear in other modes 1 Tap the Detail key to change to normal mode Changing mode from each mode page 4 9 2 Tap the Original key 3 Tap the Scan Size key and tap the Custom Size tab 4 Tap Store Delete key Auto Direct Entry Inch Store Delete AB Custom Size A4 Scan Size CA Others Address Fax Number Dual Page Scan Div...

Page 445: ...ation Tap the CA key CA Others Address Fax Number Dual Page Scan Divide into 2 Pages N Up Put Multiple Pages in A Page Slow Scan Mode Scan Thin Paper Original reception memory 100 Speaker Start Address Book Preview Scan Size Store Delete Select the size key to store delete the custom original size Skip Blank Page in Original Blank Page Skip Scan Thin Paper Original Slow Scan Mode Background Adjust...

Page 446: ...om Size tab 4 Tap the key of the original size that you wish to retrieve After selecting the key of the original size tap the key Check that the specified size is displayed on the scan size screen To cancel the operation Tap the CA key Scan Thin Paper Original Slow Scan Mode Address Address Book Touch to input Address Others Store Delete Auto Scan Size Direct Entry Inch AB Custom Size X420 Y297 A4...

Page 447: ... size key After the settings are completed tap Depending on the paper size specified for the Scan Size it may not be possible to select some sizes for the Send Size You cannot tap size keys that are unavailable for the Send Size Original Auto 2 Sided Tablet 2 Sided Booklet A4 A4 Auto Scan Size Send Size Image Orientation 100 Others Address Fax Number Dual Page Scan Divide into 2 Pages N Up Put Mul...

Page 448: ...ngs Image Send Settings Common Settings Condition Settings Image Orientation in Settings administrator The ratio used for reduction or enlargement of the original will appear between the Scan Size and the Send Size Original Auto 2 Sided Tablet 2 Sided Booklet A4 A4 Auto Scan Size Send Size Image Orientation 100 Others Address Fax Number Dual Page Scan Divide into 2 Pages N Up Put Multiple Pages in...

Page 449: ...d Exposure Suggestion Auto This setting automatically adjusts the exposure for light and dark parts of the original Manual 1 2 Select this setting when the original consists of dark text 3 Select this setting for a normal original neither dark nor light 4 5 Select this setting when the original consists of light text 1 After tapping the Exposure key tap the Manual key 2 Adjust the exposure with th...

Page 450: ...t this setting when your original is a photograph or has gradations of colour such as a colour original This setting will produce a clearer image than Fine Super Fine or Ultra Fine used alone Halftone cannot be selected when Standard is used When using the automatic document feeder the resolution setting cannot be changed once scanning has begun However when Job Build or Preview Setting in Others ...

Page 451: ...nces in orientation are automatically adjusted when faxes are received When a fax smaller than A4 8 1 2 x 11 size is received the size of the paper used for printing will vary depending on the orientation vertical or horizontal in which the sender placed the original If a print job such as the copy or printer function has already been executed when printing the received data the first reserved job...

Page 452: ...until the output is removed If a PIN Code entry screen appears A PIN Code is registered to print the received fax data When the correct PIN Code is entered the received fax is printed PRINTING A PIN CODE PROTECTED FAX Hold setting for received data print page 4 59 System Information Check Fax Reception Image Check Confidential Received Data Check Error Box Release Held Received Data Terminate Remo...

Page 453: ... fax data remains unprinted it will cause the fax memory to fill up which may prevent some faxes from being received When using this function you should print the received data as soon as possible without leaving it in the fax memory You can view the remaining fax memory capacity on the fax mode base screen 2 Tap the Receive key to receive a fax When printing ends the Data Notification indicator t...

Page 454: ... or change modes The data in memory key will blink in the touch panel To enable the hold setting for received data print In Settings administrator select System Settings Image Send Settings Common Settings Condition Settings Hold Setting for Received Data Print The received faxes will be stored in memory regardless of whether they are received automatically or manually When the received data is tr...

Page 455: ... System Settings Image Send Settings Common Settings Condition Settings Preview Setting Received Data Image Check Setting is enabled If Hold Setting for Received Data Print is enabled this function is not available To print received data at the specified time In Settings select System Settings Image Send Settings Common Settings Condition Settings Time Specified Output of Received Data To disable ...

Page 456: ... shown in the job status screen that appears when you tap the job status display The received data can be forwarded deleted or saved from the received data list FORWARDING RECEIVED DATA MANUALLY page 4 69 SAVING RECEIVED DATA page 4 71 1 In the System Information tap the Event Information tab and tap the Check Fax Reception Image key The received data is listed You can also display the received da...

Page 457: ... Receive Settings Allow Reject Number Setting 3 Tap the image you wish to print and tap the Print on the action panel The machine starts printing the image Select All Page Selects all displayed images Release All Page Cancels all images that have been selected by Select All Page Use these keys to enlarge or reduce an image Rotates image counterclockwise or clockwise A preview image is an image for...

Page 458: ...transmission does not take place because the transmission was cancelled or an error occurred the fax will be held in memory until it can be printed All faxes received are forwarded Note however that faxes received and stored in an F code confidential memory box cannot be forwarded If a PIN Code entry screen appears after tapping the OK key Hold Setting for Received Data Print has been enabled Ente...

Page 459: ...has been enabled Enter the PIN Code using the numeric keys to begin forwarding PRINTING A PIN CODE PROTECTED FAX Hold setting for received data print page 4 59 Whether or not to forward data for each forwarding table can be quickly set In Settings administrator System Settings Image Send Settings Inbound Routing Forwarding Storing Settings Administration Settings Inbound Routing tap Enable Disable...

Page 460: ...atus screen tap Check Error Box on the action panel 3 Click Sender Address Registration in the Inbound Routing Forwarding Storing Settings menu in the Settings Web version 4 Enter the sender address or fax number in Internet Fax Address or Fax Number as appropriate and click the Add to List button The entered address will be added to the Address to be Entered list Enter the address directly maximu...

Page 461: ... 10 Select the file format The format can be set separately for each forwarding address for each of forwarding addresses 1 2 and 3 in the table Images forwarded in TIFF format may not be displayed correctly in some recipient environments In this event change the file format to PDF If the Internet fax address is selected as a recipient data is forwarded in TIFF regardless of the specified format If...

Page 462: ...rd or Forward received data only on specified days The forwarding permission settings that appear here are linked to the forwarding conditions set in step 9 If you wish to use different forwarding conditions than those set in step 9 set the forwarding permission settings To use the inbound routing function enable the forwarding tables that you wish to use from among the stored tables To delete a f...

Page 463: ...eive How to save received faxes to the hard disk Up to 500 files can be stored in one folder as received data The faxreceive folder contains files of Settings for HDD Storing of Received Data The folder is automatically created The file name for received data can be set in File Name Setting in Settings for HDD Storing of Received Data in Inbound Routing Storage Settings 1 In Settings administrator...

Page 464: ... Data that can be saved are received faxes and received Internet faxes Confidential reception and polling reception faxes cannot be saved Depending on the setting received faxes that cannot be saved because of the file number limit or other reason are either printed or saved in the inbound routing error box 1 In the System Information tap the Event Information tab and tap the Check Fax Reception I...

Page 465: ...iew screen To store the sender fax number as a number for Allow Reject Number Setting tap Register as Junk Fax on the action panel and in the confirmation message screen tap the Store key Specify a sender fax number as a number for Allow Reject Number Setting by selecting in Settings administrator select System Settings Image Send Settings Fax Settings Receive Settings Allow Reject Number Setting ...

Page 466: ...g mode Multiple sets of received data can be selected When you select a single received data only you can tap Check Image on the action panel and check the image on the preview screen To store the sender fax number as a number for Allow Reject Number Setting tap Register as Junk Fax on the action panel and in the confirmation message screen tap the Store key Specify a sender fax number as a number...

Page 467: ...TION When a job program is not stored When a job program is stored Enter the fax number for each branch Specify N Up Specify Erase Tap the Start key Scan and send the original Call the registered program Tap the Start key Scan and send the original Considerable time is required to send the documents each month because the above settings must be selected In addition mistakes are occasionally made w...

Page 468: ... records all sub addresses and passcodes 1 Place the original According to the function stored in the program place the original in the document feeder tray of the automatic document feeder or on the document glass AUTOMATIC DOCUMENT FEEDER page 1 77 DOCUMENT GLASS page 1 79 2 Tap Call Program on the action panel 3 Tap the desired program key 4 Configure additional settings as required Some settin...

Page 469: ...ginal on the document glass scan each page one at a time After you have scanned the last original tap the Read End key A beep will sound to indicate that scanning and transmission have ended When you use the automatic document feeder to scan an original you can tap the Preview key and scan to check a preview of the image For more information see CHECKING THE IMAGE TO BE TRANSMITTED page 4 30 ...

Page 470: ...d in direct transmission mode or when the speaker is used to dial When the scan size of the original is specified by numeric values this function cannot be used This function cannot be used together with Dual Page Scan or Card Shot 1 Place the original Place the original in the document feeder tray of the automatic document feeder or on the document glass AUTOMATIC DOCUMENT FEEDER page 1 77 DOCUME...

Page 471: ... indicate that scanning and transmission have ended When you use the automatic document feeder to scan an original you can tap the Preview key to check a preview of the image before sending a fax For more information see CHECKING THE IMAGE TO BE TRANSMITTED page 4 30 If you tap the Change Setting key on the scan confirmation screen you can change the exposure resolution scan size and send size How...

Page 472: ...s function cannot be used in direct transmission mode or when the speaker is used to dial 1 Place a card face down on the document glass DOCUMENT GLASS page 1 79 2 Enter the destination fax number Entering a destination number using the numeric keys page 4 13 Retrieving a destination from an address book page 4 14 Using a search number to retrieve a destination page 4 17 Retrieving a destination f...

Page 473: ...creen of this step appears when you tap the scan size key For the procedure for setting the send size see SPECIFYING THE SEND SIZE OF THE IMAGE page 4 52 To cancel the specified size settings tap the Reset key To cancel the Card Shot settings Tap the Off key 5 Tap the Start key and scan the front side 6 Place a card face up on the document glass and tap the Start key to scan the reverse side Befor...

Page 474: ...nal settings select the settings before scanning the original Up to 999 pages can be scanned Note that when the memory is being used for other jobs fewer pages can be scanned If the memory becomes full during scanning a message will appear and the transmission will be cancelled The scan settings can be changed for each set of originals 1 Place the original in the document feeder tray of the automa...

Page 475: ...ancel scanning Tap the CA key All settings including scanned data will be cleared 7 Tap the Read End key If no action is taken for one minute after the confirmation screen appears scanning automatically ends and the transmission is reserved To change the time until transmission takes place automatically Select Settings administrator System Settings Image Send Settings Common Settings Condition Set...

Page 476: ... cannot be specified After the original scan size has been selected Mixed Size Original cannot be specified Rotate cannot be used when Mixed Size Original is enabled This function is not available if System Settings Common Settings Device Control Original Size Detector Setting is set to AB 3 in Settings 1 Place originals in the automatic document feeder Insert the originals with the corners aligne...

Page 477: ...ge before sending a fax For more information see CHECKING THE IMAGE TO BE TRANSMITTED page 4 30 However settings for this function cannot be changed in the preview screen Exposure Auto Original Mixed Size Orig Resolution Super Fine Job Build Original Count Slow Scan Mode Others Address Fax Number Sending History Call Search Number Call Program Call Registered settings Direct TX Verification Stamp ...

Page 478: ... A4 8 1 2 x 11 x 2 pages When using dual page scan the original must be placed on the document glass This function can be enabled when the original size setting is set to Auto Note that Centre Erase and Edge Centre Erase cannot be used 1 Place the original on the document glass DOCUMENT GLASS page 1 79 Align the centre of the original with the appropriate size mark Book or bound document Two page ...

Page 479: ... the Dual Page Scan key A checkmark appears on the icon After the settings are completed tap the Back key To cancel the Dual Page Scan setting Tap the Dual Page Scan key to clear the checkmark 4 Tap the Start key to start scanning of the original Back Erase Dual Page Scan Book Divide Card Shot Timer Verif Stamp Own Name Select Transaction Report Memory Box File Quick File N Up Polling Sending Hist...

Page 480: ...et to Auto The document glass is not available for this function 1 Place the original in the document feeder tray of the automatic document feeder AUTOMATIC DOCUMENT FEEDER page 1 77 2 Enter the destination fax number Entering a destination number using the numeric keys page 4 13 Retrieving a destination from an address book page 4 14 Using a search number to retrieve a destination page 4 17 Retri...

Page 481: ... scanning of the original A beep will sound to indicate that scanning and transmission have ended Tap the Preview key to check the preview of an image before sending a fax For more information see CHECKING THE IMAGE TO BE TRANSMITTED page 4 30 However settings for this function cannot be changed in the preview screen Back Back Right Binding Tablet Left Binding Others Book Divide Select Original Bi...

Page 482: ...not detect shadows and erase only the shadows For example if you set an erase width of 10 mm 1 2 and reduce the image to 70 before transmission the erase width will be reduced to 7 mm 3 8 To change the default erase width setting Select System Settings Image Send Settings Common Settings Condition Settings Erase Width Adjustment The width can be set from 0 mm to 20 mm 0 to 1 The factory default se...

Page 483: ... side to scan a 2 sided original If the Reverse erase position of back face checkbox is set to the edge in the position opposite to the erased edge on the front side will be erased If the Reverse erase position of back face checkbox is set to the edge in the same position as on the front side will be erased 5 Specify the erase width After the settings are completed tap and Back keys in sequence Ta...

Page 484: ...n scanning finishes place the next original and tap the Start key Repeat the procedure until all pages have been scanned and then tap the Read End key When you use the automatic document feeder to scan an original you can tap the Preview key to check a preview of the image before sending a fax For more information see CHECKING THE IMAGE TO BE TRANSMITTED page 4 30 However settings for this functio...

Page 485: ...eder tray of the automatic document feeder AUTOMATIC DOCUMENT FEEDER page 1 77 Adjust the original guides slowly If the originals are inserted with too much force they may crumple and misfeed 2 Enter the destination fax number Entering a destination number using the numeric keys page 4 13 Retrieving a destination from an address book page 4 14 Using a search number to retrieve a destination page 4...

Page 486: ...of an image before sending a fax For more information see CHECKING THE IMAGE TO BE TRANSMITTED page 4 30 However settings for this function cannot be changed in the preview screen Exposure Auto Original Mixed Size Orig Resolution Super Fine Job Build Original Count Slow Scan Mode Others Address Fax Number Sending History Call Search Number Call Program Call Registered settings Direct TX Verificati...

Page 487: ...Retrieving a destination from an address book page 4 14 Using a search number to retrieve a destination page 4 17 Retrieving a destination from a global address book page 4 18 Using a transmission log to resend page 4 20 3 Tap the Original Count key A checkmark appears on the icon To cancel the original count setting Tap the Original Count key to uncheck it 4 Tap the Start key to start scanning of...

Page 488: ...n tapped If the displayed number of original sheets is different from the actual number of sheets Tap the Cancel key and then tap the OK key in the message screen to clear all scanned data Scan settings and destination settings will not be cleared Insert the original sheets in the document feeder tray again and tap the Start key to re scan Exposure Auto AAA AAA Original Mixed Size Orig Resolution ...

Page 489: ...m an address book page 4 14 Using a search number to retrieve a destination page 4 17 Retrieving a destination from a global address book page 4 18 Using a transmission log to resend page 4 20 3 Tap Verification Stamp on the action panel or Others key and tap the Verif Stamp key The appropriate icon or checkbox is selected If you tap the Others key tap the Back key after the settings have been com...

Page 490: ...erial Polling Use the manual polling reception when you must start polling after listening to a recorded greeting such as when using a fax information service Make sure there is no original in the machine when using the polling reception function The function can only be used when the other machine is Super G3 or G3 compatible and has a polling function The receiving machine bears the expense phon...

Page 491: ...ere entered Document reception by polling from multiple machines is called Serial Polling To enter multiple fax numbers tap after entering a fax number and enter the next fax number In this procedure one touch keys that have a sub address and passcode cannot be used A one touch key in which an address other than fax number is stored cannot be used 2 Tap the Others key and tap the Polling key A che...

Page 492: ...Retrieving a destination from a global address book page 4 18 Using a transmission log to resend page 4 20 One touch key for a contact or group in which multiple destinations are stored and one touch key for which an address other than fax number is stored cannot be used After tapping the Speaker key you can tap the Speaker Volume key to adjust the volume of the speaker 2 Tap the Speaker key You w...

Page 493: ...a Registration When you use the Own Number Setting always configure this information To add the number of pages to be transmitted In Settings select System Settings Image Send Settings Fax Settings Send Settings Printing Page Number at Receiver Page numbers appear in the format page number total pages Only the page number is printed when Manual Transmission or Quick On Line Sending is used To sele...

Page 494: ...feeder tray of the automatic document feeder or on the document glass AUTOMATIC DOCUMENT FEEDER page 1 77 DOCUMENT GLASS page 1 79 2 Enter the destination fax number Entering a destination number using the numeric keys page 4 13 Retrieving a destination from an address book page 4 14 Using a search number to retrieve a destination page 4 17 Retrieving a destination from a global address book page ...

Page 495: ...age one at a time When scanning finishes place the next original and tap the Start key Repeat until all pages have been scanned and then tap the Read End key A beep will sound to indicate that transmission has ended When you use the automatic document feeder to scan an original you can tap the Preview key to check a preview of the image before sending a fax For more information see CHECKING THE IM...

Page 496: ...f another transmission is in progress when the specified time arrives the timer operation will begin after that transmission is finished Only one timer polling operation can be stored at once To receive data from multiple destinations by polling specify Timer for serial polling Settings selected for a timer transmission exposure resolution other functions etc are automatically cleared after the tr...

Page 497: ...e The setting will show the current time If the time is not correct press the CA key to cancel the operation Correct the time in setting mode and then perform the timer transmission procedure BEFORE USING THE MACHINE AS A FAX page 4 4 To cancel the Timer Transmission settings Tap the Off key To set the date and time of the machine In Settings select System Settings Common Settings Clock Adjust If ...

Page 498: ... can tap the Preview key to check a preview of the image before sending a fax For more information see CHECKING THE IMAGE TO BE TRANSMITTED page 4 30 However settings for this function cannot be changed in the preview screen The original is scanned into memory The original cannot be scanned at a specified time Transaction reports are printed based on conditions set in Settings however you can temp...

Page 499: ...ission polling reception or F code transmission is used 5 Tap the Start key to start scanning of the original If you inserted the original pages in the document feeder tray all pages are scanned A beep will sound to indicate that scanning and transmission have ended When you place the original on the document glass scan each page one at a time When scanning finishes place the next original and tap...

Page 500: ...ting other machines that can use polling memory When a machine requests fax transmission you can only allow the machine to use polling memory if its programmed sender fax number matches a fax number stored in your machine as a polling passcode number This function is called Polling Security Setting To use this function first store polling passcode numbers the sender fax numbers programmed in the o...

Page 501: ...der or on the document glass AUTOMATIC DOCUMENT FEEDER page 1 77 DOCUMENT GLASS page 1 79 2 Select settings for the original to be scanned and other functions You cannot set the Program Timer Transaction Report Polling and Document Filing 3 Tap the Others key and tap the Memory Box key 4 Tap the Polling Memory tab 5 Tap the Public Box key from the folder list 6 Tap Change Number of Times on the ac...

Page 502: ... in the document feeder tray all pages are scanned When you place the original on the document glass scan each page one at a time When scanning finishes place the next original and tap the Start key Repeat the procedure until all pages have been scanned and then tap the Read End key 1 Tap the Others key and tap the Memory Box key 2 Tap the Polling Memory tab 3 Tap the Public Box key from the folde...

Page 503: ...b 3 Tap the Public Box key from the folder list 4 Tap Empty out Box on the action panel If you tap Check Image on the action panel you can check the image on the touch panel before it is erased 5 Tap the Yes key The document is deleted and you return to the screen of step 2 If you tap Check Image on the action panel you can check the image on the touch panel before it is erased To cancel the docum...

Page 504: ...dcast transmission with other machines that support F code communication An F code is specified in each communication enabling a higher level of security F code is a communication function based on the G3 standard of the ITU T PERFORMING F CODE COMMUNICATION The ITU T is a United Nations organization that establishes communications standards It is a department of the International Telecommunicatio...

Page 505: ...x and store them After you have created a memory box notify the other party of F code communication of the sub address and passcode of the box To use the following F code communication functions F code memory boxes must be created in your machine F code confidential reception F code polling memory F code relay broadcast transmission To use the following F code communication functions F code memory...

Page 506: ...y box confidential stored in the receiving machine your machine or the other machine the sender can direct the transmission specifically to the user of the box This is convenient for sending sensitive documents that you do not wish people other than the recipient to see or when the receiving machine is shared by multiple departments To print an F code confidential fax the PIN Code must be entered ...

Page 507: ...sscode key Symbol is entered 6 Enter the passcode using the numeric keys If the sub address and passcode are already registered you can select a one touch key as well If the passcode is omitted for the memory box of destination machine you can skip Steps 4 and 5 3 Tap the Start key Scanning of the original starts If you inserted the original pages in the document feeder tray all pages are scanned ...

Page 508: ...ur dealer or nearest authorised service representative 1 The machine rings and the fax is received A beep sounds when reception ends 2 Tap the Others key and tap the Memory Box key 3 From the Confidential tab 4 Tap the key of the memory box containing the confidential fax appears in the keys of memory boxes that have received faxes The keys of memory boxes that have not received faxes are greyed o...

Page 509: ...tion The receiving machine bears the telephone charges of the transmission If necessary use the F code polling reception in combination with a broadcast transmission or timer transmission Only one polling reception with a timer setting can be stored at a time SPECIFYING THE TIME FOR COMMUNICATION page 4 101 Polling multiple machines serial polling is not possible Make sure there is no original in ...

Page 510: ...n line number using the numeric keys 2 Tap the Sub Address key Symbol is entered 3 Enter the sub address using the numeric keys 4 Tap the Passcode key Symbol is entered 5 Enter the passcode using the numeric keys If the sub address and passcode are already registered you can select a one touch key as well If the passcode is omitted for the memory box of destination machine you can skip Steps 4 and...

Page 511: ...een stored in the memory box the document is added to the previously stored documents By factory default the document sent to the other machine will be deleted automatically To create F code memory boxes Create in Settings administrator System Settings Image Send Settings Fax Settings F Code Memory Box 1 Place the original Place the original in the document feeder tray of the automatic document fe...

Page 512: ...inserted the original pages in the document feeder tray all pages are scanned When you place the original on the document glass scan each page one at a time When scanning finishes place the next original and tap the Start key Repeat until all pages have been scanned and then tap the Read End key When you use the automatic document feeder to scan an original you can tap the Preview key to check a p...

Page 513: ...the other machine will be deleted automatically 1 Tap the Others key and tap the Memory Box key 2 Tap the Polling Memory tab 3 Tap the folder of the F code memory polling box 4 Tap Check Image on the action panel To print the document tap the Print key Back Confidential Polling Memory Register This Function in Favorite Change Number of Times Folder Name Public Box Times Unlimited Polling Memory Un...

Page 514: ...leted from the memory box during communication 1 Tap the Others key and tap the Memory Box key 2 Tap the Polling Memory tab 3 Tap the folder of the F code memory polling box 4 Tap Empty out Box on the action panel If you tap Check Image on the action panel you can check the image on the touch panel before it is erased 5 Tap the Yes key The document is deleted and you return to Step 2 To cancel the...

Page 515: ...t transmission only bears the cost of sending the fax to the relay machine The relay machine bears the cost of sending the fax to each of the destination machines If necessary this function can be used in combination with a broadcast transmission or timer transmission It is convenient to store this function in a program When faxes forwarded using this function are printed at the forwarding destina...

Page 516: ...ation machine it is not necessary to take steps 5 and 6 7 Tap the Start key Scanning begins If you inserted the original pages in the document feeder tray all pages are scanned A beep will sound to indicate that scanning and transmission have ended When you place the original on the document glass scan each page one at a time When scanning finishes place the next original and tap the Start key Rep...

Page 517: ...machine CREATING MEMORY BOXES IN THE MACHINE FOR F CODE COMMUNICATION page 4 110 It is not necessary for the destination machines to support F code communication The machine that requests a relay broadcast transmission only bears the cost of sending the fax to your machine the relay machine Your machine bears the cost of sending the fax to each of the destination machines When faxes forwarded usin...

Page 518: ...AL TELEPHONE Enable the Tel Fax Auto Change function This is useful as the telephone or fax operation is selected automatically according to the calling You cannot send a fax from your telephone You can connect a telephone with a modular cable plug to your machine Also use the two wire cable for telephone connection If another type of cable is used the telephone may not operate normally If the plu...

Page 519: ...till lifted when fax transmission ends an alarm signal will sound and a message will appear in the touch panel The alarm and message will stop when the extension phone is replaced To receive a fax after answering a call on the extension telephone Set Settings administrator System Settings Image Send Settings Fax Data Receive Forward Manual Fax Settings Receive Settings to Manual Reception To chang...

Page 520: ...a fax is being received the status field displays Receiving in the job queue list When reception is completed the job moves to the completed job list and the status field displays In Memory After the fax is printed the status changes to Received Timer transmission jobs A timer transmission job appears at the end of the job queue list until the specified time is reached Transmission begins at the s...

Page 521: ...ng in the job queue list When forwarding the received fax is completed the field changes to Forward OK CHECKING IMAGE SENDING ACTIVITIES PRINTING IMAGE SENDING ACTIVITY REPORTS You can have the machine print a log of recent image sending activity date name of other party time required result etc The Image Sending Activity Report contains useful information such as the types of errors that occurred...

Page 522: ...n when polled because no data was in its F code memory polling box RX POLL NG The connection was broken because the sub address for F code polling memory was not valid F POLL PASS NG The connection was broken because the passcode for F code polling memory was not valid BOX NO NG Your machine broke the connection because the specified sub address for an F code memory box does not exist F PASS NG Yo...

Page 523: ...OF SCAN TRANSMISSION 5 28 SENDING A FAX IN INTERNET FAX MODE 5 31 CHANGING THE SUBJECT FILE NAME AND BODY TEXT AT THE TIME OF INTERNET FAX TRANSMISSION 5 33 SENDING THE SAME IMAGE TO MULTIPLE DESTINATIONS BROADCAST TRANSMISSION 5 36 SETTING MODES WHEN MULTIPLE TYPES OF ADDRESSES ARE INCLUDED IN A BROADCAST TRANSMISSION 5 38 RESENDING TO UNSUCCESSFUL BROADCAST TRANSMISSION DESTINATIONS 5 40 SENDING...

Page 524: ...0 SPECIFIC FUNCTIONS 5 102 ADDING YOUR SENDER INFORMATION TO FAXES I FAX OWN ADDRESS SEND 5 102 CHANGING THE PRINT SETTINGS FOR THE TRANSACTION REPORT TRANSACTION REPORT 5 103 STARTING A TRANSMISSION AT A SPECIFIED TIME TIMER TRANSMISSION 5 105 ADDING A SIGNATURE WHEN SENDING AN IMAGE ELECTRONIC SIGNATURE 5 108 ENCRYPTING THE TRANSMITTED DATA ENCRYPTION 5 110 INTERNET FAX RECEPTION FUNCTIONS CHECK...

Page 525: ...n e mail to a previously stored e mail address to inform the recipient of the location of the file Scan to Desktop The scanned file is sent to a specified folder on your computer For information on Scan to Desktop consult your dealer Scan to Network Folder The scanned file is sent to a network folder on a Windows PC on the same network as the machine When the file is sent it is also possible to se...

Page 526: ... information about a file how it is to be processed and its relation to other objects 1 Make sure the main power switch is in the position When the main power indicator is lit up the main power is in the position If the main power indicator is not lit up turn the main power switch to the position and press the POWER button on the operation panel If the fax function will be used and in particular i...

Page 527: ...ices Settings Administrator rights are required To configure basic settings for the network scanner In Settings administrator select System Settings Image Send Settings Scan Settings Administrator rights are required To configure settings for Internet Fax In Settings administrator select System Settings Image Send Settings and then configure options in Internet Fax Settings Administrator rights ar...

Page 528: ...rs If a communication error occurs or the other fax machine does not answer the call within a preset period of time transmission will automatically be attempted again after a preset interval To install Network Scanner Tool see the Shapdesk Installation Guide When a standard installation is performed Network Scanner Tool is installed with Sharpdesk To cancel transmission Do so from the job status s...

Page 529: ...t Original A4 Address E mail Address Detail B W Start Colour Start Tap to display the soft keyboard Change the function display Starts black and white or colour transmission Automatically set the original placement orientation resolution and skipping of blank pages MX 3060N MX 3070N MX 3560N MX 3570N MX 4060N MX 4070N only Scans the original and shows a preview image PREVIEW SCREEN page 1 17 Chang...

Page 530: ...nput Address Options Sending History Call Search Number Call Program Call Registered settings Quick File Store Data Temporarily Verification Stamp Send Same Image as Fax Address Auto Mono2 Tap to display the soft keyboard Enter subject file name and other items Searches for the address Displays the functions that can be used in image send mode Scans the original and shows a preview image PREVIEW S...

Page 531: ...is displayed B W Start Colour Start Preview Colour Mode Full Colour Paper Select Auto Exposure Auto Original Auto A4 2 Sided Copy 1 Sided 1 Sided Sort Group Auto Copy Ratio 100 Others Plain Send as well as print Call Eco Program Store Data in Folder File Store Data Temporarily Quick File 1 A4 No of copies LINE PRINTER Easy Scan HDD File retrieve Sharp OSA Job Status CA A4 B5 B4 A3 2 1 3 4 A4 B5 B4...

Page 532: ... Store Data in Folder File Store Data Temporarily Quick File 1 A4 No of copies LINE PRINTER Easy Scan HDD File retrieve Sharp OSA Job Status CA A4 B5 B4 A3 2 1 3 4 Colour Mode LINE PRINTER Paper Select Exposure Original 2 Sided Copy Sort Group Copy Ratio Others Job Status Preview B W Start Colour Start Send as well as print Call Eco Program Plain A4 A4 B5 B4 A3 Store Data in Folder File Store Data...

Page 533: ... DESTINATION FROM AN ADDRESS BOOK page 5 15 USING A TRANSMISSION LOG TO RESEND page 5 23 RETRIEVING A DESTINATION FROM A GLOBAL ADDRESS BOOK page 5 21 ENTERING AN ADDRESS MANUALLY page 5 19 RETRIEVING A DESTINATION FROM AN ADDRESS BOOK page 5 15 USING A SEARCH NUMBER TO RETRIEVE A DESTINATION page 5 18 RETRIEVING A DESTINATION FROM A GLOBAL ADDRESS BOOK page 5 21 USING A TRANSMISSION LOG TO RESEND...

Page 534: ...T IN INTERNET FAX MODE page 5 60 CHANGING COLOUR MODE page 5 61 4 Send the original Tap the B W Start or Colour Start key Start key in normal mode When you have used the automatic document feeder to scan an original you can tap the Preview key before tapping the B W Start key or the Colour Start key the Start key in normal mode to check a preview of the image When the original is placed on the doc...

Page 535: ...e original size may not appear In this event manually set the correct original size SPECIFYING THE ORIGINAL SCAN SIZE IN PAPER SIZE page 5 45 SPECIFYING THE ORIGINAL SCAN SIZE USING NUMERIC VALUES page 5 46 To specify the size that the machine can automatically detect Select the group of detected original sizes by selecting System Settings in Settings administrator Common Settings Device Control O...

Page 536: ... 17 8 1 2 x 13 2 5 216 mm x 340 mm 8 1 2 x 11 8 1 2 x 11 R 5 1 2 x 8 1 2 A3 A4 Inch 3 11 x 17 8 1 2 x 13 2 5 216 mm x 340 mm 8 1 2 x 11 8 1 2 x 11 R 5 1 2 x 8 1 2 11 x 17 8 1 2 x 13 2 5 216 mm x 340 mm 8 1 2 x 11 8 1 2 x 11 R 5 1 2 x 8 1 2 A3 A4 Selections Standard sizes detected original sizes Document Glass Document feeder tray automatic document feeder ...

Page 537: ... ADDRESSES THROUGH DIRECT ENTRY page 1 94 STORING ADDRESSES THROUGH GLOBAL ADDRESS SEARCH page 1 95 and STORING GROUPS page 1 98 ENTERING DESTINATIONS Fax Scan to E mail Internet Fax Direct SMTP Scan to FTP Scan to Network Folder Scan to Desktop Group key with multiple destinations 1 Tap the Address Book key In Easy mode In Normal mode CA Preview Auto Set Original A4 Address E mail Address Detail ...

Page 538: ...ess Review key VIEWING A LIST OF THE SELECTED DESTINATIONS page 5 17 The destination for transmission can be selected by tapping a stored destination In Normal mode Tap the one touch key and then tap Display Registered Information on the action panel to display the detailed information screen To retrieve a destination by using a search number tap Call Search Number on the action panel USING A TRAN...

Page 539: ... In normal mode you can change the delivery type To Cc Bcc Tap the address and then tap Change to To Change to Cc or Change to Bcc on the action panel If you placed the original on the document glass and tapped the Start key you cannot delete an address when changing settings CA Preview Auto Set Original A4 Address Detail B W Start Colour Start Address Book Sending History Global Address Search Sc...

Page 540: ...and check the address list When entering search numbers such as 0001 and 0011 0 can be omitted For example to enter 0001 enter 1 and tap the OK key Preview Start Scan Size Auto Auto Colour Mode Resolution 200x200dpi File Format PDF Original Auto Others A4 A4 100 Send Size Address Book Subject File Name Address Touch to input Address Options Sending History Call Search Number Verification Stamp Cal...

Page 541: ... Setting Enable Bcc is enabled in System Settings In Internet Fax mode the transmission confirmation request setting screen will appear if System Settings Image Send Settings Internet Fax Settings Send Setting I Fax Reception Report On Off Setting is enabled To request confirmation tap the Set key To cancel tap the Cancel key When Direct SMTP is used transmission confirmation is not performed CA P...

Page 542: ...sh to access Tap the Search key and enter a keyword to search for a workgroup server or network folder Up to 100 workgroups 100 servers and 100 network folders are displayed Tap the Cancel key to return to the screen of step 1 3 Tap the key of the server or computer that you wish to access If a screen appears prompting you to enter a user name and password check with your server administrator and ...

Page 543: ... Tap Destination and tap the LDAP server to be used If an authentication screen for the LDAP server appears enter your user name and password If only one LDAP server has been stored it is not necessary to take step 2 In this case start from step 3 CA Preview Auto Set Original A4 Address E mail Address Detail Start Colour Start Address Book Sending History Global Address Search Scan to HDD USB B W ...

Page 544: ...Tap the Search Again key to add more search letters To continuously add other destination Tap the destination To check the destination information Tap the one touch key of the target destination and then tap the Info key Tap to close the address information screen In normal mode you can select an address and tap New Registration with Address Book on the action panel to add the address to the addre...

Page 545: ...ses are not stored for resending One touch key for a contact or group in which multiple destinations are stored Group destinations Broadcasting destinations The user name and password are not stored for security reasons If a screen requiring you to enter such information appears enter the information again 1 In Easy mode Tap the Sending History key In Normal mode In the base screen or address book...

Page 546: ...ars enter the information To cancel the resend setting Tap the highlighted key In normal mode you can select an address and tap New Registration with Address Book on the action panel to add the address to the address book This is convenient if you have entered a destination directly Preview Start CA Sending History Delete All Histories Select Address to Send Again Direct Entry 123 Direct Entry 456...

Page 547: ...tector plate and prevent correct detection of the document size 1 Place the original Place the original in the document feeder tray of the automatic document feeder or on the document glass AUTOMATIC DOCUMENT FEEDER page 1 77 DOCUMENT GLASS page 1 79 When placing the originals orient them as shown below To place a large portrait oriented original place it as shown in the figure titled Landscape or...

Page 548: ...ATIONS page 5 17 Multiple destinations can be specified To change Subject File Name Reply To or Body Text in normal mode tap a target entry box or tap Options CHANGING THE SUBJECT FILE NAME REPLY TO AND BODY TEXT AT THE TIME OF SCAN TRANSMISSION page 5 28 3 Tap the Original key 4 Tap the appropriate orientation key Specify the orientation of the original placed in step 1 After the settings are com...

Page 549: ...ters and tap the OK and Send key in sequence The recipient must use the password entered here to open the Encrypt PDF file To cancel Encrypt PDF tap the Cancel key The format settings screen will appear to let you change the file type Select a new file type and tap the B W Start or Colour Start key to begin transmission 6 If the original was placed on the document glass replace it with the next or...

Page 550: ... in Settings administrator To enter text see NAMES AND FUNCTIONS OF SOFT KEYBOARD KEYS page 1 156 in the BEFORE USING THE MACHINE 1 Tap the Detail key to change to normal mode Changing mode from each mode page 5 9 2 To change the subject tap the Subject entry box 3 Tap a pre set text key After the settings are completed tap To cancel the selection of the subject Tap the Clear key If you wish to di...

Page 551: ... panel allows you to directly enter the e mail address Selecting the Add Reply to to Cc checkbox to adds a reply address to the Cc address 8 To change the body text tap the Body Text entry box Preview Start Scan Size Auto Auto Colour Mode Auto Mono2 Resolution 200x200dpi File Format PDF Original Auto Others A4 A4 100 Send Size Address Book Subject File Name Address Touch to input Address Verificat...

Page 552: ... the Edit key To clear all entered text Tap the Clear All key When this key is tapped the entire body of the message is erased immediately not just the selected line Enter up to 1800 characters A line break counts as one character To edit the selected line tap the Edit key The soft keyboard will appear with the selected text entered Address Book Body Entry Address Touch to input Address Clear All ...

Page 553: ...on Settings Add a Footer Automatically to the Mail Message Body in Settings If a default address has been configured using Settings System Settings Image Send Settings Scan Settings Default Address Default Address Setting the mode cannot be changed or the destination cannot be changed or added To switch to Internet fax mode tap the Cancel key in the touch panel and then perform the transmission pr...

Page 554: ...Others key allows you to configure various functions for example collectively sending two original pages as one sheet or original pages with different sizes 5 Tap the appropriate orientation key After the settings are completed tap 6 Tap the Start key to start scanning of the original If the original is placed on the document glass the Read End key appears in the touch panel If the original is onl...

Page 555: ...scanning an even numbered original page If the subject and file name are not changed the settings in the Setting mode Web version are used To configure the candidates for the subject file name and body text click System Settings Image Send Settings Scan Settings in Settings administrator To enter text see NAMES AND FUNCTIONS OF SOFT KEYBOARD KEYS page 1 156 in the BEFORE USING THE MACHINE 1 Tap th...

Page 556: ... Name Settings If you wish to directly enter the text tap the Direct Entry key to display the soft keyboard Enter the file name and tap the OK key To cancel the selection of the file name Tap the Clear key 7 To change the body text tap the Body Text entry box AAA No 1 BBB CCC DDD EEE No 2 No 3 No 4 No 5 Start Receive Preview Back reception memory 100 Others Subject Direct Entry Clear CA AAA No 1 B...

Page 557: ...he Edit key To clear all entered text Tap the Clear All key When this key is tapped the entire body of the message is erased immediately not just the selected line Enter up to 1800 characters A line break counts as one character Use to select on a line basis To edit the selected line tap the Edit key The soft keyboard will appear with the selected text entered Body Entry Others Clear All Pre Set S...

Page 558: ...SING A TRANSMISSION LOG TO RESEND page 5 23 STORING GROUPS page 1 98 When the checkbox of Settings administrator System Settings Image Send Settings Common Settings Condition Settings Address Book Default Selection Apply Addresses of Sending Modes Only is set to factory default setting the image is only sent to those destinations among the destinations that are set to Set as Default used which are...

Page 559: ...ansmission will not take place If System Settings Image Send Settings Common Settings Condition Settings Be sure to press Next Address Key before selecting the next address is enabled in Settings administrator tap before specifying the next destination If you wish to send the same image Mono2 as the one for the fax address to all destinations in normal mode tap Send Same Image as Fax Address on th...

Page 560: ...4R 8 1 2 x 11 R size If an original larger than A4 8 1 2 x 11 is scanned it will automatically be reduced to A4R before transmission Resolution image quality Pages are sent using settings configured in each mode File format file compression mode The compression mode set with System Settings Image Send Settings Scan Settings Condition Settings Compression Mode at Broadcasting in Settings administra...

Page 561: ...MAGE Drop Out colour This mode is available for Scanner and Data entry It is linked to a mode with an appropriate function RGB This mode is available for Scanner Network Folder and FTP Desktop It is linked to a mode with an appropriate function ...

Page 562: ...modes 3 After tapping the key of the completed broadcast transmission tap Check Details of Selected Job on the action panel Broadcast xxxx will appear as the destination of the broadcast job key The job control number that appeared on the touch panel when scanning ended appears in xxxx Job Queue Complete Internet Fax Fax Scan Job Address Set Time Pages Status Enter Plural Selection Mode Back Print...

Page 563: ... filing You will return to the document filing resend screen with the unsuccessful destinations entered Perform the document filing resend procedure There is no need to re scan the original Not using document filing You will return to the base screen with the unsuccessful destinations entered Place the original and perform the steps of the broadcast transmission All Destinations Failed Details Res...

Page 564: ...g Viewer application Internet faxes can be sent using the transmission log displayed in the Log Viewer For the procedures for using this function see the PC Fax driver Help To send an Internet fax using the PC I Fax function the PC Fax driver must be installed and then updated using the CD ROM that accompanies the Internet fax expansion kit For more information see the Software Setup Guide This fu...

Page 565: ...t key See the figure on the left to check the binding edge of the original and select the key to be tapped In normal mode tap the 2 Sided Tablet or 2 Sided Book key 2 Tap the Image Orientation key with the same orientation as the placed original If this setting is not correct a suitable image may not be transmitted After the settings are completed tap To cancel 2 sided scanning Tap the 1 Sided key...

Page 566: ...E OF THE PLACED ORIGINAL page 5 13 When the original size is an inch size or a non standard size or if the size is not detected correctly manually specify the original scan size SPECIFYING THE ORIGINAL SCAN SIZE IN PAPER SIZE page 5 45 SPECIFYING THE ORIGINAL SCAN SIZE USING NUMERIC VALUES page 5 46 CA Preview Start Scan Size Auto Auto Colour Mode Resolution 200x200dpi File Format PDF Original Aut...

Page 567: ... document feeder to scan a long original The maximum width that can be scanned is 1 000 mm 39 3 8 the maximum height is 297 mm 11 5 8 TRANSMITTABLE ORIGINAL SIZES page 5 13 Preview Start Others Original Scan Size Send Size Image Orientation Auto 2 Sided Tablet 2 Sided Booklet Auto Address Address Book Touch to input Address Background Adjustment Colour Mode Skip Blank Page in Original Blank Page S...

Page 568: ... tapping the Scan Size key tap the Direct Entry key 4 Specify the original size Tap the areas displaying width and height sizes respectively and enter the sizes using the numeric keys It is convenient to use to finely adjust the entered size 5 Tap the OK key After the settings are completed tap twice On the base screen check that the specified size is displayed on the Original key To cancel the sp...

Page 569: ...n standard original sizes can be stored The added original sizes will also appear in other modes 1 Tap the Detail key to change to normal mode Changing mode from each mode page 5 9 2 Tap the Original key 3 Tap the Scan Size key and tap the Custom Size tab 4 Tap Store Delete key Auto Direct Entry Inch AB Custom Size Address Address Book Touch to input Address A4 Skip Blank Page in Original Blank Pa...

Page 570: ...p the CA key Address Address Book Touch to input Address Skip Blank Page in Original Blank Page Skip Scan Thin Paper Original Slow Scan Mode Background Adjustment Colour Mode Adjust Outline of Image Sharpness Preview Start CA Others Scan Size Store Delete Select the size key to store delete the custom original size Skip Blank Page in Original Blank Page Skip Scan Thin Paper Original Slow Scan Mode...

Page 571: ...at you wish to retrieve After selecting the key of the original size tap the key Check that the specified size is displayed on the Scan Size screen To cancel the operation Tap the CA key Address Touch to input Address Skip Blank Page in Original Blank Page Skip Scan Thin Paper Original Slow Scan Mode Background Adjustment Adjust Outline of Image Sharpness Preview Start CA Others Store Delete A4 Au...

Page 572: ...ax mode The send size is fixed at A4R 8 1 2 x 11 R 1 Tap the Detail key to change to normal mode Changing mode from each mode page 5 9 2 Tap the Original key 3 Tap the Send Size key 4 Tap the desired send size key After the settings are completed tap Depending on the paper size specified for the Scan Size it may not be possible to select some sizes for the Send Size You cannot tap size keys that a...

Page 573: ...end Settings Common Settings Condition Settings Image Orientation in Settings administrator The ratio used for reduction or enlargement of the original will appear between the Scan Size and the Send Size Preview Start Others Background Adjustment Colour Mode Skip Blank Page in Original Blank Page Skip Scan Thin Paper Original Slow Scan Mode Adjust Outline of Image Sharpness Address Address Book To...

Page 574: ...he original consists of dark text 3 Select this setting for a normal original neither dark nor light 4 5 Select this setting when the original consists of light text Setup Items Description Auto The original image type is automatically selected to match the original Manual Text Printed Photo This mode provides the best balance for scanning an original which contains both text and printed photograp...

Page 575: ... completed tap When Auto is selected the exposure will be set to 3 Preview Start Others Background Adjustment Colour Mode Select File Format File Format Change Sending Resolution Resolution Skip Blank Page in Original Blank Page Skip Address Address Book Touch to input Address E mail Exposure Specify density of image to send Auto Manual Text Text Printed Photo Text Photo Printed Photo Photo Map 3 ...

Page 576: ...al mode Changing mode from each mode page 5 9 2 Tap the Resolution key 3 Tap the key of the desired resolution After the settings are completed tap When E mail FTP Desktop or Network Folder is selected When Internet Fax is selected If there is a mix of destinations in different modes tap to switch modes to set the resolution in each mode However FTP Desktop and Network Folder are set to the same m...

Page 577: ...e mode are linked The file type cannot be set separately for each When JPEG is selected for Colour Greyscale mode TIFF is automatically selected for B W mode Colour Greyscale tab B W tab PDF PDF Compact PDF 1 PDF Compact PDF Ultra Fine 1 PDF PDF A 1 2 PDF A 1 2 PDF A 3 PDF A 3 Compact PDF A 1 2 PDF A 1 2 Compact PDF A 3 4 PDF A 3 Compact PDF A 1 Ultra Fine 2 PDF A 1 2 Compact PDF A Ultra Fine 3 4 ...

Page 578: ...l type setting has been specified in scanner or other mode Photo will change to Text Photo and Map will change to Text Printed Photo The condition of the original may prevent the OCR function from correctly recognizing some characters and graphics and omissions or incorrect recognition of characters may result The OCR function is not guaranteed to completely reproduce all characters graphics or ot...

Page 579: ...on checkbox is selected the orientation of the original is detected and the image is rotated before transmission When the File Name Auto Extraction checkbox is selected the text string that is read from the file is included in the file name If a file name is set the set file name will be used for transmission 5 To select more detailed settings tap the Detail key to switch to normal mode Changing m...

Page 580: ... B W File Format E mail TIFF XPS PDF A PDF Encry 1 99 Page Programmed None Compression Mode Specified Pages per File MMR G4 MH G3 Address Book Preview Start Address Address Book Touch to input Address Colour Greyscale B W Programmed Compression Mode MMR G4 TIFF XPS PDF PDF A 1b Encry Specified Pages per File Processing time is dependent on the format File Format E mail 1 Colour Mode Background Adj...

Page 581: ...p Blank Page in Original Blank Page Skip Specify Send Exposure Exposure Change Sending Resolution Resolution CA Address Touch to input Address Others Colour Greyscale B W File Format E mail TIFF XPS PDF A PDF Encry 1 99 Page Programmed None Compression Mode Specified Pages per File MMR G4 MH G3 Address Book Processing time is dependent on the format Preview Start Colour Mode Address Touch to input...

Page 582: ...elected the transmission settings are restricted as follows Resolution The selections are 200x100dpi and 200x200dpi If TIFF S is selected after 200x400dpi 400x400dpi or 600x600dpi is selected the resolution automatically changes to 200x200dpi Send size Always A4R 8 1 2 x 11 R If TIFF S is selected after the send size is changed the send size is automatically fixed to A4R 8 1 2 x 11 R If a size lar...

Page 583: ...2 Colours in the original are scanned as black or white This mode is best for text only originals Greyscale The colours in the original are scanned in black and white as shades of grey greyscale This function cannot be used in Internet fax mode 1 Tap the Detail key to switch to the normal mode Changing mode from each mode page 5 9 2 Tap the Colour Mode key 3 Tap the key of the desired colour mode ...

Page 584: ...nd a better quality original to the destination 4 Tap the Greyscale or Mono2 key to set the B W mode for automatic colour selection Specify whether Mono2 or greyscale is used when scanning black and white originals Note that if the file format is set to JPEG scanning will take place in greyscale After the settings are completed tap The B W mode can be set only when the Auto key is selected in the ...

Page 585: ...ss of each branch office Tap the key of a stored program Select Dual Page Scan Tap the Start key Scan and send the original Specify Erase Tap the Start key Scan and send the original Considerable time is required to send the documents each month because the above settings must be selected In addition mistakes are occasionally made when selecting the settings When a program is stored settings are s...

Page 586: ...s function cannot be used in data entry mode 1 Tap the Detail key to switch to the normal mode Changing mode from each mode page 5 9 2 Place the original and tap Call Program on the action panel According to the function stored in the program place the original in the document feeder tray of the automatic document feeder or on the document glass AUTOMATIC DOCUMENT FEEDER page 1 77 DOCUMENT GLASS p...

Page 587: ... document glass scan each page one at a time When scanning finishes place the next original and tap the Start key Repeat until all pages have been scanned and then tap the Read End key When you use the automatic document feeder to scan an original you can tap the Preview key to check a preview of the image before sending an image For more information see CHECKING THE IMAGE TO BE TRANSMITTED page 5...

Page 588: ...ion cannot be used in scan mode or data entry mode The N Up is only available for originals with A4 8 1 2 x 11 B5 or A5 5 1 2 x 8 1 2 size Transmission is not possible at a size smaller than the original size When the scan size of the original is specified by numeric values this function cannot be used This function cannot be used together with Dual Page Scan or Card Shot 1 Place the original Plac...

Page 589: ...e original If you inserted the original pages in the document feeder tray all pages are scanned A beep will sound to indicate that scanning and transmission have ended When you place the original on the document glass scan each page one at a time When scanning finishes place the next original and tap the Start key Repeat the procedure until all pages have been scanned and then tap the Read End key...

Page 590: ... Rotate cannot be used when Mixed Size Original is enabled This function is not available if System Settings Common Settings Device Control Original Size Detector Setting is set to AB 3 in Settings administrator 1 Place the original in the document feeder tray of the automatic document feeder Insert the originals with the corners aligned together in the far left corner of the document feeder tray ...

Page 591: ... Original to Auto To cancel the mixed size original setting Tap the Mixed Size Original key to uncheck it 5 Tap the Start key to start scanning of the original A beep will sound to indicate that scanning and transmission have ended Tap the Preview key to check the preview of an image before sending a fax For more information see CHECKING THE IMAGE TO BE TRANSMITTED page 5 62 However settings for t...

Page 592: ...h to the initial screen of each mode Changing mode from each mode page 5 9 3 Specify the destination RETRIEVING A DESTINATION FROM AN ADDRESS BOOK page 5 15 VIEWING A LIST OF THE SELECTED DESTINATIONS page 5 17 USING A SEARCH NUMBER TO RETRIEVE A DESTINATION page 5 18 ENTERING AN ADDRESS MANUALLY page 5 19 SPECIFYING A NETWORK FOLDER page 5 20 RETRIEVING A DESTINATION FROM A GLOBAL ADDRESS BOOK pa...

Page 593: ... step appears when you tap the scan size key For the procedure for setting the send size see SPECIFYING THE SEND SIZE OF THE IMAGE page 5 50 To cancel the Card Shot settings Tap the Off key 6 Tap the Start key and scan the front side 7 Place a card face up on the document glass and tap the Start key to scan the reverse side Before scanning the back of the card tap the Change Setting key on the tou...

Page 594: ...an be placed at once Separate the originals by at least 5 mm Recommended originals sizes are 45 to 297 mm in height and 80 to 432 mm in width If the shape of an original is not square or rectangular the original may not be cropped correctly 2 Keep the auto document feeder open not closed If you scan the originals with the auto document feeder closed it will not be possible to detect the outlines o...

Page 595: ...move the checkmark 6 Tap the Start key to start scanning the originals When scanning is completed place the next originals and tap the Start key Repeat the above step until you have scanned all originals and then tap the Read End key When transmission is completed a beep sounds Restrictions when multicrop is enabled The following restrictions apply when multicrop is enabled Resolution 600 x 600 dp...

Page 596: ...jobs fewer pages can be scanned If the memory becomes full during scanning a message will appear and the transmission will be cancelled The scan settings can be changed for each set of originals 1 Place originals in the automatic document feeder Insert the originals all the way into the document feeder tray Originals can be stacked up to the indicator line AUTOMATIC DOCUMENT FEEDER page 1 77 2 Tap...

Page 597: ... key to scan the first original page 7 Place the next set of originals and tap the Start key Repeat until all originals have been scanned If needed tap Change Setting before tapping the Start key and change the original scan settings and send settings for the next original The setting changes will be applied to the next job If you tap the Preview key you cannot scan additional pages To cancel scan...

Page 598: ...ccessively scan each page of a book or other bound document When using dual page scan the original must be placed on the document glass Original scan size Transmitted image A3 11 x 17 x 1 page A4 8 1 2 x 11 x 2 pages B4 8 1 2 x 14 x 1 pages B5 5 1 2 x 8 1 2 x 2 pages This function is available when the original size setting is set to Auto Note that Centre Erase and Edge Centre Erase cannot be used...

Page 599: ...NSMISSION LOG TO RESEND page 5 23 4 Tap the Others key and tap the Dual Page Scan key A checkmark appears on the icon After the settings are completed tap the Back key To cancel the dual page scan setting Tap the Dual Page Scan key to uncheck it Centreline of B4 original Centreline of A3 original Centreline of 11 x 17 original Size mark The page on this side is copied first Centreline of original ...

Page 600: ...p the Start key to start scanning of the original When scanning finishes place the next original and tap the Start key Repeat until all pages have been scanned and then tap the Read End key A beep will sound to indicate that transmission has ended ...

Page 601: ...Place the original in the document feeder tray of the automatic document feeder AUTOMATIC DOCUMENT FEEDER page 1 77 2 Tap the mode display to switch to the initial screen of each mode Changing mode from each mode page 5 9 3 Specify the destination RETRIEVING A DESTINATION FROM AN ADDRESS BOOK page 5 15 VIEWING A LIST OF THE SELECTED DESTINATIONS page 5 17 USING A SEARCH NUMBER TO RETRIEVE A DESTIN...

Page 602: ...ge is correct To cancel the Book Divide setting Tap the Off key 6 Tap the Start key to start scanning of the original A beep will sound to indicate that scanning and transmission have ended Back Others Preview Start Skip Blank Page in Original Blank Page Skip Erase Shadow Around Erase Background Adjustment Colour Mode Change Sending Resolution Resolution Book Divide Select Original Binding Edge Of...

Page 603: ...OMATIC DOCUMENT FEEDER page 1 77 DOCUMENT GLASS page 1 79 2 Tap the mode display to switch to the initial screen of each mode Changing mode from each mode page 5 9 3 Specify the destination RETRIEVING A DESTINATION FROM AN ADDRESS BOOK page 5 15 VIEWING A LIST OF THE SELECTED DESTINATIONS page 5 17 USING A SEARCH NUMBER TO RETRIEVE A DESTINATION page 5 18 ENTERING AN ADDRESS MANUALLY page 5 19 SPE...

Page 604: ...time When scanning finishes place the next original and tap the Start key A beep will sound to indicate that transmission has ended When you use the automatic document feeder to scan an original you can tap the Preview key to check a preview of the image before sending an image For more information see CHECKING THE IMAGE TO BE TRANSMITTED page 5 62 However settings for this function cannot be chan...

Page 605: ...isplay to switch to the initial screen of each mode Changing mode from each mode page 5 9 3 Specify the destination RETRIEVING A DESTINATION FROM AN ADDRESS BOOK page 5 15 VIEWING A LIST OF THE SELECTED DESTINATIONS page 5 17 USING A SEARCH NUMBER TO RETRIEVE A DESTINATION page 5 18 ENTERING AN ADDRESS MANUALLY page 5 19 SPECIFYING A NETWORK FOLDER page 5 20 RETRIEVING A DESTINATION FROM A GLOBAL ...

Page 606: ... When scanning finishes place the next original and tap the Start key Repeat the procedure until all pages have been scanned and then tap the Read End key A beep will sound to indicate that scanning and transmission have ended When you use the automatic document feeder to scan an original you can tap the Preview key to check a preview of the image before sending an image For more information see C...

Page 607: ...lay to switch to the initial screen of each mode Changing mode from each mode page 5 9 3 Specify the destination RETRIEVING A DESTINATION FROM AN ADDRESS BOOK page 5 15 VIEWING A LIST OF THE SELECTED DESTINATIONS page 5 17 USING A SEARCH NUMBER TO RETRIEVE A DESTINATION page 5 18 ENTERING AN ADDRESS MANUALLY page 5 19 SPECIFYING A NETWORK FOLDER page 5 20 RETRIEVING A DESTINATION FROM A GLOBAL ADD...

Page 608: ...nning finishes place the next original and tap the Start key Repeat the procedure until all pages have been scanned and then tap the Read End key A beep will sound to indicate that scanning and transmission have ended When you use the automatic document feeder to scan an original you can tap the Preview key to check a preview of the image before sending an image For more information see CHECKING T...

Page 609: ... Changing mode from each mode page 5 9 3 Specify the destination RETRIEVING A DESTINATION FROM AN ADDRESS BOOK page 5 15 VIEWING A LIST OF THE SELECTED DESTINATIONS page 5 17 USING A SEARCH NUMBER TO RETRIEVE A DESTINATION page 5 18 ENTERING AN ADDRESS MANUALLY page 5 19 SPECIFYING A NETWORK FOLDER page 5 20 RETRIEVING A DESTINATION FROM A GLOBAL ADDRESS BOOK page 5 21 USING A TRANSMISSION LOG TO ...

Page 610: ...t key Repeat the procedure until all pages have been scanned and then tap the Read End key A beep will sound to indicate that scanning and transmission have ended When you use the automatic document feeder to scan an original you can tap the Preview key to check a preview of the image before sending an image For more information see CHECKING THE IMAGE TO BE TRANSMITTED page 5 62 Tap the Change Set...

Page 611: ...T OF THE SELECTED DESTINATIONS page 5 17 USING A SEARCH NUMBER TO RETRIEVE A DESTINATION page 5 18 ENTERING AN ADDRESS MANUALLY page 5 19 SPECIFYING A NETWORK FOLDER page 5 20 RETRIEVING A DESTINATION FROM A GLOBAL ADDRESS BOOK page 5 21 USING A TRANSMISSION LOG TO RESEND page 5 23 4 Tap the Others key and tap the RGB Adjust key 5 Tap of the colour you want to adjust or slide the slider to adjust ...

Page 612: ...t key Repeat the procedure until all pages have been scanned and then tap the Read End key A beep will sound to indicate that scanning and transmission have ended When you use the automatic document feeder to scan an original you can tap the Preview key to check a preview of the image before sending an image For more information see CHECKING THE IMAGE TO BE TRANSMITTED page 5 62 Tap the Change Set...

Page 613: ...n erase setting the erase width will change according to the selected ratio For example if you set an erase width of 10 mm 1 2 and reduce the image to 70 before scanning it the erase width will be reduced to 7 mm 3 8 When the erase setting is selected the image orientation will be forcibly portrait To change the default erase width setting In Settings administrator select System Settings Image Sen...

Page 614: ...eckbox of the edge that you wish to erase and specify the erase position Check that the tapped checkbox is set to If the Specify Frame key is tapped the Up Down Left and Right checkboxes are set to If the Specify Frame Centre key is tapped all the checkboxes are set to Specify the erase edge on the reverse side when erasing edges of one to three sides of Up Down Left and Right on the front side to...

Page 615: ...of the original If you inserted the original pages in the document feeder tray all pages are scanned A beep will sound to indicate that scanning and transmission have ended When you place the original on the document glass scan each page one at a time When scanning finishes place the next original and tap the Start key Repeat until all pages have been scanned and then tap the Read End key A beep w...

Page 616: ...AUTOMATIC DOCUMENT FEEDER page 1 77 If the originals are inserted with too much force they may crumple and misfeed 2 Tap the mode display to switch to the initial screen of each mode Changing mode from each mode page 5 9 3 Specify the destination RETRIEVING A DESTINATION FROM AN ADDRESS BOOK page 5 15 VIEWING A LIST OF THE SELECTED DESTINATIONS page 5 17 USING A SEARCH NUMBER TO RETRIEVE A DESTINA...

Page 617: ...iew of an image before sending a fax For more information see CHECKING THE IMAGE TO BE TRANSMITTED page 5 62 However settings for this function cannot be changed in the preview screen Back Erase Dual Page Scan Job Build Slow Scan Mode Original Count Mixed Size Original Sending History Others Call Search Number Verification Stamp Send Same Image as Fax Address Preview CA Store Data Temporarily Quic...

Page 618: ... and thus sent This function cannot be used in Internet fax mode If the Send Same Image as Fax Address key is tapped this function is cancelled if a fax address is specified for the destination 1 Place the original Place the original in the document feeder tray of the automatic document feeder or on the document glass AUTOMATIC DOCUMENT FEEDER page 1 77 DOCUMENT GLASS page 1 79 2 Tap the mode disp...

Page 619: ...hat include two blank pages are scanned by duplex scanning A will show 5 B will show 10 and C will show 8 If this step is not performed within one minute after the above confirmation screen appears the scanned image and settings will be cleared and the base screen will reappear Scanning will not be completed automatically and the image will not be reserved for transmission Back Others Preview CA S...

Page 620: ...ap the mode display to switch to the initial screen of each mode Changing mode from each mode page 5 9 3 Specify the destination RETRIEVING A DESTINATION FROM AN ADDRESS BOOK page 5 15 VIEWING A LIST OF THE SELECTED DESTINATIONS page 5 17 USING A SEARCH NUMBER TO RETRIEVE A DESTINATION page 5 18 ENTERING AN ADDRESS MANUALLY page 5 19 SPECIFYING A NETWORK FOLDER page 5 20 RETRIEVING A DESTINATION F...

Page 621: ...te after the above confirmation screen appears the scanned image and settings will be cleared and the base screen will reappear Scanning will not be completed automatically and the image will not be reserved for transmission If the displayed number of original sheets is different from the actual number of sheets Tap the Cancel key and then tap the OK key in the message screen to clear all scanned ...

Page 622: ... optional stamp unit must be installed When 2 sided originals are used the front of each original is stamped twice If an error occurs during scanning an original that was not scanned may be stamped When the O mark that is stamped on originals starts to become faint replace the stamp cartridge For the procedure for replacing the stamp cartridge see REPLACING THE STAMP CARTRIDGE page 1 153 1 1 Origi...

Page 623: ...page 5 21 USING A TRANSMISSION LOG TO RESEND page 5 23 4 Tap Verification Stamp on the action panel or Others key and tap the Verif Stamp key The appropriate icon or checkbox is selected If you tap the Others key tap the Back key after the settings have been completed To cancel the verification stamp setting Tap Verification Stamp on the action panel or the Others key and tap Verif Stamp to clear ...

Page 624: ...ings Common Settings Clock Adjust Sender name sender address In Settings administrator select System Settings Image Send Settings Common Settings Own Number and Name Set Sender Data Registration If you intend to use the I Fax Own Address Send function be sure to configure this information Page numbers Select whether or not to include page numbers using System Settings Image Send Settings Internet ...

Page 625: ...ntry mode For a broadcast transmission changes to the transaction report print conditions apply to all destinations 1 Place the original Place the original in the document feeder tray of the automatic document feeder or on the document glass AUTOMATIC DOCUMENT FEEDER page 1 77 DOCUMENT GLASS page 1 79 2 Tap the mode display to switch to the initial screen of Internet Fax mode Changing mode from ea...

Page 626: ... of the original If you inserted the original pages in the document feeder tray all pages are scanned A beep will sound to indicate that scanning and transmission have ended When you place the original on the document glass scan each page one at a time When scanning finishes place the next original and tap the Start key Repeat the procedure until all pages have been scanned and then tap the Read E...

Page 627: ... are automatically cleared after the transmission is finished However when the document filing function is used the scanned original image and settings are stored in the built in hard drive If another transmission is in progress when the specified time arrives the timer transmission will begin after that transmission is finished If a job scheduled for timer transmission is given priority on the jo...

Page 628: ...ient to use to finely adjust the time The setting will show the current time If the time is not correct press the CA key to cancel the operation Correct the time in setting mode and then perform the timer transmission procedure BEFORE USING THE MACHINE AS A NETWORK SCANNER FUNCTION page 5 3 To cancel the Timer Transmission settings Tap the Off key To set the date and time of the machine In Setting...

Page 629: ...t a time When scanning finishes place the next original and tap the Start key Repeat until all pages have been scanned and then tap the Read End key A beep will sound to indicate that scanning has ended and the machine stands by for transmission When you use the automatic document feeder to scan an original you can tap the Preview key to check a preview of the image before sending an image For mor...

Page 630: ...to the initial screen of E mail mode Changing mode from each mode page 5 9 3 Specify the destination RETRIEVING A DESTINATION FROM AN ADDRESS BOOK page 5 15 VIEWING A LIST OF THE SELECTED DESTINATIONS page 5 17 USING A SEARCH NUMBER TO RETRIEVE A DESTINATION page 5 18 ENTERING AN ADDRESS MANUALLY page 5 19 SPECIFYING A NETWORK FOLDER page 5 20 RETRIEVING A DESTINATION FROM A GLOBAL ADDRESS BOOK pa...

Page 631: ... document glass scan each page one at a time When scanning finishes place the next original and tap the Start key Repeat the procedure until all pages have been scanned and then tap the Read End key A beep will sound to indicate that scanning and transmission have ended When you use the automatic document feeder to scan an original you can tap the Preview key to check a preview of the image before...

Page 632: ...n is not possible when the address is directly entered Encrypted data can only be sent to an address for which you have registered a user certificate Register a user certificate for the address in Settings Web version Address Book E mail User Certificate Only one E mail address can be registered for an address that has a user certificate If the Disable sending to the addresses which cannot be encr...

Page 633: ... document glass scan each page one at a time When scanning finishes place the next original and tap the Start key Repeat the procedure until all pages have been scanned and then tap the Read End key A beep will sound to indicate that scanning and transmission have ended When you use the automatic document feeder to scan an original you can tap the Preview key to check a preview of the image before...

Page 634: ... errors that occurred The most recent 200 transactions are included in the report You can have the machine print the Image Sending Activity Report each time the number of transactions reaches 201 or at a specified time once a day only INTERNET FAX RECEPTION FUNCTIONS The contents of the Image Sending Activity Report are erased when the report is printed and thus it cannot be reprinted To configure...

Page 635: ...x was sent from a party that is blocked Report Wait Transmission confirmation was enabled but transmission confirmation was not received within the set time NG LIMIT Transmission was not possible because the file size exceeded the machine s file size limit setting E mail An e mail was received however the attached file was not a TIFF F file or there was no attached file and thus printing was not p...

Page 636: ... in the message to load an appropriate size of paper You can print the received Internet fax data at the specified time PRINTING RECEIVED DATA AT A SPECIFIED TIME page 5 116 You can print the received Internet fax data when a password has been entered PRINTING A PIN CODE PROTECTED FAX Hold setting for received data print page 5 115 You can print forward or save the received Internet fax data after...

Page 637: ...s administrator select System Settings Image Send Settings Common Settings Condition Settings Hold Setting for Received Data Print To display the received data list screen after entering the PIN Code In Settings select System Settings Common Settings Operation Settings Condition Settings Preview Setting Received Data Image Check Setting To transfer received data to another machine In Settings admi...

Page 638: ...function can be specified when the Received Data Image Check Setting is enabled If Hold Setting for Received Data Print is enabled this function cannot be used To print received data at the specified time In Settings select System Settings Image Send Settings Common Settings Condition Settings Time Specified Output of Received Data To disable the hold setting for received data print In Settings ad...

Page 639: ...on Image key The received data is listed You can also display the received data list by tapping the job status display and tapping Check Received Data on the action panel of Job Status screen 2 Tap the key of the received data you wish to check and tap Check Image on the action panel Displays the received data image Tap to show thumbnails of received images Thumbnail screen The list view or thumbn...

Page 640: ...view image is an image for the touch panel It will differ from the actual print result Tap Erase Specified Range on the action panel to delete unwanted area of the image Specify the image area you wish to delete in the Erase Specified Range screen To forward the selected image tap the Forward to Other Address on the action panel FORWARDING RECEIVED DATA MANUALLY page 5 125 To save the selected ima...

Page 641: ...were not printed will be forwarded If forwarding was not successful because the transmission was cancelled or a communication error occurred the faxes that were to be forwarded will return to the print queue on the machine If a PIN Code entry screen appears after tapping the OK key Hold Setting for Received Data Print has been enabled Enter the PIN Code using the numeric keys to begin forwarding P...

Page 642: ...and time of reception cannot be printed on the faxes Receiving Date Time Print is disabled The received data is not forwarded to a hyperlink destination that is registered in the specified address 1 In Settings Web version click System Settings Image Send Settings Inbound Routing Forwarding Storing Settings Administration Settings 2 In Inbound Routing select Enable and click the Submit button User...

Page 643: ...A maximum of 500 sender numbers addresses can be stored To delete an entered address select the address in Address to be Entered and click the Delete button 5 When you have finished adding addresses click the Submit button 6 Click Inbound Routing Settings in the Inbound Routing Forwarding Storing Settings menu in the Settings Web version menu and click the Add button 7 Enter a Table Name A maximum...

Page 644: ... is selected as a recipient the file format is ignored 11 Select the recipient from the address book You can specify multiple registered addresses or telephone numbers from the address book of the machine Up to 1 000 recipients can be registered for Recipients 1 2 and 3 in total When you select the recipients from the address book up to 400 recipients can be registered for network folder FTP Deskt...

Page 645: ...appear here are linked to the forwarding conditions set in step 9 If you wish to use different forwarding conditions than those set in step 9 set the forwarding permission settings To use the inbound routing function enable the forwarding tables that you wish to use from among the stored tables To delete a forwarding table click the checkbox next to the table name so that it is selected and click ...

Page 646: ...bmit button 1 In Setting mode administrator click System Settings Image Send Settings Inbound Routing Forwarding Storing Settings Inbound Routing Storage Settings Settings for HDD Storing of Received Data Administrator rights required Data that can be saved are received faxes and received Internet faxes Confidential reception and polling reception faxes cannot be saved Depending on the setting rec...

Page 647: ...tion panel of Job Status screen 2 Tap the key of the received data you wish to forward and tap Forward to Other Address Tap to show thumbnails of received images Thumbnail screen The list view or thumbnails view can be changed depending on the setting mode Multiple sets of received data can be selected When you select a single received data only you can tap Check Image on the action panel and chec...

Page 648: ...n 2 Tap the key of the received data you wish to save and tap File on the action panel Tap to show thumbnails of received images Thumbnail screen The list view or thumbnails view can be changed depending on the setting mode Multiple sets of received data can be selected When you select a single received data only you can tap Check Image on the action panel and check the image on the preview screen...

Page 649: ...N PROGRESS OR RESERVED page 1 83 PRIORITY PROCESSING OF A RESERVED JOB page 1 84 CHECKING A RESERVED JOB OR THE JOB IN PROGRESS page 1 86 CHECKING COMPLETED JOBS page 1 87 CHECKING THE STATUS OF TRANSMISSION RECEPTION JOBS Image send jobs include reception timer transmission and data forwarding as well as usual transmission For the Image Send job operations see COMPLETED TRANSMISSION RECEPTION JOB...

Page 650: ...n Internet Fax transmission job with a reception report request specified excluding a direct SMTP transmission job is placed into the standby state at the bottom of the Job Queue screen after a transmission has been completed Report Wait appears in the status field The screen changes to the completion screen when a reception report e mail has been received from the destination or it could not be r...

Page 651: ... example the procedure for scanning from the Sharpdesk application is explained below At the machine SCANNING FROM A COMPUTER PC Scan Mode For the procedures for installing the scanner driver and configuring settings see the Software Setup Guide This function cannot be used when it has been disabled using Disable Scan Function in the system settings administrator The procedures for selecting the s...

Page 652: ...isplayed in the touch panel can be used on the machine no other keys can be used 3 Start the TWAIN compliant application on your computer and select Select Scanner from the File menu 4 Select the scanner driver of the machine 1 Select SHARP MFP TWAIN K 2 Click the Select button 5 Select Acquire Image from the File menu The scanner driver opens Operation Guide Enlarge Display Mode Settings Total Co...

Page 653: ... the resolution or other advanced settings change to the Professional screen Image Area menu Select the scan area If Auto is selected the original size detected by the machine will be scanned You can also set the scanning area in the preview window with your mouse 3 Click the Preview button The preview image will appear in the scanner driver If you are not satisfied with the preview image repeat 2...

Page 654: ...ied the entered numbers will change the area relative to the top left corner of the specified area button When a preview image is displayed and a scanning area is not specified you can click the button to automatically set the scanning area to the entire preview image For further information on the scan settings click button to open scanner driver Help If the originals are placed in the document f...

Page 655: ...Enlarge Display Mode Settings Total Count Brightness Adjustment Job Status PC Scan This machine is in the PC scan mode Do not remove the original Scanner IP address 0 0 0 0 Exit 10 15 PC Scan PC scan in progress Finish PC scan mode Yes No Operation Guide Enlarge Display Mode Settings Total Count Brightness Adjustment Job Status 10 15 ...

Page 656: ...in XML format By linking the metadata with applications such as document management software a workflow application or an encryption server a sophisticated document solution environment can be built Using the application integration module kit information on a generated image file can be entered at the touch panel and transmitted along with the image as an XML file METADATA DELIVERY Server Fax ser...

Page 657: ... between the image file and XML file by means of the file name generated by the computer When setting the file name in Options to ensure that an existing file on the PC is not overwritten by a transmitted file of the same name be sure to configure the file name so that name duplication will not occur for example by including a unique extension the date etc in the generated file name If the file na...

Page 658: ...ap the Data Entry icon on the Home Screen and tap Metadata Set If a specific metadata set has been specified as the default set go to step 3 If no metadata sets have been stored Metadata Entry is unavailable Store metadata set in the setting mode Web version before performing transmission 2 Tap the key for the desired metadata set 3 The keys of the items stored in the metadata set will appear Tap ...

Page 659: ...n Enter appropriate information in the related items of the send settings Name entered in metadata fields Description Where entered formName Name of the user who sent the job If the name is not entered as metadata the sender name determined by the usual rules for determining the sender name will be applied as metadata Reply To sender name of selected sender replyTo E mail address to which the tran...

Page 660: ...Y SCAN TO HDD 6 14 SAVE ON HDD 6 14 SAVE IN EXTERNAL MEMORY DEVICE 6 16 USING STORED FILES SEQUENCE FOR USING A STORED FILE 6 20 FILE SELECTION SCREEN 6 21 SELECTING A FILE TO RETRIEVE 6 23 FILE PRINTING 6 23 MULTI FILE PRINTING 6 25 MULTI FILE PRINTING 6 25 BATCH PRINTING 6 26 FILE TRANSMISSION 6 27 FILE MOVING 6 28 DELETE FILE 6 29 FILE IMAGE CHECKING 6 31 FILE MERGING 6 32 RETRIEVING AND USING ...

Page 661: ...y print out conference material with the same settings or print out ledger sheets used for routine tasks as required DOCUMENT FILING A PDF file created for PC browsing can be displayed or printed on a computer Additionally printing out conference material with the same settings Printing out ledger sheets as required Copying File Store Edit Reuse Print Transmission External memory device Fax Image ...

Page 662: ...iously stored user name and assign a file name when storing a job Passwords PIN code 5 to 8 digit number can be established for custom folders and for files saved in custom folders Quick File As a copy image send or other job is performed this function saves the document data to the hard drive Use this function when you want to quickly and easily store document data without specifying a file name ...

Page 663: ... specify it as a location for storing files Specify a password for the user folder as required Enter the PIN Code to use the folder My Folder A previously created custom folder can be selected as My Folder or a new folder created as My Folder When My Folder has been configured and user authentication is used My Folder will always be selected as the destination of File and File Store To store a cus...

Page 664: ...een stored in the Quick File folder it may not be possible to perform a large copy job using sort mode Delete unnecessary files from the Quick File Folder The original types above are examples to make the explanation easier to understand The actual number of pages and number of files that can be stored will vary depending on the contents of the original images and the settings when the files are s...

Page 665: ...m the disclosure of sensitive information due to manipulation by a third party of any data saved using the Quick File function or File function or incorrect operation of the Quick File function or File function by the operator who saves the data User Name The user name is required to enter a file ownership and other information The user name must be registered in advance File Name Names a file Sto...

Page 666: ...nter driver For details on document filing see SAVING AND USING PRINT FILES DOCUMENT FILING page 3 75 in PRINTER Using document filing in PC Fax PC I Fax mode To use document filing in PC Fax or PC I Fax mode select document filing settings in the PC Fax driver For more information see Help in the PC Fax driver Start Colour Start CA Preview Colour Mode Full Colour Paper Select Auto Exposure Auto O...

Page 667: ... HHH III III JJJ KKK LLL Use to save originals to be shared among users The folder for the registered user Displayed during user authentication Tap this key to open the logged in user s personal screen Resets all settings Displays the functions available in document filing mode Use to search for a file in a folder Use to save a file temporarily Displays the usage status of the machine s built in h...

Page 668: ...lly selected Only the file name and location of a file stored in the Quick File folder can be changed To delete all files in the Quick File folder with the exception of protected files In Settings administrator select System Settings Document Filing Settings Condition Settings Delete All Quick Files Configure settings to have all files deleted when the power is turned on as required 1 Place the or...

Page 669: ...efault setting after the Start key Colour Start key or B W Start key in copy mode is tapped To change the message display time in Settings administrator System Settings Common Settings Operation Settings Condition Settings Message Time Setting To cancel Quick File Tap Quick File to enable File can be used in normal mode When a file is stored using File without appending file information the follow...

Page 670: ...Go to the next step If you do not wish to assign a user name or other information to the file go to the next step 3 Tap You will return to the base screen of copy mode 4 Select copy settings and then tap the Colour Start key or the B W Start key Simultaneously with starting copy the original is stored as a file The selected copy settings are also saved For the procedure for placing the original se...

Page 671: ...ty Change in the Job Settings Protect Protect does not require setting of a password but prevents a file from being moved deleted or edited A password cannot be established The icon appears with the mode icon in the file key of a protected file Confidential To protect a Confidential file a password is set The password must be entered to retrieve the file The icon appears with the mode icon in the ...

Page 672: ...ettings administrator User List 3 Tap The system goes back to the screen of step 1 to display the selected user name 1 Tap the File Name text box and enter the file name Enter a file name using up to 30 characters File Name If a file name that already exists is specified a tilde and a serial number are added after the file name and this file is saved as a different file The file name is not case s...

Page 673: ...ss AUTOMATIC DOCUMENT FEEDER page 1 77 DOCUMENT GLASS page 1 79 4 Tap Scan to HDD 5 To select settings tap the key of each desired setting IMAGE SEND SEQUENCE page 5 11 6 Tap the Colour Start or B W Start key to start scanning A beep will sound to indicate that scanning and file store have ended Easy Copy Operation Guide Enlarge Display Mode Settings Total Count Brightness Adjustment Easy Fax Easy...

Page 674: ...from the Web page For original scan settings see the explanation of the copy or image send mode If the original is 2 sided be sure to tap the Original key and then tap the 2 Sided Tablet key or the 2 Sided Book key as appropriate for the original To set a user name file attribute or password tap Options When a file is created with Create Downloadable File disabled this setting cannot be enabled la...

Page 675: ...IC DOCUMENT FEEDER page 1 77 DOCUMENT GLASS page 1 79 4 Tap Scan to USB 5 To select settings tap the key of each desired setting IMAGE SEND SEQUENCE page 5 11 6 Tap the Colour Start or B W Start key to start scanning A beep will sound to indicate that scanning and file store have ended Easy Copy Operation Guide Enlarge Display Mode Settings Total Count Brightness Adjustment Easy Fax Easy Scan Job ...

Page 676: ...ve location and tap keys for any settings you want to select For original scan settings see the explanation of the copy or image send mode If the original is 2 sided be sure to tap the Original key and then tap the 2 Sided Tablet key or the 2 Sided Book key as appropriate for the original 5 Tap the Start key to start scanning A beep will sound to indicate that scanning and file store have ended CA...

Page 677: ...EN page 1 17 4 After scanning all originals tap the Read End key When you scan the original using the automatic document feeder this screen does not appear CLOUD PORTAL Operation Guide Enlarge Display Mode Settings Total Count Brightness Adjustment Easy Fax Job Status Print from external memory device USB Scan to External Memory Device Perform Detail Setting External memory device USB is connected...

Page 678: ...6 19 DOCUMENT FILING SAVING FILES WITH DOCUMENT FILING 5 Check the Sending data has been completed message and remove the USB memory device from the machine ...

Page 679: ... SEARCH AND RETRIEVAL page 6 34 3 Select an operation item Select the desired operation and configure settings FILE SELECTION SCREEN page 6 21 FILE PRINTING page 6 23 FILE TRANSMISSION page 6 27 FILE MOVING page 6 28 DELETE FILE page 6 29 FILE IMAGE CHECKING page 6 31 FILE MERGING page 6 32 CA Select All Batch Print All Files Delete Start Main Folder File Name User Name User Unknown 06 06 2015 Use...

Page 680: ...le key displayed for each job type Search for a file saved in a folder Displays the functions that can be used Print in black and white Reset all settings Return to the base screen of document filing mode Displays the saved files Tap this key to display the usage status of the machine s built in hard disk drive Select or clear all files Tapping this key switches the key display mode between Select...

Page 681: ...ns Copying Internet Fax Send Direct SMTP Send Printer RGB Printer CMYK Fax Send Scan to E mail File Store Scan to FTP Scan to Desktop Scan to Network Folder PC Fax Send PC I Fax Send Edit When different types of jobs such as copy and fax are combined ...

Page 682: ...the Tap the Print Now key to printed out the file with the settings used for its storage Tap the Filter by Job key to display the keys of a particular mode such as copy or scanner mode enabling quick data search Tap the File Name key the User Name key or the Date key to change the order of display of the files Select User Control in Settings administrator Authority Group List Then in authority gro...

Page 683: ...rint on the action panel 2 Change the print settings 3 Select the Delete or B W Print checkbox when needed 4 Tap the Start key The file will be printed CA Select All Batch Print All Files Delete Main Folder File Name User Name User Unknown 06 06 2015 User Unknown 06 06 2015 User Unknown 06 06 2015 User Unknown 06 06 2015 User Unknown 06 06 2015 User Unknown 06 06 2015 User Unknown 06 06 2015 Date ...

Page 684: ...anged by being tapped while a file is selected the selection of the file will be cancelled 2 Tap Print on the action panel 3 When not printing with the number of copies at data saving tap the Apply the Number from Stored Setting of Each Job checkbox to set to When printing with the number of copies at data saving without specifying copies go to step 5 4 Use to specify the number of copies As requi...

Page 685: ... selected 4 If a password has been established tap the Password key Enter the password 5 to 32 characters and tap Only files that have the same password will be selected If you do not wish to enter a password go to the next step 5 When not printing with the number of copies at data saving tap the Apply the Number from Stored Setting of Each Job checkbox to set to When printing with the number of c...

Page 686: ...is set to RGB This settings is accessed by selecting the Other Settings button on the Detailed Settings tab These transmission methods require installation of the corresponding options If any of the following other modes were included in the saved file the file cannot be transmitted Stamp Photo Repeat Multi Page Enlargement for copying If any of the following other modes were included in the saved...

Page 687: ...d a password entry screen will appear Enter the password 5 to 8 digit number using the numeric keys and tap the When multiple files are moved file names cannot be changed 4 Tap the Move key CA Select All Batch Print All Files Delete File Name File Name User Name User Unknown 06 06 2015 User Unknown 06 06 2015 User Unknown 06 06 2015 User Unknown 06 06 2015 User Unknown 06 06 2015 User Unknown 06 0...

Page 688: ...wn 06 06 2015 User Unknown 06 06 2015 User Unknown 06 06 2015 User Unknown 06 06 2015 Date Change Setting to Print Move Check Image See Detail Information Print and Delete the Data B W Print Print Now Copy_04042015_112030 Copy_04042015_112100 Copy_04042015_112130 Copy_04042015_112200 Copy_04042015_112230 Copy_04042015_112300 Copy_04042015_112330 CA Select All Batch Print Delete Main Folder File Na...

Page 689: ... Deletion date and time Document A 05 23 2015 2 22AM 05 25 2015 9 00AM Document B 05 23 2015 11 59PM 05 25 2015 9 00AM Document C 05 24 2015 0 01AM 05 26 2015 9 00AM To automatically delete document filing data periodically In Settings administrator select System Settings Document Filing Settings Automatic Deletion of File Settings To check the set deletion cycle In Settings administrator select S...

Page 690: ...12030 Displays file information Displays file preview images Enlarge or reduce the preview screen Displays the total page count Displays the page number Rotate the preview screen in increments of 90 degrees CA Select All Batch Print All Files Delete Main Folder File Name User Name User Unknown 06 06 2015 User Unknown 06 06 2015 User Unknown 06 06 2015 User Unknown 06 06 2015 User Unknown 06 06 201...

Page 691: ...Specifying the folder page 6 13 Creating PDF for PC browsing page 6 13 To delete the original file select the Delete Original File checkbox 3 Tap the Execute key Combining of files starts and after the processing is finished the Combining complete message appears To cancel the operation Tap the CA key Note that the operation cannot be cancelled when the original file is being deleted after the fil...

Page 692: ...tab with a file to be retrieved and tap the Complete key 3 Tap the key of the desired file from the completed job A file that has been processed by Quick File or File can be selected for a job in the retrieve operation 4 Tap Send or Change Setting to Print on the action panel FILE TRANSMISSION page 6 27 FILE PRINTING page 6 23 To view detailed information on a file select the file and then tap Che...

Page 693: ...der with a password is tapped a password entry screen will appear Enter the password 5 to 8 digit number using the numeric keys 2 Tap Hard disk Personal use Quick File for conference Standard Regular conference Text 1 Reports Graph for conference When you search by entering Conference Graph for conference Regular conference for conference You can find all folders and files that contain the word Co...

Page 694: ... selected Today or Date Set set the time and date 4 Tap the Search Start key A list of the files that match your search conditions will appear Select the desired file from the list The job settings screen will appear To return to the base screen of document filing mode tap the CA key To return to the file search screen tap the Search Again key When you search using File or Folder Name custom folde...

Page 695: ...network folder of a PC can be printed The file can also be modified before printing by changing the print settings On the action panel tap Select File from FTP to Print Select File from USB Memory to Print or Select File from Network Folder to Print For more information see PRINTING WITHOUT THE PRINTER DRIVER page 3 79 ...

Page 696: ... 78 Home Screen Registration 7 78 Copy Settings 7 79 Condition Settings 7 79 Initial Status Settings 7 81 Text Image Printing 7 82 Printer Settings 7 83 Condition Settings 7 83 Interface Settings 7 84 Initial Status Settings 7 85 PCL Settings 7 86 PostScript Settings 7 87 OOXML Settings 7 87 Print Release Settings 7 87 E mail Print Settings 7 88 Direct Print Settings FTP 7 88 Direct Print Settings...

Page 697: ...Psec Settings 7 149 IEEE802 1X Setting 7 150 Security Control 7 151 Document Administration Function 7 151 Hidden Pattern Print Setting 7 152 Tracking Information Print 7 153 Energy Save 7 154 Eco Setting 7 154 Eco Scan Setting 7 157 Energy Saving Pattern List 7 157 Specific Date Operation Settings 7 158 Power ON OFF Schedule Setting 7 159 Toner Save Mode 7 159 System Control 7 160 Job Log 7 160 D...

Page 698: ...displayed screen Tap the setting in the menu that you want to configure For details of the settings see the explanation for each item 2 On the upper tab tap the item that you want to set The setting menu appears on the left side of the displayed screen Tap the setting in the menu that you want to configure When you tap the System Settings tab item keys appear on the screen When you tap the key of ...

Page 699: ...t the Web browser on the PC and enter the IP address of the machine Start a Web browser on a PC on the same network the machine is on and enter the IP address of the machine Recommended Web browsers Internet Explorer 8 or later Windows Firefox 37 or later Windows Safari 4 0 or later Mac OS Chrome 42 or later Windows Depending on the machine settings user authentication may be required to display t...

Page 700: ...ng of the machine s setting mode SETTING MODE LIST Depending on the machine specifications and peripheral devices installed it may not be possible to use some settings Some setting items can only be configured on the Web page Setup Items Factory default setting U A Status page 7 45 Machine Identification page 7 45 Yes Yes Total Count page 7 46 Yes Yes Device Status page 7 46 Yes Yes Network Status...

Page 701: ... Group List page 7 59 No Yes Default Settings page 7 59 No Yes X User Authentication Disabled No Yes X Default Network Authentication Server Setting Not Set No Yes X Perform network server access control Disabled No Yes X Authentication Method Setting Authenticate a User by Login Name and Password No Yes X Device Account Mode Setting Disabled No Yes X Login User No Yes X Card Setting No Yes Use IC...

Page 702: ...Page Limit Setting page 7 65 No Yes Authority Group page 7 66 No Yes Favourite Operation Group page 7 70 No Yes X Favourite Operation Group List No Yes X Favorite Key List No Yes X Home Screen List No Yes User Count page 7 72 No Yes X View User Count No Yes X Save User Count No Yes Billing Code Setting page 7 73 No Yes X Administration Settings No Yes Use Billing Code Disabled No Yes Default Code ...

Page 703: ... Disabled No Yes Importing from the setup file No Yes X Card Type Card Reader Settings page 7 76 No Yes Card Type Card Reader 200 No Yes Setup Items Factory default setting U A Home Screen Settings page 7 77 X Condition Settings No Yes X Icon No Yes X Background Image No Yes Setup Items Factory default setting U A Copy Settings page 7 79 X Condition Settings No Yes Rotation Copy Setting Rotation C...

Page 704: ...sabled No Yes High Quality Scan from Document Feeder B W Disabled No Yes Quick Scan from Document Glass B W Disabled No Yes Auto Clear Before Copy Execution Also Disabled No Yes X Initial Status Settings No Yes Colour Mode Full Colour No Yes Image Orientation Portrait No Yes Paper Tray Varies depending on the machine configuration No Yes Exposure Type Auto No Yes Copy of Copy Disabled No Yes Colou...

Page 705: ...r Size in Bypass Tray Disabled No Yes Enable Selected Paper Type in Bypass Tray Disabled No Yes Exclude Bypass Tray from Auto Paper Select Disabled No Yes Job Spool Queuing Enabled No Yes Disabling of USB Memory Direct Print Disabled No Yes Disabling of Network Folder Direct Print Disabled No Yes Disabling sending while printing Disabled No Yes X Interface Settings No Yes Hexadecimal Dump Mode Dis...

Page 706: ...s PCL Symbol Set Setting PC 8 Yes Yes PCL Font Setting Internal Font 0 Courier Yes Yes PCL Line Feed Code 0 CR CR LF LF FF FF Yes Yes Wide A4 Disabled Yes Yes X PostScript Settings Yes Yes Screen Settings Standard Yes Yes Print PS Errors Disabled Yes Yes Binary Processing Disabled Yes Yes X OOXML Settings Yes Yes Print What Selected Sheet Yes Yes X Print Release Settings For information about each...

Page 707: ...sion kit is installed No Yes Address Book Default Selection No Yes Higher priority is given to the display of address book Disabled No Yes Apply Addresses of Sending Modes Only Enabled No Yes Category Displayed as Default None No Yes Display all address type regardless of the mode being displayed currently Disabled No Yes Enlarge Address Book Enabled No Yes Image Orientation Portrait No Yes Previe...

Page 708: ...tration of Memory Box All Invalid No Yes Disable Destination Registration Using Global Address Search All Invalid No Yes Disable Registration Using Network Scanner Tool Disabled No Yes Disabling of Forwarding via Network Disabled No Yes Settings to Disable Transmission No Yes Disable Resend on Fax Image Send Mode Disabled No Yes Disable Selection from Address Book All Invalid No Yes Disable Direct...

Page 709: ...ges per File Disabled No Yes OCR Setting No Yes Font Western Languages Arial No Yes Japanese MS Gothic No Yes Chinese SimSun No Yes Traditional Chinese MingLiU No Yes Korean Dotum No Yes Detect Image Direction Enabled No Yes File Name Extraction Disabled No Yes E mail No Yes File Type PDF No Yes OCR Disabled No Yes Black White Compression Mode MMR G4 No Yes Colour Greyscale Compression Ratio Mediu...

Page 710: ...exceed maximum size it will be sent in multiple files Disabled No Yes Maximum Size of Data Attachments FTP Desktop Network Folder Unlimited No Yes Bcc Setting No Yes Enable Bcc Disabled No Yes Display Bcc Address on the Job Status Screen Disabled No Yes Auto Scan Setting Disabled No Yes Set Image Orientation Automatically Enabled 2 Sided No Yes Set Resolution Automatically Enabled No Yes Blank Pag...

Page 711: ...o Yes Mail Footer Registration No Yes Subject Name Settings No Yes File Name Settings No Yes Message Body Settings No Yes Setup Items Factory default setting U A Internet Fax Settings page 7 98 X Default Settings No Yes Resolution Setting No Yes Apply the Resolution Set when Stored Disabled No Yes No item 200x100dpi No Yes Half Tone Disabled No Yes Auto Wake Up Print Enabled No Yes Compression Set...

Page 712: ...n Line is Busy 3 Time s No Yes Recall in Case of Communication Error No Yes Number of Times to Recall in Case of Error 2 Time s No Yes Interval to Wait Between Recall Attempts min in Case of Error 3 Time s No Yes X Receive Settings No Yes Auto Receive Reduce Setting Enabled No Yes 2 Sided Printing of Received Data Disabled No Yes Set Address for Data Forwarding No Yes Forwarding to No Yes Direct S...

Page 713: ... Yes Direct SMTP Setting No Yes Port Number Receive 25 No Yes Timeout 300 seconds No Yes Port Number Send 25 No Yes Timeout 300 seconds No Yes Setup Items Factory default setting U A Fax Data Receive Forward Manual page 7 104 X Fax Settings No Yes Receive Settings Auto Reception No Yes X Internet Fax Settings No Yes Manual Reception Key in Initial Screen Enabled No Yes Setup Items Factory default ...

Page 714: ... Change Delete of Forward Table Disabled No Yes Disabling of Forward Condition Change Disabled No Yes Print Style Setting Print at Error No Yes File Name Setting No Yes Preset of Character No Yes Character 1 2 No Yes File Naming No Yes No 1 Sender Name No Yes No 2 Date Time No Yes No 3 None No Yes No 4 None No Yes No 5 None No Yes No 6 None No Yes No 7 None No Yes If received from a contact regist...

Page 715: ... 3 None No Yes No 4 None No Yes No 5 None No Yes No 6 None No Yes No 7 None No Yes If received from a contact registered in the address book sender s name is changed to contact s name Disabled No Yes Setting of Result Notification Address at Storing No Yes Reception Notification Settings Disabled No Yes Address of Notification Destination No Yes Direct Entry No Yes Setup Items Factory default sett...

Page 716: ... Auto Mono2 No Yes Disable Change of B W Setting in Auto Mode Disabled No Yes Default Exposure Settings Auto No Yes Default Original Image Type Text No Yes Initial Resolution Settings 200x200dpi No Yes Scan Complete Sound Setting Middle No Yes Default Output Tray Varies depending on the machine configuration No Yes Disable Text Stamp functions for Reprinting Disabled No Yes Batch Print Settings No...

Page 717: ...t Fax Disabled No Yes Apply the resolution at job execution Disabled No Yes Resolution 200 100dpi No Yes Fax Disabled No Yes Apply the resolution at job execution Disabled No Yes Resolution Standard No Yes Scan to HDD Enabled No Yes Apply the resolution at job execution Disabled No Yes Resolution 200 200dpi No Yes X Document Output Options No Yes Print No Yes Copies Enabled No Yes Printer Enabled ...

Page 718: ... Disabled No Yes Fax Send Incl PC Fax Enabled No Yes Scan to HDD Disabled No Yes X Automatic Deletion of File Settings All Invalid No Yes Setup Items Factory default setting U A Sharp OSA Settings page 7 112 X Standard Application Settings No Yes X Receiving Application Setting No Yes Forward to Application Disabled No Yes Application Name No Yes Address for Web Service No Yes Timeout 20 seconds N...

Page 719: ...owser n2 0 No Yes Extended Platform Disabled No Yes Data Size Wide SVGA No Yes Communication Error Notification No Yes E mail Address No Yes Body Text No Yes X Embedded Application Settings No Yes X Polling Setting No Yes Server 1 Server 2 Disabled No Yes Polling Address No Yes Check Interval 1min No Yes Timeout 20 seconds No Yes Setup Items Factory default setting U A ...

Page 720: ...m 1 to 7 Auto AB Auto Inch X 420mm 17 Y 297mm 11 Yes Yes Paper Type Registration Yes Yes X Operation Settings No Yes Condition Settings No Yes Enlarge Display Mode Disabled No Yes Message Time Setting 6 sec No Yes Language Setting Varies depending on country and region No Yes Default Display Setting Home Screen No Yes Display Favorite Menus as Default Disabled No Yes Display Action Panel as defaul...

Page 721: ...All Invalid No Yes Preview Setting No Yes Received Data Image Check Setting Disabled No Yes Default List Thumbnail Display No Yes Fax I Fax Reception Data Thumbnail No Yes File Retrieve of Main Folder Quick File Folder List No Yes File Retrieve of Custom Folder List No Yes File Retrieve of Direct Print List No Yes Remote Operation Settings No Yes Remote Software Operation No Yes Operational Author...

Page 722: ...ddress of Client Machine 0 0 0 0 No Yes Port Number 50001 No Yes Tandem Mode No Yes Disabling of Master Machine Mode Disabled No Yes Disabling of Client Machine Mode Disabled No Yes Detect Standard in Auto Colour Mode 3 Normal No Yes Status Indicator Setting Pattern 1 No Yes Status Indicator will blink if data is received Enabled No Yes Total Setting for Finish Specify Finishing Position Based on ...

Page 723: ...Disabling sending while printing Disabled No Yes Disable Blank Page Print Disabled No Yes Image Send Settings No Yes Disable Switching of Display Order Disabled No Yes Disable Fax Broadcasting Disabled No Yes Disable Scan Function All Invalid No Yes Settings to Disable Registration No Yes Disable Registering Destination from Operation Panel All Invalid No Yes Disable Registering Destination on Web...

Page 724: ...ts Mode Disabled No Yes Disable Printing of Operation Manual from the Operation Panel Disabled No Yes Device Control No Yes Disabling of Document Feeder Disabled No Yes Disabling of Duplex Disabled No Yes Disabling of Optional Paper Drawer Disabled No Yes Disabling of Tray Settings Disabled No Yes Disabling of Finisher Disabled No Yes Disabling of Offset Disabled No Yes Disabling of Stapler Disabl...

Page 725: ...Serial Number No Yes Font Kit for Barcode No Yes Internet Fax Expansion Kit No Yes Application Integration Module No Yes Direct Print Expansion Kit 2 No Yes Application Communication Module 2 3 No Yes External Account Module 2 3 No Yes X Custom Links No Yes Setup Items Factory default setting U A Network Settings page 7 132 X Quick Settings No Yes Wireless Settings No Yes Connection Type Wired Onl...

Page 726: ...ssword No Yes Change Password No Yes Authentication Type No Yes KDC Server No Yes Realm No Yes Allow selection on operation panel Disabled No Yes Authenticate a User in Global Address Search Disabled No Yes Enable SSL No Yes Connection Test No Yes Public Folder NAS Setting No Yes public No Yes Use of Storage Allowed No Yes shared No Yes Use of Storage Allowed No Yes faxreceive No Yes Use of Storag...

Page 727: ... Yes MTU 1500 No Yes Ping Command No Yes IPv4 No Yes IPv6 No Yes X Services Settings No Yes DNS No Yes SMTP No Yes Kerberos No Yes SNTP No Yes mDNS No Yes SNMP No Yes WINS No Yes X Print Port Settings No Yes LPD No Yes LPD Settings No Yes LPD Enabled No Yes Timeout 90 seconds No Yes Use Banner Disabled No Yes RAW No Yes Raw Print Settings No Yes Raw Print Enabled No Yes Port Number 9100 No Yes Tim...

Page 728: ... Disabled No Yes mDNS Enabled No Yes Service Name No Yes Machine Location No Yes X Cloud Connect Settings No Yes Office 365 No Yes Domain Name No Yes X LDAP Settings No Yes Global Address Books List No Yes X Public Folder NAS Setting No Yes public No Yes Use of Storage Allowed No Yes shared No Yes Use of Storage Allowed No Yes faxreceive No Yes Use of Storage Allowed No Yes X Proxy Setting No Yes ...

Page 729: ... minutes No Yes View Login User No Yes X Active Directory Settings No Yes Domain Name No Yes Search Attribute cn No Yes Linkage with User Control Function No Yes Pages Limit Group pagelimit No Yes Authority Group authority No Yes Favourite Operation Group favorite No Yes My Folder myfolder No Yes Device Registration Account No Yes User Name No Yes Password No Yes Setup Items Factory default settin...

Page 730: ...No Yes X Port Control No Yes Server Port No Yes HTTP Enabled No Yes Port Number 80 No Yes HTTPS Enabled No Yes Port Number 443 No Yes FTP Print Enabled No Yes Port Number 21 No Yes Raw Print Enabled No Yes Port Number 9100 No Yes LPD Enabled No Yes Port Number 515 No Yes IPP Enabled No Yes Port Number 631 No Yes IPP SSL Disabled No Yes Port Number 443 No Yes Tandem Output Receive Enabled No Yes Po...

Page 731: ... No Yes POP3 Enabled No Yes POP3 SSL Enabled No Yes SNMP TRAP Enabled No Yes Port Number 162 No Yes Notify Job End Enabled No Yes LDAP Enabled No Yes LDAP SSL Enabled No Yes SMB WINS Enabled No Yes SNTP Disabled No Yes mDNS Enabled No Yes Tandem Output Send Enabled No Yes Data Backup Send Enabled No Yes Print Release Enabled No Yes X Filter Setting Disabled No Yes Filter Disabled No Yes IP Address...

Page 732: ...Encryption Low No Yes Device Certificate No Yes Certificate Status No Yes Export Certificate and Private Key No Yes Make of Certificate Signing Request CSR No Yes X S MIME Settings No Yes Condition Settings No Yes S MIME Settings Disabled No Yes Device Certificate No Yes Certificate Status No Yes Sign Settings No Yes Sign E mail Always Enable No Yes Signature Algorithm SHA 1 No Yes Encryption Sett...

Page 733: ...s Number of EAP Retries 3 times No Yes Device Certificate No Yes Certificate Status No Yes CA Certificate Status No Yes Make of Certificate Signing Request CSR No Yes X Security Control No Yes Restrict Print Jobs other than the current Print Hold Job Disabled No Yes Restrict Operation Force Retention No Yes Reject Requests from External Sites Enabled No Yes X Document Administration Function No Ye...

Page 734: ...Setting No Yes Pre Set Word Enabled DO NOT COPY No Yes Unit Serial Number Disabled No Yes Account Job ID Disabled No Yes Login Name User Number Disabled No Yes Control No Disabled No Yes Date Time Disabled No Yes Disable Direct Entry Disabled No Yes Contrast No Yes Hidden Pattern Print No Yes Black 5 No Yes Magenta 5 No Yes Cyan 5 No Yes Custom Text Registration No Yes X Tracking Information Print...

Page 735: ...abled No Yes Fax Receive Enabled No Yes List Prints Enabled No Yes X Initialize Private Data Data in Machine No Yes X Security code input No Yes Setup Items Factory default setting U A Energy Save page 7 154 X Eco Setting No Yes Eco Recommendation Function Display Disabled No Yes Display Message When Extending Transition Time to Preheat Auto Power Shut Off Mode Disabled No Yes Mode Setting Custom ...

Page 736: ... Operation Settings No Yes X Power ON OFF Schedule Setting No Yes X Toner Save Mode All Invalid No Yes Setup Items Factory default setting U A System Control page 7 160 X Job Log No Yes Job Log Operation No Yes Job Log No Yes Save Job Log No Yes The Number of Job Log to Notify by E mail 50000 No Yes Delete Job Log No Yes View Job Log No Yes X Data Import Export CSV Format No Yes X Storage Backup N...

Page 737: ...ssage for black streaks detection Disabled No Yes X Copy Image Quality No Yes Quick Image Quality Adjustment 2 No Yes Colour Balance Colour All 0 No Yes Colour Balance Black White All 0 No Yes Color Copy Black Component Amount Adjustment All 0 No Yes Density Adjustment when Auto is selected for Exposure No Yes Colour Document Glass Document Feeder 5 Normal No Yes B W Document Glass Document Feeder...

Page 738: ...r Copy No Yes Auto Colour Calibration for Print No Yes Copy Calibration by Screen No Yes Printer Calibration by Screen No Yes Density Smoothing Adjustment Middle No Yes X Remove Toner Cartridge 1 No Yes Setup Items Factory default setting U A Initial Installation Settings X Condition Settings No Yes Name No Yes Machine Code No Yes Machine Location No Yes Memo No Yes Clock Adjust No Yes Current Dat...

Page 739: ... No Yes Display Message When Extending Transition Time to Preheat Auto Power Shut Off Mode Disabled No Yes Sleep Mode Power Level Low Power No Yes X Network Quick Settings No Yes X Paper Tray Settings No Yes X Product Key No Yes Setup Items Factory default setting U A ...

Page 740: ...current status of the machine If two or more errors occur at the same time only one status is displayed according to the priority order The errors and machine conditions are displayed in the following priority order Printer Error Account Limit Incorrect Paper Overdue service maintenance Paper jammed Marker supply missing No toner Replace waste toner box Cover open The paper is not available Input ...

Page 741: ... printed will vary depending on the machine specifications and peripheral devices installed Before printing the number of pages used select Settings administrator Status Data List List for Administrator In All Sending Address List the following items are handled by 2 sided printing on an item basis Individual List Group List Item Description Update button Updates the information displayed Paper In...

Page 742: ...the IPv6 status IPv6 Displays whether IPv6 is enabled DHCPv6 Displays the status of the DHCPv6 server Manual Address Displays the IPv6 address that has been manually specified Default Gateway Displays the current default gateway Link Local Address Displays the link local address Stateless Address 1 Displays the stateless address Stateless Address 2 Displays the stateless address Stateful Address D...

Page 743: ...on requires administrator rights Item Description Reboot the MFP Reboots the machine Tapping the Execute key opens the Restart screen and then tapping the Execute key again restarts the machine Enter the Power Save Mode Shifts the machine to power save mode Tap the Execute key to open the power save mode screen The two sided or one sided list printing setting is determined by Device Control Data L...

Page 744: ...owing modes can be printed Paper Settings List Machine Identification Settings List Operation Settings List Keyboard Settings List Device Control List Image Sending Activity Report The following Image Sending Activity Reports can each be separately printed Image Sending Activity Report Scan Image Sending Activity Report Internet Fax Image Sending Activity Report Fax Data Receive Forward List The f...

Page 745: ...tting Set whether the address will be shared with all users or only selected users If you select Select user click the user selection buttons to select the users with whom the address will be shared Share also to the following group When this function is enabled you can select a previously stored group from the list below and share the address with that group E mail E mail Address To store a new a...

Page 746: ...ext box Select the Add Hostname or IP Address checkbox and enter the host name or IPv4 address of the receiving machine in the Hostname or IP Address text box Example When the e mail address of the receiving machine is user sample_domain com and the IPv4 address is 192 168 123 45 Enter user sample_domain com in the Direct SMTP Address text box and enter 192 168 123 45 in the Hostname or IP Address...

Page 747: ...lour greyscale images To enhance black text when scanning select Bk Letter Emphasis User Name Enter a user name in the computer to be used for transmission Password Enter the password associated with the entered user name Enable SSL Use SSL to encrypt data before transmission Set as Default used Set an address as a default address Network Folder Network Folder Path To store a new path select New A...

Page 748: ... A specified file can be manipulated by clicking Print Send Move or Delete If the file to be manipulated has a password enter the password in PIN Code Password of File DOCUMENT OPERATIONS Item Description Display Style Saved files can be displayed in list format or thumbnail format Job Classification The saved files that are displayed can be filtered by job Display Items Set the number of files th...

Page 749: ...ckbox Item Description User Name Enter the user name Up to 32 characters Select from User List Click the Setup button and search for users from the list Login Name Set the number of files that are displayed Search Folder Set the folder File Name Enter a file name Up to 30 characters PIN Code Password of File Enter the password that is set for the file 5 to 32 digits Stored Date Set the date and ti...

Page 750: ... to be printed Paper Size Set the print size Orientation Select portrait or landscape for the print orientation 2 Sided Print Select one sided printing two sided printing booklet or two sided printing tablet Output If printing by set select the Print per Unit checkbox Separator Page Select to insert separator pages Specify whether separator pages are to be added in front of or behind each set Sele...

Page 751: ...ars in front of the user name of auto registered users When you select a user name the user edit or delete screen appears Storing a user When you tap the Add key the registration screen appears Up to 1000 groups can be registered For information on the settings see Settings page 7 58 Editing and deleting a user When you select a user from the list the user edit delete screen appears For informatio...

Page 752: ...the colour prohibited authority is granted Other User This is used when a print job is executed using invalid user information This cannot be selected from the login user screen For settings related to each of the users see the following table 1 Items that can be changed 2 For detailed information see Authority Group page 7 66 User Name Admin System Administrator Users Device Account Vender Vender...

Page 753: ...e And Password for User Authentication Set whether or not the login name password for user authentication will be the same as the user name password for home directory path authentication User Name Enter a maximum of 127 full width half width characters for the user name for home directory path authentication Password Enter a maximum of 255 numeric digits for the password for home directory path a...

Page 754: ... factory default page 7 57 User Authentication When User Authentication is enabled the authentication screen appears before an operation is carried out in any mode except the job status screen Log in as an already registered user After logging in you can move freely through the modes The login screen appears when a document filing file is used or when a broadcast transmission is reattempted from t...

Page 755: ...ction and then select Pages Limit Group Authority Group Favourite Operation Group and My Folder The Pages Limit Group Authority Group and Favourite Operation Group information that is registered in each machine determines the authority and settings that the user is actually granted To use this function to ensure that users are granted the same authority and settings on any machine register the Pag...

Page 756: ...d login will not be possible Maximum entries for User Name is 1000 Please delete old or unused user name Consult the administrator of the machine Item Description User Name Information is acquired from the LDAP server Initial 1 Index User1 Card ID PIN Code Password Authentication Server Settings Authentication Server Network Authentication E mail Address Information is acquired from the LDAP serve...

Page 757: ...ng Use IC Card for Authentication Use these settings for authentication and for use of a HID or other IC card Actions when the Limit of Pages for Output Jobs This setting determines whether or not a job will be completed if the page limit is reached while the job is in progress The following settings can be configured Job is Completed even when the Limit of Pages is Reached Job is Stopped when the...

Page 758: ...fies whether or not to enable automatic logout The time until logout can be specified up to 240 seconds in increments of 10 seconds Case sensitivity of login name is enabled Set whether or not to make login names used at the time of user authentication case sensitive If the checkbox is set to login names with identical spelling but different cases upper and lower will be identified as different lo...

Page 759: ... no groups are stored Release the Lock on Machine Operation Panel If login fails three times in succession you will be prohibited from logging in to the machine for 5 minutes This function can be used to cancel the 5 minute prohibition state Reset Counter After Sending E mail Status After E mail Status has been sent the counter is reset This only appears when E mail Status is enabled To specify On...

Page 760: ...t Setting Sets the page limit for the machine Settings Item Description Group Name Store a name of group up to 32 characters Select the Group Name to be the Registration Model Select one of the previously stored groups for use as a template for the new group When selected the settings of this group are applied Function Names The name of the functions that can be configured is displayed Set a limit...

Page 761: ...actory default Item Description Group Name Store a name of group up to 32 characters Select the Group Name to be the Registration Model Select one of the previously stored groups for use as a template for the new group When selected the settings of this group are applied The factory default groups and their settings are shown below Admin System Administrator User Guest Colour Prohibited Authority ...

Page 762: ...ing Allowed Prohibited Allowed Allowed Allowed Allowed Access to Fax Data Allowed Allowed Allowed Allowed Allowed Allowed Approval Setting for Addressing Approval Setting for Direct Entry Approval Setting to Use a Local Address Book Approval Settings to Use a Global Address Book All allowed All allowed All allowed All allowed All allowed All allowed Document Filing Scan to HDD Colour Scan Allowed ...

Page 763: ...hine Settings Total Count Allowed Allowed Allowed Prohibited Allowed Allowed Device Network Status Allowed Allowed Allowed Prohibited Allowed Allowed Power Reset Allowed Allowed Prohibited Prohibited Prohibited Prohibited List for User Allowed Allowed Allowed Prohibited Allowed Allowed List for Administrator Allowed Allowed Prohibited Prohibited Prohibited Prohibited Address Registration Allowed A...

Page 764: ...bited Prohibited Prohibited Prohibited Keyboard Settings Allowed Allowed Prohibited Prohibited Prohibited Prohibited Device Control Allowed Allowed Prohibited Prohibited Prohibited Prohibited Machine Identification Settings Allowed Allowed Prohibited Prohibited Prohibited Prohibited Clock Allowed Allowed Prohibited Prohibited Prohibited Prohibited Product Key Allowed Allowed Prohibited Prohibited ...

Page 765: ...sure Type Copy Ratio 2 Sided Original Binding Output Binding Output Offset Output Tray Separator Page Staple Sort Staple Position Punch and Fold Image Send Initial Status Settings Select settings for Image Orientation Exposure Resolution Colour Mode File Format and Original Image Type Select settings for Specified Pages per File and Fax Sender Name Document Filing Image Orientation Specify the ima...

Page 766: ... Settings Preview Setting Default List Thumbnail Display Fax I Fax Reception Data Select whether the default display format of the received fax I Fax list screen is list or thumbnails File Retrieve of Main Folder Quick File Folder Select whether the default display format of the document filing main folder and temporary folder screens is list or thumbnails File Retrieve of Custom Folder Select whe...

Page 767: ...each case are described in the table below Template Select a layout pattern of the registered key Key Layout of the Screen The layout of the keys in the home screen is displayed Change Text Colour On Home Screen Set the colour of the text in the scroll area fixed area and clock Home Button Registers the function to use for the selected key number Fix Key Registers the function to use for the selec...

Page 768: ...register edit or delete a billing code In addition you cannot directly type in a billing code in the billing code entry window Apply Default Code when Billing Code not entered Billing Code not Entered If this function is enabled a use code is always set while you are logging in with device account Item Description Next Displays the next user in the order of the registration numbers Previous Displa...

Page 769: ... the settings see Settings page 7 74 After the setting has been completed tap the Submit and Register Next key you can continuously register the next main code To end the registration process tap the Submit key Correct a main code Selecting a main code from the list displays the window to correct the main code For information on the settings see Settings page 7 74 After the setting has been comple...

Page 770: ...orrect a sub code Selecting a sub code from the list displays the window to correct the sub code For information on the settings see Settings page 7 75 After the setting has been completed tap the Submit key you can apply the corrected contents and complete processing Search for a sub code Enter the sub code and sub code name then tap the Search key the search result is displayed Settings Item Des...

Page 771: ...FeliCa User Area mode Check Facility Code in HID mode Checks the facility code of a HID card Facility Code Enters the facility code of a HID card When you tap the Store key the facility code is stored Importing from the setup file When you enter the configuration file name and tap the Execute key the card area settings are read from the configuration file If you tap the Clear key all files that ma...

Page 772: ... Home Button item Fixed area list Set the keys fixed keys that appear in the fixed area below the home buttons The order of arrangement of the keys is indicated by the No and the keys appear in the fixed key column To edit the fixed keys click the Fix Key item Display Toner Quantity Select this to display the toner level in the fixed area Item Description Icon list Use this setting to register ico...

Page 773: ...ge of a home button register the desired icon in advance using Icon and then select the image with Select File Item Description Background image list Image files such as a background images are registered in the registered image list To register an image click a name with a registered image or an unused name The background image registration screen will appear Register the desired image The format...

Page 774: ...s is used to set the default margin shift amount Specify a value from 0 mm 0 to 50 mm 2 in increments of 3 mm 1 8 for both the front and reverse sides Erase Width Adjustment This is used to set the default erase width for erase function Specify a value from 0 mm 0 to 25 mm 1 in increments of 3 mm 1 8 for both edge erase and centre erase InitialN Up Setting Set the default state for N Up Select the...

Page 775: ...special media enters the reversing unit a misfeed or damage to the unit may result If special media for which 2 sided copying is prohibited is often used it is recommended that you enable this setting Disabling of Auto Paper Selection Disables the Auto Paper Selection function When this setting is enabled automatic selection of paper that is the same size as the original on the document glass or i...

Page 776: ...py mode The following settings can be changed When high quality mode is not selected the following conditions must be satisfied in order to scan at 600 x 400 dpi and attain the fastest speed The copy ratio must be set to 100 Do not select a special mode that will change the ratio Do not copy in black and white with the Colour Start key When high quality mode is not selected the following condition...

Page 777: ...can set an image to be used in Custom Watermark in Custom Image of Others for copying Output Tray Specify the output tray Staple Configure staple settings Offset Set whether or not offset is performed in the default settings Separator Page Separator pages can be inserted before or after jobs Set the paper tray used for the separator pages Punch Configure punch settings Factory defaults This return...

Page 778: ...ze specified for a print job is different from the paper size inserted in the bypass tray Exclude Bypass Tray from Auto Paper Select When Auto is selected for paper type selection the bypass tray is excluded from the trays that can be selected This is recommended when special paper is often placed in the bypass tray Job Spool Queuing When this function is enabled received print jobs are displayed ...

Page 779: ...ction temporarily breaks the connection if the set duration of time elapses without any data being received by the port After the connection is broken the port is set to auto selection or the next print job is begun Enable Network Port Enables printing from the network port Network Port Emulation Switching This setting is used to select the emulated printer language when the machine is connected b...

Page 780: ...r Size Set the default paper size Output Tray Set the default delivery tray Paper Type Set the default paper type Resolution Setting 600dpi 600dpi High Quality 1200dpi 1 Disable Blank Page Print Enabled Disabled 2 Sided Print 1 Sided 2 Sided Book 2 Sided Tablet Colour Mode Auto Black White N Up Print 2 N Up 1 Up 2 Up 4 Up 8 Up Layout Left to Right 3 Right to Left 3 Right and Down 4 Down and Right ...

Page 781: ...CL environment Settings Quick File Disabled Enabled Setup Items Settings Setting PCL Symbol Set Setting Specify the symbol set used for printing Select from 35 items PCL Font Setting Select a font used for printing Internal Font Extended Font List of internal fonts when extended fonts are not installed PCL Line Feed Code This setting is used to select how the printer responds when a line feed comm...

Page 782: ... or the entire book On the MX 3050N MX 3550N MX 4050N this can only be enabled when the Direct print expansion kit is installed Print Release Settings Select this option to use the E mail printing For detailed information see Print Release Settings Guide Setup Items Settings Setting Screen Settings Configure image settings for PostScript Standard Text Photo Text Photo Dot High Line Number Dot Low ...

Page 783: ...y polling interval Enable SSL Use when SSL is used Direct Print Settings FTP Configure these settings if you will be printing files on an FTP server by direct print A list of available FTP servers is shown To add an FTP server click the Add button and configure the settings FTP Server Registration Configure FTP server settings Name Set the name to be used for direct print FTP Server Set the name o...

Page 784: ...name to be used for direct print Folder Path Set the folder path that has the files User Name Set the user name used to log in to the network folder Password Set the password used to log in to the network folder Print Setting from PC Mobile Terminal Configure these settings to print files on a computer or mobile terminal by direct print FTP Print Specify whether or not FTP print settings are used ...

Page 785: ...en to the display of address book If image send mode is enabled the Address Book is displayed in place of the initial screen of this mode Apply Addresses of Sending Modes Only When an address is selected from the address book only the addresses displayed in narrowing mode are applied Category Displayed as Default Select a category to be displayed with the default None Frequent Use Categories 1 to ...

Page 786: ...r Internet fax mode with another mode If this function is disabled an image specified with each Scan Setting is sent to E mail FTP Desktop and Network Folder Be sure to press Next Address Key before selecting the next address Set whether or not the Next Address key must be pressed before an address is added for a multi address job such as broadcast transmission Scan Complete Sound Setting Sets the...

Page 787: ...the machine Configure the setting for each of the following items Group Direct Entry Group Address Book Select All Selects all items Clear Checked Clears all selections Disable Registering Destination on Web Page Disables to store the destination from Setting mode Web version Configure the setting for each of the following items Group Direct Entry Group Address Book Contacts Select All Selects all...

Page 788: ...e PC Fax Transmission This prohibits PC Fax transmission Own Name and Destination Set Stores the Internet Fax or Fax sender information Sender Data Registration Use this to store the sender name for fax and Internet fax the sender fax number and the sender address for Internet fax The stored sender name and sender fax number or Internet sender address will be printed at the top of the received fax...

Page 789: ... Ultra Fine 4 Encrypt PDF Encrypt Compact PDF 3 Encrypt Compact PDF Ultra Fine 3 XPS RTF 5 TXT UTF 8 5 DOCX 5 XLSX 5 PPTX 5 1 When Black White is selected the format is TIFF 2 When Black White is selected the format is PDF 3 When Black White is selected the format is Encrypt PDF 4 When Black White is selected the format is PDF A 5 Can only be enabled on the MX 3060N MX 3070N MX 3560N MX 3570N MX 4...

Page 790: ...ply to in the send settings when performing Scan to E mail Compression Mode at Broadcasting Selects the compression mode for broadcasting using Scan to E mail or Internet fax The compression mode set here is used for all destinations regardless of their individual compression mode settings Black White MH G3 MMR G4 Colour Greyscale Low Medium High Bk Letter Emphasis Maximum Size of E mail Attachmen...

Page 791: ...anning Preset restriction of E mail for direct input Enable this setting to prohibit e mail transmission to an address that has an unsuitable domain A file will not be sent if the e mail address is entered directly and the domain is one of the set domains Default Address Default Address Setting A default address can be stored that makes it possible to transmit by simply pressing the Colour Start k...

Page 792: ...es Unit Serial Number You can add the machine s serial number to the file name Text You can add any text to the file name Up to 64 characters Sender Name You can add the sender s name to the file name Date Time You can add the date and time of transmission to the file name Session Page Counter You can add counter information to the file name Unique Identifier An ID number can be created for each f...

Page 793: ...nfigures the default settings for Internet fax Resolution Setting Apply the Resolution Set when Stored You can apply the resolution setting that was set when the file was saved to transmission of the file Resolution Setting Set the resolution used for file transmission Half Tone Enable half tones Auto Wake Up Print When the Power button is Off but the main power switch is On and an Internet fax is...

Page 794: ...nsmitted original on the transaction report For more information see Original Print on Transaction Report page 7 99 Activity Report Print Select Setting Prints the Image Sending Activity Report stored in the machine memory periodically The Image Sending Activity Report can be set to print each time the number of transactions reaches 200 or at a specified time once a day only The settings can be si...

Page 795: ...ted Rotation Sending Setting When transmitting an image that is one of the following sizes this function rotates the image 90 degrees counterclockwise The setting can be configured separately for each size A4 B5R A5R 8 1 2 x11 5 1 2 x8 1 2 R Default Own Number Sending You can include the date and your sender information sender name and address at the top of the page when the receiving machine prin...

Page 796: ...fax is received that includes printed information such as the sender s name and address the received image is slightly larger than the standard size This setting is used to automatically reduce the image to fit the standard size 2 Sided Printing of Received Data This is used to have received faxes printed on both sides of the paper When this setting is enabled and a fax consisting of 2 or more pag...

Page 797: ...me the machine waits until stopping reception can be set from 30 to 300 seconds in increments of 30 seconds if no response is received from the mail server POP3 server Reception Check Interval Setting Specifies an interval at which the machine automatically checks the mail server POP3 server for received Internet faxes The interval can be set from 0 minutes to 8 hours in increments of 1 minute If ...

Page 798: ...aximum of 20 full width half width characters for the sender name for Internet Fax transmission Source Address Enter a maximum of 56 half width characters for the sender address for Internet Fax transmission Item Settings Item Reception from the stored address domain is not allowed Allow Reception Reception from the stored address domain is allowed All Invalid All Invalid Add New Adds a new addres...

Page 799: ...arded to another Internet fax machine To cancel forwarding Tap the job status display and cancel fax forwarding in the similar way as for a transmission job Forwarding is not possible if no faxes were received or a forwarding fax number is not programmed For an explanation of settings related to the fax function see Fax Data Receive Forward Manual page 7 182 To enable Reception Start the POP3 serv...

Page 800: ... data select Forward All Received Data Forward Condition 1 2 3 You can set the forwarding date and destination Forward Condition Set the data forwarding conditions Day of the Week Select a day of week to start data forwarding Start Time Set a time to start data forwarding Completing Time Set a time to end the data forwarding Format for Forwarding Select a format of forwarding data Forwarding Desti...

Page 801: ...gistered in the address book sender s name is changed to contact s name When the sender of the data is stored in the address book the sender information is changed to the name stored in the address book 1 Enable the Inbound Routing function Tap the Administration Settings from the menu Enable the Inbound Routing function from the setting screen 2 Store the sender number or address Tap the Sender N...

Page 802: ...int received fax when save fails Save in inbound routing error box when save fails When save fails save the fax in the inbound routing error box Preset of Character Set the characters added to the file name when a file is saved When Character 1 and Character 2 are set in File Naming No 1 to No 7 the set characters are added to the file name Enter up to 64 full width half width characters File Nami...

Page 803: ...to send the image and metadata Allow Custom Filenames Enable or disable to edit the name of image file and XML file to be sent by the metadata send job Address Type Allowing Metadata Entry Set the destination information to be used for metadata transmission Name Enter a metadata name to be displayed on the touch panel XML Tag Name XML Tag Name Entry Type Direct entry Allows direct entry of each me...

Page 804: ...ge the preset ratio if necessary Delete All Quick Files Deletes all files from the Quick File folder except for protected files Delete Tap this key to start deletion of all files immediately Delete quick files at power up Protected files excluded This is used to automatically delete all files in the Quick File Folder with the exception of protected files when the Power button is turned On Image Or...

Page 805: ...function prevents an inconsistency of the date between the original data and output data and others Batch Print Settings Set whether or not the All Users key and the User Unknown key are prohibited in the user name selection screen when printing all files whether files are sorted by date in newest or oldest order and whether file names are sorted in ascending or descending order Erase Width Adjust...

Page 806: ...ings Delete Now When this is executed with a folder selected all files in the folder will be immediately deleted regardless of the date and time setting The items that appear will vary depending on the functions that have been added to the machine Item Settings Copy For each mode select whether or not copying of stored files is allowed Print For each mode select whether or not printing of stored f...

Page 807: ...ored For information on the settings see the following table Edit or Delete Standard Application When you tap an application name on the list the edit screen appears for that standard application Tap the Delete key to delete the standard application Settings These functions can be set only in the Web page Item Settings Application Name Enter an application name Address for Application UI Set an IP...

Page 808: ...ys enter the application name or Web service address Set Authentication Server Server 1 If the server is set the external authentication mode is selected Any access to the MFP is controlled by the application that you set on this page If set always enter the application name application UI address or Web service address of server 1 If not set the external totalling mode is selected Server 1 4 Set ...

Page 809: ... delete the standard application with the Delete key Polling Setting When linked to an external application you can store and manage addresses in order to use a service that uses a polling function When installing from the operation panel of the machine the files in the USB memory connected to the machine are installed When installing from the Web page the files in the computer are installed The m...

Page 810: ... Paper Type Registration page 7 117 Size Select the paper size from the list The paper sizes that can be selected vary by tray The sizes that can be selected may also be restricted by the paper type selected above For more information see Tray Settings page 7 116 If the desired size does not appear in the list select Custom Size and directly enter the size only for the bypass tray For more informa...

Page 811: ...1 2 A3 A4 B4 B5 320mm x 450mm 225mm x 320mm 8 1 2 x 13 1 2 8 1 2 x 13 2 5 8 1 2 x 13 Tray 3 when a paper drawer is installed Tray 4 when a paper drawer is installed Tray 3 when a stand 550 2100 sheet paper drawer is installed Plain Pre Printed Recycled Letter Head Pre Punched Colour User Type A4 8 1 2 11 Tray 4 when a stand 550 2100 sheet paper drawer is installed A4 B5 8 1 2 x 11 Tray 5 when a la...

Page 812: ...on can be set between 140mm and 457mm The factory default setting is 420mm The Y direction can be set between 90mm and 320mm The factory default setting is 297mm Size Input Inch The X direction can be set between 5 1 2 and 18 The factory default setting is 17 The Y direction can be set between 3 5 8 and 12 1 2 The factory default setting is 11 Paper Type Registration Store a paper type when the de...

Page 813: ...lay with the action panel on the screen Icon is displayed when LAN cable is not connected Show an icon when a LAN cable is not connected Display Confirmation Dialog when job is cancelled Show a confirmation dialog box when a job is cancelled Switch the Number of Sets to be Displayed for Job Status Set whether the remaining number of sets or the final number of sets is shown in the job status Align...

Page 814: ...input is registered Disable Auto Key Repeat This is used to disable key repeat Key repeat causes a setting to change continuously not only each time the key is tapped but while a key is tapped Time for Accepting Key Entry of Long Touch Select a time when a long key touch is detected Double Tap Interval Setting Select an interval when a double tap is detected Disabling of Job Priority Operation The...

Page 815: ...shows the folders as a list or as thumbnails Remote Operation Settings Configure settings required for remote operation of the machine from a PC connected to the same network Remote Software Operation Operational Authority This is used when remote software is used to operate the machine remotely View Password Entry Screen When remote software is used to operate the machine remotely you can have a ...

Page 816: ...opy Scan Internet Fax Fax and Data Entry tabs to configure settings for the favourite key screens shown in each of the normal modes Favorite Key Number Sets the favourite key number The items appear will appear in order on the screen starting from the item that is set in No 1 Key Name Enter a maximum of 20 characters for the favourite key name Function Menu To set functions such as Other Functions...

Page 817: ...ey layout and display according to the set language Set Keyboard Priority When an external keyboard is connected set whether the external keyboard or the keyboard shown on the touch panel soft keyboard is given priority Soft Keyboard Template Setting Register a text that you frequently use when entering an address or domain name in advance Enter a maximum of 16 characters ...

Page 818: ...ny paper types other than the paper types specified with this setting The paper type set for each paper tray by selecting System Settings in Settings Paper Tray Settings Selections Detectable original sizes Selections Document feeder tray automatic document feeder AB 1 A3 A4 A4R A5 B4 B5 B5R 11 x 17 8 1 2 x 14 8 1 2 x 11 A3 A4 A4R A5 B4 B5 B5R AB 2 A3 A4 A4R A5 B5 B5R 216 mm x 330 mm 8 1 2 x 13 A3...

Page 819: ...ese settings apply to plain paper recycled paper punched paper pre printed paper letterhead paper coloured paper and user type paper You can select 60g m2 to 89g m2 or 90g m2 to 105g m2 16 to 23 lbs or 23 to 28 lbs Data List To specify One Sided or Two Sided printing in Data List Disabling of Duplex This is used to disable 2 sided printing such as when the duplex module malfunctions Disabling of O...

Page 820: ...e finisher such as when it malfunctions Disabling of Stapler This setting is used to prohibit the use of staple such as when the staple of finisher or saddle finisher malfunctions Disabling of Punch This setting is used to prohibit the use of punch such as when the punch module of finisher or saddle finisher malfunctions ...

Page 821: ...ng of Auto Paper Selection Disables the Auto Paper Selection function When this setting is enabled automatic selection of paper that is the same size as the original on the document glass or in the automatic document feeder does not take place Disabling Registration of Custom Image Disables storage of a custom image Disabling sending while copying Disables the Image Send function during copy Print...

Page 822: ...n from Setting mode Web version Configure the setting for each of the following items Group Direct Entry Group Address Book Contacts Select All Selects all items Clear Checked Clears all selections Disable Registration Delection of All Program Items Disables the use of address book when a program is stored Disable Registration of Memory Box Disables all types of memory box registration Configure t...

Page 823: ...ion prevents an inconsistency of the date between the original data and output data and others Batch Print Settings When files are printed by batch printing you can prohibit selection of the All Users key and User Unknown key in the user selection screen and set whether the file order is by date from the newest date or oldest date or by file name in ascending order or descending order Operation Se...

Page 824: ...rawer such as when it malfunctions Disabling of Tray Settings Disable the tray settings Disabling of Finisher This setting is used to prohibit the use of finisher or saddle finisher such as when it malfunctions Disabling of Offset Disable offset output Disabling of Stapler This setting is used to prohibit the use of staple such as when the staple of finisher or saddle finisher malfunctions Disabli...

Page 825: ...If System Settings in Settings administrator Common Settings Enable Disable Settings Disabling of Clock Adjustment is enabled the date and time cannot be set Item Description Daylight Saving Time Setting Select whether or not the Daylight Saving Time Setting is enabled If disabled the following settings will not be possible Select Setting Type Specify whether the starting and ending day of dayligh...

Page 826: ...oduct key of the external account module Custom Link Setting The stored Web addresses can be displayed in the display area of the setting menu Click a custom link to jump to the website of the stored address If System Settings in Settings administrator Common Settings Enable Disable Settings Disabling of Clock Adjustment is enabled the date and time cannot be set Item Description Current Setting T...

Page 827: ...s When using the machine on a TCP IP IPv4 network use this setting to configure the IP address of the machine DHCP Use this setting to have the IP address obtained automatically using DHCP Dynamic Host Configuration Protocol BOOTP Bootstrap Protocol When this setting is enabled it is not necessary to manually enter an IP address IPv4 Address Enter the IP address of the machine Subnet Mask Enter th...

Page 828: ...s of system administrator Enable SSL If is selected the SMTP over TLS encryption communication can be used by STARTTLS command This requires the server to support the STARTTLS command To allow SSL communication set the Port Number to the same port number as the normal SMTP SMTP Authentication If is set the SMTP server authentication is carried out User Name Enter the user name Password Enter the p...

Page 829: ... the global address to be selected on the operation panel of the machine Authenticate a User in Global Address Search Select whether or not authenticate a user when a global address is searched for Enable SSL If is set the SSL encryption communication is enabled Connection Test Tap the Execute button to test the connection to the LDAP server Public Folder NAS Setting Set each option to Prohibited ...

Page 830: ...se this setting to have the IP address obtained automatically using DHCP Dynamic Host Configuration Protocol v6 When this setting is enabled it is not necessary to manually enter an IP address Manual Address Prefix Length Enter the IP address and the prefix length 0 to 128 of the machine Default Gateway Enter the default gateway address MTU Settings Set the maximum data size that can be forwarded ...

Page 831: ...mary Server Enter the IP address or the host name of the primary SMTP server Secondary Server Enter the IP address or the host name of the secondary SMTP server Port Number Enter a port number The default setting is port 25 Timeout Enter a timeout The default setting is 20 seconds This value is used for connection to the SMTP server and for data transmission according to the e mail system specific...

Page 832: ...munication or the STLS command To allow SSL communication set the Port Number to the POP over SSL communication port number To allow POP over TLS communication set the Port Number to the same port number as for the normal POP3 communication Connection Test Tap the Execute button to test the connection to the SMTP server Kerberos Kerberos Authentication Settings KDC Server Enter the IP address or h...

Page 833: ...ommunity name required for SNMP setting Change SET Community To change the SET community set TRAP Community Enter the community name to be used for the SNMP TRAP sent from the device TRAP Target Address Enter the IP address of the destination computer for SNMP TRAP communication SNMP v3 Settings SNMP v3 Settings Set this option to use the SNMPv3 settings User Name Enter the user name Authenticatio...

Page 834: ...option to use WSD printing Use Multicast Discovery Set this option to use multicast discovery Google Cloud Print Settings Google Cloud Print Specify whether or not Google Cloud Print is used Always Retain Prints The retention print function can be enabled in Google Cloud Print When this setting is enabled Google Cloud Print jobs are saved in the Main Folder of document filing When disabled the mac...

Page 835: ...hether the machine will be found when searched for from a client device This setting is the same as mDNS in the mDNS settings in the service settings of the network settings Service name Text box Set the printer name that will appear on the client device This setting is the same as the service name in the mDNS settings in the service settings of the network settings Installation location Set the n...

Page 836: ...ctory Path Enter a maximum of 127 full width half width characters for the home directory path User Name Enter a maximum of 127 full width half width characters for the user name for home directory path authentication Password Enter a maximum of 255 characters for the password for home directory path authentication Custom Property 1 10 Enter each custom property Port Number Enter a port number The...

Page 837: ...ype Encry and Security Key Initialize Wireless Settings Click the Initialize button The settings for SSID Security Type Encry and Security Key are initialized Item Settings public When Use of Storage is set to Allow the PDF files for PC viewing in the public folder can be accessed shared If the Use of Storage is set to Allow you can use the shared folder as a network folder faxreceive If the Use o...

Page 838: ...he communication mode is 11n Select the bandwidth to be used IP Address Distribution Range Setting Configure the range to be used the IP address Wireless Setting screen Infrastructure Mode If Connection Type is set to Wireless Infrastructure Mode and the Setup button is clicked the infrastructure mode wireless setting screen is displayed Configure the SSID of a wireless LAN Security Type Encry and...

Page 839: ...ho have logged in this machine are displayed Current Login User The currently logged in users are displayed Logout All Users The current login users are logged out Security Type Security Key WEP WPA WPA2 mixed Personal WPA WPA2 mixed Enterprise WPA2 Personal WPA2 Enterprise WEP64bit 5 characters or 10 digit hexadecimal number WEP128bit 13 characters or 26 digit hexadecimal number WPA WPA2 8 to 63 ...

Page 840: ...it Group Enter to set a page limit group The default setting is pagelimit Authority Group Enter to set an authority group The default setting is authority Favourite Operation Group Enter to set a favorite operation group The default setting is favorite My Folder Enter to set My Folder The default setting is myfolder Device Registration Account User Name Enter the user name to be used Password Ente...

Page 841: ...n password is required to select all settings and the same functions as those available with the user level password When you log on enter admin as the user name Then enter the administrator password that you have registered with this option If you tap the Store key without entering a password the previously set value is assumed Password protection is enabled by default Port Control Enable or disa...

Page 842: ...n Setting mode Web version Access When this setting is enabled all communication that attempts to access the machine by HTTP is redirected to HTTPS Client Port HTTPS Apply SSL encryption to HTTP communication FTPS Apply SSL encryption to FTP communication SMTP SSL Apply SSL encryption to SMTP communication POP3 SSL Apply SSL encryption to POP3 communication LDAP SSL Apply SSL encryption to LDAP co...

Page 843: ...able Sign E mail to use a signature Encrypt Enable encryption Disable sending to the addresses which cannot be encrypted Prohibit transmission to addresses that cannot be encrypted Make of Certificate Signing Request CSR Enter the information below and click the Execute key to create a Certificate Signing Request CSR Common Name Required Enter the name to be used Organization Enter the name of the...

Page 844: ...etime size Set the SA lifetime size IKE Lifetime Set the IKE lifetime IPsec Rules The registered IPsec rules are displayed To add a new rule click the Add key To delete a rule select the rule you want to delete and click the Delete key IPsec Rule Registration Rule Name Enter a name for the IPsec rule Priority Set the priority level Select the Rule Name to be the Registration Model If there is a pr...

Page 845: ...on Settings IEEE802 1X Authentication Set whether IEEE802 1X authentication is used EAP Authentication Method Set the EAP authentication method in IEEE802 1X EAP User Name Enter a maximum of 64 full width half width characters for the EAP user name used for authentication Password Enter a maximum of 64 half width characters for the EAP password used for authentication Server Authentication Set whe...

Page 846: ...a sent or received by facsimile or e mail transfer can be forwarded to any destination Item Settings Force Retention This setting forcibly sets all print jobs as print hold jobs even jobs for which print hold is not selected Disable Job Prohibit all print jobs other than print hold jobs List name Settings Forwarding Destination Settings Send Data Forward Send Data Set a destination to forward the ...

Page 847: ...ect a font size Angle Select a character angle Font Style Select the standard or italic character settings Camouflage Pattern Set a camouflage pattern Print Method Select a character display pattern Positive Negative Item Settings Pre Set Word Allows you to select a preset character string The following character strings can be selected DO NOT COPY Copy Ban Internal Use Only Handle with Care CONFI...

Page 848: ...ngs Tracking Information Print Setting Set this option to print the tracking information Print Information The following information can be printed Serial number characters account job ID login name user number date and time Select the Print Colour Select a print colour Position Set a print position on each page Select the Job to Print Set a job to print the tracking information ...

Page 849: ...n Time to Preheat Auto Power Shut Off Mode Set whether a message is displayed 15 seconds before Preheat Mode or Auto Power Shutoff Mode is entered Mode Setting Energy Save Custom Mode Eco Mode Eco Scan On Sending Modes Only On All Modes Except Copy Auto Power Shut Off Timer Change transition time by time of day Auto Fix transition time On 1min As soon as the remote job is finished enter Auto power...

Page 850: ...etes a print job received from the PC or outputs received fax data the machine immediately returns to the Auto Power Shut Off mode Fix transition time The Auto Power Off transition time is fixed When this setting is enabled the Change transition time by time of day option is disabled Change transition time by time of day This function controls the transition to Auto Power Shut Off mode optimally f...

Page 851: ...me period Up to 39 Sleep Mode Power Level Low Power The machine switches to the power saving mode but it takes some time to recover Fast Wake Up Compared with Low Power the power value rises by a certain degree but it results in faster recovery Motion Sensor This enables switching of power saving modes by the motion sensor If the machine does not have the 4 week job log information the machine ent...

Page 852: ...me by time of day and select an Automatic Update Pattern from the pull down list or one of Original Eco Patterns 1 to 4 To automatically analyze machine usage and update the pattern as needed set Automatic Update Pattern Edit Pattern Set the Original Eco Pattern Item Description Change Pattern Name To change the pattern name enter the desired name Pattern to Be Modeled Select the stored pattern th...

Page 853: ...energy saving pattern you want to apply Use the Pattern tab page 7 158 to specify the details of the energy saving pattern Operation for Holiday Configure how the machine operates if the preset specific date falls on a holiday Use the Holiday tab page 7 158 to specify the day as the holiday If a specific date that is initially specified coincides with the one that is moved because it falls on a ho...

Page 854: ...e is subject to the following restrictions If the machine is running due to the current job execution or other reasons the machine is turned off only after the job has finished The machine cannot receive printer jobs The machine can receive output jobs such as received fax data outputs If the Time Specified Output of Received Data setting is enabled they are output next time the machine is turned ...

Page 855: ...CSV format into the machine Storage Backup Address book information and user information stored in the machine can be saved to and retrieved from a USB memory device To use the machine to manipulate a file first insert the USB memory device in the machine If you need to select settings on the Web page use your computer to manipulate the file Export Exports data Import Imports data into the machine...

Page 856: ...he currently configured Setting mode in the machine memory The stored settings will be retained even if the Power button is turned off To retrieve the stored settings use Restore Configuration below Items not stored Network Settings These are not stored as unexpected settings may cause damage to the network Product Keys Product Keys are not stored as reissue of keys may be necessary Restore Config...

Page 857: ...o create a record of the current settings before restoring print the current settings by selecting Status in Settings administrator Data List List for Administrator Reset the NIC This returns all Network Settings to the factory default settings When settings are changed the changes will take effect after the machine is restarted To restart the machine see TURNING ON THE POWER page 1 10 ...

Page 858: ...ion When you enter multiple addresses separate them by a semicolon or a comma Send Now When tapped the status message is sent to the destination of the e mail address list Send on Schedule 1 If checked as an E mail is sent periodically according to the preset schedule Send on Schedule 2 If checked as an E mail is sent periodically according to the preset schedule Time Schedule Select a schedule to...

Page 859: ...uction or not The black streak reduction can be used for Scan Original Copy Image Send and Scan to HDD functions If the black streak reduction is enabled select any of the following options Treat Thin Black Streaks Use this setting to make thin black streaks less apparent Low level Normal Use this setting to make black streaks less apparent Medium level Treat Up to Thick Black Streaks Use this set...

Page 860: ...and black white copying when Auto is selected for the copy exposure The exposure can be adjusted separately for copying using the document glass and copying using the auto document feeder Sharpness You can make copy images in the default state sharper or softer Image Quality Priority Specify image quality priority Set this for the auto copy exposure and text printed photo settings Print Image Qual...

Page 861: ...just the contrast of scanned images Colour Profile Settings Set colour profiles used for printing Custom CMYK Simulation Profile Current Profile Name This shows the currently set profile name Profile Update Select the updated colour profile and click the Store key Custom Input Profile This shows the currently set profile name Profile Update Select the colour profile you want to update and click St...

Page 862: ...o Colour Calibration for Copy and Auto Colour Calibration for Print To return the adjusted values to their factory default state tap Return Density Smoothing Adjustment Value to Defaults If you tapped Return to the Defaults perform adjustment of the density that you want to readjust medium density in the default mode Remove Toner Cartridge Normally toner cartridges cannot be removed However when a...

Page 863: ... page 7 129 Machine Code Machine Location Memo Clock Adjust System Settings Common Settings Clock Adjust page 7 130 Daylight Saving Time Setting System Settings Common Settings Clock Adjust page 7 130 Preheat Mode Setting System Settings Energy Save Eco Setting page 7 154 Auto Power Shut Off Display Message When Extending Transition Time to Preheat Auto Power Shut Off Mode Sleep Mode Power Level N...

Page 864: ...bled No Yes Pause Time Setting 2 seconds No Yes Fax Dest Confirmation Mode Disabled No Yes Speaker Settings No Yes Speaker Volume 5 Yes No Ringer Volume Volume 2 No Yes Line Monitor Volume No Sound No Yes Fax Receive Complete Signal Volume 2 Tone Pattern 3 Transmission Complete Sound Time Setting 3 sec No Yes Fax Send Complete Signal Volume 2 Tone Pattern 3 Transmission Complete Sound Time Setting...

Page 865: ...iginal Image No Yes Recall in Case of Line Busy Varies depending on country and region No Yes Recall in Case of Communication Error Varies depending on country and region No Yes Disable Fax Broadcasting Disabled No Yes Receive Settings No Yes Number of Calls in Auto Reception 2 times No Yes Switching to Automatic Reception Disabled No Yes 2 Sided Printing of Received Data Disabled No Yes Auto Rece...

Page 866: ...f but the main power switch is On and a fax is received this function activates the machine and prints the fax When this function is disabled received faxes are not printed until the Power button is switched On Pause Time Setting Changes the length of pauses inserted in fax numbers If a hyphen is entered when dialling or storing a fax number a pause of 2 seconds is inserted It can be set between 1...

Page 867: ...that is printed when memory transmission is performed Print Out All Report Print Out Error Report Only No Printed Report This setting will not be effective if the next Activity Report Print Select Setting page 7 173 setting is set to Do not Print Transaction Report Print Select Setting Selects whether or not a transaction report will be printed and if printed the condition for being printed Select...

Page 868: ...attern You can set your machine to automatically receive faxes when your fax number is called by setting the pattern that corresponds to your fax number Note that in Canada six selections are available PBX Setting This Setting can only be activated in France and Germany When the machine is used on a PBX you can enable the PBX setting to have the machine automatically connect to the outside line Wh...

Page 869: ...number are printed at the top of faxes you send Sender Destination Name Switch Allows you to change the destination name and sender fax number if necessary Date Own Number Print Position Setting This setting determines the position of the date and sender information printed at the top of faxes by the receiving machine To have the information printed outside the transmitted document image tap the O...

Page 870: ...nited Kingdom France Germany Sweden Italy Spain Netherlands Saudi Arabia South Africa Hungary Czech Republic Slovakia Poland Greece Russia 1 to 10 default 2 any number of minutes from 1 to 15 default 3 Canada 1 to 14 default 2 Australia New Zealand Singapore Thailand Malaysia India Philippines 1 to 9 default 2 Hong Kong 1 to 3 default 2 Taiwan 1 to 15 default 2 any number of minutes from 4 to 15 d...

Page 871: ...e pages are printed on both sides of the paper Singapore Thailand Malaysia India Philippines 1 to 9 default 2 any number of minutes from 1 to 15 default 1 Hong Kong 1 to 3 default 2 Taiwan 1 to 15 default 2 Indonesia 1 to 5 default 2 any number of minutes from 4 to 15 default 4 When this setting is enabled note that your machine will not re attempt a call when manual transmission or direct transmi...

Page 872: ... Only one forwarding fax number can be programmed maximum of 64 digits To insert a pause between digits of the number tap the key If you wish to specify an F code confidential memory box in the destination machine tap the key after entering the fax number and enter the F code sub address and passcode Letter Size RX Reduce Print This program is not available in Canada and Philippines When a letter ...

Page 873: ... Prints Set the number of copies of received faxes that are printed to any number from 1 to 99 Staple Settings When a finisher is installed set the position at which received faxes are stapled Paper Size When a finisher is installed select the paper used for printing of received faxes This setting can only be used when the Multiple Set Print and Staple checkboxes are selected The maximum number of...

Page 874: ...have been stored disregard the numbers and allow reception from all numbers Add New Adds a new address or domain maximum of 50 from which reception is to be rejected or allowed Enter the number maximum of 20 digits and tap the Store key Registration Number List A list of the stored numbers can be displayed When you select a number from this screen it is deleted from the list Reject hidden Number I...

Page 875: ...only machines that have been stored in your machine Add New When the Polling Security Setting is enabled use this setting to store or delete the fax numbers of the machines that are allowed to poll your machine Up to 10 destination fax numbers can be stored Each number must be within 20 digits in length Passcode Number Key List This shows a list of the stored passcode numbers Select a number from ...

Page 876: ... broadcast transmission Up to 30 destinations can be stored to forward the received data The sub address and passcode that you program in the memory box are necessary for the other machine to send a fax to the machine by F code relay request transmission Memory Box Name Enter a name maximum of 18 characters for the memory box Sub Address Passcode Enter a sub address and passcode A maximum of 20 di...

Page 877: ...Only when a finisher is installed Forward Received Data When the machine cannot print because it is out of paper or out of toner received faxes can be forwarded to another previously stored fax machine If there is no forwarding data or if the destination is not registered no data is forwarded If Hold Setting for Received Data Print page 7 91 is enabled you are prompted to enter a password Enter th...

Page 878: ... are held by SHARP is not distributed Software Copyrights Copyright c 2000 Carnegie Mellon University All rights reserved Redistribution and use in source and binary forms with or without modification are permitted provided that the following conditions are met 1 Redistributions of source code must retain the above copyright notice this list of conditions and the following disclaimer 2 Redistribut...

Page 879: ...ademarks of the Massachusetts Institute of Technology MIT No commercial use of these trademarks may be made without prior written permission of MIT Commercial use means use of a name in a product or other for profit manner It does NOT prevent a commercial firm from referring to the MIT trademarks in order to convey information although in doing so recognition of their trademark status should be gi...

Page 880: ...tribution as the author of the parts of the library used This can be in the form of a textual message at program startup or in documentation online or textual provided with the package Redistribution and use in source and binary forms with or without modification are permitted provided that the following conditions are met 1 Redistributions of source code must retain the copyright notice this list...

Page 881: ...ing to freedom not price Our General Public Licenses are designed to make sure that you have the freedom to distribute copies of free software and charge for this service if you wish that you receive source code or can get it if you want it that you can change the software or use pieces of it in new free programs and that you know you can do these things To protect your rights we need to make rest...

Page 882: ...er of warranty keep intact all the notices that refer to this License and to the absence of any warranty and give any other recipients of the Program a copy of this License along with the Program You may charge a fee for the physical act of transferring a copy and you may at your option offer warranty protection in exchange for a fee 2 You may modify your copy or copies of the Program or any porti...

Page 883: ...of the work for making modifications to it For an executable work complete source code means all the source code for all modules it contains plus any associated interface definition files plus the scripts used to control compilation and installation of the executable However as a special exception the source code distributed need not include anything that is normally distributed in either source o...

Page 884: ...the rest of this License 8 If the distribution and or use of the Program is restricted in certain countries either by patents or by copyrighted interfaces the original copyright holder who places the Program under this License may add an explicit geographical distribution limitation excluding those countries so that distribution is permitted only in or among countries not thus excluded In such cas...

Page 885: ...inter to where the full notice is found one line to give the program s name and a brief idea of what it does Copyright C year name of author This program is free software you can redistribute it and or modify it under the terms of the GNU General Public License as published by the Free Software Foundation either version 2 of the License or at your option any later version This program is distribut...

Page 886: ...ublic Licenses are intended to guarantee your freedom to share and change free software to make sure the software is free for all its users This license the Lesser General Public License applies to some specially designated software packages typically libraries of the Free Software Foundation and other authors who decide to use it You can use it too but we suggest you first think carefully about w...

Page 887: ...ry the combination of the two is legally speaking a combined work a derivative of the original library The ordinary General Public License therefore permits such linking only if the entire combination fits its criteria of freedom The Lesser General Public License permits more lax criteria for linking other code with the library We call this license the Lesser General Public License because it does...

Page 888: ...For a library complete source code means all the source code for all modules it contains plus any associated interface definition files plus the scripts used to control compilation and installation of the library Activities other than copying distribution and modification are not covered by this License they are outside its scope The act of running a program using the Library is not restricted and...

Page 889: ... based on the Library with the Library or with a work based on the Library on a volume of a storage or distribution medium does not bring the other work under the scope of this License 3 You may opt to apply the terms of the ordinary GNU General Public License instead of this License to a given copy of the Library To do this you must alter all the notices that refer to this License so that they re...

Page 890: ...hat the Library is used in it and that the Library and its use are covered by this License You must supply a copy of this License If the work during execution displays copyright notices you must include the copyright notice for the Library among them as well as a reference directing the user to the copy of this License Also you must do one of these things a Accompany the work with the complete cor...

Page 891: ... automatically terminate your rights under this License However parties who have received copies or rights from you under this License will not have their licenses terminated so long as such parties remain in full compliance 9 You are not required to accept this License since you have not signed it However nothing else grants you permission to modify or distribute the Library or its derivative wor...

Page 892: ...n number If the Library specifies a version number of this License which applies to it and any later version you have the option of following the terms and conditions either of that version or of any later version published by the Free Software Foundation If the Library does not specify a license version number you may choose any version ever published by the Free Software Foundation 14 If you wis...

Page 893: ...ibrary is free software you can redistribute it and or modify it under the terms of the GNU Lesser General Public License as published by the Free Software Foundation either version 2 1 of the License or at your option any later version This library is distributed in the hope that it will be useful but WITHOUT ANY WARRANTY without even the implied warranty of MERCHANTABILITY or FITNESS FOR A PARTI...

Page 894: ...e freedoms that you received You must make sure that they too receive or can get the source code And you must show them these terms so they know their rights Developers that use the GNU GPL protect your rights with two steps 1 assert copyright on the software and 2 offer you this License giving you legal permission to copy distribute and or modify it For the developers and authors protection the G...

Page 895: ...1 Source Code The source code for a work means the preferred form of the work for making modifications to it Object code means any non source form of a work A Standard Interface means an interface that either is an official standard defined by a recognized standards body or in the case of interfaces specified for a particular programming language one that is widely used among developers working in...

Page 896: ...egal power to forbid circumvention of technological measures to the extent such circumvention is effected by exercising rights under this License with respect to the covered work and you disclaim any intention to limit operation or modification of the work as a means of enforcing against the work s users your or third parties legal rights to forbid circumvention of technological measures 4 Conveyi...

Page 897: ...y and only if you received the object code with such an offer in accord with subsection 6b d Convey the object code by offering access from a designated place gratis or for a charge and offer equivalent access to the Corresponding Source in the same way through the same place at no further charge You need not require recipients to copy the Corresponding Source along with the object code If the pla...

Page 898: ...ditional permissions apply only to part of the Program that part may be used separately under those permissions but the entire Program remains governed by this License without regard to the additional permissions When you convey a copy of a covered work you may at your option remove any additional permissions from that copy or from any part of it Additional permissions may be written to require th...

Page 899: ...ently reinstated you do not qualify to receive new licenses for the same material under section 10 9 Acceptance Not Required for Having Copies You are not required to accept this License in order to receive or run a copy of the Program Ancillary propagation of a covered work occurring solely as a consequence of using peer to peer transmission to receive a copy likewise does not require acceptance ...

Page 900: ...identifiable patents in that country that you have reason to believe are valid If pursuant to or in connection with a single transaction or arrangement you convey or propagate by procuring conveyance of a covered work and grant a patent license to some of the parties receiving the covered work authorizing them to use propagate modify or convey a specific copy of the covered work then the patent li...

Page 901: ...al or different permissions However no additional obligations are imposed on any author or copyright holder as a result of your choosing to follow a later version 15 Disclaimer of Warranty THERE IS NO WARRANTY FOR THE PROGRAM TO THE EXTENT PERMITTED BY APPLICABLE LAW EXCEPT WHEN OTHERWISE STATED IN WRITING THE COPYRIGHT HOLDERS AND OR OTHER PARTIES PROVIDE THE PROGRAM AS IS WITHOUT WARRANTY OF ANY...

Page 902: ... of the GNU General Public License along with this program If not see http www gnu org licenses Also add information on how to contact you by electronic and paper mail If the program does terminal interaction make it output a short notice like this when it starts in an interactive mode program Copyright C year name of author This program comes with ABSOLUTELY NO WARRANTY for details type show w Th...

Page 903: ...fic prior written permission of Sam Leffler and Silicon Graphics THE SOFTWARE IS PROVIDED AS IS AND WITHOUT WARRANTY OF ANY KIND EXPRESS IMPLIED OR OTHERWISE INCLUDING WITHOUT LIMITATION ANY WARRANTY OF MERCHANTABILITY OR FITNESS FOR A PARTICULAR PURPOSE IN NO EVENT SHALL SAM LEFFLER OR SILICON GRAPHICS BE LIABLE FOR ANY SPECIAL INCIDENTAL INDIRECT OR CONSEQUENTIAL DAMAGES OF ANY KIND OR ANY DAMAG...

Page 904: ... may terminate this License at any time by destroying the Software and related documentation and all copies thereof This License will terminate immediately without notice from SHARP and or SHARP s Licensors if you fail to comply with any provision of this License Upon termination you must destroy the Software and related documentation and all copies thereof 4 Export Law Assurances You agree and ce...

Page 905: ...ES INCLUDING NEGLIGENCE SHALL SHARP BE LIABLE FOR ANY INCIDENTAL SPECIAL OR CONSEQUENTIAL DAMAGES THAT RESULT FROM THE USE OR INABILITY TO USE THE SOFTWARE OR RELATED DOCUMENTATION EVEN IF SHARP OR A SHARP AUTHORIZED REPRESENTATIVE HAS BEEN ADVISED OF THE POSSIBILITY OF SUCH DAMAGES SOME JURISDICTIONS DO NOT ALLOW THE LIMITATION OR EXCLUSION OF LIABILITY FOR INCIDENTAL OR CONSEQUENTIAL DAMAGES SO ...

Page 906: ...2016A EX2 ...

Reviews: