background image

English Englis_ 

English

 _31

SYSTEM MANAGEMENT

Function Name

Descriptions

Anti-passback

Antipassback limits door access only when entering and exiting matches if a door is installed with two 
separate readers both for entering and exiting respectively. In general, this function is used for preventing 
entering a door by following the previous authorization.

Alarm waiting time setting

You can set the delay time until the product triggers the door open alarm if the door stays open after the 
Door Relay time. This function requires Door Contact Sensors installed. 

Voice mode

You can set to play recorded voice guide.

Voice Mode Time Schedule

You can set time schedule for voice mode, which will play recorded voice guide only within the specifi ed 
time table.

Duress Mode

Duress mode requires the Duress Mode Password for enabling this function. Duress mode is a special 
feature that outputs a special tacit alarm signal when it is forced to open the restricted area, by entering 
2-digit code before authorizing. The door opens as normally but the program generates duress event 
which will trigger the alert.

Duress Mode Password

The 2-digit password to trigger the Duress mode.

Arm/Disarm

Alarm controllers of other manufacturers can be connected through the access controller’s output if 
required. At the moment, if armed with the ARM code and ARM card, it can be confi gured to make all 
access controllers of doors to deny any access requests.

Arm Code

This is a two-digit code required to set the arm function.

Disarm Code

This is a two-digit code required to release the arm function.

Enable Two Men Mode

Enable this when two men operation mode (for administrator and visitor) is required. If this is enabled, the 
door will be not open until both the administrator card and the visitor card issued in the Card Holder 
settings are authorized.

Duress mode and Arm/Disarm will require keypad readers (SSA-R2000, SSA-R2001, etc.) if used with the 
SSA-P102 and 400 series products.

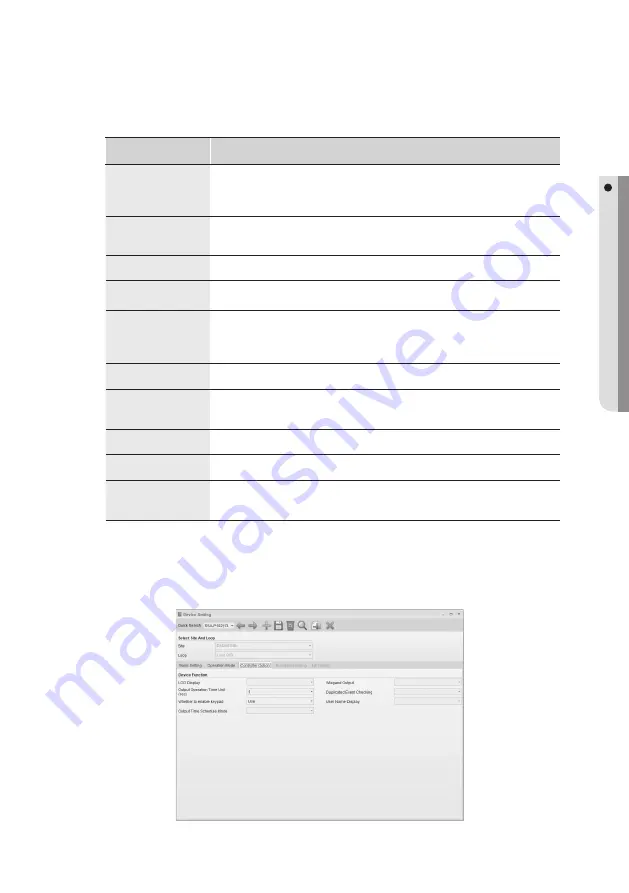
 Move to the [Controller Option] tab.

J

14.

Summary of Contents for TECHWIN SAMS Pro

Page 1: ...SAMS Pro SAMS Pro Lite User Manual SSA M2000 SSA M2100 ...

Page 2: ...ght of this document Under no circumstances this document shall be reproduced distributed or changed partially or wholly without formal authorization of Samsung Techwin Disclaimer Samsung Techwin makes the best to verify the integrity and correctness of the contents in this document but no formal guarantee shall be provided Use of this document and the subsequent results shall be entirely on the u...

Page 3: ... Group Settin 42 User Accounts Role Setting 43 Setting The Door Access By Users DEVICE MANAGEMENT 44 44 Initialize Device 45 Device Time Setting 46 Batch Transmit By Device 47 Card Holder Batch Transmit By Device 49 Device Version And Registered No Of User 50 Master Card Management Contents OPERATION MANAGEMENT 53 53 Company Setting 54 Department Setting 54 Title Setting 55 Position Setting 55 Com...

Page 4: ...3 Card Holder Management VIDEO MONITORING 94 94 Recorder Setup Register 97 Camera Settings 99 Camera Mapping 100 Search Video Data Search Play 101 Recorder Camera Settings Report 102 Live Video 103 Configuring The Live Screen 104 Event Video Screen 104 Configuring The Event Video Search LIFT 105 105 Lift Setting 107 Lift Output Point Setting 109 Lift Access Group Setting 110 Lift Access Group Report...

Page 5: ... Card Holders By Doors 169 Accessible Door Report By Person 170 Normal Event Report 172 Alarm Report 173 Reader Event Summary 175 Access Event Summary 176 Mustering Report 177 Auditing Log Report 179 Notification Report 180 Login out Report 182 Patrol Report 183 Visitor Information Report TROUBLESHOOTING 184 184 Troubleshooting APPENDIX A 187 187 Introduction On Sams Pro 188 Understanding Sams Pro ...

Page 6: ...PACKAGE SAMS consists of the following SAMS Pro SAMS Pro Lite SAMS Pro SAMS Pro Lite USB Keylock Driver SSA X500 Installation User Manual SAMS Pro SAMS Pro Lite Installation files of SAMS Pro SAMS Pro Lite SAMS Pro SAMS Pro Lite USB Keylock Driver SAMS is free of charge for controlling less than 40 doors and 1 000 card holders For bigger capacity it is required to purchase a Keylock To enable use o...

Page 7: ...or visitor management SAMS Integrated Monitoring A program that provides integrated monitoring of access control events and video SAMS Manager A program that provides scheduled task execution for SAMS e g Scheduled DB backup Device Time sync etc refer Appendix D Installing Run SAMS Setup file and select preferred language for your installation process You can select from Korean and English Click OK...

Page 8: ...roceed unless you agree to the terms of use If you computer is not installed with Microsoft SQL Server already below screen appears for SQL Server installation For the Windows Server 2008 operating system install Microsoft NET Framework 3 5 SP1 by referring to Appendix B Install NET Framework 3 5 SP1 on Windows Server 2008 3 4 5 J ...

Page 9: ...er to Microsoft knowledge base or forums or try clean installation of the operating system For custom installation or installation with existing MS SQL Server products make sure to select mixed authentication mode Windows authentication and SQL Server authentication SAMS database connection supports SQL Server authentication only For custom installation or installation with existing MS SQL Server ...

Page 10: ...dividual program may differ depending on the package In general installation all programs are installed onto one computer If selected database from the installable programs a screen for selecting database server appears as shown below In this installation example the database server name is SAMS and its password is set to samsp w4321 Set as shown below and continue 8 9 J 10 ...

Page 11: ...which contains user inputs is mdf and the ldf files are logs These two SAMS database files are located in the SAMS Pro SAMS Pro Lite Database folder under the installation path More data results bigger file size Check settings items and click Next If a database server named SAMS already exists on the installing computer the server is automatically updated to SQL Server 2008 R2 Express Updating may ta...

Page 12: ... SAMS and its password is set to samsp w4321 from the screen shot 6 of page 9 Click Connection Test button to check the connection A message appears if succeeded Databasc Configuration Information The default database name of SAMS Pro is SAMSUNG_PRO The default database name of SAMS Basic is SAMSUNG_ACS If changed database password run Config exe to update the system with the changed information Cl...

Page 13: ...R2 Express to ON before checking the database connection in SAMS Config Run Microsoft SQL Server 2008 R2 Configuration Tools SQL Server Configuration Management Click SQL Server Network Configuration SAMS Protocol Select TCP IP from the list and right click on it to set to ON Click SQL Server Service SQL Server SAMS Restart ...

Page 14: ...he server for proper running of SAMS Pro SAMS Pro Lite and SAMS VM Visitor Management If you changed database server computer s name database name or database password during installation run the SAMS Communication Server to reflect changes to database settings From the server setup configure the database settings Make your changes for Server Setting and then Database Setting from the Setup in order...

Page 15: ...l may not be recognized In such cases enter the computer s name or the IP address instead of local Once completed with setup click System Tasks Server Restart 2 below the Server Setup to check connection to the database server For successful database test connection a message below appears ...

Page 16: ...s admin If you are logging in for the first time click Login without entering the password You will be prompted to change the password Password should meet the following condition s Must be at least 8 characters Must contain at least one alphabet Must contain at least one number Must contain at least one special character 1 2 J 1 2 3 4 Logging in SAMS PRO ...

Page 17: ...ng existing data Delete Used for deleting existing data Transmit Used for sending data to devices Receive Used for receiving data from a device Batch transmit Used for sending data to devices in a batch Batch receive Used for receiving data from a device in a batch Close Close or exit the screen Previous Moves to the previous existing data Next Moves to the next existing data Save Saves the data S...

Page 18: ...essary In the Device tab you can check the structured information system of the registered devices In the Connection Status Device tab you can check the communication status of the device In the Connection Status Recorder Camera tab you can check the structured information system of the registered recorders and cameras as well as the communication status between camera and recorder Furthermore you...

Page 19: ...vice Setting Wizard provides faster and easier device setup steps This is not available in SAMS Pro Lite Device Setting Wizard Site Setting Registered Site List Shows the list of registered sites Select a site by checking the Whether to use checkbox and use Connection Test button to test the connection and move to the next step if successful Site Setting Use this button to setup a new site and reg...

Page 20: ...ommunication settings refer to the Network Communication section Click Loop Setting to add a loop Enter the Loop Enter the Communication Port that is used for communication to the device Enter the baud rate of the device to Speed Check your device and specify the value properly since the baud rate differs from devices When you complete your selection press the Save button Once completed with addin...

Page 21: ...displayed in the Searched Controller List The controllers found will be displayed in the Searched Controller List Select a controller to use in the controller list and drag and drop it to the Registered Controller List on the bottom Or use the triangle or the inverted triangle shaped button to register or delete it Select the name column of each controller in the Registered Controller List and ren...

Page 22: ...on of the firewall function as follows Select the Exception tab in Control Panel Security Center Windows Firewall Click Add Programs to install SAMS Pro This is a step to configure the device settings Scan for controllers to communicate with via the previously specified loop and select one to register Specify the address range for the controllers to scan for By default the automatic scan will check t...

Page 23: ... input box Select a floor to be added in the Available Floor List and use the right arrow key to move to the right Or use the mouse to drag and drop an item Click Save in the tool bar Modify Use Quick Search at the top toolbar to find desired data for modification and select a floor to be added and move it to the right pane or delete by moving a floor to the left pane and click to save changes Delete U...

Page 24: ...ommunication Server Pro Enter the IP address that is assigned to the PC Check the port It is recommended to use the default 51008 If this port is changed communication to the SAMS Communication Server Pro may not establish If changed this port make the same change to the SAMS Communication Server Pro too Check whether the Use is checked If Use is not checked communication to the corresponding comm...

Page 25: ...Loop Select Serial Communication in Communication Type Check Whether to use If unchecked devices connected to the selected loop will not communicate Set the interval of polling in Polling Speed ms It is recommended to set to 200 ms even the optimal polling speed may vary depending on devices Access controllers will communicate with the management program for data transfer in polling method Polling...

Page 26: ...anagement program must match For setting the device s communication setting refer to the product documentation for further details Click Save in the tool bar When Do you want to restart the communication server message appears click Yes Y If SAMS Communication Server Pro is running and site configuration is properly done communication server will restart normally If SAMS Communication Server Pro is...

Page 27: ...cation in Communication Type Select whether to use or not in Whether to use If unchecked devices connected to the selected loop will not communicate Set the interval of polling in Polling Speed ms It is recommended to set to 200 ms even the optimal polling speed may vary depending on devices Access controllers will communicate with the management program for data transfer in polling method Polling...

Page 28: ... port number and baud rate Column Name Descriptions IP addres Enter the IP address of the added device Subnet Mask Enter the Subnet Mask of the added device Gateway Enter the Gateway address of the added device Port Enter the port number for the communication with the added device It is recommended to use the default 5000 Baud Rate Enter the baud rate of the network converter which means communica...

Page 29: ...Device Setting provides setup methods of controller and other biometrics readers related to communication address name and other detailed options of each device From the upper menu select System Management Device Setting Click Add in the tool bar Select a Site Select a Loop Move to the Basic Setting tab Select a Device Type Select Controller for access controller device or select Biometrics Reader...

Page 30: ...ice not to duplicate already existing device name even for devices in different loops Check Whether to use If unchecked the selected device will not be activated Set the Card Memory Card memory field will be activated or deactivated according to the device type When this option is enabled you can set the card memory for registering to the device and its transaction memory will be automatically defin...

Page 31: ...cit alarm signal when it is forced to open the restricted area by entering 2 digit code before authorizing The door opens as normally but the program generates duress event which will trigger the alert Duress Mode Password The 2 digit password to trigger the Duress mode Arm Disarm Alarm controllers of other manufacturers can be connected through the access controller s output if required At the mo...

Page 32: ...nable keypad For devices with built in keypad select whether to allow keypad use Wiegand Output Select whether to output the authorization number through the Wiegand output on a successful accessing Duplicated Event Checking Select whether to detect duplicated events User Name Display Specify whether to display accessing user s name Applied to SSA S210x series and SSA S301x series Output Time Sche...

Page 33: ...he recognition speed is slightly slowed down This function improves the recognition rate by compensating dry and wet fingerprints When it is enabled the fingerprint scanner s red indicator will blink during the recognition Set this function not to use if increased recognition speed is necessary When it is disabled the fingerprint scanner s red indicator will turn on during the recognition Fingerprint...

Page 34: ... door setting tabs appeared Enter the Door Select Area Select an Operating Time This field is an optional item set this if required Set the unlock duration time on a successful authorization by the access control Sample screen shows the case of SSA P40x T when Door Lock is installed on the Relay 1 If the Door Lock is not connected to the Relay 1 leave it empty and set the time in the corresponding ...

Page 35: ... reader Select a Operation Mode Operation Mode options differs from the reader types RF Only authorizes access only with the card RF Fingerprint Password authorizes access with combination of card and fingerprint or card and password RF Fingerprint Password authorizes access with combination of card fingerprint and password Select whether to use Operation Mode Time Schedule Usage This field is an opt...

Page 36: ...earch in the tool bar Available reader points are listed in the Select Reader Point list on the right pane of the screen Reader points displayed may differ from device s type that is registered in the Device Setting You can set output signal s duration for each item listed in the Select Reader Point For example you can specify the signal duration for which output for how many seconds long whenever...

Page 37: ...ut Point Setting Select an item to change using Quick Search in the tool bar Available input points are listed in the Select Input list on the right pane of the screen Input points displayed may differ from device s type that is registered in the Device Setting Select an input point to be edited from the Select Input list Move to the Basic Setting tab Enter the Input Name The entered name is used ...

Page 38: ...s for inputs on a graphic map Select an Icon This field is an optional item set this if required Sets the icon for the input Move to the Output Time Setting tab You can set output signal s duration for each input point For example pressing the exit button requires signaling the door contact of the corresponding door to open it In general Output 1 is set to 03 seconds of activation when the exit but...

Page 39: ...registered in the Device Setting Select an output point to be edited from the Select Output list Move to the Basic Setting tab Enter the Output Name Select an Output Type Select Door Lock when the output is connected to a door lock Door Alarm for door alarm devices or General for other devices Select the Time Schedule This field is an optional item set this if required Set the time schedule for eac...

Page 40: ...ounts Setting Click Add in the tool bar Enter the user s Login ID Enter the Password and Password Confirmation Select a Company If selected All the account can manage information of all registered companies If selected a certain company name registered the account can manage the selected company information only Click Save in the tool bar Modify Use Quick Search at the top toolbar to find desired da...

Page 41: ... the upper menu select System Management User Accounts Group Setting Click Add in the tool bar Enter the User Accounts Group Select Whether to Add of members to be included to the user accounts group in the Member list Click Save in the tool bar Modify Use Quick Search at the top toolbar to find desired data for modification change as necessary and click to save changes Delete Use Quick Search at th...

Page 42: ...egistered From the upper menu select System Management User Accounts Role Setting SAMS Pro SAMS Pro Lite Select a User Accounts Group Grant permissions of each menu item New Save Delete View Report Transmit Receive Batch Receive and Batch Transmit Click Save in the tool bar Only those users who log in as a user account belonging to Admin Group can access User Accounts Setting User Accounts Group S...

Page 43: ... door s monitoring and lock unlock From the upper menu click System User Accounts Door Setting Select the User Accounts Group Grant or refuse permissions monitoring lock unlock of each door to the account group Click the Save button of the toolbar A user belongs to the Admin Group is granted with all permissions of monitoring lock unlock to every doors Not modifiable 1 2 3 4 J ...

Page 44: ...Biometrics Device tab for biometrics reader device initialization Select the Product Type to be initialized Select the Initialization Type Initialization Type Descriptions System Initialization Initializes the system and deletes all information added ID fingerprint event time schedule and holiday and restores the factory default values Card ID Clear Deletes all ID and fingerprint information added t...

Page 45: ...er s current time To specify a certain time point check Time Setting with User Input Enter the Date and Time Click Transmit button in the toolbar to send the configuration to the device To confirm the data transmission and its result run the Monitoring Integrated Monitoring from the toolbar before clicking the transmit button The data transmission result of each item will be displayed in the Auditin...

Page 46: ...h Transmit by Device When enabling User Name Display for devices of SSA S30XX or SSA S210X initialize card IDs registered to the corresponding device before transferring the settings Select the Controller tab for controller transmission or Biometrics Device tab for biometrics reader device transmission Select the device for sending settings information in the Product Type Select information items ...

Page 47: ... the selected device option searches and transmits card holder information according to the group accessing permissions to which the card holder belongs regardless of the search conditions Mark or unmark card holders displayed in the Card Holder List for the transmission Click Transmit button in the toolbar to send the configuration to the device To confirm the data transmission and its result run t...

Page 48: ...name by default Pressing the Transmit button will transmit information to the selected device and update the corresponding information in the database You can edit individual card holder s information created by the sequential creation Essential input fields required for card holder management will be generated automatically with default values Card Type will be Access Card the password will be 000...

Page 49: ...nt Device Version and Registered No of User Select the Controller tab for controller transmission or Biometrics Device tab for biometrics reader device transmission Select the device from which to receive data in the Product Type Click Receive button in the tool bar Received information is displayed in the Product Version Name and Registered Number of User fields of the Device Information pane 1 2 ...

Page 50: ...t management by the device and this program supports master card management for the first one From the upper menu select Device Management Master Card Management Click Add in the tool bar Select a Company Enter the Card Number For SSA S30XX and SSA S210x you can set the Master Card as the PIN number To activate the PIN number please select the PIN number checkbox For further instructions on registr...

Page 51: ...r turns off release your finger and then put the same finger onto the fingerprint scanner again when the light turns on As shown in the figure the registered fingerprint is scanned properly if the fingerprint is clear and marked with stars more than 3 Once completed with the first fingerprint scanning release your finger from the scanner and wait until the red indicator turns on before the second fingerprin...

Page 52: ... the transmit button The data transmission result of each item will be displayed in the Auditing Log window of the integrated monitoring screen Modify Use Quick Search at the top toolbar to find desired data for modification change as necessary and click to save changes If required move to the Device List tab and send information as necessary Delete Use Quick Search at the top toolbar to find desired...

Page 53: ... the logo click Open to register it before use Provide information for the other items if required as they are optional Click Save in the tool bar Modify Use Quick Search at the top toolbar to find desired data for modification change as necessary and click to save changes Delete Use Quick Search at the top toolbar to find desired data for deletion select desired data to be deleted and click to delet...

Page 54: ...o find desired data for deletion select desired data to be deleted and click to delete If you are prompted to delete it click Yes TITLE SETTING Enter the job title Title Setting Add From the upper menu bar select Operation Management Title Setting Click Add in the tool bar Provide a job title in the Title input box Click Save in the tool bar Modify Use Quick Search at the top toolbar to find desired...

Page 55: ...d click to save changes Delete Use Quick Search at the top toolbar to find desired data for deletion select desired data to be deleted and click to delete If you are prompted to delete it click Yes COMPANY DEPARTMENT SETTING Specify departments to use for each registered company From the upper menu bar select Operation Management Company Department Setting Select a company in the Select Company lis...

Page 56: ... registered company From the upper menu bar select Operation Management Company Title Setting Select a company in the Select Company list box Select a job title in the Title List and use the right arrow key to move to the right Or use the mouse to drag and drop an item Click Save in the tool bar 1 2 3 4 ...

Page 57: ...gistered company From the upper menu bar select Operation Management Company Position Setting Select a company in the Select Company list box Select a job title in the Company Position List and use the right arrow key to move to the right Or use the mouse to drag and drop an item Click Save in the tool bar 1 2 3 4 ...

Page 58: ...ry door by releasing the lock on the door when a Fire Sensor event occurs which is specified in System Management Input Point Setting This feature operates using SAMS Pro and SAMS Communication Server Pro which may not work for the following reasons If fire events are received late because of lots of events in standby If the system PC is turned off or does not work If the communication configuration ...

Page 59: ...ting menu Move to System Management Input Point Setting select an input point in the Input Point Setting menu and set the Input Type to Fire Sensor Select a door that was open when a fire signal occurred in the Door List and use the right arrow key to move to the right Or use the mouse to drag and drop an item Click Save in the tool bar Modify Use Quick Search at the top toolbar to find desired data...

Page 60: ...layed for reception and processing the application operating PC is turned off or not properly operating communication between devices or its configurations are not properly set SAMS Pro or SAMS Communication Server Pro is not running Upon a fire event SAMS Pro will report all registered area s mustering report if card holders did not properly conduct entering exiting card readings An entrance assign...

Page 61: ...se Quick Search at the top toolbar to find desired data for modification change as necessary and click to save changes Delete Use Quick Search at the top toolbar to find desired data for deletion select desired data to be deleted and click to delete If you are prompted to delete it click Yes 5 6 7 ...

Page 62: ...xiting card reader has reading event of the card holder the card holder is checked out of the area To force out the card holder use Confirm card has left the area menu From the top menu bar select Operation Management Confirm card has left the area Provide the search criteria as necessary Click Search to start searching Select the card holder to be checked out of the area Click button to check the c...

Page 63: ...Graphic Map Setting From the tool bar click Add Provide a map name in the Graphic Map input box Select Building Floor in the Graphic Map Location and select the building and the floor that are applicable to the current graphic map Click Open Map File to select a graphic map file image file You can add map image files in the formats bmp jpg jpeg gif png and wmf However it is recommended to use the jpg ...

Page 64: ... tab select a door and drag and drop it to a desired position on the map screen From the camera list in the Camera tab select a camera and drag and drop it to the map screen or right click it to select the Add button in the context menu Then the camera will move to the position as intended Right click a camera added in the map screen to view the live video or you can rotate the video screen accord...

Page 65: ...cle draw tool and move the cursor to the position where you insert the figure and draw a figure by the drag and drop method Click Save in the tool bar to close the graphic map setting screen Click Save in the tool bar again to save your settings Modify Use Quick Search at the top toolbar to find desired data for modification change as necessary and click to save changes Delete Use Quick Search at the ...

Page 66: ...n to search for the cardholders Select card holder s and click to add cardholder s to the Patroller List Click Save in the tool bar Modify Add or Remove cardholder s using or and click to save changes PATROL SETTING From the upper menu bar select Operation Management Patrol Setting From the tool bar click Add Select the company from the Company list box Provide the Patrol Name 1 2 3 4 5 6 1 2 3 4 ...

Page 67: ...Available Check Point list and click to add check points to the patrol Click Save in the tool bar Modify Use Quick Search at the top toolbar to find desired data for modification change as necessary and click to save changes Delete Use Quick Search at the top toolbar to find desired data for deletion select desired data to be deleted and click to delete If you are prompted to delete it click Yes PATR...

Page 68: ...elected is not already on patrol and the patrol is not being executed Select Patrol Status tab to monitor the patrol s being executed As the patroller reaches the checkpoint the patrol progress will be updated When all the checkpoints are covered the patrol ends To cancel a patrol select the patrol and click Cancel Patrol When a patrol is cancelled it will not be visible in the patrol report To en...

Page 69: ...t name in the Holiday Management input box Select a Holiday Management Code You can use up to 10 Holiday Management Codes Holiday management codes that are already registered are not displayed in the list Double click a date to register as a holiday in the calendar A separate holiday setting screen appears Provide the Holiday Click Save in the tool bar to save and close the holiday setting screen ...

Page 70: ...e a 24 hour day into 2 time ranges check Use for each of Time 1 and Time 2 Then specify the times applicable Setting a duplicating time interval is not allowed Click Save in the tool bar Modify Use Quick Search at the top toolbar to find desired data for modification change as necessary and click to save changes Delete Use Quick Search at the top toolbar to find desired data for deletion select desir...

Page 71: ...d in the list Provide a time schedule name in the Time Schedule input box Select a time interval applicable to a specific weekday Select a holiday where you want to apply the holiday time schedule Select a time interval applicable to the holiday Click Save in the tool bar Click Transmit in the tool bar to send your settings to the device Modify Use Quick Search at the top toolbar to find desired dat...

Page 72: ...e that is applicable to the door in the Door List and use the right arrow key to move to the right Or use the mouse to drag and drop an item Click Save in the tool bar Modify Use QuickSearch atthetoptoolbartofinddesireddataformodificationandmakechanges Or youcanmerge AccessGroupsifthereexistmultiplegroupscreated Movetothe AccessGroupList checkagrouptobemerged click Apply DoorofAccessGroup buttonto...

Page 73: ...y name of less than 9 alphabetic characters This function is available only for the SSA S30XX or SSA S21xx series If you use the user name display option you can display the user name on the reader s screen when the user s card is authenticated You can type in only English alphabets in less than 9 characters Select a Company Select a Department Select a Title Position or Access Type if necessary a...

Page 74: ... if the user does not use his her card any more because of a return of the card Select a Card Type Card Type includes Access Card Parking Card and Etc Card This is an option to identify cards with each other if multiple cards are issued to one user Type in the Card Number All controllers can be used with entering the PIN number instead of using the card number In case of 26 bit Wiegand system you ...

Page 75: ...e this function to divide the door opening time in 4 levels for authenticated access This function complies with the operation time specified in System Management Reader Point Setting Check Valid Date if you want to use the validity time option Enter the Valid from and the Valid by respectively If you have lost the card check Lost and provide the date when you lost the card Provide the Issue Date a...

Page 76: ...t data with the corresponding card numbers before you can receive the data from it You should also check if the card number matches with the fingerprint data to receive If the registered card number is 25500001 and you try to receive the fingerprint corresponding to card number 00100001 you couldn t obtain the fingerprint data Click Fingerprint Receive The fingerprint data received is displayed in Bio...

Page 77: ...l the red indicator turns on before the second fingerprint scanning If the scanned fingerprint is marked with 1 or 2 stars try again or use another finger Click Apply Check Use Biometric Information to apply the scanned fingerprint in Fingerprint Management You may not select this option for a bad quality fingerprint that can be hardly used for the fingerprint data If this is the case you can get access...

Page 78: ...the device belonging to the selected access group Modify Use Quick Search at the top toolbar to find desired data for modification change as necessary and click to save changes Delete Use Quick Search at the top toolbar to find desired data for deletion select desired data to be deleted and click to delete If prompted to delete it click Yes Click Yes to delete all information of the card holder inclu...

Page 79: ...he tool bar Auto Closing Setting function can be implemented only with a retail version of Microsoft SQL Server 2008 R2 Sold Separately WORK CODE SETTING SAVE You can edit Work Codes and Exception Codes for each registered company All added codes are used when evaluating an employee s hours of work and selectively display the selected code in the Closing Report From the upper menu bar select Atten...

Page 80: ...sing time Absence without notice Not at work as scheduled without a prior notice OVERTIME SETTING Overtime means worked hours more than the regular working hours and is calculated by the applicable rule defined by the user Overtime Setting Add From the upper menu bar select Attendance Overtime Setting Select a Company Provide a name in the Overtime input box If you want to use the Overtime Early At...

Page 81: ...of hours specified by the Overtime Deduction is deducted from one s overtime Ex If the Overtime Deduction is set to 01 00 1 hour and an employee overworked 02 00 2 hours then the effective overtime is calculated as 01 00 1 hour A attended at 07 00 then the early in becomes 2 hours Still Overtime deduction is set to 1 hour calculated paid overtime due to early in Overtime 0 becomes 1 hour A attended...

Page 82: ... exceeding the normal work hours Example Assume employee A left at the time below where the Overtime Setting is defined as above and the Work Time Code Setting is configured with Attendance Time of 09 00 and Leave Time of 18 00 A left at 20 00 then the late out becomes 2 hours Still Overtime deduction is set to 1 hour calculated paid overtime due to late out Overtime 1 becomes 1 hour A left at 23 00...

Page 83: ... the time for each of Start Work Time and End Work Time Work Time Codes are managed for each company where you can select Today or Tomorrow as the Start Work Time for a company Select an item in the Overtime option as necessary Click Save in the tool bar Modify Use Quick Search at the top toolbar to find desired data for modification change as necessary and click to save changes Delete Use Quick Sea...

Page 84: ...ng in the Registered Work Time List select a specific day in the right pane and use the button to move the selected item to the right list You can select multiple days to which the selected work time setting is applied To make Saturdays off biweekly check Biweekly Off and check applicable week To make dates listed in Holiday Setting Attendance off check Apply Holiday Click Save in the tool bar Modi...

Page 85: ...for the Closing Basis Time The Closing Basis Time is the time when all business activities are closed The closing time will be the basis for preparing the closing data If you want to apply the holiday work check the Apply Holiday Work option Select a work time setting in the Registered Work Time List and use the button to move the selected item to the Work Time List for Holiday List items of Regis...

Page 86: ... of Apply Holiday in Work Schedule Setting Holiday Setting Attendance Add From the upper menu bar select Attendance Holiday Setting Attendance Select a Company Provide a name in the Holiday Select a Date Provide a comment in the Description Sets holidays other than Sundays used for calculating holiday works When a holiday is added it is listed in the holiday list shown near the bottom of the scree...

Page 87: ...red Reader List Specify a reader for the time and attendance management for each company The reader list displays the current entry door and the reader in use Click Save in the tool bar Modify Use Quick Search at the top toolbar to find desired data for modification change as necessary and click to save changes DAILY CLOSING Closes the day s attendance record for the specified period The Closing butt...

Page 88: ...ing Revision menu before doing reclosing Reclosing Recreate the closing data for additional or changed attendance rules based on the original event record Folder Path Specify a file path where you save the closing list in the format of txt or xls Export Exports the data list in the table in the format of txt or xls Search You can check the details of the closing status on a specific date MONTHLY CLO...

Page 89: ...ing rule page the monthly closing period will be specified automatically based on the basis date Search If the specific date to search has any closing data recorded you can use the Search button to search for data by providing applicable criteria Export Exports the data list in the table in the format of txt or xls You can directly move to the revision screen to add or edit attendance record by sele...

Page 90: ...edit and adjust already closed daily attendance records To revise closed attendance data cancel the closing of desired period before proceeding Cancel the closing data on the specific date in the Daily Closing page before proceeding with the correction When done reclose your changes on the specific date to apply them From the upper menu bar select Attendance Revise Daily Closing Select a Company and...

Page 91: ... Search in the tool bar Period Specify the period for the closing report to search Report Type Select necessary items from Daily Closing Report Individual Individual Closing Rule and Monthly Closing Report Name If you want to search for an employee click Search to display the employee list where you can select multiple employees Conversion To export the report click Conversion in the Preview tool ...

Page 92: ...reader device counts the number of meals taken with the triggered event on the reader From the top menu click Attendance Reader Setting Meal Counting Click Company From the Reader List select a reader for attendance check and click to move to the Registered Reader List For each company select a reader from the listed attendance check readers The reader list shows the currently registered doors and...

Page 93: ...he Report Search button of the toolbar Period Sets the search time period of meal count report Employee Name Click the search button to display the list of employees and you can select multiple employees from the list Sort Type Applies the sort type to the report Sort Order Sets ascending or descending order to the selected Sort Type Report Type Meal Count Report This report shows the basic inform...

Page 94: ...l in the Recorder Model Name list If you select a model name the channel count supported by the recorder will be entered automatically in Number of channels The Number of channels cannot be changed by the user Provide the recorder name in Recorder Name Enter the IP address in IP Address Specify the IP port number in IP Port If you change the IP port number connection to the recorder may fail If yo...

Page 95: ... Live View and Search permissions can use the video monitoring feature The other fields are optional Provide information if necessary From the tool bar click Auto Registration This is to register a recorder automatically with no need of the user to register a recorder manually From the upper menu bar select Video Recorder Settings From the top tool bar click Add Click the auto search recorder butto...

Page 96: ...viewed even if you register a camera Enter the log in ID in Login ID Enter the password in Password For the recorder the default login ID is admin and the default password is 4321 Only the user account with the Live View and Search permissions can use the video monitoring feature The other fields are optional Provide information if necessary From the tool bar click Modify Click Video Recorder Setti...

Page 97: ...rom the top menu bar select Video Camera Settings If you register a recorder a list of cameras as many as the channel count supported by the recorder will be created automatically So click Quick Search in the tool bar and select a registered recorder The camera list will be automatically created according to the channel number of the recorder but the recorder has no setting configured yet So you mu...

Page 98: ...to monitor The other fields are optional Provide information if necessary Activate the Whether to Use PTZ checkbox if you are using a PTZ camera If you are using a PTZ camera you can control the PTZ camera using the buttons provided in the live screen Select an icon in Icon If you are using a map select an icon to be displayed in the map By default two icons are provided one for Use PTZ one for Do ...

Page 99: ...te Camera Mapping Save From the top menu bar select Video Camera Mapping Cameras that are yet to register in Camera Settings will not be displayed in the mapping screen Select a camera to map in Camera List and select a reader and input device in Device List Click the right arrow to move them right Or you can use the drag and drop method for this purpose Newly mapped cameras will be displayed gree...

Page 100: ...t event Search criteria Event Time One of search criteria that specifies the event time range Card number One of search criteria that specifies the card number Event Status If you set the event status as search criteria clicking this button will display a list of Event Status Select an event status of your choice Employee If you set the employee name as search criteria clicking this button will disp...

Page 101: ...he search criteria Select Sort Type The default setting of Sort Type is recorder name Select Sort Order By default the list will be sorted in the ascending order From the top tool bar select View Report If matches are found the search results will be displayed as follows In Camera Settings any unregistered camera will have the options of Whether to Use Whether to Use PTZ and Use Graphic Map unchec...

Page 102: ... Font in the View menu Select a desired font for Report Font and click Apply button LIVE VIDEO The event video can be played on the live screen only if the camera is mapped with the recorder and the access control device This is not available in SAMS Pro Lite To watch the live video To view the live video the recorder should be checked to be enabled the camera should be checked to be enabled and c...

Page 103: ...27 The live screen for simple monitoring will display the camera name in the message box while the live screen for an event will display the camera name event name and occurrence time and date This is the camera name that you provided in Camera Settings This is a live screen where camera channels and time and date information are shown A collection of direction buttons Button that enlarges the ima...

Page 104: ... bottom and double click the event to play Event video using the video data search From the top menu bar select Video Search Video Data Perform the search with appropriate search criteria and double click the event CONFIGURING THE EVENT VIDEO SEARCH This is not available in SAMS Pro Lite 1 2 3 4 5 Playback screen Number of screens automatically changes according to number of cameras connected to t...

Page 105: ...l bar click Add Enter a lift name in the Lift Name input box Select Building You will see a list of buildings registered in Building Floor Setting Select a floor to register from Available Floor List of the selected building and use the right arrow button to move to the right Or you can use the drag and drop method for this purpose Move to the Device Setting tab 1 2 3 4 5 6 ...

Page 106: ... types include proximity reader proximity reader keypad biometrics reader If the reader type is biometric reader Biometrics Reader should be checked Reader 2 through reader 4 are optional Configure the lift device settings as necessary Select a controller to register from Available Floor List and use the right arrow button to move to the right Or you can use the drag and drop method for this purpos...

Page 107: ...e lift controller corresponds to one floor button You can specify one floor for each output point and set the operation time unit sec and time schedule This is not available in SAMS Pro Lite The floor matching with one output point cannot be matched with other output point Lift Output Point Setting Register From the upper menu bar select Lift Lift Output Point Setting 12 output points for a registere...

Page 108: ... Select Time Schedule This is an optional item Set it if necessary Output will be activated according to the time schedule The default is Time Schedule Not Use From the tool bar click Save If you are prompted to transfer your settings to the device select Yes or click Transfer in the tool bar to start transferring the settings Modify Click Lift Lift Output Setting from the top menu and use Quick S...

Page 109: ... group in the Available Floor List tab and use the right arrow button to move to the right Or you can use the drag and drop method for this purpose From the tool bar click Save Modify Click Lift Lift Output Setting from the top menu and use Quick Search to find desired data for modification change as necessary and click to save changes Delete Click Lift Lift Output Setting from the top menu and use ...

Page 110: ...ype is the name of Lift Access Group Select Sort Order The default of Sort Order is Ascending From the upper tool bar select View Report If matches are found the search results will be displayed as follows If you want to print out a report click Print in the Preview Report tool bar to print out the report If you export the report in a different file format click Conversion in the Preview Report too...

Page 111: ...e proper formatting if used font cannot be found from the computer Change the font used on such occasions How to change font From the top menu click Tools Options On the left menu of options click Font in the View menu Select a desired font for Report Font and click Apply button ACCESSIBLE FLOOR REPORT BY CARD HOLDER From the upper menu bar select Lift Lift Access Group Report by Card Holder Enter...

Page 112: ...ill display a list of employees Select an employee of your choice Sort Type Specify the display sequence of the report contents Select one from employee ID card number employee name company name and department name Sort Order Select either ascending order or descending order Conversion If you want to export the report in formats of TEXT PDF or TIF click Conversion in the preview tool bar Note that...

Page 113: ...OR REPORT BY LIFT From the upper menu bar select Lift Accessible Card Holder Report by Lift Select Lift Name in the search criteria Select Sort Type The default of Sort Type is lift Select Sort Order The default of Sort Order is Ascending 1 2 3 J 4 J ...

Page 114: ...n to display a list of lifts where you can select lifts that you want to check Sort Type Specify the display sequence of the report contents Select either Lift or Building Sort Order Select either ascending order or descending order Conversion If you want to export the report in formats of TEXT PDF or TIF click Conversion in the preview tool bar Note that saving as a PDF may not produce proper for...

Page 115: ... information of the new card design The basic information of a card design means the basic data of the design for identification To move to the next step the company name and design name are required Using the interface Step 1 Enter the name of the company Required field Card holders for this card design should be from the company selected in this field Step 2 Enter the name of the new card design Re...

Page 116: ...hen you select the Label Paper only the Single sided mode is available in the next step Step 1 For label paper print select Label Paper radio button Step 2 Select the name of the label paper to be used Step 3 Check and confirm the width and height of the selected label Step 4 Click Next to proceed User defined label if there is no label paper in the list select user defined for custom size label Size...

Page 117: ...s 204 336 Height Avery 2961 Thermal Fold Clip ID Badges 336 204 Width Avery 2962 Thermal Fold Clip ID Badges 204 336 Width Avery 2990 Labels for Access Control Cards 323 203 Width Avery 5095 Self Adhesive Name Badges 282 182 Width Avery 5140 Print or Write Name Badge Labels 324 225 Width Avery 5384 Clip Style Name Badges 384 288 Width Avery 5883 Pin Style Name Badges 306 177 Width Avery 74461 Clip...

Page 118: ...Step 1 Select Double sided radio button Step 2 Click Next to proceed Once card face setup is complete background setup screen appears as shown below Screen descriptions At this step specify the background color or image for the card design Card background color is for the background filling of the applicable side of the card If specified the applicable face of the card is filled with the designated c...

Page 119: ...n the color scheme below Step 4 Click OK Color Scheme displayed with Find Color Step 5 Check if the custom color is displayed in the preview How to set the background image Step 1 Check the Fill Image option Step 2 Click Find Image Step 3 Select an image that is stored in the PC An image in sizes of more than 500kb is not selectable Step 4 Click Open The Open File browser with Find Image Step 5 Th...

Page 120: ...n the corner of the created rectangle area use the mouse to set a new area Step 3 The image of the selected area will be displayed in the top right corner of Image Editor Zoom In Out From Image Editor use the arrows of the Zoom In Out combo box to enter an integer manually Min 10 max 10 Rotate Image From Image Editor use the arrows of the Rotate combo box or enter an integer manually Min 0 max 360...

Page 121: ...New Card Design Wizard to move to the previous step Next Button If you set the necessary settings the Next button in the bottom right of New Card Design Wizard will be active Click Next to move to the next step Cancel Button If you click Cancel in the bottom right of New Card Design Wizard New Card Design Wizard will be exit Save Button The Save button in the bottom right of New Card Design Wizard...

Page 122: ...me for the card design Required The card design name is a representative name for the card design You must enter a unique name for the selected company Step 3 Select both sided printing Single sided Card Design if you want to use a single sided card check the Single sided Mode option Select Single sided if you want to use only the front side of the card design Only the front side will be printed o...

Page 123: ...nate of the line start point The line start point is the closest point to the top left corner of the work screen The Y coordinate of the line is the distance from the upper border of the work screen to the start point Not available X coordinate of the end point DisplaytheXcoordinateofthelineendpoint Thelineendpointistheclosestpointtothe bottomrightcorneroftheworkscreen TheXcoordinateofthelineendpo...

Page 124: ...rk screen to the end point Not available Y coordinate of the end point DisplaytheYcoordinateoftherectangleendpoint Therectangleendpointistheclosestpointto thebottomrightcorneroftheworkscreen TheYcoordinateoftheRectangleendpointisthe distancefromtheupperborderoftheworkscreentotheendpoint Not available Width Display the width of the rectangle where you can change the width of the rectangle Enter an ...

Page 125: ... is the distance from the upper border of the work screen to the start point Not available X coordinate of the end point Display the X coordinate of the textbox end point The textbox end point is the closest point to the bottom right corner of the work screen The X coordinate of the textbox end point is the distance from the left border of the work screen to the end point Not available Y coordinat...

Page 126: ... textbox 1 Click 2 Select a color from the color scheme Click Create User defined Color to create your own color 3 Click OK Description User defined Youcanwriteacommentordescriptiontobeinputinthetextbox Youcanwritecontentsinup to500characters Ifyouhaveselectedemployeeinformation theselecteditemwillbereset 1 Check the User defined option 2 Provide a description in the input box under the User defined a...

Page 127: ...oxstartpointisthedistancefrom theupperborderoftheworkscreentothestartpoint Not available X coordinate of the end point DisplaytheXcoordinateoftheimage boxendpoint Theimage boxendpointistheclosestpointto thebottomrightcorneroftheworkscreen TheXcoordinateoftheimage boxendpointisthe distancefromtheleftborderoftheworkscreentotheendpoint Not available Y coordinate of the end point Display the Y coordin...

Page 128: ...be reset 1 Check the Employee Data option 2 Select a column title next to the Employee Data checkbox One dimensional Barcode Properties Window Select a one dimensional barcode in the work screen to display the properties window The readability of the one dimensional barcode is in proportion to the barcode size but in reverse proportion to the input data If you want to improve the readability of th...

Page 129: ...nd point is the closest point to the bottom right corner of the work screen The Y coordinate of the one dimensional barcode end point is the distance from the upper border of the work screen to the end point Not available Width Display the width of the one dimensional barcode where you can change the width of the one dimensional barcode Enter an integer number Length Display the length of the one ...

Page 130: ...eight in integer Card Background color Image Barcode Select Screen Selected card face is displayed 1 Clicking the front work space displays Front Side Background Setting 2 Clicking the back side work space displays Rear Side Background Setting Background color Usedtofillthebackground 1 Select background color radio button 2 Click button 3 Select the desired color 4 Click OK button Image Used to set...

Page 131: ...erence for the card design Unit is the base unit used for the card design Working Space Selects the working space Selects the working space displayed on the screen 1 Todisplayfrontsideworkingspaceonly selectitsradiobutton 2 Todisplayrearsideworkingspaceonly selecttheRearradiobutton Thisradio buttonisactiveifselectingdouble sided workingspace 3 Todisplaybothfrontandrearwork spaces selecttheDouble S...

Page 132: ...0 Print or Write Name Badge Labels 324 225 Width Avery 5384 Clip Style Name Badges 384 288 Width Avery 5883 Pin Style Name Badges 306 177 Width Avery 74461 Clip Style Name Badges 336 213 Width Avery 74551 Pin Style Name Badges 360 237 Width Avery 74552 Pin Style Name Badges 288 189 Width Avery 8395 Self Adhesive Name Badges 324 224 Width Using the Image Editor Using an image as is Click Apply butt...

Page 133: ... in out or rotated Step 1 Edit the image in Image Editor Step 2 Click Save button below the top right image Save confirmation window that appears when Save button is clicked Step 3 Click Yes in the saving confirmation File save dialog displayed when Yes is clicked in the saving confirmation Step 4 File saving dialog appears Step 5 Enter the file name and choose the file format Step 6 Click Save button ...

Page 134: ...ck search Method 2 Use Previous and Next buttons to browse designs and select one Method 3 Click Search button to move to the Search Card Design screen and find a desired one Using the Search Card Design Click Search Card Design on the left menu of main screen or click the search button on toolbar of the Add Card Design screen The following screen appears 3 ...

Page 135: ...on on the top toolbar to delete the design Creating a new card design Step 1 Click New button on the toolbar and the following message box will appear Step 2 Click Yes to initialize the Add Card Design screen Saving a Card Design Step 1 Enter the required input fields for the card design s basic information Required fields Company Name Card Design Name Select Both Sides of Card Step 2 Click Save but...

Page 136: ...a card holder Step 1 Enter the search condition Search conditions are shown below Search Criteria Employee Name Employee ID Card Number Step 2 Enter the search keyword Step 3 Click the Search button If there exists matching card holder the number of matching records are shown right next to the Search button ex 1 23 means the working window will show the first searched card holder out of 23 total Us...

Page 137: ...multiple objects Only objects inside the dragging are will be selected Use mouse with Ctrl key to select deselect multiple objects without clicking the arrow button After using the arrow button to select objects you can select more objects with using the Ctrl key and mouse Or you can deselect in the same way Line Used to draw a line 1 Click the line button 2 Click the mouse on the desired starting...

Page 138: ...n Edit Button Screen descriptions Cut copy paste undo redo align left align center align right zoom in out front and back buttons are provided How to use Click the desired button to use the following editing functions Button Name Button Description and How to Use Cut You can cut out the selected object Use the Paste button to paste the cut out object Step 1 Select the desired object Step 2 Click C...

Page 139: ...le objects are to be aligned to the center You can select multiple objects by using the arrow button Step 1 Select the desired objects Step 2 Click Align Center button Align Right Multiple objects are to be aligned to the right You can select multiple objects by using the arrow button Step 1 Select the desired objects Step 2 Click Align Right button Zoom Out Reduces the working window by 25 Maximu...

Page 140: ...ill not appear for saved card designs Step 4 Print Employee Card screen appears Refer to Print Employee Card part of the manual PRINT EMPLOYEE CARD In this part of the user manual we provide an overview of Print Employee Card so that you can print out the card design that you have added in Add Card Design Performreadabilitytestbyprintingthedesignonaregularpaperbeforeprintingontheactualcardifthedes...

Page 141: ... print in both sides check this option Some printers support just a manual double sided printing rather than automatic operation If this is the case you must insert the other side of the paper in the printer tray by yourself Printing Employee Card Searching a card holder Screen descriptions Search the desired card holder for printing If any object related to the database text box image box or 1 di...

Page 142: ...vation time of the Print button differs depending on the use of DB associated object textbox image box one dimensional barcode Activation time of Print button 1 For a card design with no DB associated object used textbox image box one dimensional barcode the button will be active if you complete the Card Design Print Information settings 2 For a card design using any DB associated object textbox i...

Page 143: ...f Card Issuance Setting Step 2 Select the company name in the card counting setting Step 3 Specify the desired maximum allowed card copies Step 4 Click Apply Step 5 To check the allowed maximum copies use search function of Reset Card Issuance Information with desired company name and check the allowed maximum copies from the search result Initializing the printed card counting Step 1 Select the R...

Page 144: ...ill be listed if no search keywords of Step 2 Step 5 is provided Step 7 From the search result select the desired card holder by checking the checkbox Use Select All Deselect All buttons to select deselect all employees Step 8 Click Initialize button to reset selected card holder s card print count record Step 9 Check the count is reset to 0 Successful initialization INDIVIDUAL CARD REPORT From th...

Page 145: ...ll will include both print and reset details in the report If selected Print Details only only corresponding print history will be included in the report Similarly if selected Reset Details only only corresponding card issuance count reset history will be included in the report Step 6 Set the sort key Optional Sort key means the report will be sorted out based on the designated data Employee ID em...

Page 146: ... produce an image of the report rotated by 90 degrees CARD REPORT From the top menu bar select Card Design Card Report Screen descriptions The Card Report provides card issuance information by card holder as a report which allows printing or exporting How to use Step 1 Select the company name for the report Optional Step 2 Select the card design name Optional Step 3 Select the search criteria from...

Page 147: ...ed according to the designated order of ascending or descending by the sort key Step 7 After specifying search key sort key and sort order in steps 1 6 click button on the toolbar If no report specifics described in Steps 1 6 are selected the report preview will display a report for all available employees Step 8 1 To print click print button on the preview window s toolbar Step 8 2 To export the p...

Page 148: ...e title should contain the same instructions otherwise it will not be added When finished click Add below the text box To delete one instruction for the event click Remove To clear all entered instructions for the event click Reset To edit an instruction of the event double click the desired instruction item When finished press ENTER to save temporarily To change orders of entered instructions for t...

Page 149: ...cify the delivery method for the outbound email messages SMTP Delivery Method Description Network Transfer Send the emails to the SMTP server via the network Using IIS Internet Information Service Copy the emails to the pickup directory used in IIS Internet Information Service before delivering them External Application Program Copy the emails to a local folder before transferring them to an exter...

Page 150: ...erver Address and port number of the SMS server Login ID User ID for the SMS server Password Password for the SMS server Phone Mobile Cellular phone number of the sender Notice Items Select items as necessary The SMS message is limited to 80 characters in length Only the selected options Card Holder Date and Time and Location are included in the message Before you can use the SMS messaging you mus...

Page 151: ...mber IPIPI provides the SMS messaging service for all around the world Thus if you want to receive the message in Korea provide the country code 82 and add your cellular phone number thereafter For example if your phone number is 010 1234 1234 type in 821012341234 without the dash Receiving Event Select items to receive by e mail or SMS as necessary Modify Use Quick Search at the top toolbar to fin...

Page 152: ...tabase Backup Used to backup files automatically Click Generation in Scheduled Database Backup Used to backup files automatically Select a file to restore in Select Backup File from Database Restore Used to restore a database Click Restore in Database Restore to start restoring the selected database Used to restore a database The access control data will be saved in the SQL Server 2008 R2 Express dat...

Page 153: ... a description for Manual Backup Schedule Backup Restore Manual Database Backup Specify the backup path and provide the file name then click Backup to create a backup file in the specified location Scheduled Database Backup Every Day When the backup is completed with the provided information a backup file named Access_Daily_Full_yyyymmdd bak will be created in that location Scheduled Database Backup E...

Page 154: ...e event data occurred while the device or access control works normally Alarm Event Check it if you want to delete the event data occurred while the device or access control works abnormally I O Event Check it if you want to delete the event data regarding the I O settings of the device Auditing Log Check it if you want to delete the event data regarding the use history and the transfer records af...

Page 155: ...used as a delimiter for User Defined Delimiter This will be activated only if you select a text file and the Custom Delimited option For an Excel file select a sheet name in Sheet Name to import This will be activated if you select an Excel file Click Connect When connection is made successfully map an appropriate column for each item in Map Data by Columns When selecting an item from Map Data by Colu...

Page 156: ...e number and mobile phone number from the combo box The red marked columns are required so you must provide information for the columns Preview Displays the mapping information between the selected header and the database column These are the data that will be imported to the card holder information table Click the Export tab Select a Type Select a DSN Provide the ID Enter the Password Click Conne...

Page 157: ... about the current server Target Database Displays information about the server to export your selection Mapping Preview Data by Columns Displays the mapping information OPTIONS In this page you can specify items to monitor context font types and colors and alarm sound From the upper menu bar select Tool Option Click Left Pane Monitoring Select Monitoring Event to select events to monitor 1 2 ...

Page 158: ...he report Click Left Pane Display Tooltip Display Time to specify the tooltip display duration Click Left Pane Display Display Biometrics Data and Image to specify whether to display the biometrics data Click Left Pane Display View Quick Setting to specify whether to use the quick view mode 3 4 5 6 ...

Page 159: ...to specify the lock mode Click Left Pane User Defined Field User Defined Field Setting to specify the custom fields as necessary Common Items Your settings in this page will be applied to the current system alone and your setting file Client xml will be saved to the path where the program is installed on the local PC Consequently your settings will not be applied to other than your local PC even if yo...

Page 160: ... Sync PC time to Recorder time and check the option to synchronize the PC time with the recorder time From the left list move to Auto print mustering report Whether to auto print mustering report and check the option to specify the auto printing 10 11 ...

Page 161: ...ck Save in the tool bar Type Select a type for the selected icon Icon Group Provide a name of the group where the selected icon belongs Icon Setting Browse the icon image that fits the icon type Description Provide brief information about the selected icon group Icon List Displays information on the selected icons Delete Click Tools Icon Setting from the top menu select an icon to be deleted from t...

Page 162: ...uct Type in the Search Condition Select an output device and a biometric recognition reader in the Device List Select a Sort Type in the Sort Type and Order Select a Sort Order in the Sort Type and Order Click Preview in the upper tool bar The report meeting the search criteria will be displayed as shown To print out the previewed report click Print in the Preview tool bar To export the previewed ...

Page 163: ...ect Door in the Product Type Select one from Door Building and Floor If you select Controller in the Device Type and select Reader in the Product Type Select Reader Address or Reader If you select Controller in the Device Type and select Input in the Product Type Select one from Input Address Input Whether to use Input Type Building and Floor If you select Controller in the Device Type and select ...

Page 164: ...teria where you specify a search period Sort Type Specify the display order of data in the report Select one from Holiday Management Holiday and Date Sort Order Select Ascending or Descending for the sort type above Conversion You can click Conversion in the report preview toolbar to export files in any of the EXCEL TEXT PDF or TIF format Note that saving as a PDF may not produce proper formatting ...

Page 165: ... time schedule name Time Interval One of search criteria where you provide a time interval name Sort Type Specify the display order of data in the report Select Time Interval Name or Time Schedule Name Sort Order Select Ascending or Descending for the sort type above Select Holiday or Date Conversion You can click Conversion in the report preview toolbar to export files in any of the EXCEL TEXT PDF...

Page 166: ...porting it Search Condition Company One of search criteria where you select a company Access Group Name One of search criteria where you provide an access group name Sort Type Specify the display order of data in the report Select Access Group or Company Sort Order Select Ascending or Descending for the sort type above Conversion You can click Conversion in the report preview toolbar to export file...

Page 167: ...ition Click Search Employee to find an employee Select a Sort Type in the Sort Type and Order Select a Sort Order in the Sort Type and Order Click Preview Report in the upper tool bar The report meeting the search criteria will be displayed as shown To print out the previewed report click Print in the Preview tool bar To export the previewed report click Conversion in the Preview tool bar to conver...

Page 168: ...der Select Ascending or Descending for the sort type above Conversion You can click Conversion in the report preview toolbar to export files in any of the EXCEL TEXT PDF or TIF format Note that saving as a PDF may not produce proper formatting if used font cannot be found from the computer Change the font used on such occasions How to change font From the top menu click Tools Options On the left me...

Page 169: ... report preview toolbar to export files in any of the EXCEL TEXT PDF or TIF format Note that saving as a PDF may not produce proper formatting if used font cannot be found from the computer Change the font used on such occasions How to change font From the top menu click Tools Options On the left menu of options click Font in the View menu Select a desired font for Report Font and click Apply butto...

Page 170: ...report preview toolbar to export files in any of the EXCEL TEXT PDF or TIF format Note that saving as a PDF may not produce proper formatting if used font cannot be found from the computer Change the font used on such occasions How to change font From the top menu click Tools Options On the left menu of options click Font in the View menu Select a desired font for Report Font and click Apply button...

Page 171: ...for a door click Door Search to display the door list where you can select multiple doors to check Sort Type and Order You can sort and display the devices in a desired sequence Sort Type Specify the display order of data in the report Sort Order Select Ascending or Descending for the sort type above Conversion You can click Conversion in the report preview toolbar to export files in any of the EXC...

Page 172: ...ecify the Door in Search Condition Select a Sort Type in the Sort Type and Order Select a Sort Order in the Sort Type and Order Click Preview Report in the upper tool bar The report meeting the search criteria will be displayed as shown To print out the previewed report click Print in the Preview tool bar To export the previewed report click Conversion in the Preview tool bar to convert it to a de...

Page 173: ... Conversion in the report preview toolbar to export files in any of the EXCEL TEXT PDF or TIF format Note that saving as a PDF may not produce proper formatting if used font cannot be found from the computer Change the font used on such occasions How to change font From the top menu click Tools Options On the left menu of options click Font in the View menu Select a desired font for Report Font and...

Page 174: ...Reader Name If you set the reader as search criteria clicking this button will display a list of readers available Select a reader of your choice Sort Type and Order You can sort and display the devices in a desired sequence Sort Type Specify the display order of data in the report Sort Order Select Ascending or Descending for the sort type above Conversion You can click Conversion in the report p...

Page 175: ...Reader Name in Search Condition Select a Sort Type in the Sort Type and Order Select a Sort Order in the Sort Type and Order Click Preview Report in the upper tool bar The report meeting the search criteria will be displayed as shown To print out the previewed report click Print in the Preview tool bar To export the previewed report click Conversion in the Preview tool bar to convert it to a desir...

Page 176: ...ding for the sort type above Conversion You can click Conversion in the report preview toolbar to export files in any of the EXCEL TEXT PDF or TIF format Note that saving as a PDF may not produce proper formatting if used font cannot be found from the computer Change the font used on such occasions How to change font From the top menu click Tools Options On the left menu of options click Font in th...

Page 177: ... to display a list of entrance doors Select a door s to check Sort By Specify the display order of the data for a printed report Select one from employee name card number and event time Sorting Type Select Ascending or Descending for the sort type Conversion You can click Conversion in the report preview toolbar to export files in any of the TEXT PDF or TIF format Note that saving as a PDF may not ...

Page 178: ...s to check Search Menu If you want to search for a menu click the corresponding button to display the menu list where you can select multiple menu items to check Sort Type and Order You can sort and display the devices in a desired sequence Sort Type Specify the display order of data in the report Select Login ID or Event Time Sort Order Select Ascending or Descending for the sort type above Conve...

Page 179: ...tion Specify the Event Time period in Search Condition Select a Sort Type in the Sort Type and Order Select a Sort Order in the Sort Type and Order Click Preview Report in the upper tool bar The report meeting the search criteria will be displayed as shown To print out the previewed report click Print in the Preview tool bar To export the previewed report click Conversion in the Preview tool bar t...

Page 180: ...the report preview toolbar to export files in any of the EXCEL TEXT PDF or TIF format Note that saving as a PDF may not produce proper formatting if used font cannot be found from the computer Change the font used on such occasions How to change font From the top menu click Tools Options On the left menu of options click Font in the View menu Select a desired font for Report Font and click Apply bu...

Page 181: ...a desired or sorted order Sort Type Specify the display order of the data for a printed report Select one from Login ID Event Time and Login Name Sort Order Select Ascending or Descending for the selected sort type Conversion You can click Conversion in the report preview toolbar to export files in any of the EXCEL TEXT PDF or TIF format Note that saving as a PDF may not produce proper formatting i...

Page 182: ...ement Patrol Status Management Search Condition Date Select the period of patrol execution Company Select the company Patrol Name Provide the patrol name Card Number Provide the card number Patroller Provide the patroller name Click Preview Report in the upper tool bar The report meeting the search criteria will be displayed as shown 1 1 2 3 4 5 2 ...

Page 183: ...on of visitors Detailed Visitor Report Shows further details on the visitor information Visitor Name Provide the visitor s name Card Number Provide the card number Company Click the button to display the company list and select one from the listed company names Sort Type You can sort the found matches based on the selected column and can be printed in the order Select from the visitor name company...

Page 184: ... the below for trouble shooting PROBLEM ACTION I encountered an error while installing SAMS Pro Database 1 On your desktop select Start Control Panel Administrative Tools Service 2 Select SQL Server SAMS and right click it to select Properties 3 Select Local System Account in the Log on tab and click Apply ...

Page 185: ...SAMS Pro database is not installed automatically so I want to know how to install it manually 1 On your desktop select Start All Programs Microsoft SQL Server 2008 R2 Express Microsoft SQL Server Management Studio Express 2 In the login dialog enter sa in Login and enter the password in Password for database connection 3 In the upper left corner select Database and right click it to select Restore...

Page 186: ...lect Start Run to launch the registry editor regedit 2 Move to HKEY_CLASSES_ROOT Installer Products 3 Check the ProductName item if it contains a key including MSXML6 Delete the key if any if you can t find such key move to the next step 4 Move to the HKEY_LOCAL_MACHINE Software Classes Installer Products 5 Find the MSXML6 under the ProductName field and delete it if exists Move to the next step if ...

Page 187: ...on Server Pro which is the dedicated communication server for communicating with ACU Access Control Unit ACU Acronym of Access Control Unit which means a hardware for the access control system Device Means all hardware units for the access control system For example access controller biometrics readers etc Biometrics Device Reader Access control systems using biometrics information such as fingerpr...

Page 188: ...n Server Pro SSA P102 SSA P102 series SSA S3010 S2100 SSA R2010 Series Play the recording file in the recorder in sync with an event Display the live screen of a specific camera Recorder Commands communication of SAMS Pro from to devices are transferred to the SAMS Communication Server Pro SAMS Communication Server Pro communicates with the controller and processes the command from SAMS Pro SAMS C...

Page 189: ...e required for each SSA P102 and SSA P400 SAMS Pro supports the following recorders SAMS Pro Model Notation Actual Model Names SAMS Pro Model Notation Actual Model Names SHR 216X SHR 2160 SHR 2162 SRD 44X SRD 440 SHR 504X SHR 5040 SHR 5042 SRD 47X SRD 470 SRD 470D SRD 471 SHR 508X SHR 5080 SHR 5082 SRD 480D SRD 480D SHR 516X SHR 5160 SHR 5162 SRD 83X SRD 830 SRD 830D SHR 604X SHR 6040 SHR 6042 SRD...

Page 190: ...lay the video recorded in the recorder on the time and date of the ordinary or warning event occurring from the access control system Namely it synchronizes the text based access history with the video information to provide an enhanced security system Access control system integrated with video surveillance Recorder A variety of recorder and camera models manufactured by Samsung Techwin are compl...

Page 191: ...zard provides simplified setup steps for automatic setup and its automatic search for controllers enables faster and easier setup This is not available in SAMS Pro Lite Comprehensive Tooltips Plentiful and comprehensive tooltips with detailed information are provided for each input items of interfaces users can easily understand its usage Integrated Monitoring The integrated monitoring screen can b...

Page 192: ...operating systems However you must follow the instructions below to install NET Framework 3 5 on Windows Server 2008 before installing SQL Server 2008 R2 included in the SAMS package Select All Programs Administration Tool Server Manager Select Features Add Feature Check NET Framework 3 5 1 and press Next to start installation Once completed installation check if NET Framework 3 5 1 appears as sho...

Page 193: ...nector for system connection Communication uses the PIN 2 RXD and PIN 5 GND of 9 pins of the connector DSUB 9 PIN Male Connector Pin Out RS232 Pinout Pin 1 Data Camer Detect DCD Pin 2 Received Data RXD Pin 3 Transmit Data TXD Pin 4 Data Terminal Ready DTR Pin 5 Ground GND Pin 6 Data Set Ready DSR Pin 7 Request To Send RTS Pin 8 Clear To Send CTS Pin 9 Ring Indicator RI DSUB 9PIN Male Connector Pin...

Page 194: ...ion checkup between the Reader and connector refer to the manual of the Reader Ex The below figure shows the pin configuration of SSA R1000 1100 reader device brown wire RS 232 TX and black wire GND Item Cable Color Signal Line Description Power Red DC 12V DC 12V supplied Black GND Earth grounding for power Input Blue Buzzer Control BUZZER Control Input Port Yellow LED Control LED Control Input Port...

Page 195: ...h _195 APPENDIX C Connecting the Reader Wires Check the serial port number To check the serial port number open the Device Manager My Computer Properties Device Manager Port COM LPT Checking the Serial Port Device Manager 4 ...

Page 196: ...the Reader Once hardware connection is completed click Tools Options menu of the SAMS Pro SAMS Basic Move to the Devices Registration Reader Set the port number into the Communication Port Refer to the reader device s manual to set the proper communication speed For all readers except stand alone readers are set to 9600 by default Set the Bit Setting in accordance of each item and click OK button ...

Page 197: ...lis_ English _197 APPENDIX C Registering a Card To register a user visitor card click the card number input field and then place the card to be registered onto the Reader SAMS Pro SAMS Basic SAMS Visitor Management ...

Page 198: ...nc of access control devices Database Scheduled Backup If you choose SAMS Manager feature during installation SAMS Manager is executed after installation like below You can do SAMS Manager setting by right clicking the icon If database server setting is not registered after installation the service will not be executed In that case you should have database setting Database setting is available aft...

Page 199: ... config exe will be executed After database setting please click Start for service restart If you see below message box when you click Start please restore service following below procedure Move SAMS setup folder Execute uninstall bat Execute install bat 5 6 1 2 3 ...

Page 200: ...MEMO ...

Page 201: ...Electrical Electronic Equipment Applicable in the European Union and other European countries with separate collection systems This marking on the product accessories or literature indicates that the product and its electronic accessories e g charger headset USB cable should not be disposed of with other household waste at the end of their working life To prevent possible harm to the environment o...

Page 202: ...82 70 7147 8740 60 FAX 82 31 8018 3745 SAMSUNG TECHWIN EUROPE LTD Samsung House 1000 Hillswood Drive Hillswood Business Park Chertsey Surrey UNITED KINGDOM KT16 OPS TEL 44 1932 45 5300 FAX 44 1932 45 5325 SAMSUNG TECHWIN AMERICA Inc 100 Challenger Rd Suite 700 Ridgefield Park NJ 07660 Toll Free 1 877 213 1222 Direct 1 201 325 6920 Fax 1 201 373 0124 www samsungcctvusa com SALES NETWORK ...

Reviews: