Before Use
5-1
●
Selection
The yellow cursor shows the current window. Use the
,
,
¦
,
key in the front to move
the cursor on your desirous menu. If you press the “Enter” key with the cursor clicking on
your desirable menu, the system will enter the new mode.
Press the “Enter” key to finish the selection. On seeing Drop Down Menu, use the
or
key to move the cursor on your desirable menu.
●
“OK” or “Cancel” in Menu Setup Window
Once changed, the new menu setup procedure will be finalized by pressing “OK”.
Pressing “Cancel” will cancel the new setup and return to the upper menu.
●
Front “MENU” and “SEARCH” Button
The MENU button or SEARCH button, if pressed first, acts as an entrance button.
Once entering, it reverses the page to the previous one.
●
The “>” or “V” mark beside the title copies the line in the arrow direction to the value of the
first line.
●
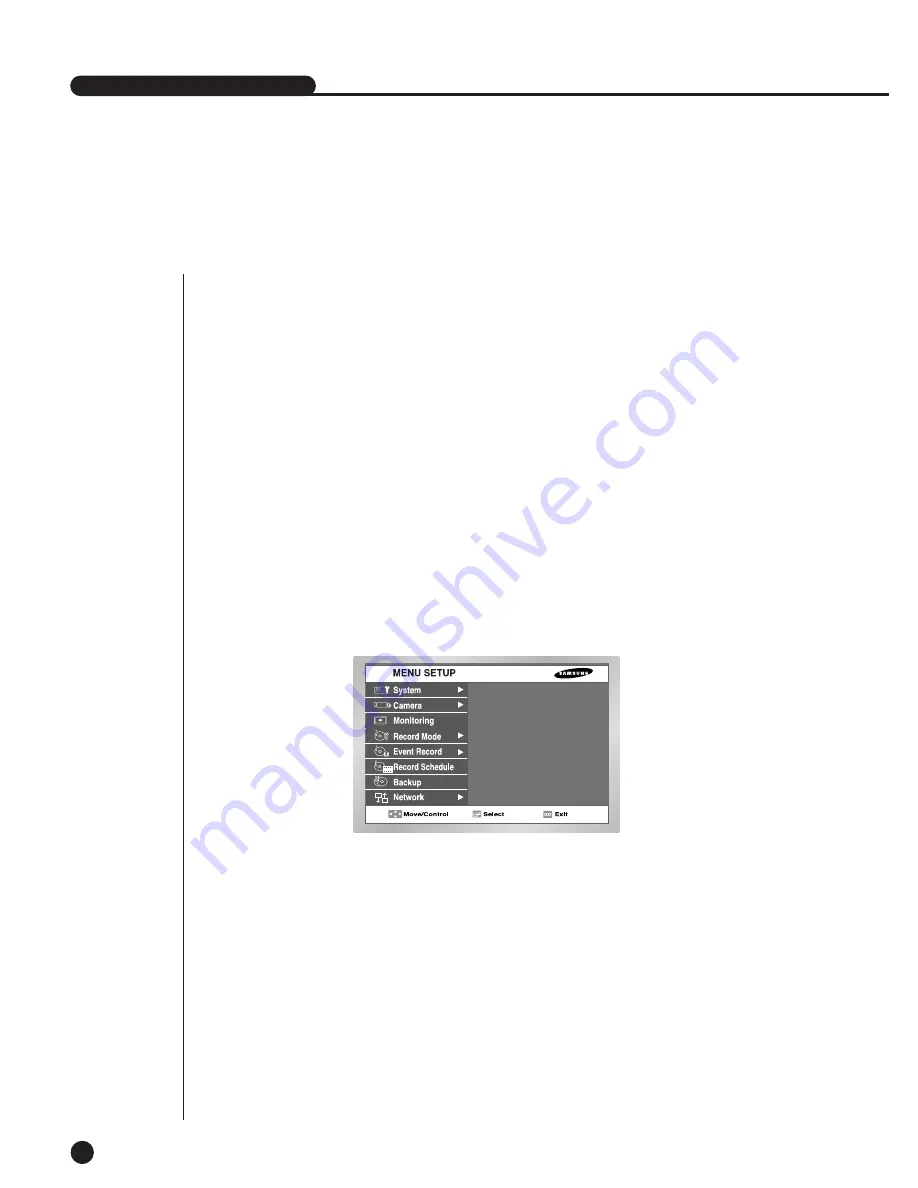
The first page of the menu is structured as follows.
SHR-2040/2041/2042 USER’S MANUAL
Summary of Contents for SHR-2040P
Page 1: ...Real Time DVR SHR 2040 2041 2042 User s Manual ...
Page 7: ...Chapter 1 Overview 1 ...
Page 16: ...Chapter 2 Installation 2 ...
Page 20: ...2 4 SHR 2041 SHR 2042 ...
Page 28: ...2 12 The cable should be out from the left hole ...
Page 29: ...Chapter 3 Connecting with other device 3 ...
Page 30: ...1Connecting the Video Audio and Monitor 3 1 SHR 2040 2041 2042 USER S MANUAL SHR 2040 ...
Page 31: ...3 2 SHR 2041 2042 ...
Page 36: ...SHR 2040 2041 2042 USER S MANUAL 3 7 ALARM IN OUT Connection ...
Page 38: ...Chapter 4 Live 4 ...
Page 47: ...Chapter 5 Menu Setup 5 ...
Page 80: ...Chapter 6 PTZ Camera Control 6 ...
Page 89: ...Chapter 7 Recording 7 ...
Page 93: ...Chapter 8 Search and Play 8 ...
Page 104: ...9 Chapter 9 Smart Viewer ...
Page 164: ...Appendix 10 ...
Page 169: ...SHR 2040 2041 2042 USER S MANUAL 3Outline Drawings 10 5 SHR 2040 SHR 2041 ...
Page 170: ...10 6 SHR 2042 ...


