29
Subject to change without notice
10.4. Screen shots
The most important method of storing for documentation
purposes is the screen photo. At least one USB stick must be
connected, only then will any settings regarding the destination
and the format be possible. Push the keys SAVE/RECALL and
SCREENSHOTS
for opening the appropriate menu.
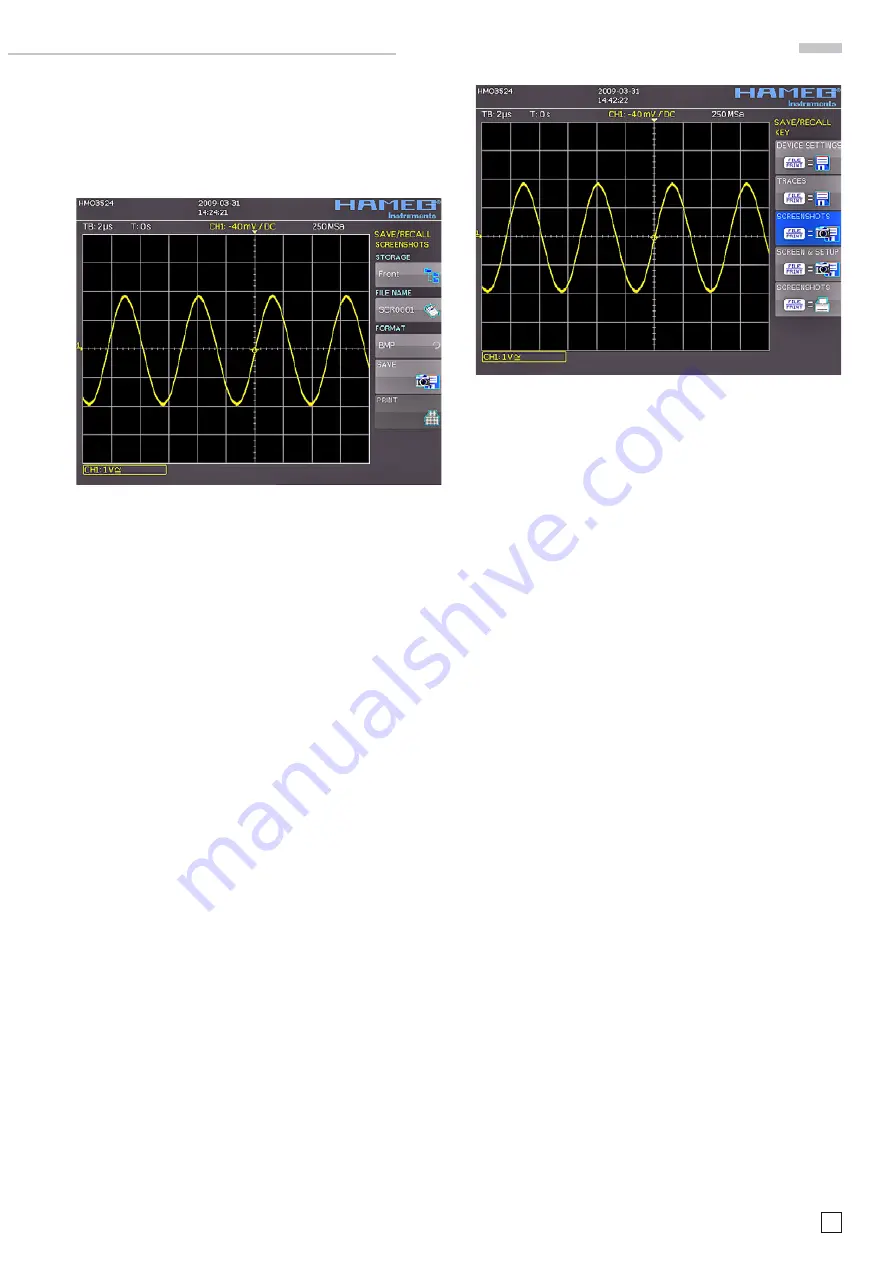
Fig. 10.7: Menu for screen shots
Also in this menu the destination (according to the USB sticks
connected) can be selected with the top menu key. When this
is done the fi rst time, the data manager will appear in order to
either select or generate a destination listing. After the entry of
this information, the
SCREEN SHOT
storing menu will reappear.
The second menu item
DATA NAME
allows you to enter a name
with the respective name entry menu which will open automa-
tically upon selecting this menu item. If FORMAT is selected
with the respective menu key, these formats will be offered
and can be selected with the universal knob: BMP = Windows
Bitmap (uncompressed format).
Pushing the key next to
STORE
will store the actual screen
display along with the name and format at the destination
selected.
10.5. Sets of formulas
Pushing the key SAVE/RECALL will open the main menu where
a menu item is called
FORMULARIES
, selection of this menu
item will call a submenu which allows you to move sets of for-
mulas between the internal memory and the USB stick as well
as to import or export such sets. How this is done was already
described in chapter 9.2.
10.6. Defi nition of the FILE/PRINT key
The key FILE/PRINT on the front panel allows you to store cur-
ves, screen shots, screen shots with settings, by just pushing it.
However, it is required that the necessary settings for the desti-
nation, the name etc. have been previously defi ned as described
in the preceding chapters. In order to open the settings menu
of the FILE/PRINT key, push the SAVE/RECALL key for calling
its main menu, then select the menu item
FILE/PRINT
.
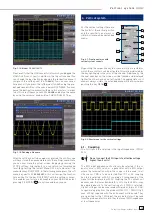
By pushing the respective menu key, it is possible to defi ne the
action which shall take place upon pushing the key, the following
actions are available:
–
DEVICE SETTINGS
stores settings of the instrument
–
TRACES
stores
curves
–
SCREEN SHOT
stores screen photos
–
SCREEN & SETUP
stores screen photos and settings
The upcoming fi rmware versions
>
2.0 will also allow you to
directly print on a compatible printer.
After the selection of the desired action by pushing the respective
key, the acceptance will be confi rmed by the blue background.
By pushing MENU OFF the menu will be switched off.
Fig. 10.8: Defi nition of the FILE/PRINT key settings
D o c u m e n t a t i o n , s t o r i n g a n d r e c a l l i n g


