background image


T

echnical


B

ulletin


PAGE: 1/2 

Model: 

Shepherd-Lt


Date: 

16-May-19


No.: 

RM0D4001


Subject: Troubleshooting : Poor Print Quality may occur when 
parameter in print control software unmatched with current 
ink type 

Prepared by: D.Kobayashi 

From: 

Regional Sales Department, Global IP Sales Center


Classification: 

 Troubleshooting 
 Mechanical 
 Paper path 

 Part information 
 Electrical 
 Transmit/receive 

 Action required 
 Service manual revision 
 Retrofit information 


 Product Safety  

 Other (


 Tier 2 

 Tier 0.5 

There is an information of troubleshooting regarding poor print quality by unmatched 
between parameter in print control software and actual installed ink type. 


Symptom 

There are different image processing parameters for each ink type in Pro TF6250.  

Poor print quality may be occurred by unmatched between actual installed ink type and  
parameter in print control software. 


If dot pattern or image alignment is not problem but banding or uneven density may 
occur, then check the parameter in print control software whether it is matched with 
actual installed ink type. 


How to Check 

Check the Connection between PC and Machine 

Start print control software (if already started, close it once and then restart) 

Check the parameter below 

Maintenance

Voltage

Printhead configuration 


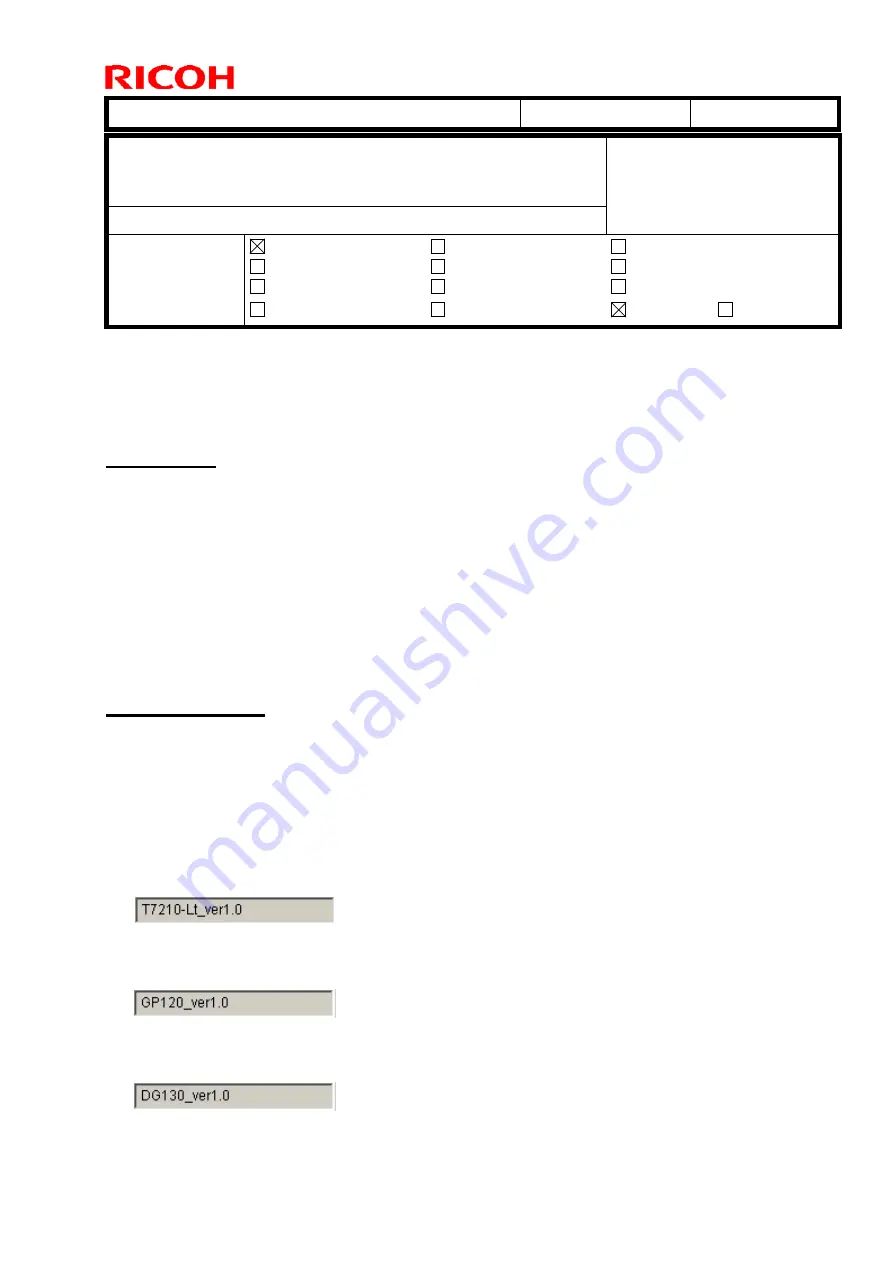
RICOH Pro UV Ink Bottle T7210 


RICOH Pro UV Ink Bottle GP120 


RICOH Pro UV Ink Bottle DG130 


Summary of Contents for Shepherd-Lt

Page 1: ...parameter in print control software and actual installed ink type Symptom There are different image processing parameters for each ink type in Pro TF6250 Poor print quality may be occurred by unmatch...

Page 2: ...as the result you will not be able to check the parameter At that time you can check by restart print control software and should check this parameter first Solution If unmatched parameter is found r...

Page 3: ...l revision Retrofit information Product Safety Other Tier 2 Tier 0 5 Service manual correction Please apply the following corrections to your Pro TF6250 field service manual in section 2 Installation...

Page 4: ...Technical Bulletin PAGE 2 5 Model Shephered Lt Date 20 May 19 No RM0D4002 Front view of palette 5 Remove the cross bar A in front A A A A A A...

Page 5: ...Technical Bulletin PAGE 3 5 Model Shephered Lt Date 20 May 19 No RM0D4002 6 Pull out while lifting the vertical sleepers A 7 Pull out the fixing bracket A A B A B B A A A A A A...

Page 6: ...ielding sheet as shown below Note The whole machine is covered with heat shielding sheet Therefore you need to open the sheet so that the fork of the fork lift can access the forklift insertion bracke...

Page 7: ...able 10 Lift the machine 1436kg 3165 9lb with the forklift and take it out from the wooden box Important When installing the machine the inclination angle of machine shall be 3 degrees or less 11 Pull...

Page 8: ...e Action required Service manual revision Retrofit information Product Safety Other Tier 2 Tier 0 5 Symptom Error Code 6 Carriage height is too low error may occur when operating Motion Test menu on P...

Page 9: ...2 2 Model Shepherd Lt Date 27 May 19 No RM0D4003 Cause Software bug Solution Perform Reset Origin or Restart Print Control software This bug will be resolved in the next version software Refer to the...

Page 10: ...and Pro TF6250 field service manual in section 2 Installation Main Machine Installation Installation Procedure Print Head Front and Back Position Adjustment Additional step in red for Step 3 3 and 4...

Page 11: ...ed to tighten it any more Especially when rotate the screw B counter clockwise it may need to tighten the screw C a little until the tip of the screw contact the print head mount D When tightening the...

Page 12: ...otted lines become overlapped and deviation amount become within the standard value Check whether the screw C which is rear side of Print head mount D is loose or not If it is loose then tighten the s...

Page 13: ...hard it is just contact to the print head mount D After the adjustment print the test pattern and check the two dotted lines If two dotted lines do not be overlapped then rotate the screw B clockwise...

Page 14: ...ual correction Please apply the following corrections to your Pro TF6250 field service manual in section 2 Installation Main Machine Installation Installation Procedure Unpacking Descriptions were add...

Page 15: ...rning on the power 1 Check that the light level indication lamp turns on If all 5 lamps A turn on installing procedure of the sensors are finished If even one lamp does NOT turn on adjust the level by...

Page 16: ...Technical Bulletin PAGE 3 17 Model Shepherd Lt Date 14 Jun 19 No RM0D4005 Tighten each screw temporarily at first then tightening the screws while checking the 5 lamps turning on...

Page 17: ...Important information is added to step 8 8 Connect the GND wire bundled together with USB cable to PC s GND Connect to any of the screws shown in red circle USB error may be caused by the electrical...

Page 18: ...D4005 2 Installation Main Machine Installation Installation Procedure Resetting the Negative Pressure Value to Zero Descriptions were corrected in red and deleted in strikethrough 2 Disconnect the har...

Page 19: ...adjustment The table surface parallel is checked by measuring the gap between the carriage and table surface at 72 points When the measured results are not within a prescribed standard range adjustme...

Page 20: ...Date 14 Jun 19 No RM0D4005 2 Disconnect the cable B from the motor driver A for X axis drive motor 3 Attach the loopback connector A provided with the machine and then close the maintenance station re...

Page 21: ...e reference value for the table surface parallelism adjustment Regard a middle value of all of the measurement spots as reference spot In the following case 0 30 A is highest and 0 20 B is lowest valu...

Page 22: ...as step4 and step5 3 Check that none of the ink tubes are twisted or bent Check that connector of the print head to amplifier board is set correctly If an ink tube is twisted or bent problems may occu...

Page 23: ...ure Cleaning the Ink Tank Important information is added in top of this section Descriptions were corrected in red and deleted in strikethrough Cleaning the Ink Tank This section explains how to clean...

Page 24: ...from rear of the negative pressure operation panels B 2 Installation Main Machine Installation Installation Procedure Print Head Front and Back Position Adjustment Description is corrected in red and...

Page 25: ...value of deviation amount C Cyan nozzle Less than 1 6 dots 10 m If the deviation amount is less than the standard value adjustment is not required Proceed to step 3 4 If not proceed to the next step...

Page 26: ...ore Especially when rotate the screw B counter clockwise it may need to tighten the screw C a little until the tip of the screw contact the print head mount D When tightening the screw C it is not nec...

Page 27: ...cross lines with a loupe so that you can see the two dotted lines The cyan line A is the pattern for the print head of the first row for the cyan nozzles the yellow line B is the pattern for the prin...

Page 28: ...otted lines Perform the adjustment until the two dotted lines become overlapped and deviation amount become within the standard value Check whether the screw C which is rear side of Print head mount D...

Page 29: ...tion Procedure Adjustment for Misalignment in Bidirectional Printing Descriptions were corrected in red deleted in strikethrough 2 Configure the print speed the print direction and the print start pos...

Page 30: ...re Installing the USB Device Driver Installing the USB Device Driver 20 Connect the machine and computer with the USB cable After a little while Device driver software installed successfully is displa...

Page 31: ...t is in Red Service manual correction Please apply the following corrections to your Pro TF6250 field service manual in section 2 Installation Main Machine Installation Installation Procedure Checking...

Page 32: ...rotate the screw Sequence of table adjustment using adjustment mechanism is below Adjustment method for table height 1 Loosen the nut A that used to fix adjustment screw to body frame B 2 Loosen the b...

Page 33: ...tment screw A and table B adjust height in the other position around this point 4 If table height is adjustment to the desirable height after tightening the bolt A Do not rotate the bolt A too tight b...

Page 34: ...Technical Bulletin PAGE 4 4 Reissued 17 Oct 19 Model Shepherd Lt Date 15 Oct 19 No RM0D4006a 5 Tighten the Nut A that used to fix adjustment screw to body frame B A B...

Page 35: ...ection Add this RTB procedure to Pro TF6250 field service manual after the following section 2 Installation Main Machine Installation Installation Procedure Reading the Initial Setting File for Print...

Page 36: ...g 19 No RM0D4007 4 Print Option Printhead Protection Enable Pre Flush ON For using GP120 ink or DG130 ink OFF For using T7210 ink GP120 ink DG130 ink T7210 ink 5 Maintenance Motion Pre print Flush Set...

Page 37: ...d Lt Date 21 Aug 19 No RM0D4007 T7210 ink All 0 6 Maintenance Calibration Temp GP120 ink or Pro T7210 ink PH1 PH14 43 0 PH17 0 0 PH18 PH19 2 0 DG130 ink PH1 PH3 40 0 PH4 PH6 44 0 PH9 PH11 47 0 PH12 PH...

Page 38: ...it switch is always ON during printing Perform the Motion test and check Y rear Limit switches behavior Check the Door s switches Check whether the proximity sensors work correctly 174 Carriage cannot...

Page 39: ...oor s switches Check whether the proximity sensors work correctly 178 Carriage cannot go to original position Y2 HP sensor is always ON when Reset Perform the Motion test and check the Y2 HP sensor be...

Page 40: ...ector after purging with jig 2 Keep air purge port cover closing when not needed Cause 1 Ink leak from air purge port may occur by adhesive ink around the fitting connector 2 Remaining ink into the ai...

Page 41: ...ing connector by wiping cloth At this time clean Cyan and Magenta as example 2 Inner Air purge port Make the wiping cloth twisting then clean inner the air purge fitting connector To avoid contaminati...

Page 42: ...or occur ink leak from them 3 Air purge jig Clean inner Air purge jig fitting connector by wiping cloth same as step1 and step2 Then make sure that there is no ink inner the air purge jig fitting con...

Page 43: ...Quality Color Misalignment Additional information is in Red Symptom The ink drop position is misaligned between color nozzles Cause The print head gap is not correct 0 8 to 1 5mm Vertical calibration...

Page 44: ...P1 Lt Date 1 Sep 19 No Case White ink is misalignment White image misalignment is occurred when Black image is overprinted on the white ink Adhesive material on X axis encoder sheet after cleaning the...

Page 45: ...ply paths are cleaned by cleaning liquid As the cleaning method changes only the print head will be cleaned and shipped from now on so the cleaning procedure of the print head and the ink paths will b...

Page 46: ...l Height Position Adjustment 16 Changing the Ink Supply Path When Using Double White Configuration 17 Discharging Cleaning liquid from Print Head with Syringe 18 Replenishing the Ink Tanks with Ink 19...

Page 47: ...liquid from Print Head by Syringe Discharge cleaning liquid inside the print heads with the air bubble ejection tool and the syringe provided with the machine 1 Click Left in the Print Control softwar...

Page 48: ...any port on the carriage Use only one tube to push out the cleaning liquid more strongly though air bubble ejection tool has 2 tubes 6 Connect the bypass tube with the tube of the print head which ha...

Page 49: ...t is being connected to the print head in order to prevent from contamination of the print head 8 Connect the bypass tube connector LF4131 to the syringe 9 Push the syringe in order to discharge the r...

Page 50: ...the syringe tube assy when using M1533053 or M0BY3200 11 Repeat 3 times step 7 to 10 at one air purge port 12 Repeat step 6 to 11 to all of the air purge port Pull out the tube while pressing the but...

Page 51: ...ocedure Replenishing the Ink Tanks with Ink Replenishing the Ink Tanks with Ink 1 Open the caps of the ink tanks and then replenish the ink into the ink tanks C M Y K Cl Pr 1000ml for each W 850ml Che...

Page 52: ...arted up when the doors are closed the carriage starts the initializing operation and starts moving while the ink drops down from the print heads Negative pressure should be set to 0 kPa in order to p...

Page 53: ...interrupted by door opening But ink filling is done correctly under the condition so Ignore these errors and proceed to the next step While ink is filling the remaining ink indicator A at the lower r...

Page 54: ...bes of the sub tank for Pr 6 Open the fitting and discharge the ink completely then close the fitting Three ink tubes will be clean as same operation so select one tube to perform to clean at this ste...

Page 55: ...If an ink tube is twisted or bent problems may occur with discharge The print heads are arranged in three rows and each print head has four nozzle rows The respective color inks C M Y K W Cl Pr will...

Page 56: ...ink tube C For W C M Y K ink three ink tubes from the sub tank need to be connected for each color For Pr ink one ink tube from the sub tank needs to be connected For Cl ink two ink tubes from the su...

Page 57: ...rness Connecting the Waste tank tube and herness 1 Open the maintenance station rear door A 2 Connect connectors A and D and tubes B and C through the hole E under the maintenance station A Connector...

Page 58: ...2 C 3 M 4 Y 5 K 6 W2 Before doing the following procedure make sure that the table front right cover is open If the Print Control software is started up when the table front right cover is closed the...

Page 59: ...ain Machine Installation Installation Procedure Setting the Negative Pressure Value Setting the Negative Pressure Value 1 Make sure that the ink is leaking from the nozzle faces A 2 Open the table fro...

Page 60: ...MODE button and select Lo 1 The Lo 1 value is displayed Press the DOWN button to set the value For C M Y K Cl Pr ink 4 4kPa For W ink 4 9kPa 2 Set the Hi 1 value Press the MODE button and select Hi 1...

Page 61: ...sure to perform the setting for both operation panels This setting is required to stable the pressure inside sub tank This mode enable to keep negative pressure 0 1kPa Enter the Hysteresis mode by pre...

Page 62: ...lation Path with White Ink This section explains how to fill the circulation path with White ink By driving the circulation pumps E and F white ink in the main ink tank B is filled in circulation path...

Page 63: ...will stop after 60sec working 2 Installation Main Machine Installation Installation Procedure Removing the Air Bubbles Removing the Air Bubbles Use this procedure to eject unnecessary air and cleanin...

Page 64: ...t Control software 5 Select the one color of the port to which the air bubble ejection tool will be connected And change Purge Ink Time Sec to 15 then click OK Usually you cannot select only one color...

Page 65: ...d by 2 persons One person operates the Print Control Software the other one connects or disconnects the tube of the air bubble ejection tool If only one person will perform this step set Purge Ink Tim...

Page 66: ...e the ink from the ports with the paper towel and then put back the carriage front cover 10 Remove the ink from the connectors of the bubble ejection tool with the paper towel and then store it in a d...

Page 67: ...e front right cover Before closing the table front right cover make sure to exit the Print Control software and press the power off button Otherwise the carriage might be operated by mistake 15 Press...

Page 68: ...ervice manual revision Retrofit information Product Safety Other Tier 2 Tier 0 5 Symptom Caps may be out from capping unit Cause Vibration during transportation or incorrect daily care around the cap...

Page 69: ...s performed with the cap is out from capping unit the print head may be damaged Cap holder will be changed one that can fix the cap more strongly Cut in S N are blow Pro T7210 Pro TF6250 J09317 R869X9...

Page 70: ...e Action required Service manual revision Retrofit information Product Safety Other Tier 2 Tier 0 5 Necessary power supply in customer site Only Y Star connection satisfies this specification Please c...

Page 71: ...ectrician for more detail Confirm any pins voltage Confirm the voltage between every connector pin whether voltage is within acceptance as below table Pin Mainly North America Mainly Europe and Asia L...

Page 72: ...Product Safety Other Tier 2 Tier 0 5 Additional Information of Service manual Please apply the following additional information and correction to your Pro T7210 and Pro TF6250 field service manual in...

Page 73: ...2 0 7 19 6 0 1 21 0 0 8 18 3 0 6 19 7 0 1 21 1 0 9 18 4 0 6 19 8 0 2 21 2 0 9 18 5 0 5 19 9 0 2 21 3 1 0 18 6 0 5 20 0 0 3 21 4 1 0 18 7 0 4 20 1 0 3 21 5 1 1 18 8 0 4 20 2 0 4 21 6 1 1 18 9 0 3 20 3...

Page 74: ...Base voltage value If the print quality is not stable as shown in the picture below adjust the image quality by adding 0V to 1 0V from the values in the table above For example when the print head vo...

Page 75: ...Technical Bulletin PAGE 4 4 Model Shepherd P1 Shepherd Lt Date 17 Oct 19 No RM0D4014 Dot pattern Not good Good Y direction line pattern...

Page 76: ...ro T7210 and Pro TF6250 field service manual in section 4 Replacement and Adjustment X axis Drive X axis Encoder Sensor When Installing the X axis Encoder Sensor Additional information is in Red When...

Page 77: ...sor cable Take care the wiring route A as without kink or without touch the X axis frame Result of kink the cable is touched and rubbed with the frame Red circle B Good Not Good wire kinked Take care...

Page 78: ...1 Shepherd Lt Date 24 Oct 19 No RM0D4015 Fix the sensor cable with a cable tie with the ionizer cable inside the UV lamp cover The sensor cable A should be tied by cable tie C with the ionizer cable B...

Page 79: ...correction Please apply the following additional procedure to your Pro TF6250 field service manual in section Between 2 Installation Main Machine Installation Installation Procedure Removing the Shipp...

Page 80: ...oosening by shake the wire with finger If there are loosen tighten them Check whether the screw is not loosening by shake the wire with finger If there are loosen tighten them Check whether the connec...

Page 81: ...E 3 5 Model Shepherd Lt Date 14 Nov 19 No RM0D4016 C 2 Retighten the screws on the wire terminal and any electric devices regarding view of D Filter A and Filter B may be placed in different positions...

Page 82: ...n PAGE 4 5 Model Shepherd Lt Date 14 Nov 19 No RM0D4016 3 Retighten the screws on the wire terminal regarding view of E 4 Retighten or check the screws on the wire terminal and any electric devices re...

Page 83: ...Technical Bulletin PAGE 5 5 Model Shepherd Lt Date 14 Nov 19 No RM0D4016 5 Retighten the screws on the wire terminal and any electric devices regarding view of G...

Page 84: ...Procedure Clean the Print Head with cleaning liquid when send back to RCL for investigation This process will take approx 30min If you do not perform the procedure below immediately after replacement...

Page 85: ...hing cleaning liquid Air tubes from the air purge port should be put into the drain hole or on the cloth because cleaning liquid will be discharged from this tube 3 Fill the syringe with 30ml of Clean...

Page 86: ...n step4 6 Attaching the caps LCAP31 to the both air tubes from the air purge port 7 Fill the syringe with 30ml of Cleaning Liquid and connect the syringe to ink supply tube 8 Push the syringe to expel...

Page 87: ...nother Ink supply tube and push the syringe same as step 8 10 Cutting the either tube of Air purge port to 5cm same as the ink supply tube Then bypass the tube each port as below picture to avoid liqu...

Page 88: ...with Bemcot A and store it in the print head part box B with complete light shielding And cover the print head driver board with bubble wrap C which was used in brand new print head 14 Pack the print...

Page 89: ...sition is unmatched with the setting of the print start position on Print Control Software Cause The parameter of origin position in Print Control Software may be incorrect Action 1 Check whether the...

Page 90: ...chine Installation Install Procedure Turning On the Main Power Switch Additional section is in Red Turning On the Main Power Switch This section describes how to turn on the main power of the machine...

Page 91: ...ds Because this mechanism keeps negative pressure only temporary make sure that the carriage is at the ink receiver position left side of the machine To use the machine open the two negative pressure...

Page 92: ...es were not opened during print ink may leak from printhead nozzle cause by negative pressure is broken by ink supply from Main ink tank When opening valves 1 Turn the main power on 2 Turn the two neg...

Page 93: ...ion Electrical Transmit receive Action required Service manual revision Retrofit information Product Safety Other Tier 2 Tier 0 5 Information Providing the information of compressor air tube which is...

Reviews: