2.Installation
87
1.
Log in from the control panel as the machine administrator.
2.
Press [System Settings].
3.
Press [Administrator Tools].
4.
Press [ ] to display Page 11.
5.
Press [Machine Data Encryption Settings].
6.
Press [Print Encryption Key].
7.
Select the backup method.
If you have selected [Save to SD], load an SD card into the media slot on the side of the control panel and press
[OK]; once the machine's data encryption key is backed up, press [Exit].
If you have selected [Print on Ppr], press the [Start] key. Print out the machine's data encryption key.
8.
Press [Exit].
9.
Log out.
Encryption Key Restoration
How to restore the old encryption key to the machine
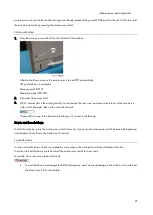
The following message appears after the controller board is replaced. In such a case, it is necessary to restore the
encryption key to the new controller board.
To do this, follow the procedure below.
1.
Prepare an SD card that has been initialized in FAT16 format.
2.
Using a PC, create a folder in the SD card and name it "restore_key".
3.
Create a folder in the “restore_key” folder and name it the same as machine’s serial number, “xxxxxxxxxxx” (11
digits).
4.
Create a text file called "key_xxxxxxxxxxx.txt" and save it in the "xxxxxxxxxxx“ folder. Write the encryption key in
the text file.
/restore_key/xxxxxxxxxxx/key_xxxxxxxxxxx.txt
Ask an Administrator to enter the encryption key. The key has already been printed out by the user and
may have been saved in the "key_xxxxxxxxxxx.txt" file. (The function of back-up the encryption key to
the SD card directly is provided 11A products or later.)
5.
Turn ON the main power.
6.
Confirm that a message is displayed on the LCD telling to insert the SD card that contains the encryption key.
7.
Turn OFF the main power.
8.
Insert the SD card that contains the encryption key into Slot 2 (the lower slot).
9.
Turn ON the main power.
Summary of Contents for M0A0
Page 2: ......
Page 10: ...8 ...
Page 12: ......
Page 34: ...2 Installation 22 9 Enter the password 10 Press OK 11 Enter the password again ...
Page 85: ...2 Installation 73 ...
Page 189: ...4 Replacement and Adjustment 177 ...
Page 203: ...5 System Maintenance 191 SP Mode Tables See Appendices ...
Page 229: ...5 System Maintenance 217 LDAP authorization information ...
Page 344: ...7 Detailed Descriptions 332 side guides from side to side ...
Page 358: ...7 Detailed Descriptions 346 ...
Page 368: ......
Page 558: ......
Page 574: ...1 Replacement and Adjustment 16 7 LCD A 4 8 Microphone A cushioning 1 ...
Page 622: ......
Page 624: ... A Short Edge Feed SEF B Long Edge Feed LEF ...
Page 626: ......
Page 632: ...1 Installation 6 ...
Page 752: ...5 Detailed Section Descriptions 126 Report Sample ...
Page 758: ...6 Specifications 132 Fax Unit Configuration Component No Remarks FCU 1 Speaker 2 ...
Page 760: ......
Page 762: ......
Page 776: ...2 Replacement and Adjustment 14 4 Detach the paper size switch from the bracket A Hook x2 ...


