background image

PROCESSING AUDIO

62

About the Effects

ReCycle features three effect processors, Envelope, Equalizer, and Transient 
Shaper, that can be used to further manipulate audio loops. 

D

D

D

D

All effects are applied globally, i.e. they will affect all slices equally 
in a loop.

D

D

D

D

To be able to apply the effects, Preview mode must be activated.

To activate Preview mode for a file you must first set up the left and right lo-
cators, specify the length and time signature of the loop and create a suffi-
cient number of slices (see the previous chapter). You could also load REX2 
(ReCycle’s native file format) files for further processing of course, in which 
case these settings have already been made and you can apply effects in 
Preview mode directly.

D

D

D

D

The principle “what you hear is what you get” applies when you ap-
ply effects, like with all the other Preview mode functions. 

Open the Effect Panels

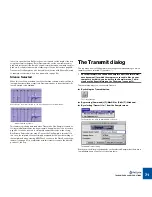
The three Effect buttons (from left to right); Envelope, Transient Shaper and 
Equalizer.

The three Effects each have their own panel, containing the parameters. By 
clicking on one of the effect buttons located to the left of the transport controls 
on the Toolbar, the corresponding panel is shown below the toolbar. You can 
also open the effect panels from the View menu. 

D

D

D

D

The top to bottom order of the Effect panels also reflects the inter-
nal signal path of the effects. 

If all are activated, Envelope is always the first effect in the signal path, the 
Transient Shaper is the second, and Equalizer is the last.

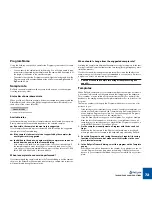
The three effect panels.

Activating Effects

Effects can be active regardless of whether the panel is visible or not. There are 
two ways you can activate effects:

D

D

D

D

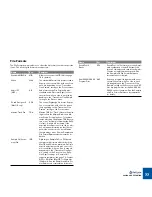
By clicking on the Effect On/Off button on an open panel.

When an effect is on (activated), the On/Off button becomes dark, and a 
green light is shown in the effect button for the corresponding effect.

Effect On/Off button. 

D

D

D

D

By holding down [Option] (Mac) / [Alt] (Win) and clicking on an ef-
fect button you can toggle the effect on and off.

About the Presets

For each Effect there are a number of preset settings available. 

D

D

D

D

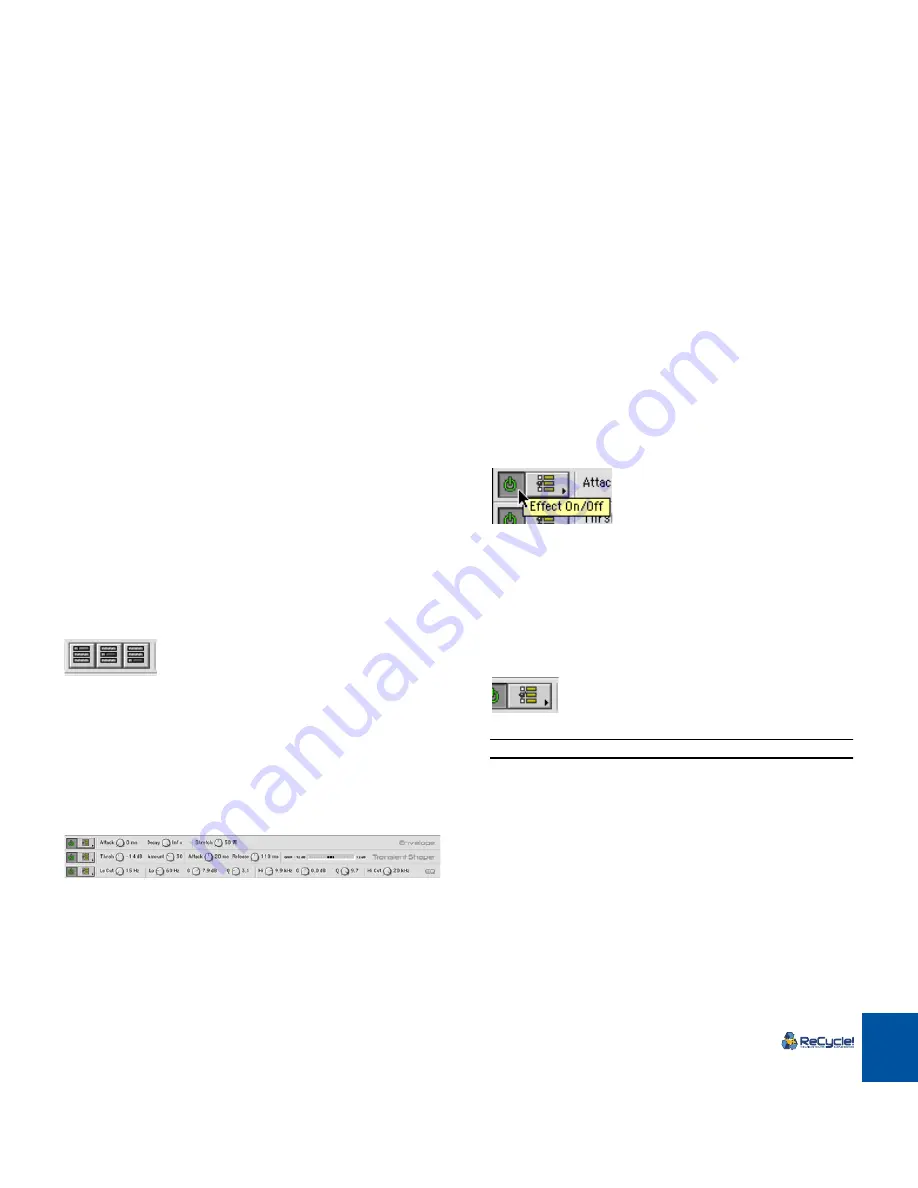
To select a Preset, click on the Preset button beside the Effect On/
Off button.

A pop-up menu appears with the available Presets listed.

The Effect Presets button.

!

It is not possible to store user presets.

About the Parameter Controls

For all effect parameter controls, the following applies:

D

D

D

D

[Shift]-clicking a parameter increases the resolution of the adjust-
able range.

Use this for a finer tuning range.

D

D

D

D

[Ctrl]-clicking (Win) / [Command]-clicking (Mac) a parameter resets 
the parameter to the default value.

A green light is shown in the Effect button if the 
corresponding effect is activated.

Summary of Contents for ReCycle

Page 1: ...l www propellerheads se Change the tempo of a groove without altering its pitch and vice versa Change the feel of your grooves or quantize them Create endless variations and fills out of a single loop...

Page 2: ...d to any other media expect as specifically allowed in the License Agreement No part of this publication may be copied reproduced or otherwise transmitted or recorded for any purpose without prior wri...

Page 3: ...D D D D Table of Contents...

Page 4: ...ional Info 15 Windows Installation 16 Requirements 16 Setting Up The Computer 16 Turning on your system 16 Finding your way on the ReCycle CD ROM 16 Installing the Acrobat Reader 17 Installing ReCycle...

Page 5: ...Setting the Loop 60 Tempo Time Signature Bars and Beats 61 Processing Audio 62 About the Effects 63 Effect Parameters 65 The Process Menu 66 Additional Processing Items 69 Transmit and Sampler Options...

Page 6: ...TABLE OF CONTENTS 4...

Page 7: ...1 D D D D Introduction...

Page 8: ...market to pick from However please read the following text carefully Every published recording carries a warning like this All rights of the producer and owner of the recorded work are protected by la...

Page 9: ...led and positioned in both versions Sometimes a key command is different in the two versions This is indicated like this Hold down Option Mac Alt Win and Everything said in the manuals applies to both...

Page 10: ...INTRODUCTION 8...

Page 11: ...2 D D D D Macintosh Installation...

Page 12: ...the Memory Control Panel This is necessary for trouble free audio playback If Virtual Memory is On turn it off and restart the computer Finding your way on the ReCycle CD ROM Once you have turned on y...

Page 13: ...w ReCycle folder on the hard disk not on the CD ROM and double click on it 2 The program prompts you to insert the ReCycle CD ROM if not al ready in the drive This is only required the first time you...

Page 14: ...dditional items will be available in the Audio Preferences D D D D If the card and its driver supports it the Clock Source pop up al lows you to set an external source to which the audio playback can...

Page 15: ...using the pop up menu you can check which MIDI interfaces are available D D D D It doesn t matter which interface is selected on the pop up menu The pop up is only there for you to view the available...

Page 16: ...available If there isn t that much memory for it to grab you might have other programs running which already occupy some of your memory it will use as much as it can get If the program can t even find...

Page 17: ...3 D D D D Windows Installation...

Page 18: ...reflect the fi nal audio in the sampler or in exported files since this always main tains highest possible quality Depending on whether you plan to use a sampler and the model of the sam pler s you m...

Page 19: ...dam age to the computer sampler and other SCSI peripherals Installing SCSI ReCycle works with any SCSI host adapter that is 100 Windows compatible Do not connect anything to the SCSI card until you h...

Page 20: ...make it into the manual Please double click on it and read it before pro ceeding Register your software Please fill out and send in the registration card that comes in this package Do ing so will mak...

Page 21: ...und driver for the audio hardware This makes ReCycle communicate with the hardware via Direct Sound a part of the Microsoft DirectX package For this to be possible you need to have DirectX installed o...

Page 22: ...the file Drum Tools Demo aif 4 Activate Playback by clicking the Play button 5 Open the Preferences dialog from the Edit menu 6 In the Preferences dialog locate the Buffer Size slider and drag it all...

Page 23: ...Now This takes you to the Prop Shop where you can place orders for all cool Propellerhead products D D D D Register ReCycle Now This is where you register your copy of ReCycle Registering means that y...

Page 24: ...ains a list of the avail able SCSI buses Copy to Clipboard Clicking this button copies the contents of the System Information dialog onto the Windows clipboard You can then paste this into a text file...

Page 25: ...4 D D D D Quick Tour of ReCycle...

Page 26: ...this time each slice is transmitted as an individual sample The samples are automatically mapped across the keyboard in the sam pler chromatically This means that if you play the new samples in succes...

Page 27: ...ools Demo loop 4 In the window click the Play button You should now hear the entire loop from start to end repeating until you click the Stop button As you can hear the Drum Tools Demo loop has dou bl...

Page 28: ...in a sequencer or if you transmit the loop to a sampler together with a MIDI file the loop will follow the tempo setting of the sequencer regardless of this setting D D D D By adjusting the Pitch knob...

Page 29: ...ment is receiving on the MIDI channel of your choice 2 Launch your MIDI Sequencer and make sure you are also transmit ting correctly to the sampler set the MIDI Output and MIDI Chan nel 3 Play your ke...

Page 30: ...opened in ReCycle you don t have a problem Proceed as follows 1 Open the file in ReCycle and use the normal techniques to add an appropriate amount of slices set the number of Bars and Beats etc to c...

Page 31: ...5 D D D D Sampler Settings...

Page 32: ...neric SDS and SMDI Generic and Extended These cannot be automatically found by ReCycle D D D D Multiple instances of the same model samplers that require a MIDI connection for SCSI transfers i e Kurzw...

Page 33: ...know that the sampler is connected and booted click the Find button ReCycle scans the MIDI and or SCSI connections for a sampler of the se lected model If it finds one you are asked whether you want t...

Page 34: ...with all samplers on the Sampler list If a sampler isn t on line it will not be available on the Sampler menu Making Settings for a Sampler In the area to the left in the Sampler Settings dialog you...

Page 35: ...u wish to remove a sampler from the Sampler List proceed as follows 1 Pull down the Sampler pop up menu and select the sampler you want to remove 2 Click the Delete button at the bottom of the dialog...

Page 36: ...SAMPLER SETTINGS 34...

Page 37: ...6 D D D D Opening and Receiving Audio...

Page 38: ...emory Please note though that Transmitting audio re quires even more memory the exact amount depending on the length of the Slices and the Stretch factor About REX2 Files REX2 is the native file forma...

Page 39: ...will not be able to play a file under the following conditions If the file is in a format ReCycle doesn t support If there isn t enough memory RAM left to load the sample If the sample is longer than...

Page 40: ...u chose to associate WAV or AIF file formats with ReCycle during the installation you can open these files in ReCycle by double clicking just as with ReCycle files Receiving Audio from the Sampler If...

Page 41: ...ce point This is to avoid very short slices at the beginning of the sample We recommend that you click Yes unless you have good reason D D D D If you want this to be done automatically open the Prefer...

Page 42: ...OPENING AND RECEIVING AUDIO 40...

Page 43: ...7 D D D D The ReCycle Window...

Page 44: ...smit Receive Slice Audition buttons Effect buttons Preview toggle Sensitivity slider Stop Play Tools Open Save Silence Selected Gate Sensitivity Export Sound Length settings Preview Tempo setting and...

Page 45: ...the Status Bar Window Title The window title displays two things The name of the file An asterisk that indicates if the file hasn t been saved yet Toolbox The Toolbox is located in the upper left corn...

Page 46: ...cal scale is displayed in decibel and the zoom factor changes in steps of 6 dB Minimum zoom will show 0 dB as the top and bottom waveform amplitude boundaries in the window the next factor will show 6...

Page 47: ...og The View stereo files as sum of L R Option To make the size of stereo files in the ReCycle window more compact the left and right channels of stereo files can be summed to one channel instead of be...

Page 48: ...y displayed in the waveform display The thumbnail overview shows you which part of the waveform is displayed The Edit Menu The Edit menu features the following items You can use Copy Loop to copy the...

Page 49: ...strip but not directly on a slice marker handle brings up a context menu with the following items Menu Item Description Copy Loop See The Edit Menu above Set Left Locator to This Slice The Left Locat...

Page 50: ...m Description Locked Toggles the Locked status on or off for the slice handle you click on See page 56 Hidden Toggles the Hidden status on or off for the slice handle you click on See page 54 Delete T...

Page 51: ...8 D D D D Playing Audio...

Page 52: ...ns into a speaker icon When you click with the speaker tool on a Slice a section of waveform between two Slice markers it plays back Press Space to stop even if you don t playback automatically stops...

Page 53: ...s and Beats to calculate the tempo cre ate a sufficient amount of slices before enabling Preview mode How to specify loop length and how to set slices is explained in the next chapter Setting Slices a...

Page 54: ...nd start playback As you can hear at this tempo the slices sound chopped off with a dis cernible gap of silence between each slice 7 While still in playback gradually turn the Stretch knob clockwise u...

Page 55: ...9 D D D D Setting Slices And Loops...

Page 56: ...oard di rectly This can be used to quickly give the slider a rough setting If you hit 1 it gets set to 11 if you press 2 it gets set to 22 etc D D D D You can use the and keys to nudge the slider up a...

Page 57: ...o a fairly high value to get the number of slices you see But raising Sensitivity led to one unwanted slice splitting a sound in two Hiding is the solution After Hiding the unwanted slice How do I fin...

Page 58: ...s To unlock a locked Slice simply click on it again with the Lock tool When do I use the Lock tool If you got a good set of slices by just using the Sensitivity slider but discover that in one or two...

Page 59: ...Invert Selection D D D D To deselect all markers click between two markers on the ruler Manual Slice Handling It is possible to add new to move and to delete slice markers manually Before adding or mo...

Page 60: ...the correct position release the mouse but ton Only one slice marker at a time can be moved Moving a slice marker to any position D D D D If you hold down Option MacOS Alt Windows the snap to zero cr...

Page 61: ...sible the Locators snap to the lines D D D D If you want to position the Locators freely even though you have slices hold down Option MacOS Alt Win while dragging a Locator By clicking D D D D To set...

Page 62: ...Bars and Beats settings see below Bars and Beats The Bars field and Beats pop up are used to specify the length of the loop Let s explain this by example As stated above you can use Bars and Beats to...

Page 63: ...1 0 D D D D Processing Audio...

Page 64: ...e View menu D D D D The top to bottom order of the Effect panels also reflects the inter nal signal path of the effects If all are activated Envelope is always the first effect in the signal path the...

Page 65: ...the audio Stretch is used to add an extra tail of audio to each slice to lengthen it This is derived from the natural decay of the sound This extra tail of sound then fills out the gap between the sli...

Page 66: ...pply its effect when signals rise above the set threshold If you raise this value the response will be slower allowing more of the signal to pass through unaffected Typically this is used for preserv...

Page 67: ...ual level D D D D Normalizing each slice can be useful when you use ReCycle to pro cess individual sounds that don t belong to a loop Normalize can t do miracles If your recording contains unwanted no...

Page 68: ...is com mand will re discover those slices D D D D Re Analyze will add all slices that lies on a position in the file not already occupied by a slice Note that the added slices may not be visible as th...

Page 69: ...al individual sounds con taining air in between the sounds and want to save each one as a separate file Used together with the slice algorithm this also keeps the size of the trans mitted exported dat...

Page 70: ...PROCESSING AUDIO 68...

Page 71: ...1 1 D D D D Transmit and Sampler Options...

Page 72: ...e options can also be toggled on or off using the two Transmit Option buttons on the Toolbar D D D D Transmit as One Sample has no effect on playback in ReCycle Si lence Selected however can be auditi...

Page 73: ...so be used to simply skip unwanted sounds when slicing But Silence Selected works even if Transmit As One Sample is turned off In this case the selected slices will simply be skipped both when transmi...

Page 74: ...ge from the suggested sample rate Lowering the sample rate will make the samples occupy less memory in the sam pler but it will also lower the fidelity of the recording less high frequency mate rial w...

Page 75: ...ame as the Template the new Program may replace the Template Transmit This button creates a Program and samples for it as described above without creating any MIDI File MIDI File Transmit This button...

Page 76: ...TRANSMIT AND SAMPLER OPTIONS 74...

Page 77: ...1 2 D D D D Saving and Exporting...

Page 78: ...ude All the slice points and their status locked hidden etc All real time processing features like tempo pitch settings Stretch amount etc Any applied offline processing like Normalize etc Exporting F...

Page 79: ...ed document is a stereo file an alert box will appear informing you that the out put will be mixed to mono since Mixman files are always mono See the Sampler and File Format Reference documentation fo...

Page 80: ...ve it 6 Switch over to Cubase VST You need version 5 or later same for both the Mac and Windows platforms to be able to import REX2 files 7 Select an Audio Track where you want to import the file and...

Page 81: ...f you create a MIDI File from the Transmit dialog the position of the first sample in the Template affects the transposition of the MIDI File so that the file plays the right samples If you use Export...

Page 82: ...SAVING AND EXPORTING 80...

Page 83: ...1 3 D D D D Example Applications...

Page 84: ...e 65 2 Select Whole File The file is now normalized 3 Select Re Analyze from the Process menu 4 Raise Sensitivity to check if the recognition got better All offline processing is undoable last action...

Page 85: ...g See next page D D D D You could save the file as a REX2 file See page 76 In case of it being a Transmit to sampler operation and some of the Export for mats you proceed as follows 7 Set things up so...

Page 86: ...but the same technique can of course be applied to separate as many sounds as you need 1 Open or Receive the sample 2 Raise the Sensitivity until a lot of slices appear 3 Activate playback and move t...

Page 87: ...e manually at any position 4 Set the Time Signature and length Bars Beats to whatever the length of the loop The Tempo gets calculated 5 Make sure Silence Selected and Transmit as One Sample are not a...

Page 88: ...se the Gate Sensitivity parameter to prevent silent pas sages from being transmitted See page 67 7 Select your Sampler from the Sampler menu and select Transmit The slices get transmitted Alternativel...

Page 89: ...D D D D Index...
Page 90: ...ts 14 21 Contrast Slider 45 Copy to Clipboard 13 22 Copyright 6 Crop Loop 66 Cubase VST 78 D Drag and Drop 38 E Effects Activating 62 Envelope 63 Equalizer 64 Opening Effect Panels 62 Presets 62 Trans...

Page 91: ...empo 67 Processing Crop Loop 66 Gain 66 Normalize 65 Pitch 67 Re Analyze 66 R RCY files 37 Re Analyze 66 Receive sample 38 ReCycle Documents 37 ReCycle Export file 78 REX file 78 S Sample Rate Transmi...

Page 92: ...h 63 Support 14 21 System Information 13 21 T Templates 72 Tempo 67 Calculated 60 Changes Slicing for 83 Thumbnail Scrolling 45 Setting Magnification 45 Time Signature 60 Toolbox 43 Transmit As One Sa...

Reviews: