SETTING SLICES AND LOOPS
57
Selecting Slice Markers
Slice markers need to be selected for some operations, like Silence Selected
(see page 71 and page 84), or when moving and deleting slices (see “Manual
Slice Handling” in this chapter):
D
D
D
D
Selecting is done with the Arrow Tool.
You can have the Pencil Tool selected, but this automatically changes to the
Arrow tool if you point in the Marker strip.
D
D
D
D
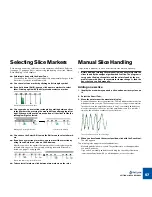
You can select one marker by clicking on its triangle symbol.
D
D
D
D
If you hold down [Shift], you can click on more markers to select
them. Clicking again with [Shift] pressed deselects a marker.
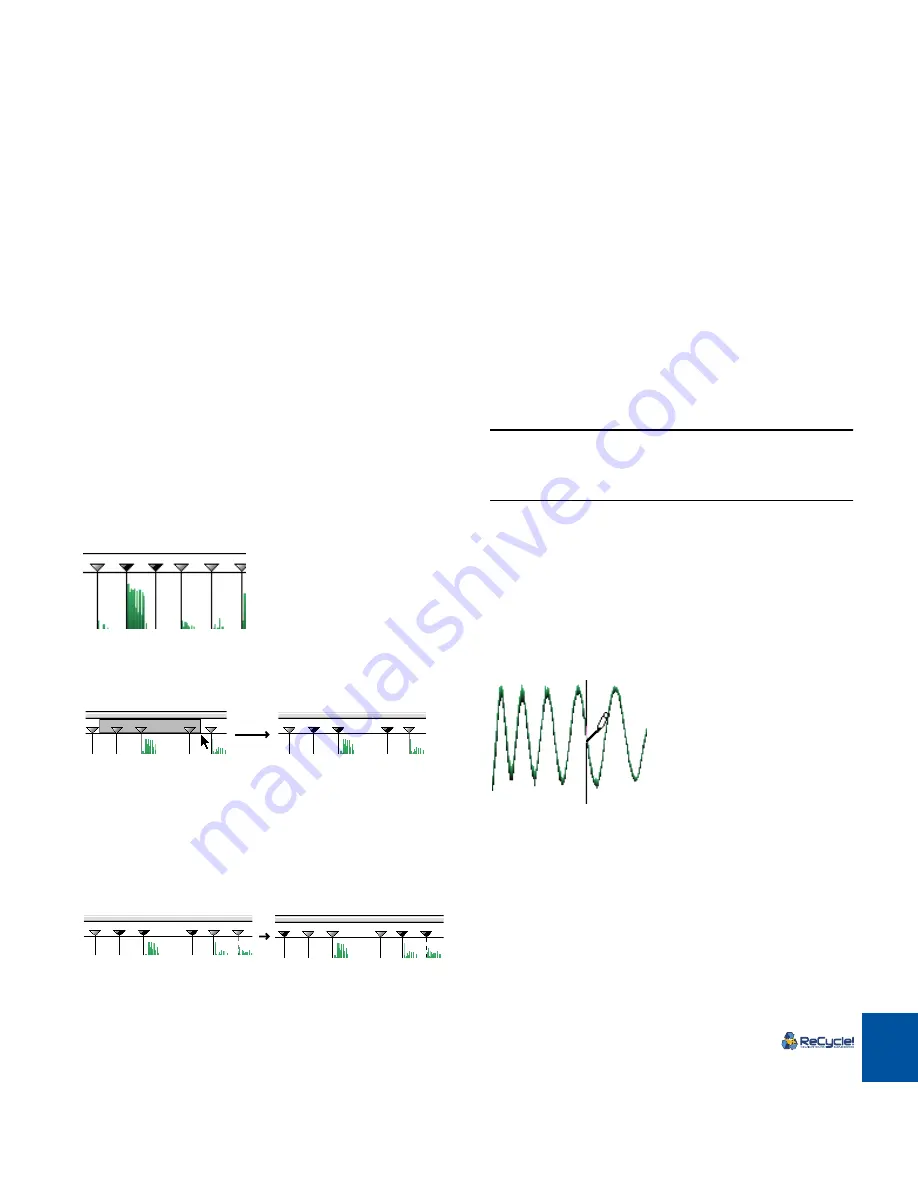
Selected and unselected markers.
D
D
D
D
You can make up a selection rectangle by pointing between slices
in the Marker strip, pressing the mouse button and dragging left or
right. When you release the mouse button, all the slices inside the
rectangle will get selected.
D
D
D
D
You can use the Select All item on the Edit menu to select all mark-
ers.
D
D
D
D
If you have a selection of markers, you can invert the selection by
using “Invert Selection”, also on the Edit menu.
After this operation, the markers that were previously selected are now de-
selected, and vice versa. This is mainly useful together with Silence Se-
lected, see page 71 and page 84.
Before and after using “Invert Selection”
D
D
D
D
To deselect all markers, click between two markers on the ruler.
Manual Slice Handling
It is possible to add new, to move, and to delete slice markers manually.
!
Before adding or moving slices manually, make absolutely sure the
slices found by the analyze algorithm don’t suffice. The program is
very good at finding slice points, and the points found by the pro-
gram often work better – for example for tempo changes – than the
ones that you can find manually.
Adding a new slice
1. Identify the area where you need a slice, and zoom in very close on
it.
2. Select the Pencil Tool.
3. Move the pointer over the waveform display.
A vertical line moves across the waveform. This line indicates where the slice
will appear when you click. The line snaps to zero crossings in the waveform
(positions where the amplitude is close to zero), so manually added slices
won’t introduce any clicks or pops. If the amplitude is zero for a period of
time, the line will move continuously over this area.
The vertical line snaps to zero crossings.
4. When you have found the correct position, click with the Pencil tool.
The slice appears.
The following rules apply to manually added slices:
•
Manually added slices are locked. They will therefore not disappear when
you lower Sensitivity.
•
If you unlock a manually added slice and drag the sensitivity slider down
lower than halfway (below 50), it will disappear, just as other slices.
Making up a rectangle like this...
...selects these markers.
Summary of Contents for ReCycle
Page 3: ...D D D D Table of Contents...
Page 6: ...TABLE OF CONTENTS 4...
Page 7: ...1 D D D D Introduction...
Page 10: ...INTRODUCTION 8...
Page 11: ...2 D D D D Macintosh Installation...
Page 17: ...3 D D D D Windows Installation...
Page 25: ...4 D D D D Quick Tour of ReCycle...
Page 31: ...5 D D D D Sampler Settings...
Page 36: ...SAMPLER SETTINGS 34...
Page 37: ...6 D D D D Opening and Receiving Audio...
Page 42: ...OPENING AND RECEIVING AUDIO 40...
Page 43: ...7 D D D D The ReCycle Window...
Page 51: ...8 D D D D Playing Audio...
Page 55: ...9 D D D D Setting Slices And Loops...
Page 63: ...1 0 D D D D Processing Audio...
Page 70: ...PROCESSING AUDIO 68...
Page 71: ...1 1 D D D D Transmit and Sampler Options...
Page 76: ...TRANSMIT AND SAMPLER OPTIONS 74...
Page 77: ...1 2 D D D D Saving and Exporting...
Page 82: ...SAVING AND EXPORTING 80...
Page 83: ...1 3 D D D D Example Applications...
Page 89: ...D D D D Index...

