80
Section 8: Maintenance
Digital Label and Decal Press 2 UserÕs Manual
7.
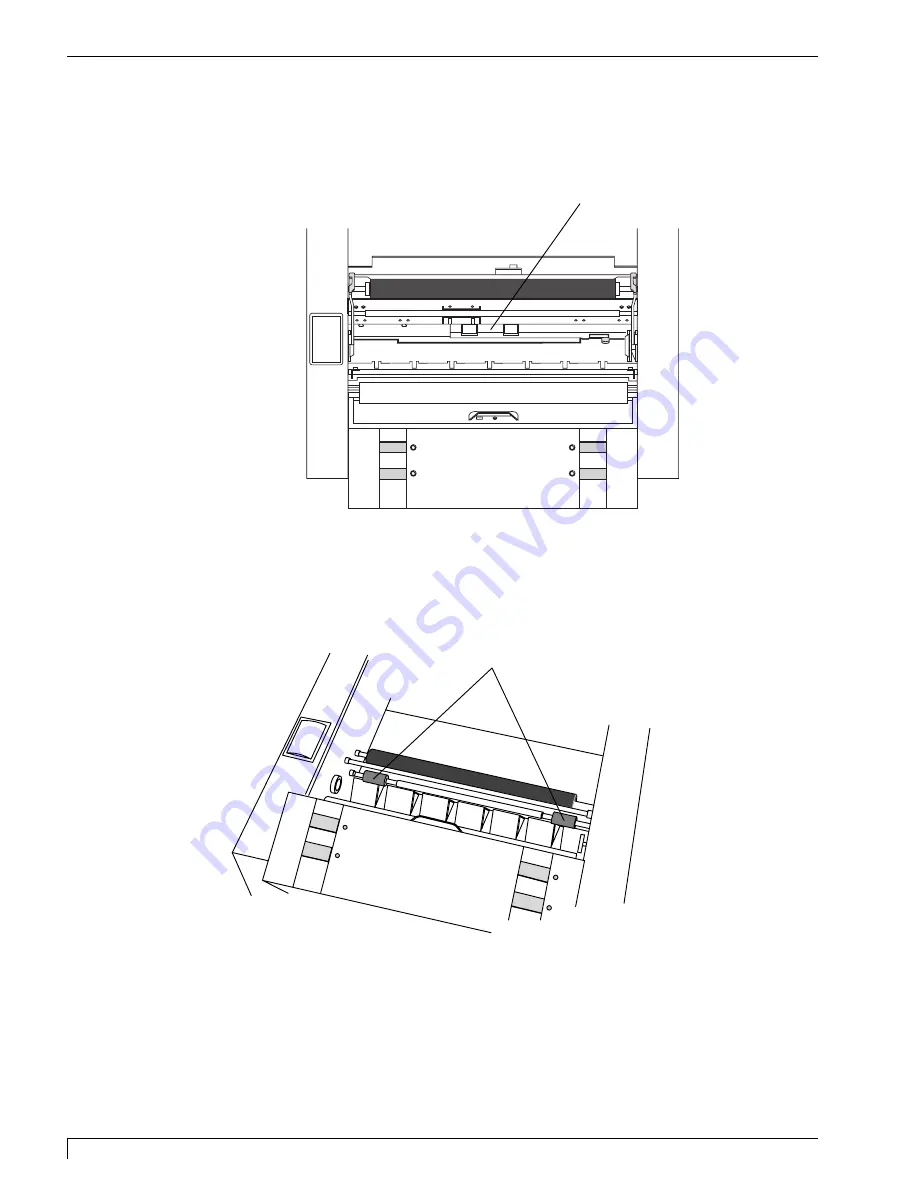
Next, clean the Pinch Rollers within the printer. To do this, you must first
remove the Print Pressure Bracket from the printer. Refer to the steps in Part I
of this section for instructions on removing this bracket.
8.
Once the Print Pressure Bracket is removed, use a Cleaning Pad from the
Printer Cleaning Kit or a soft, lint-free cloth
slightly
moistened with isopropyl
alcohol to thoroughly wipe the Pinch Rollers clean. While wiping, use the
Cancel and On-Line buttons of the Printer controls to rotate the Pinch Rollers.
9.
After the roller is clean and
completely dry
, re-install the Print Pressure Bracket
according to the steps in Part I of this section.
10. Replace the Ribbon Cartridge and close the printerÕs cover.
Print Pressure Bracket
Pinch Rollers
DLDP2.qxd 3/29/99 9:56 AM Page 80
Summary of Contents for Impressa 2
Page 1: ......
Page 9: ...4 Section 1 Introduction Digital Label and Decal Press 2 User s Manual...
Page 14: ...Section 2 Safety Precautions 9 Digital Label and Decal Press 2 User s Manual...
Page 15: ...10 Section 2 Safety Precautions Digital Label and Decal Press 2 User s Manual...
Page 23: ...18 Section 3 Getting Started Digital Label and Decal Press 2 User s Manual...
Page 35: ...30 Section 4 Ribbons and Print Media Digital Label and Decal Press 2 User s Manual...
Page 41: ...36 Section 5 Connecting the Unit Digital Label and Decal Press 2 User s Manual...
Page 89: ...84 Section 8 Maintenance Digital Label and Decal Press 2 User s Manual...
Page 104: ...Printed in the United States of America P N 510183...


