Other Settings
12
92
En
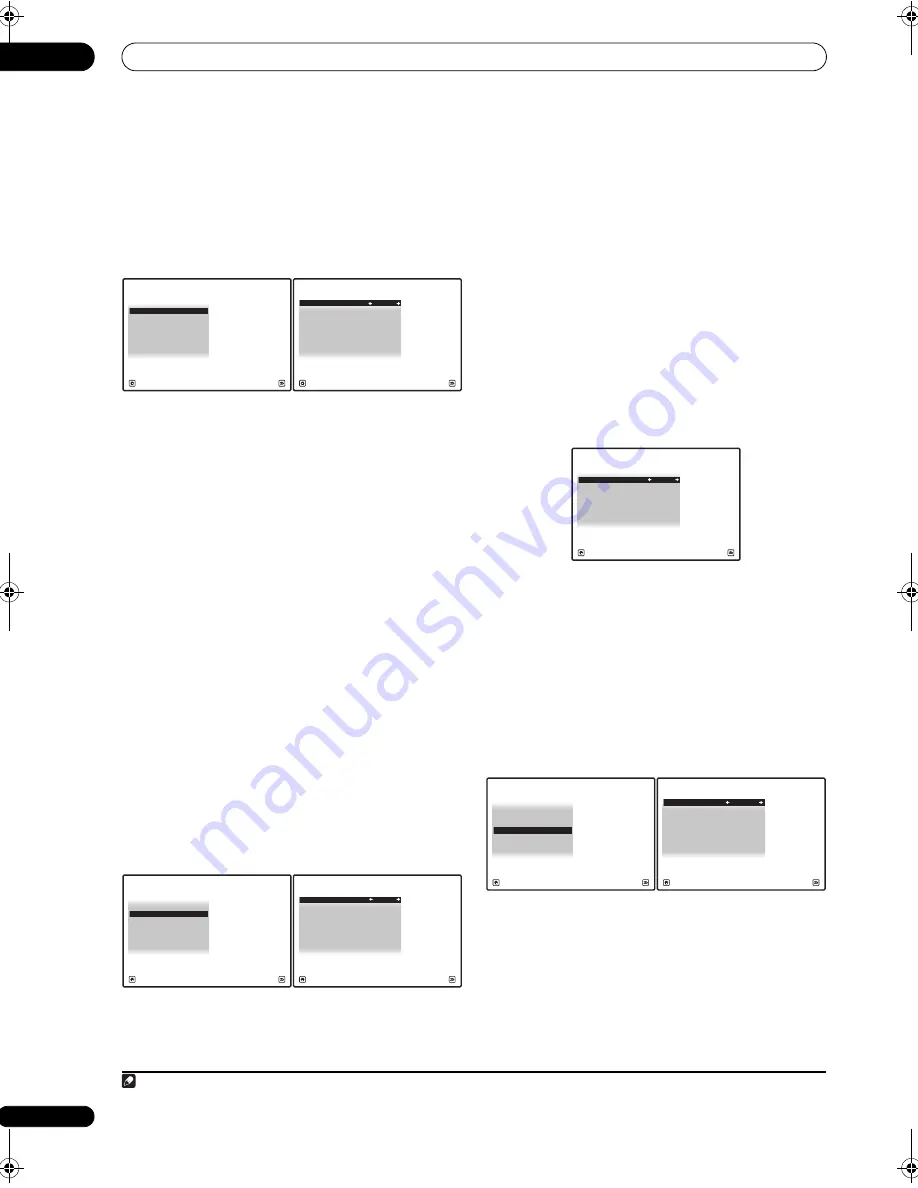
ZONE Audio Setup
If you’ve made MULTI-ZONE connections (see
MULTI-
ZONE listening
on
p
age 63), you may need to s
p
ecify you
r
volume setting.
1
Select ‘ZONE Audio Setup’ from the Other Setup
menu.
2
Select the volume level setting of ZONE 2 and
ZONE 3.
1
•
Variable
– Use this setting if you’ve connected a
p
owe
r
am
p
lifie
r
in the sub
r
oom (this
r
eceive
r
is
sim
p
ly being used as a
pr
e-am
p
) and you will be
using this
r
eceive
r
’s cont
r
ols to adjust the volume.
•
Fixed
– Use this setting if you’ve connected a fully
integ
r
ated am
p
lifie
r
(such as anothe
r
Pionee
r
VSX
r
eceive
r
) in the sub
r
oom and want to use that
r
eceive
r
’s volume cont
r
ols.
With the
Fixed
setting, the sou
r
ce is sent f
r
om this
r
eceive
r
at maximum volume, so make su
r
e the volume is
quite low in the sub zone at fi
r
st, and then ex
p
e
r
iment to
find the co
rr
ect level.
3
When you’re finished, press RETURN.
You will
r
etu
r
n to the
Other Setup
menu.
SR+ Setup for Pioneer flat screen TVs
Make the following settings if you have connected a
Pionee
r
flat sc
r
een TV to this
r
eceive
r
using an SR+
cable. Note that the numbe
r
of function settings available
will de
p
end on the flat sc
r
een TV you’ve connected.
See also
Using this receiver with a Pioneer flat screen TV
on
p
age 67 and
Using the SR+ mode with a Pioneer flat
screen TV
on
p
age 68.
1
Select ‘SR+ Setup’ from the Other Setup menu.
2
Select the ‘PDP Volume Control’ setting you want.
•
OFF
– The
r
eceive
r
does not cont
r
ol the volume of the
flat sc
r
een TV.
•
ON
– When the
r
eceive
r
is switched to one of the
in
p
uts that use the flat sc
r
een TV (
DVD
, fo
r
exam
p
le),
the volume on the flat sc
r
een TV is muted so only
sound f
r
om the
r
eceive
r
is hea
r
d.
3
Assign any input source connected to the flat
screen TV to the corresponding input number.
This matches the
r
eceive
r
’s in
p
ut sou
r
ce with a
numbe
r
ed video in
p
ut on the flat sc
r
een TV. Fo
r
exam
p
le,
assign
DVD
to in
p
ut-2 if you have connected the you
r
DVD video out
p
ut to video in
p
ut 2 on the flat sc
r
een TV.
• The
Monitor Out Connect
should be set to the in
p
ut
that you’ve used to connect this
r
eceive
r
to you
r
flat
sc
r
een TV.
4
When you’re finished, press RETURN.
You will
r
etu
r
n to the
Other Setup
menu.
Flicker Reduction Setup
• Default setting:
4
The OSD’s
r
esolution can be inc
r
eased. If you feel the
OSD is ha
r
d to see, t
r
y changing this setting. Note that
the
r
esolution in this setting only affects the OSD; it has
no influence on the video out
p
ut.
1
Select ‘Flicker Reduction Setup’ from the Other
Setup menu.
2
Select the Flicker Reduction setting you want.
3
When you’re finished, press RETURN.
You will
r
etu
r
n to the
Other Setup
menu.
Note
1 If you selected
ZONE 2
in the
Surround back speaker setting
on
p
age 56, you won’t be able to change the volume level.
4d.Other Setup
A/V RECEIVER
Exit
Return
1. Multi Ch In Setup
2. ZONE Audio Setup
3. SR+ Setup
5. Flicker Reduction Setup
4. HDMI Control Setup
4d2.ZONE Audio Setup
A/V RECEIVER
Exit
Finish
ZONE 2 Volume Level : Variable
ZONE 3 Volume Level : Variable
4d.Other Setup
A/V RECEIVER
Exit
Return
1. Multi Ch In Setup
2. ZONE Audio Setup
3. SR+ Setup
5. Flicker Reduction Setup
4. HDMI Control Setup
4d3.SR+ Setup
A/V RECEIVER
Exit
Finish
PDP Volume Control :
OFF
Monitor Out Connect :
OFF
4d3.SR+ Setup
A/V RECEIVER
Exit
Finish
PDP Volume Control :
OFF
Monitor Out Connect :
OFF
1. Multi Ch In Setup
2. ZONE Audio Setup
3. SR+ Setup
5. Flicker Reduction Setup
4. HDMI Control Setup
4d.Other Setup
A/V RECEIVER
Exit
Return
4d5.Flicker Reduction Setup
A/V RECEIVER
Exit
Finish
Flicker Reduction :
4
SCLX81_71.book 92 ページ 2008年7月25日 金曜日 午後3時1分


