41
Creating a Recording Schedule
Creating and Editing a ‘Special Day’ Schedule
Special Day Schedule
4.5.1
Creating a Recording Schedule
1) Select a day to begin creating the schedule for -or- Select the SINGLE SELECTION MODE button to create the
schedule for all the days of the week at once.
2) Highlight the time-blocks within the Recording Schedule Window for the camera(s) you wish to schedule. Once the
desired Time-Blocks are highlighted, press a RECORDING MODE button.
The Time-Blocks should now appear Blue for Motion, Yellow for Continuous and White for No Recording
Leave Cameras that will be recording with Sensor Detection set to ‘No Recording’ for the specified time block(s).
4.6
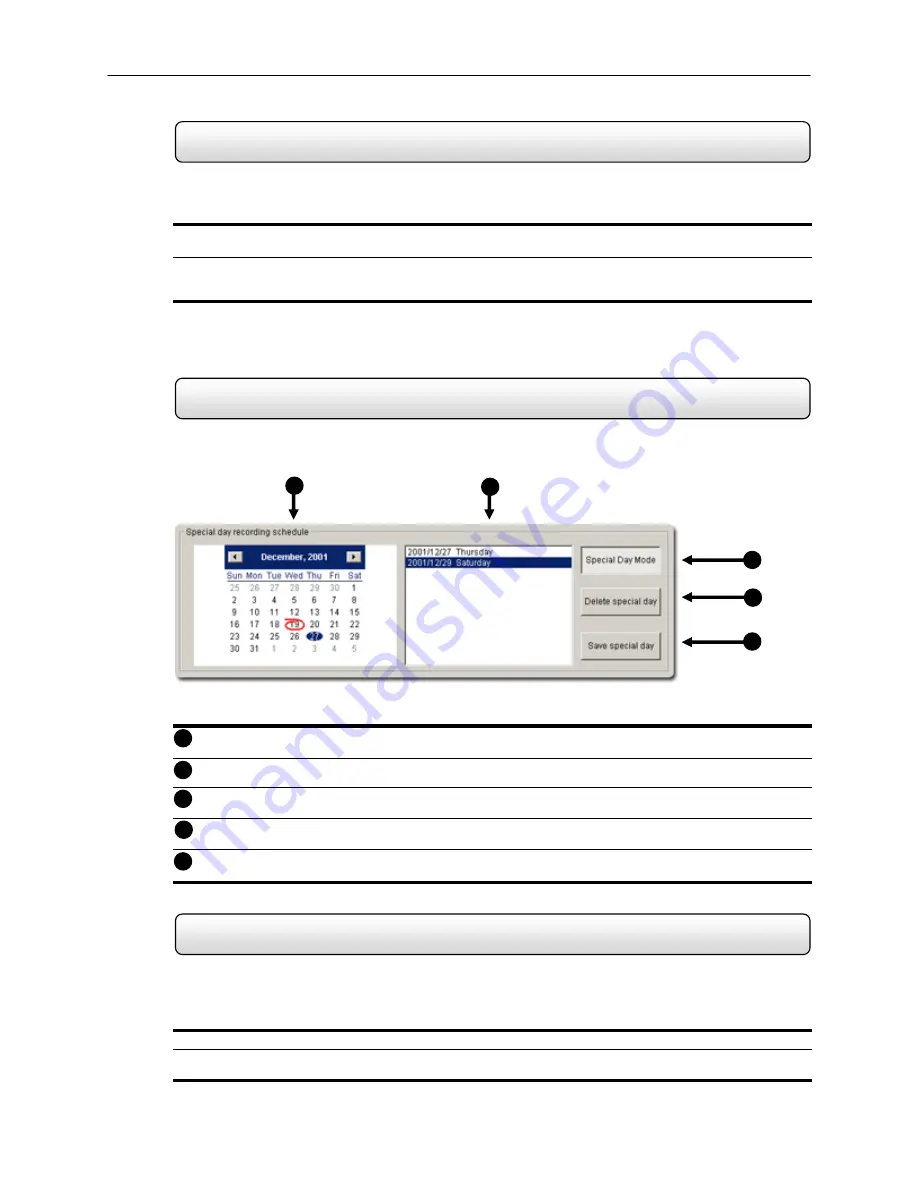
You can create days that have a unique recording schedule. You may wish to create these on days that are ‘not typical’
such as Holidays, Special Events, etc.
Calendar
– Displays the current day in a red circle.
Special
Day
Schedules
– Displays the current saved.
Special Day (Enter/Exit Edit Mode)
– Enters / Exits the Special Day Mode. Once in Special Day Mode you
can create, edit and delete Special Days.
Delete
Special
Day
– Deletes the selected Special Day Schedule.
Save
Special
Day
– Saves the selected Special Day Schedule.
4.6.1
Creating a ‘Special Day’ Schedule
1) Press the ‘NORMAL DAY MODE’ button to enable the ‘SPECIAL DAY MODE’.
2) Select a day from the Calendar by left clicking on the day with the mouse. The selected day should appear in a
blue highlighted oval.
1
2
3
4
5
1
2
3
4
5
Figure 4.6
Figure 4.6


