– 60 –
Chapter 5 Basic Operations — KEY
3
Select [In Time]/[Out Time] in the R menu, and set [In Time]/[Out Time] in the encoder menu.
f
Set the transition time. Set the transition time as with background transitions.
4
Select an item in [Type] in the [In/Out Sync] column.
[Separate]
Sets the [In Type] column and the [Out Type] column separately.
[IN=OUT]
The [In Type] column setting becomes the same as the [Out Type] column setting.
r
Transition curve settings
1
Select the <ME1>/<ME2> button
→
[KEY1], [KEY2]
→
[Transition] tab.
2
Select the items in [MIX] and [WIPE] in the [Key Transition Curve] column.
f
The transition curve can be set individually for each of MIX and WIPE according to the selection state of the transition type.
[Linear]
Straight line
[S Soft]
A shallow S curve
[S Mid]
An intermediate S curve
[S Hard]
A deep S curve
Operations on the KEY operation section
r
Operating the <KEY1 TRNS>, <KEY2 TRNS> buttons
Press the <KEY1 TRNS>, <KEY2 TRNS> buttons to execute a transition with the transition type and transition time of respective keys which have been
set on the menu.
The <KEY1 TRNS>, <KEY2 TRNS> buttons flicker during key in, and light when the transition is complete. If the <KEY1 TRNS>, <KEY2 TRNS> buttons
are pressed while key in is complete, transition of the key image (key out) is executed.
The <KEY1 TRNS>, <KEY2 TRNS> buttons light during key out, and go off when the transition is complete. If the <KEY1 TRNS>, <KEY2 TRNS>
buttons are pressed during the transition, the transition direction is reversed.
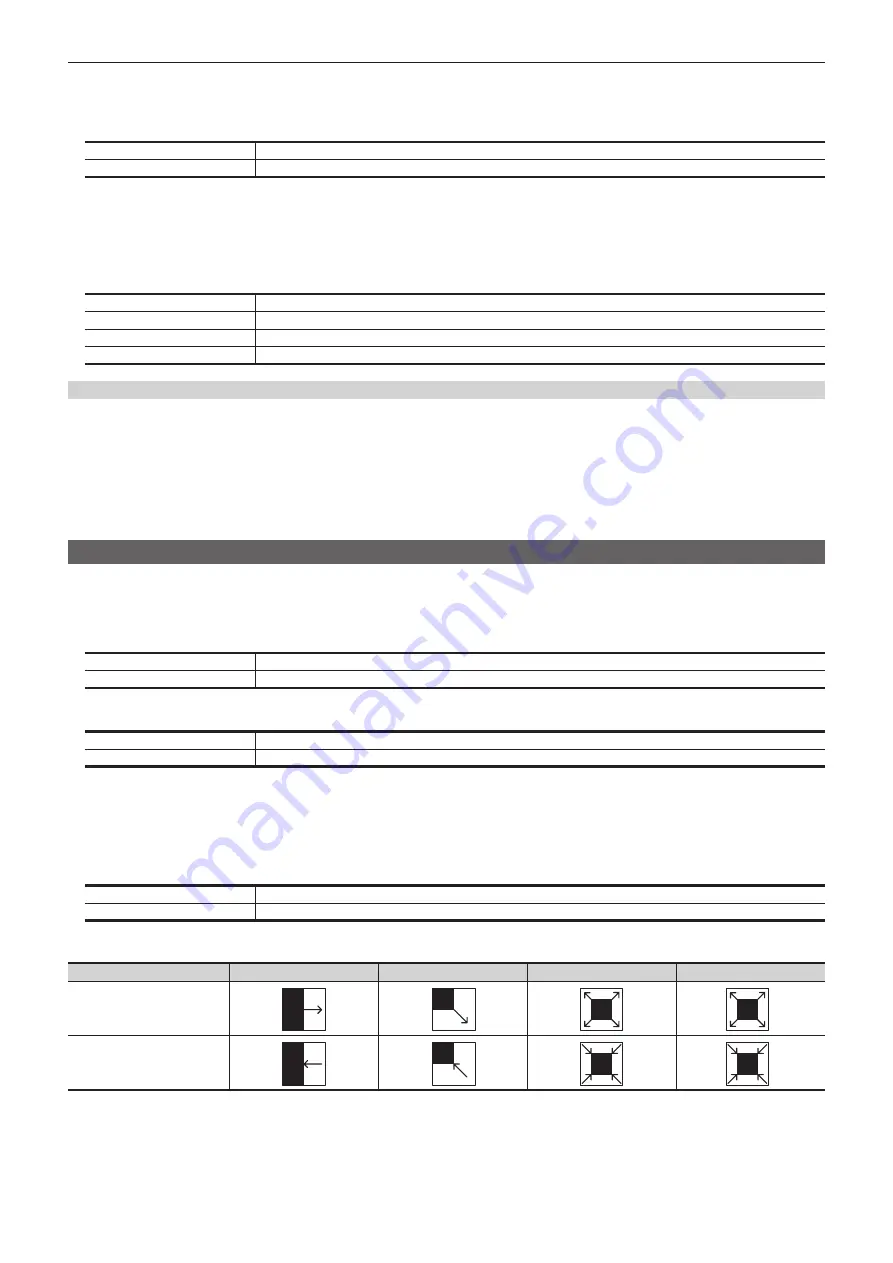
Key wipe transition
Set the pattern and position of key wipe transition on the menu.
1
Select the <ME1>/<ME2> button
→
[KEY1], [KEY2]
→
[Transition] tab.
2
Select an item displayed with a transition pattern icon, then select the wipe pattern.
Upper icon
Select the wipe pattern for key in.
Lower icon
Select the wipe pattern for key out.
3
Select an item in [WIPE] in the [In/Out Sync] column.
[Separate]
Sets the wipe patterns for [In] and [Out] separately.
[IN=OUT]
Matches the wipe pattern of [Out] to the wipe pattern of [In].
4
Select [In Position]/[Out Position] in the R menu, and set [X-Pos] and [Y-Pos] in the encoder menu.
f
Set the start position of the next pattern waveform.
- WIPE: 11, 12, 13, 14, 15
- SQ: 41, 42, 43, 44, 45, 46
5
Select an item in [Position] in the [In/Out Sync] column.
[Separate]
Sets the start position of pattern waveform separately for key in and key out.
[IN=OUT]
Sets the start position of pattern waveform for key out to the start position of pattern waveform for key in.
r
Pattern examples for wipe transition
Pattern example 1
Pattern example 2
Pattern example 3
Pattern example 4
Key in
SQ
SQ
Key out
SQ
SQ
Summary of Contents for AV-HS60C3G
Page 5: ...Please read this chapter and check the accessories before use Chapter 1 Overview ...
Page 11: ...This chapter describes installation and connection Chapter 2 Installation and Connection ...
Page 50: ...This chapter describes menu operations Chapter 5 Basic Operations ...
Page 113: ...This chapter describes the configuration of operations Chapter 7 Configuring Operations ...
Page 122: ...This chapter describes how to operate system menus Chapter 8 System Menu ...
Page 136: ...This chapter describes plug in functions Chapter 9 External Interfaces ...
Page 140: ... 140 Chapter 10 Specifications Dimensions Dimensions of the XPT Unit AV LSX10 Unit mm inch ...
Page 141: ... 141 Chapter 10 Specifications Dimensions Dimensions of the ME Unit AV LSM10 Unit mm inch ...
Page 153: ...This chapter describes the setting menu table and terms Chapter 11 Appendix ...
Page 176: ...Web Site https www panasonic com Panasonic Corporation 2020 ...


