Connections: Using This Unit With a Hard Disk
129
C
onn
ect
ion
s
1
Connect a hard disk.
A hard disk not in TYPE S or FAT format should be
formatted in TYPE S or FAT format.
➝
Refer to “Formatting Hard Disks” (page 128)
2
Insert a P2 card.
3
Press the THUMBNAIL button to open the thumbnail
screen.
4
Press the MENU button.
5
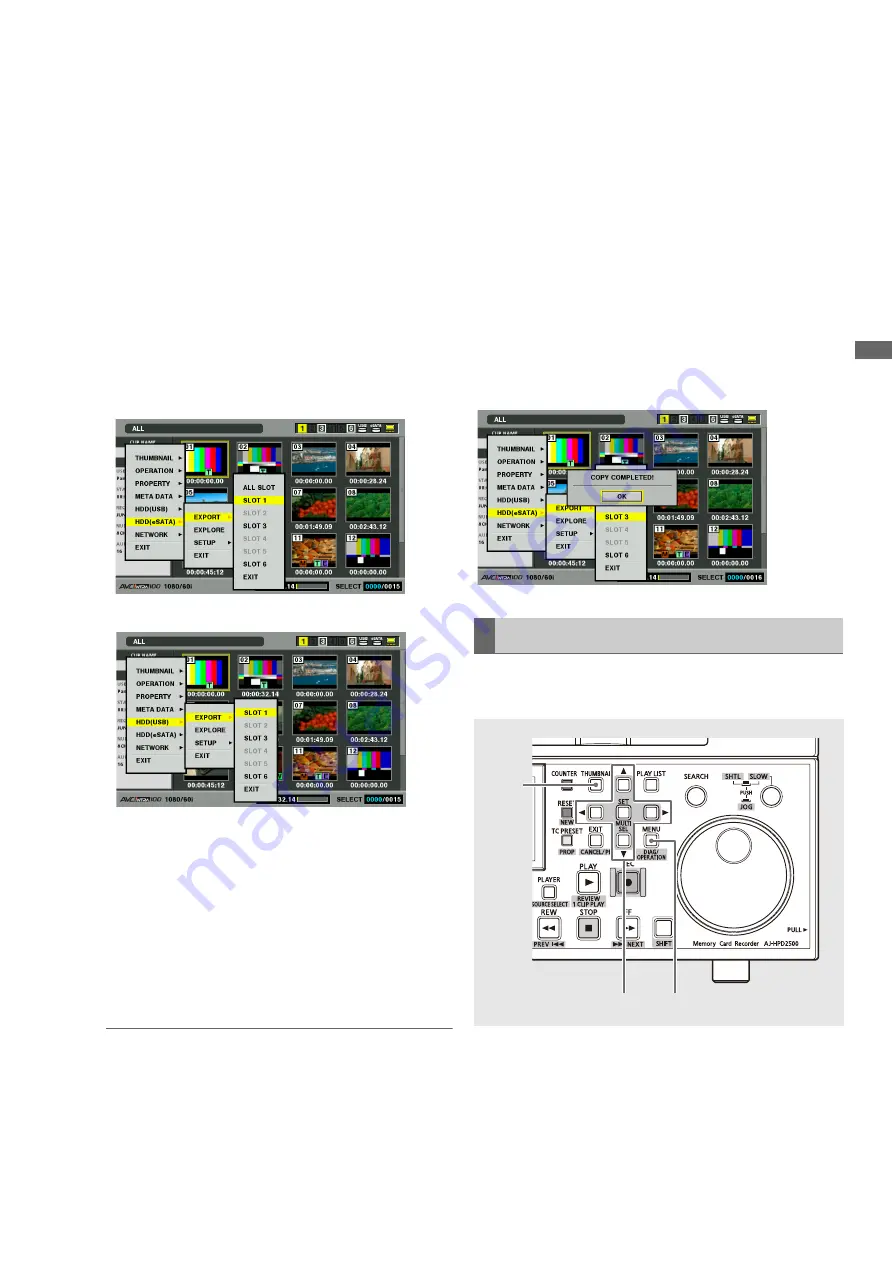
Use the cursor buttons to choose [HDD (USB or
eSATA)] – [EXPORT] and press the SET button.
TYPE S format:
FAT format:
6
Select the number of the source P2 card slot and
press the SET button.
When the hard disk is in the TYPE S format, selecting ALL
SLOT will result in a batch export of all inserted cards.
7
Select [YES] and press the SET button.
The data will now be exported. A progress bar appears
during exporting.
◆
NOTE:
• When the hard disk is in TYPE S format, verifying of the data in
the P2 card and the copied data can be performed
automatically after exporting. In the factory default settings,
verifying is enabled for export. The export operation will end
earlier when verifying is disabled though exported data is not
checked.
To turn off this setting, choose [HDD (USB or eSATA)] - [SETUP]
- [VERIFY] - [OFF].
When the hard disk is in FAT format, verifying is always disabled
regardless of the menu setting.
• To interrupt exporting, press the SET button, select [YES] in the
CANCEL confirmation that appears and press the SET button
again.
• Data copied from a P2 card will not be affected if processing
should be interrupted during verification.
• When a hard disk is connected to a PC and the network
assignment conflicts with drive assignment and a partition
cannot be seen, use our drive mount converter available free of
charge from the URL listed below. This allows you to mount the
specified folder when a hard disk is connected to a Windows
PC.
For English: http://pro-av.panasonic.net/
When the export operation ends, “COPY COMPLETED!”
appears.
Use the following steps to copy selected clips rather than
entire cards to a hard disk.
1
Connect a hard disk.
2
Press the THUMBNAIL button to open the thumbnail
screen, select the clip to copy using the cursor
buttons, and press the SET button to confirm.
You can also select multiple clips.
Copying Clips to a Hard Disk
2,4,5,6
2
3


