3. USING THE DIGIBASE-E
25
Click to highlight the digiBASE-E. If you will be using the new network’s DHCP server to
assign an IP address, simply mark the DHCP checkbox, click on Save, and close the device
controller program window.
If manually setting the IP address, leave the DHCP box unmarked, enter an IP address
compatible with the new network, Save, and close the device controller program window.
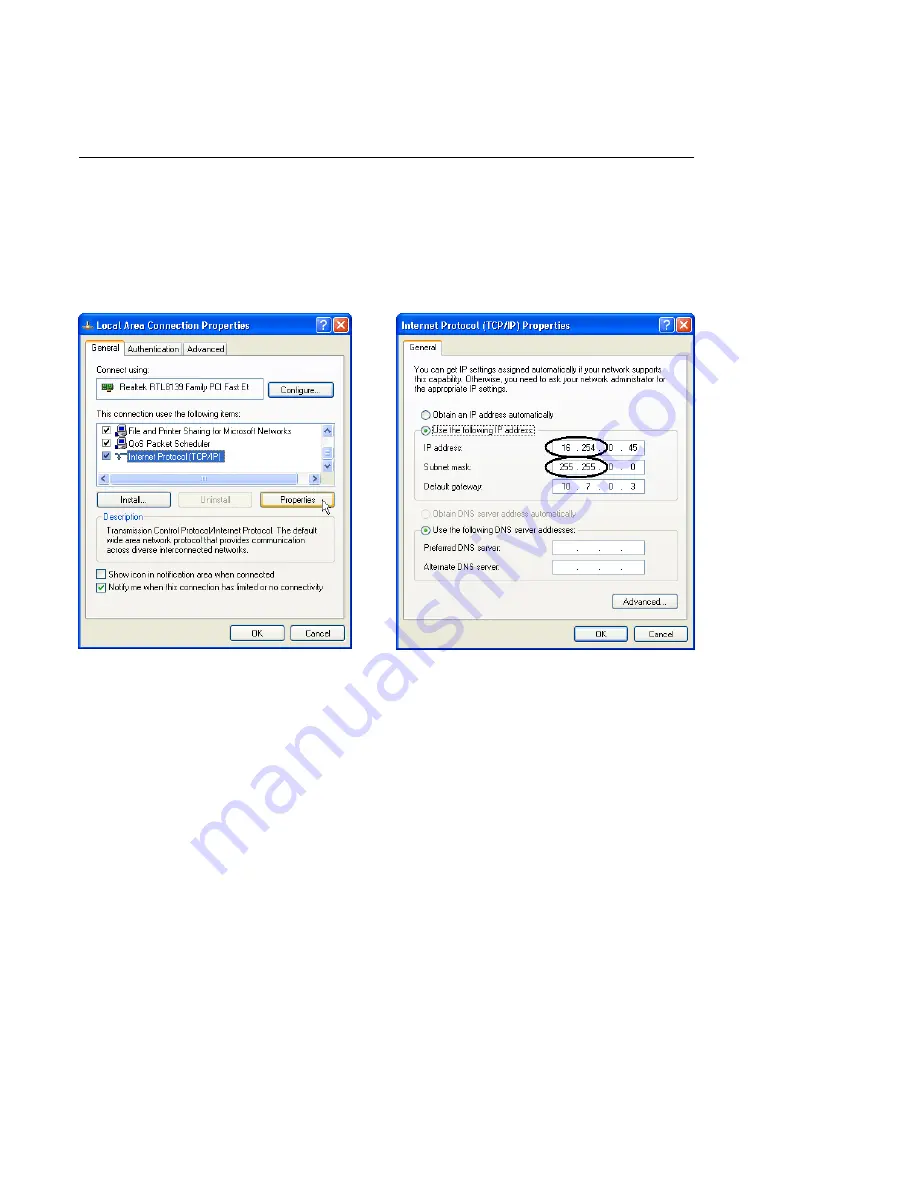
Return to your PC’s TCP/IP properties dialog (Fig. 18) and either re-select the Obtain an IP
address automatically setting or return the manual entry to its original IP address. Click on
OK, then back out of the LAN properties dialogs.
Run MCB Configuration per normal (Section 2.3.5).
If you still cannot communicate with the digiBASE-E, contact your ORTEC representative or
our Global Service Center.
Figure 17. Select the TCP/IP Protocol.
Figure 18. Manually Enter Subnet Settings
Matching the digiBASE-E Settings.
Summary of Contents for digiBASE-E
Page 6: ...vi...


