124
Configuring the Master
Section 6-4
CX-Server
Up on pressing the Configure button, CX-Server is launched and displays the
CX-Server User Interface as shown below.
Configuring CX-Server
In order to configure CX-Server for communication with the Unit, perform the
following procedure.
1,2,3...
1.
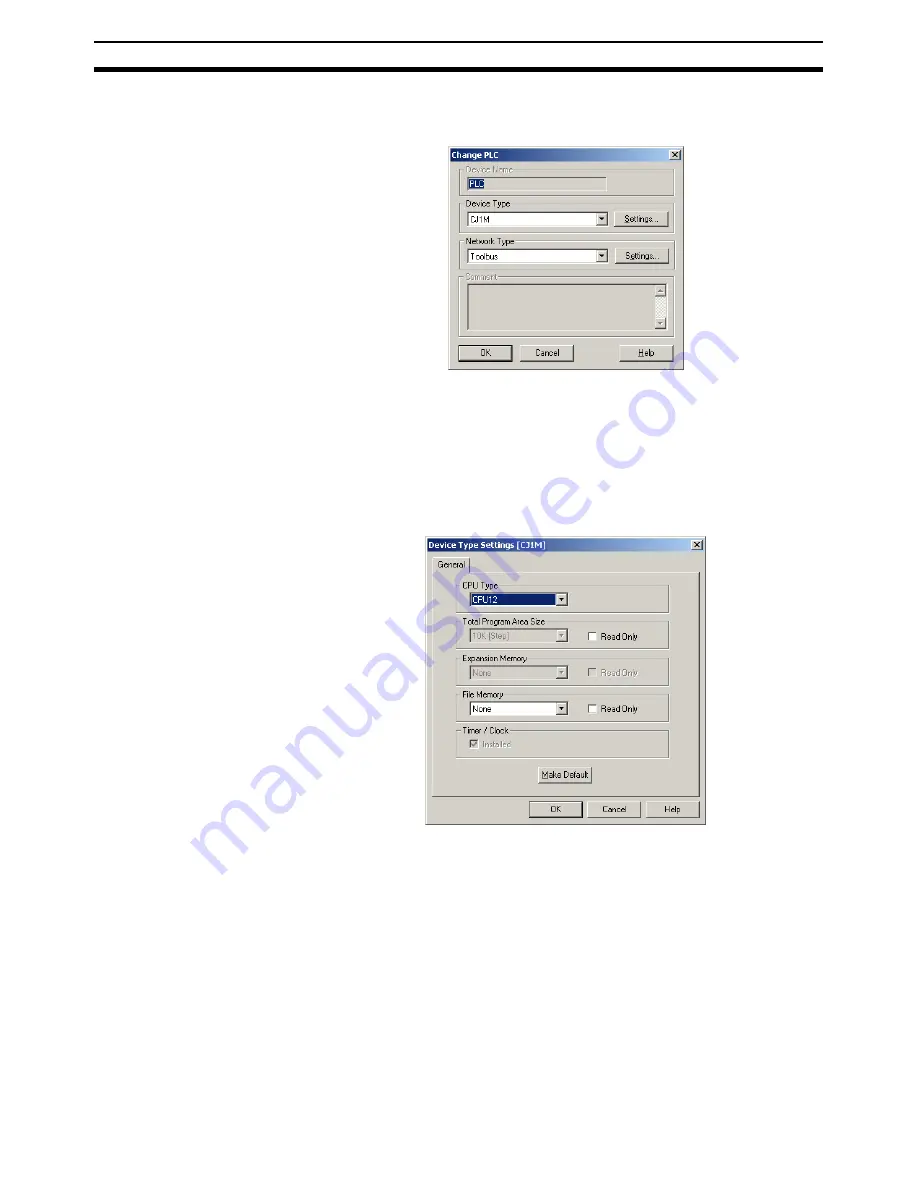
Select the type of PLC to which the Unit is attached, from the Device Type
drop down selection box.
2.
Press the Settings button next to the PLC type selected. The PLC settings
window (see figure below) is displayed.
3.
In this window make the proper adjustments if necessary. The selections
made, must match the physical configuration of the PLC system. When
done, press the OK button.
4.
Select the Network Type to be used as connection between the PC and
the Unit. The available options may include other PLC systems or Commu-
nication Units, which are setup to act as a gateway. Refer to
CX-Server
Runtime User Manual (W391)
for details on configuring CX-Server.
Note 1) For further explanation, only the direct connections between the
PC and the PLC on which the Unit is attached are considered.
These include ToolBus and SYSMAC WAY.
Summary of Contents for SYSMAC CJ1W-PRM21
Page 2: ...iv...
Page 36: ...22 Basic Operating Procedure Section 1 5...
Page 52: ...38 Defining PROFIBUS DP in the Software Section 2 5...
Page 112: ...98 Allocated CIO Area Words Section 4 2...
Page 122: ...108 Command Response Reference Section 5 2...
Page 160: ...146 Replacing the Unit Section 7 8...
Page 174: ...160 Appendix...
Page 180: ...166 I O Data Conversions Appendix D...
Page 186: ...172 Configurator Error and Warning Messages Appendix E...
Page 187: ...173 Index...
Page 188: ...174 Index...
Page 190: ...176 Revision History...


