100
LD Platform Peripherals Guide
13732-000 Rev J
6.4 Setup
NOTE:
Light Localization and Laser Localization are designed to be used at the
same time. In cases where laser readings are unreliable, Laser Localization can
be disabled to ensure that only Light Localization is being used. Optional instruc-
tions for disabling Laser Localization will also be included in this section.
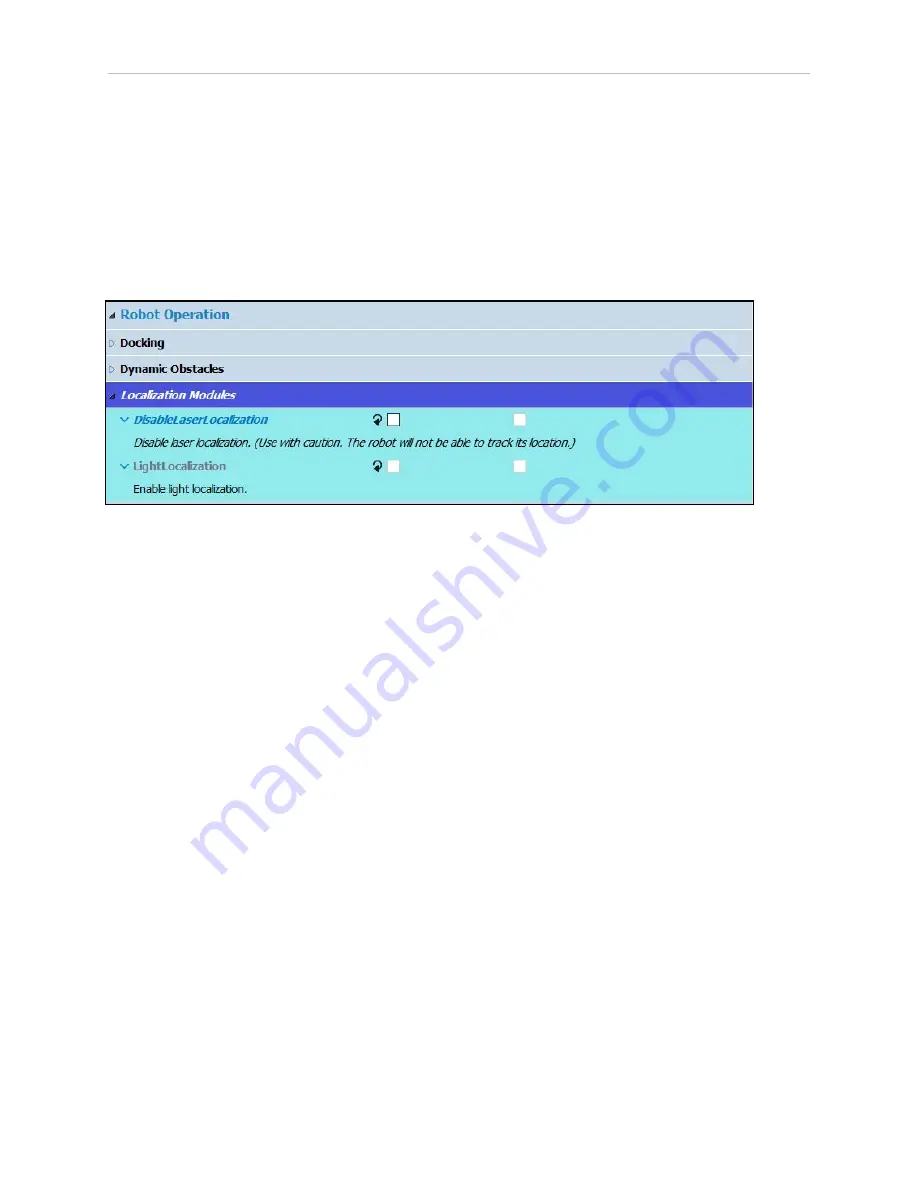
In order to enable Acuity, you need to check the LightLocalization parameter box in
MobilePlanner > Config. In this configuration section DisableLaserLocalization can also be
checked in the case that only using Light Localization is preferred.
Robot Operation > Localization Modules
Figure 6-11
Enabling Acuity in the MobilePlanner Software
These will only be visible if the Show Parameters box is checked. To make a change,
you will need to click and drag the desired parameter from the expert Parameters tab into the
Configuration tab.
For instances where only Acuity operation is desired both boxes should be checked. This will
cause the AMR to use only the Acuity camera for localization.
After enabling Acuity, save the changes to the configuration. The AMR’s software will reboot.
NOTE:
After making and saving Acuity changes within MobilePlanner, the
robot has to be power-cycled for those changes to take effect.
In SetNetGo
Select MobilePlanner > SetNetGo
Network > User LAN Ethernet
Make sure the radio button for Interface mode: is set for Accessory, and that DHCP Server for
Accessories is set to Enable. See the following figure.


