Copying Functions
1-23
4
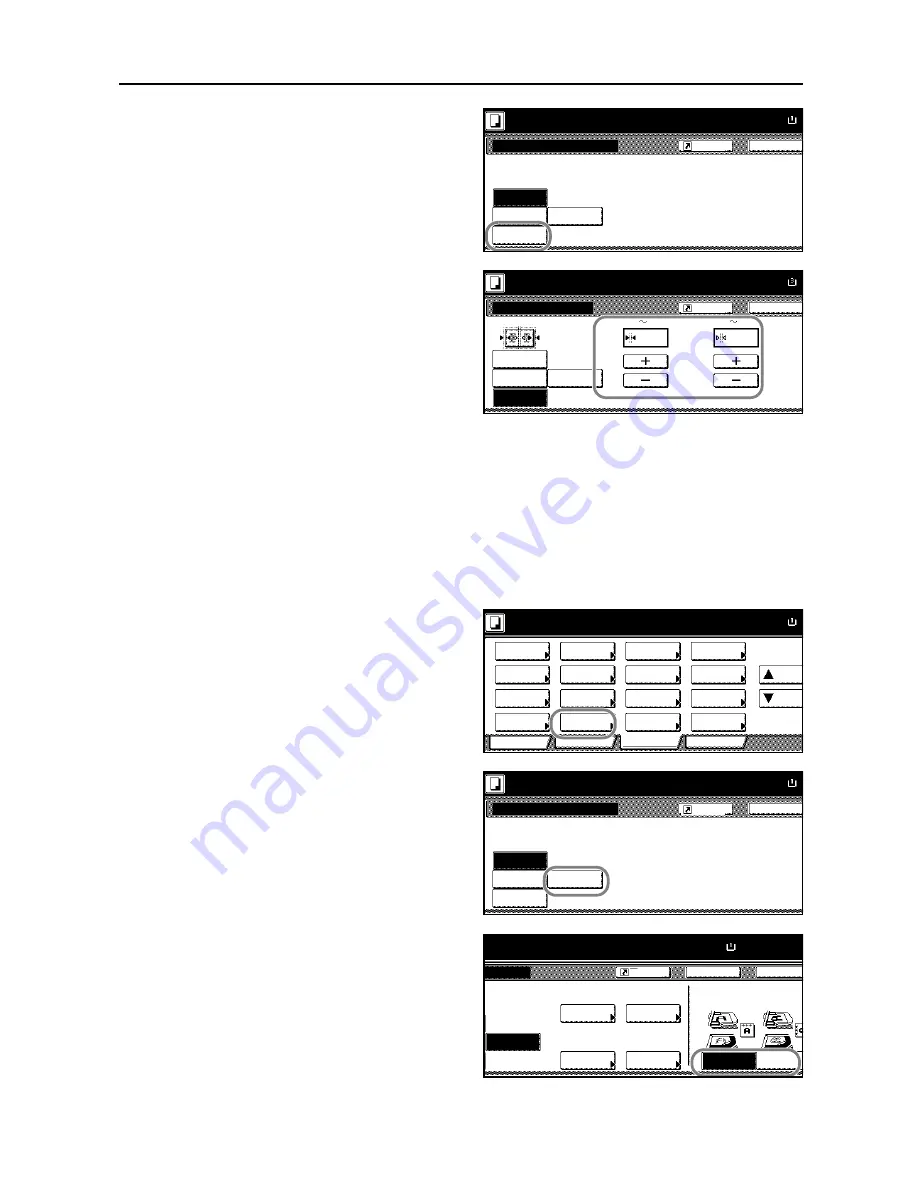
Press [Book Erase].
5
Press [+] and [-] to specify the border
width to erase.
With metric models, you can enter the
border width directly using the numeric
keys after pressing [#-Keys].
6
Press the
Start
key to start copying.
Separate Border Erase
Follow the steps as below to erase the black borders specifying the width of the borders individually.
1
Place the originals in the document processor or on the platen with the top edge facing either the
rear or the left side of the copier.
2
Press [Function].
3
Press [Border Erase] ([Erase Mode]).
4
Press [Individual BordrErase]
([Individual Erase Mode]).
5
Specify the orientation of original.
Back
Border Erase
Ready to copy.
Off
Paper Size
A
Erase edge of original or center
and copy.
Book
Erase
Bord Erase
Sheet
Individual
BordrErase
100%
Register
Border Erase
Off
Back
Paper Size
A
Ready to copy.
Individual
BordrErase
Border
Bord Erase
Sheet
Book
Erase
Gutter
(0
50)
(0
50)
mm
mm
100%
Register
6
6
Ready to copy.
A
Paper Size
Program
Function
User choice
Basic
Density
Zoom
Cover
Booklet
Up
Continuous
Scan
Mixed Size
Originals
Border
Paper
Original
Duplex
Margin/
Centering
Collate/
Offset
Original
Size
Page
Combine
Form
Overlay
Down
100%
Selection
Erase
numbering
Image
Back
Border Erase
Ready to copy.
Off
Paper Size
A
Erase edge of original or center
and copy.
Book
Erase
Bord Erase
Sheet
Individual
BordrErase
100%
Register
to copy.
A4
Paper Size
Set
Back
Top Edge
Select Original
Orientation.
Top Edge
Bottom
Close
Left
Top
Right
Individual
BordrErase
6 mm
6 mm
6 mm
6 mm
100%
Register
Left
Top
Summary of Contents for D-COPIA 6200
Page 1: ...ADVANCED OPERATION GUIDE d Copia 6200 d Copia 8200 548504en GB...
Page 83: ...Copying Functions 1 76...
Page 161: ...System Settings 3 60...
Page 211: ......


