d-Color MF350/250/201Plus
3-61
Copy Operations
3
3
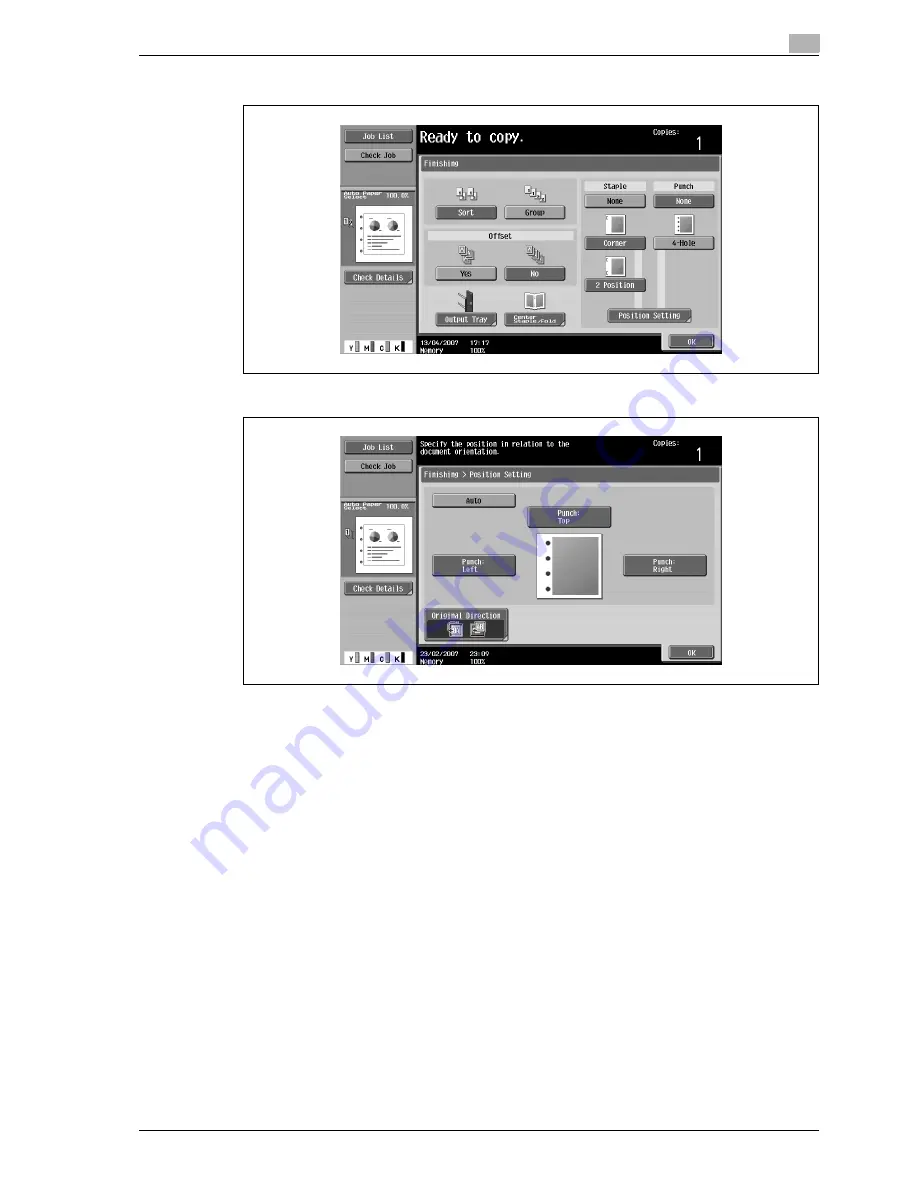
Touch [Position Setting].
–
Select the punched hole position, and then touch [OK].
–
Touch [Auto] to automatically determine the position of the punched holes according to the
orientation of the loaded original. If the original length is 297 mm or less, the holes are punched
along the long side of the paper. If the original length is more than 297 mm, the holes are punched
along the short side of the paper.
–
If "Auto" is selected for the stapling position, load the original with the top toward the back of the
machine. If the original is loaded in any other orientation, the stapling will not be correctly
positioned.
–
If "Auto" is selected, the punched hole position is set at the top or at the left.
–
To cancel the setting and select the default, press the [Reset] key.
4
If desired, touch [Original Direction], and then select the setting appropriate for the original.
5
Touch [OK].
The Basic screen appears again.
Summary of Contents for d-Color MF350
Page 15: ...1 Introduction...
Page 16: ......
Page 21: ...2 Installation and operation precautions...
Page 22: ......
Page 39: ...3 Copy Operations...
Page 40: ......
Page 187: ...4 Print Operations...
Page 188: ......
Page 243: ...5 Box Operations...
Page 244: ......
Page 287: ...6 Network Scan Fax Network Fax Operations...
Page 288: ......
Page 418: ...6 Network Scan Fax Network Fax Operations 6 132 d Color MF350 250 201Plus...
Page 419: ...7 Web Connection Operation...
Page 420: ......
Page 426: ...7 Web Connection Operation 7 8 d Color MF350 250 201Plus...
Page 427: ...8 Appendix...
Page 428: ......
Page 446: ...8 Appendix 8 20 d Color MF350 250 201Plus...
Page 447: ...9 Index...
Page 448: ......


