- 93 -
• Handling the last sheet of continuous paper
When using continuous paper such as roll paper or fanfold paper, follow the procedure
below if the remaining paper length of the continuous paper does not match the length of
paper to be printed.
•
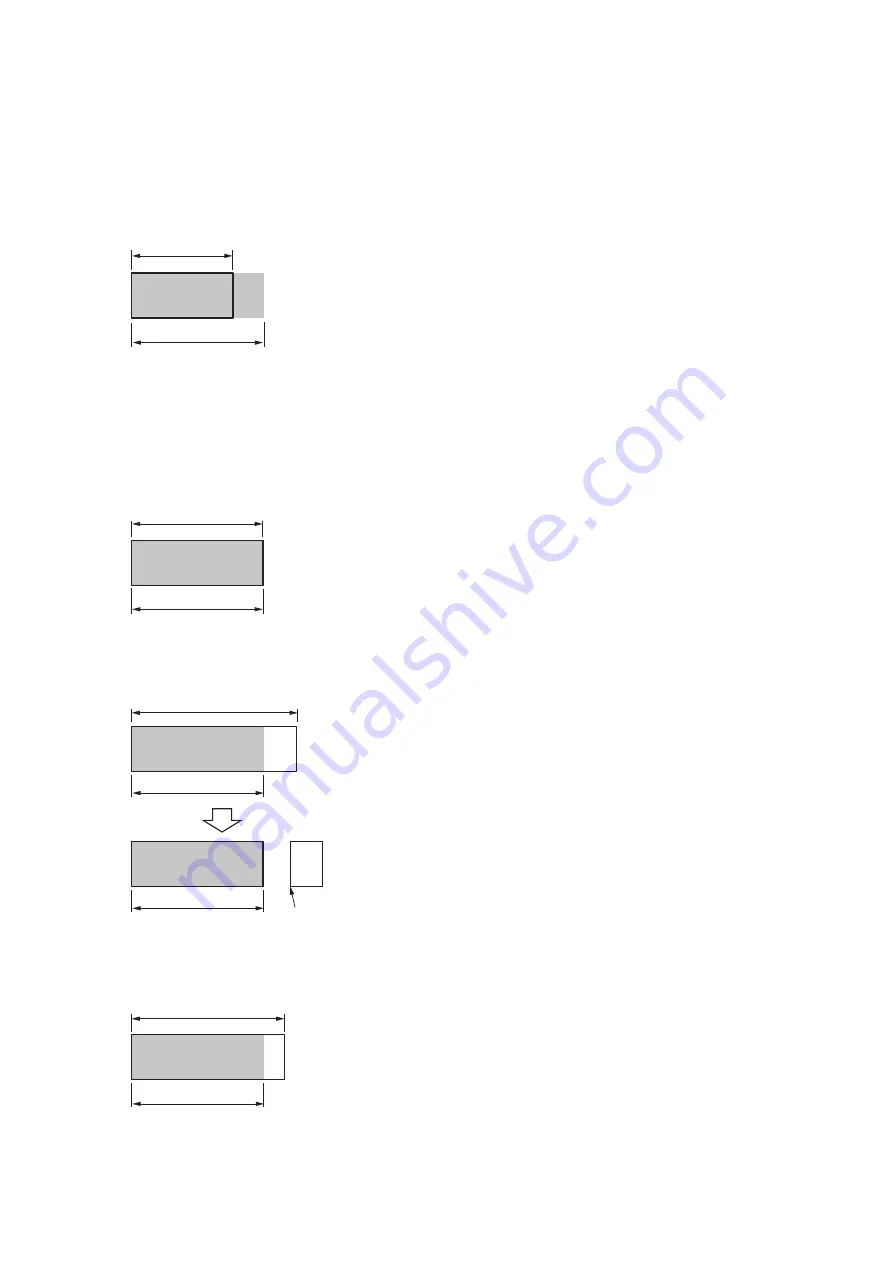
When the remaining paper is not long enough to print the data
Remaining paper length
Printed paper length
The print data cannot be printed.
A "PAPER SIZE ERROR" may occur after printing is completed.
If an error occurs, open and close the top cover to clear the
error. "RESTART PRINT?/OK OR FEED/CUT" will appear on the
display. Load new paper, and press «OK» to resume printing
from the page where the error occurred.
However, if [MENUS] - [JAM RECOVERY] is set to [OFF], the
RESTART PRINT message will not appear and the page where
the error occurred cannot be printed again.
•
When the remaining paper is long enough to print the data
Remaining paper length
Printed paper length
The print data will be printed normally, and the process will
exit.
•
When the remaining paper is longer than the print data (When the rear edge of the paper
exceeds the paper detection sensor in the paper insertion slot during operation)
Cut position
Remaining paper length
Printed paper length
Printed paper length
The print data will be printed normally, and the process will
exit.
Cut the remaining paper and eject it to the rear. When
the next print data is received in that state, "490:FEEDER
EMPTY" appears on the display. Remove the last paper that
was ejected and load new paper.
•
Exception (when approx. 82 mm or less of paper is left after printing)
Remaining paper length
Printed paper length
If the remaining cut paper is approximately 82 mm or less,
eject the printed paper together with the paper that is not
cut so that no paper is left in the machine. In this case, the
paper to be ejected will be "Length of the printed page +
Remaining paper (approx. 82 mm at maximum)".
Summary of Contents for PRO330S
Page 1: ...User s Manual...
Page 14: ...Unpacking 2 Unpacking 15 Checking the accessories 16 Installing consumables 18...
Page 102: ...102 8 Close the feeder cover...
Page 151: ...151 8 Remove the toner cover 9 Close the top cover 10 Open the toner cartridge cover...
Page 162: ...162 8 Close the top cover...
Page 172: ...172 15 Close the top cover...
Page 178: ...178 7 Install the image drum back to the machine 8 Close the top cover...
Page 182: ...182 11 Close the top cover...
Page 263: ...263 10 Input the admin password and click OK 11 Con rm the setting result and click Back...
Page 266: ...266 11 Con rm the setting result and click Back...
Page 280: ...EE8001 2750Z002 Rev1...


