5.
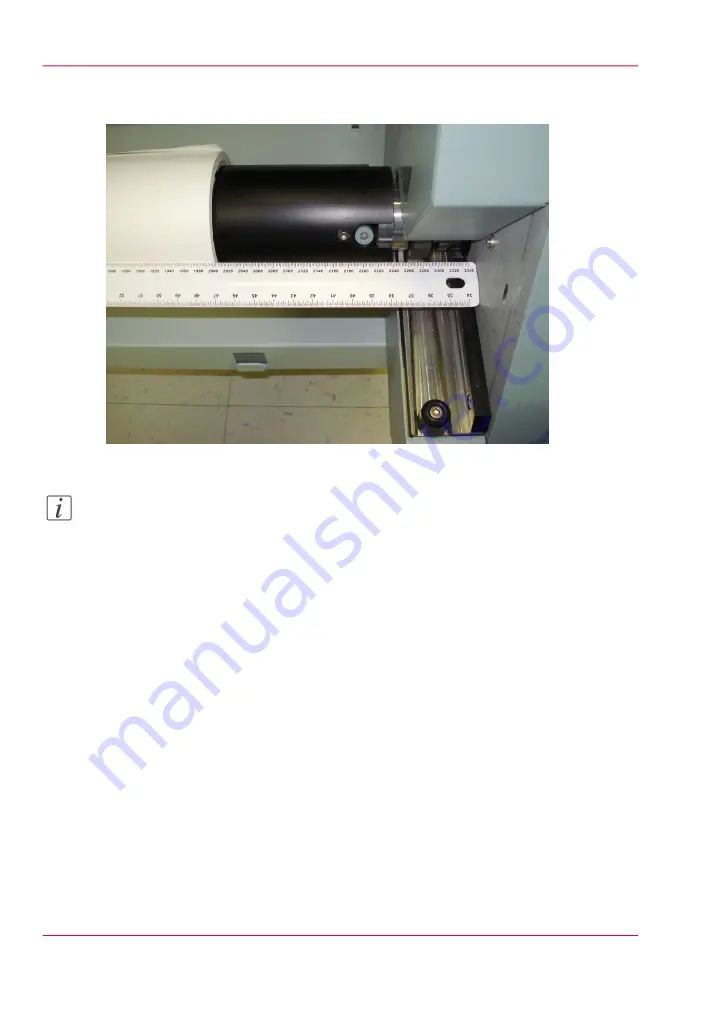
Accurately center the media using the supplied ruler. Media should be centered within
1mm on the ruler.
[77] Ruler to Center Media
Note:
The supplied ruler has both metric (millimeters) and imperial (inches) scales. When a
media roll is centered on the shaft, and the ruler is placed as shown in the photo, the
value on the ruler scale will match the width of the roll. For example, in the photo a 2
meter (or 2000mm) roll is centered on the media shaft.
6.
Lock the supply media shaft core locks by turning the 5mm hex key clock-wise.
7.
Re-check that the media is still centered as locking the core may cause the roll to shift
(usually the shift is from 1 to 2 milimeters to the right).
B: Load an Empty Core and Install in the Take-up Position
1.
Place the empty take-up media shaft on a suitable work surface and unlock the media
shaft locks with the 5mm hex key.
2.
Slide an empty media core that is at least as long as the supply media width onto the take-
up shaft.
3.
Roughly center the core and then insert the shaft into the Take-up (top) position on the
RMO unit.
Chapter 7 - How to Operate the Roll Media Option
116
How to Load Media
Summary of Contents for Arizona 400 Series GT
Page 1: ...Oc Arizona 400 Series GT Oc Arizona 440 460 480 GT XT Revision A Oc User Manual...
Page 6: ...6 Contents...
Page 7: ...Chapter 1 Introduction...
Page 14: ...Chapter 1 Introduction 14 Product Compliance...
Page 15: ...Chapter 2 Product Overview...
Page 18: ...Chapter 2 Product Overview 18 Printer Specifications...
Page 19: ...Chapter 3 Safety Information...
Page 41: ...Chapter 4 How to Navigate the User Interface...
Page 71: ...Chapter 5 How to Operate Your Oc Arizona Printer...
Page 97: ...Chapter 6 How to Operate the Oc Arizona 400 Series XT...
Page 104: ...Chapter 6 How to Operate the Oc Arizona 400 Series XT 104 How to Print With Dual Origins...
Page 105: ...Chapter 7 How to Operate the Roll Media Option...
Page 136: ...Chapter 7 How to Operate the Roll Media Option 136 How to Use Media Edge Protectors...
Page 137: ...Chapter 8 How to Use the Static Suppression Upgrade Kit...
Page 141: ...Chapter 9 How to Work With White Ink and Varnish...
Page 198: ...Chapter 9 How to Work With White Ink and Varnish 198 How to Create and Use Quick Sets...
Page 199: ...Chapter 10 Ink System Management...
Page 206: ...Chapter 10 Ink System Management 206 How to Change Ink Bags...
Page 207: ...Chapter 11 Error Handling and Trou bleshooting...
Page 211: ...Chapter 12 Printer Maintenance...
Page 265: ...Appendix A Application Information...


