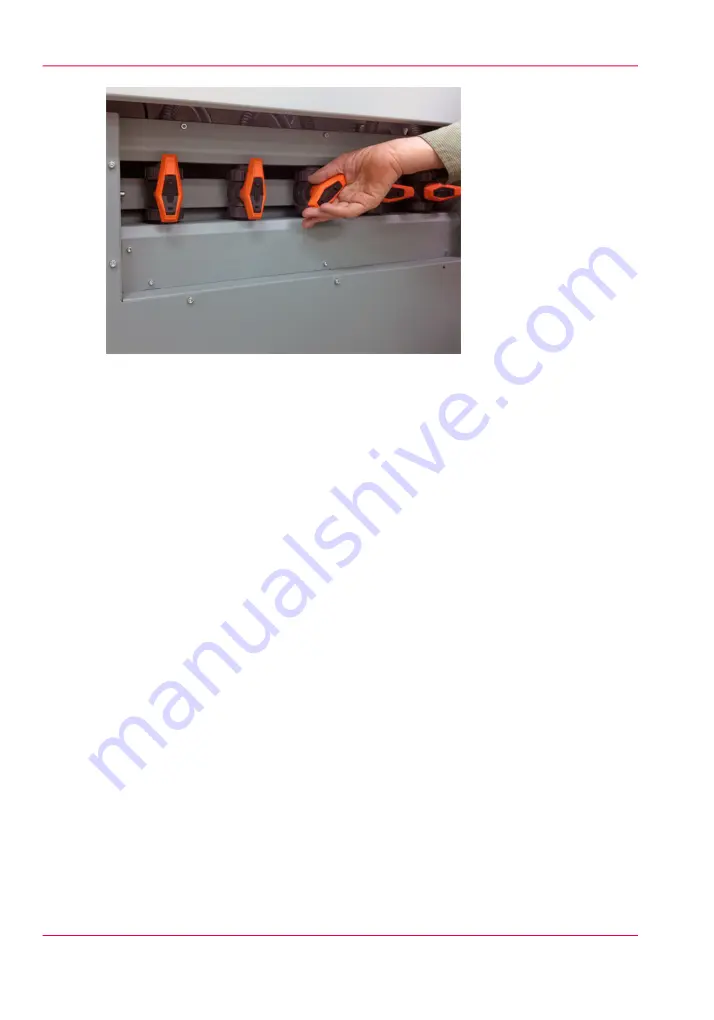
[64] Closing vacuum zone 4
Vacuum Zone Control Handles
The control handles determine the state of the vacuum zones. When the handle is vertical,
the zone is open and creates a vacuum in the related area. To close a zone, turn the control
handle a quarter turn clockwise to the horizontal position.
Masking the Vacuum Table
If your media does not cover all of a vacuum zone you must mask the area around the
media to create a closed vacuum system. Use scrap media or material that is equal to or
less than the thickness of the media to mask the table. You can tell when the vacuum is
sealed by the sound it makes and also by the vacuum gauge, which must read at least 20
"Hg.
Vacuum Table Foot Pedal
The vacuum foot pedal toggles the table vacuum on or off. It helps the operator to secure
the media on the vacuum table since it allows hands-free operation. The vacuum must
be turned on prior to starting a print, and the vacuum cannot be turned off until a print
is completed.
Vacuum Gauge
The vacuum gauge is located on the table. It provides a visual representation of the actual
pressure in the vacuum table system.
Chapter 5 - How to Operate Your Océ Arizona Printer
86
The Table Vacuum System
Summary of Contents for Arizona 400 Series GT
Page 1: ...Oc Arizona 400 Series GT Oc Arizona 440 460 480 GT XT Revision A Oc User Manual...
Page 6: ...6 Contents...
Page 7: ...Chapter 1 Introduction...
Page 14: ...Chapter 1 Introduction 14 Product Compliance...
Page 15: ...Chapter 2 Product Overview...
Page 18: ...Chapter 2 Product Overview 18 Printer Specifications...
Page 19: ...Chapter 3 Safety Information...
Page 41: ...Chapter 4 How to Navigate the User Interface...
Page 71: ...Chapter 5 How to Operate Your Oc Arizona Printer...
Page 97: ...Chapter 6 How to Operate the Oc Arizona 400 Series XT...
Page 104: ...Chapter 6 How to Operate the Oc Arizona 400 Series XT 104 How to Print With Dual Origins...
Page 105: ...Chapter 7 How to Operate the Roll Media Option...
Page 136: ...Chapter 7 How to Operate the Roll Media Option 136 How to Use Media Edge Protectors...
Page 137: ...Chapter 8 How to Use the Static Suppression Upgrade Kit...
Page 141: ...Chapter 9 How to Work With White Ink and Varnish...
Page 198: ...Chapter 9 How to Work With White Ink and Varnish 198 How to Create and Use Quick Sets...
Page 199: ...Chapter 10 Ink System Management...
Page 206: ...Chapter 10 Ink System Management 206 How to Change Ink Bags...
Page 207: ...Chapter 11 Error Handling and Trou bleshooting...
Page 211: ...Chapter 12 Printer Maintenance...
Page 265: ...Appendix A Application Information...


