Chapter
2
Microscopy
2.4 Photomicroscopy
32
2.4
Photomicroscopy
For detailed discussions of the camera, photomicroscopic software, and PC, refer to the
operating manuals provided with the respective products. The following instructions assume a
DS camera head DS-5M and DS-L1 camera control unit.
1
Adjust the microscope for proper image observation.
See the directions given in sections from “2.1 Bright-Field Microscopy” to “2.3 Epi-fluorescence
Microscopy.”
2
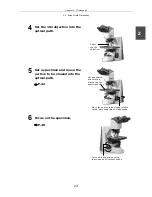
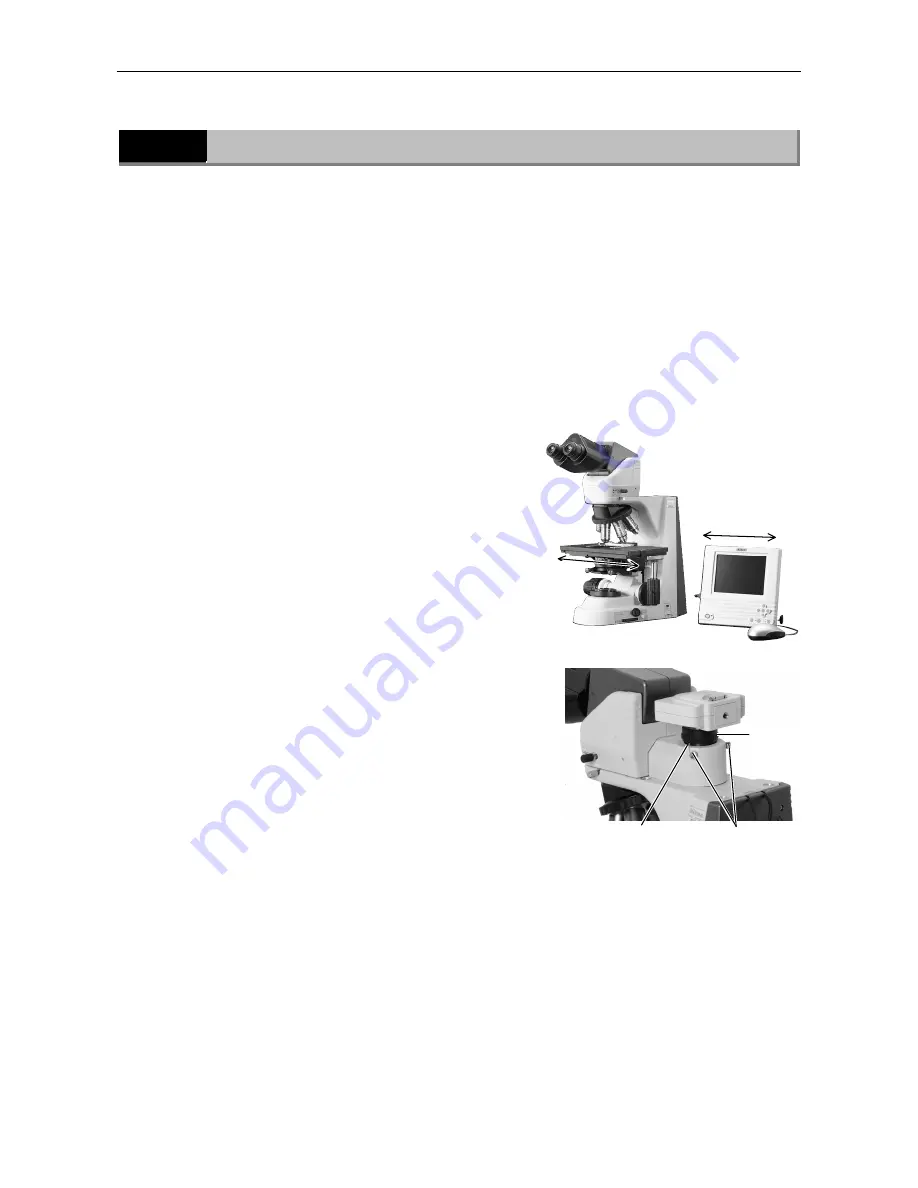
Adjust the camera head attaching position until the image is
displayed properly.
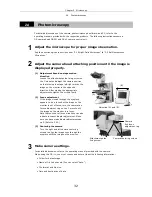
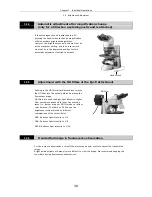
(1)
Adjustment based on stage motion
direction
Loosen the attachment guide fixing screw on
the C mount and adjust the camera position
so that moving the stage left-right moves the
image on the monitor in the opposite
direction. After making the appropriate
adjustments, tighten the screws firmly.
(2)
Focus adjustment
If the image viewed through the eyepiece
appears to be in focus but the image on the
monitor is out of focus, turn the camera fine
focus adjustment ring on the C mount until
the image on the monitor is in focus.
Note that such out of focus situations can also
indicate incorrect diopter adjustment. Make
sure you have made diopter adjustments as
well. (Refer to P.43.)
(3) Centering the camera
Turn the right and left camera centering
screws to align the image seen through the
eyepiece with the image on the monitor.
3
Make camera settings.
For detailed discussion, refer to the operating manual provided with the camera.
When using the DS-L1, you must choose and enter at least the following information:
•
Folder for data storage.
•
Name of file to be saved. (You can select “Auto.”)
•
File format and file size.
•
Date and destination of data
Attachment guide
fixing screw
Camera
fine focus
adjustment ring
(A)
(B)
Adjusting (A) and (B)
Camera centering screws

