Configure Switching
180
Insight Managed 28-Port Gigabit Ethernet Smart Cloud Switch with 2 SFP 1G & 2 SFP+ 10G Fiber Ports
6.
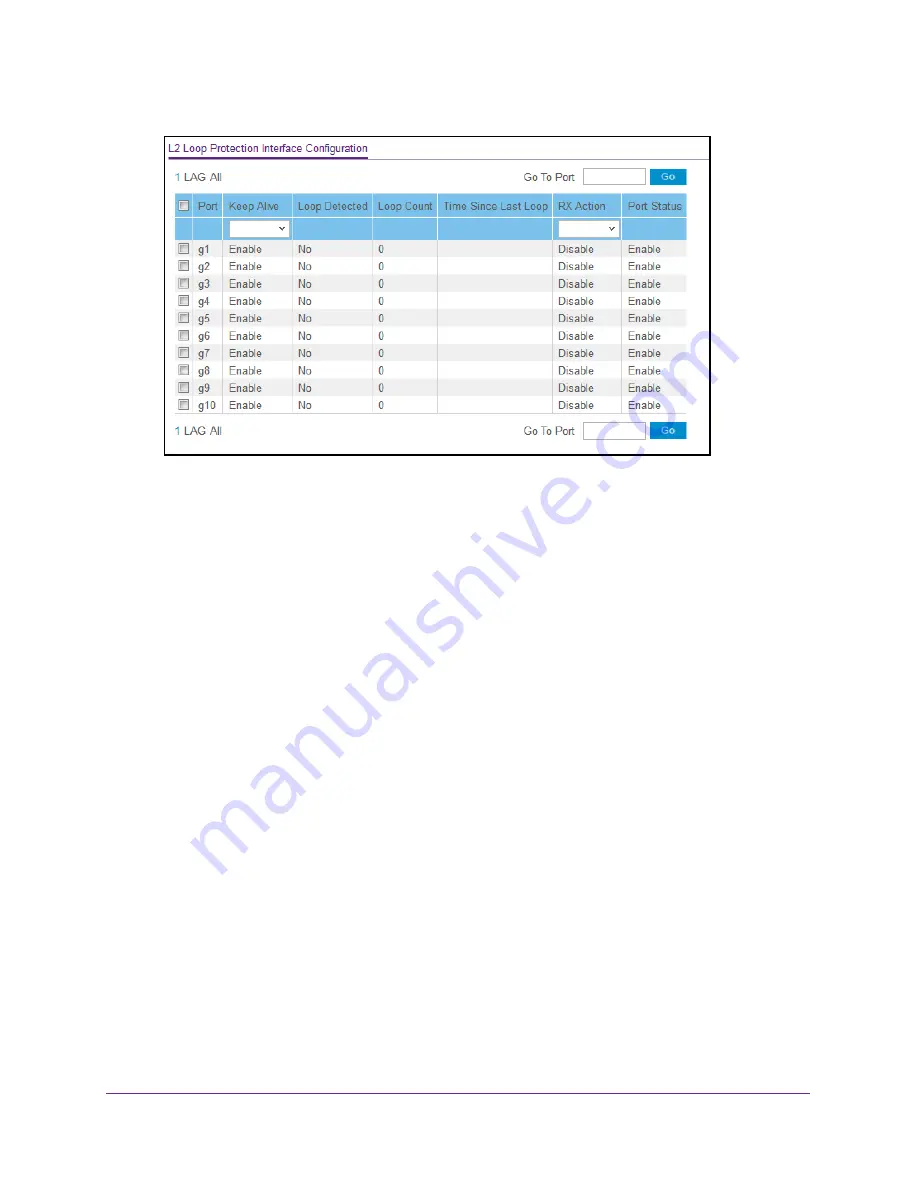
Use one of the following methods to narrow down the ports that are displayed:
•
To display all the physical ports, click the
1
link.
•
To display all LAGs only, click the
LAG
link.
•
To display all ports and LAGs, click the
All
link.
•
In the
Go To Port
field, type the port number, for example g18, and click the
Go
button.
7.
In the
Port
field, select the port for which data is to be displayed or configured.
8.
From the
Keep Alive
menu, select
Enable
or
Disable
to specify whether keep-alives are
enabled on an interface.
The default is Disable.
9.
From the
RX Action
menu, select the action that occurs when the switch detects a loop on
an interface:
•
Log
. The switch logs a message.
•
Disable
. The switch disables the interface. This is the default action.
•
Both
. The switch both logs a message and disables the interface.
10.
Click the
Apply
button.
Your settings are saved.
11.
To show the latest information on the page, click the
Refresh
button.
12.
To clear all the statistics in the table, click the
Clear
button.


