


4-44 Upgrading Your System
Note:
Observe static precautions. Use an antistatic
wrist strap.
4.
The drive carrier is shipped with the add-on drive. Remove the new drive
from its protective wrapper and place it on an antistatic surface. Record the
drive model and serial numbers in the equipment log.
5.
Position the drive so its SCA connector is near the top surface of the drive.
Place the drive on the antistatic surface again. Slide the drive into the carrier
with its SCA connector facing toward the front of the carrier (open end).
6.
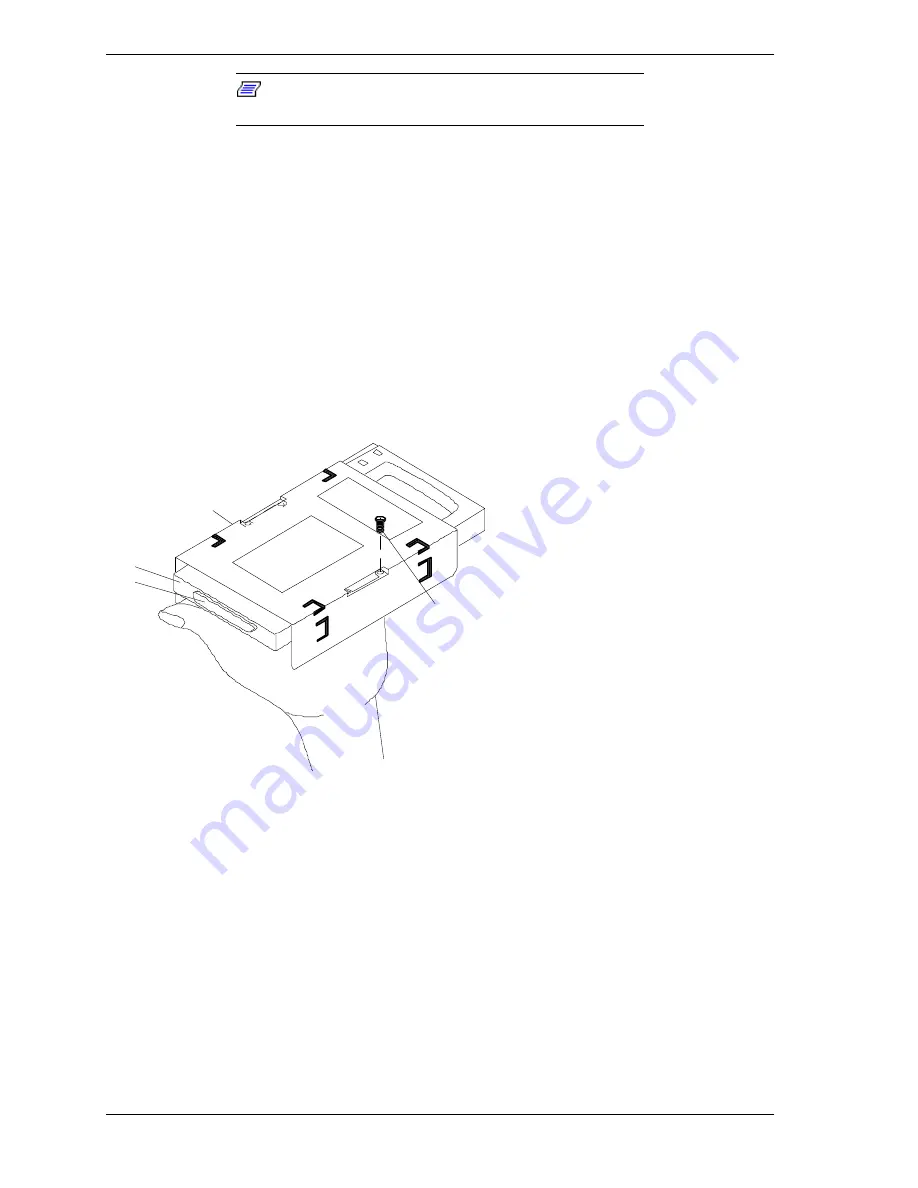
While holding the drive in the carrier with your left hand, align the drive’s
screw holes with the carrier’s screw holes and insert the four screws of
appropriate size and length (see Figure 4-36).
7.
While pressing the lock button on the carrier handle, open the handle. Align
the drive/carrier assembly so it engages the guide rails in the hard drive cage
(see Figure 4-37).
B
A
D
C
Installing 3 1/2inch hard disk drive
in carrier for hot-swap bays
A Carrier
B Four screws
C Hard disk drive
D SCA connector
Figure 4-36. Installing Hard Disk in Carrier
Summary of Contents for HV8600
Page 1: ... U s e r s G u i d e Server HV8600 ...
Page 2: ...xxx ...
Page 3: ... U s e r s G u i d e Server HV8600 ...
Page 49: ...Setting Up Your System 2 7 Figure 2 2 Connecting the AC Power Cord ...
Page 146: ...5 26 Problem Solving 1041 1040 1042 1043 Power Units ...
Page 152: ...5 32 Problem Solving ...
Page 153: ...A System Cabling Before You Begin Static Precautions RAID and SCSI Bus Configuration ...
Page 158: ...A 6 System Cabling ...
Page 159: ...B Memory Configurations Memory DIMM Configurations ...
Page 162: ...B 4 Memory Configurations ...
Page 184: ...C 22 Management Application Workstation ...
Page 194: ...10 Glossary ...
Page 198: ...4 Equipment Log ...
Page 202: ...Index 4 ...
Page 203: ...xx ...
Page 204: ... 456 01505 000 ...


