26
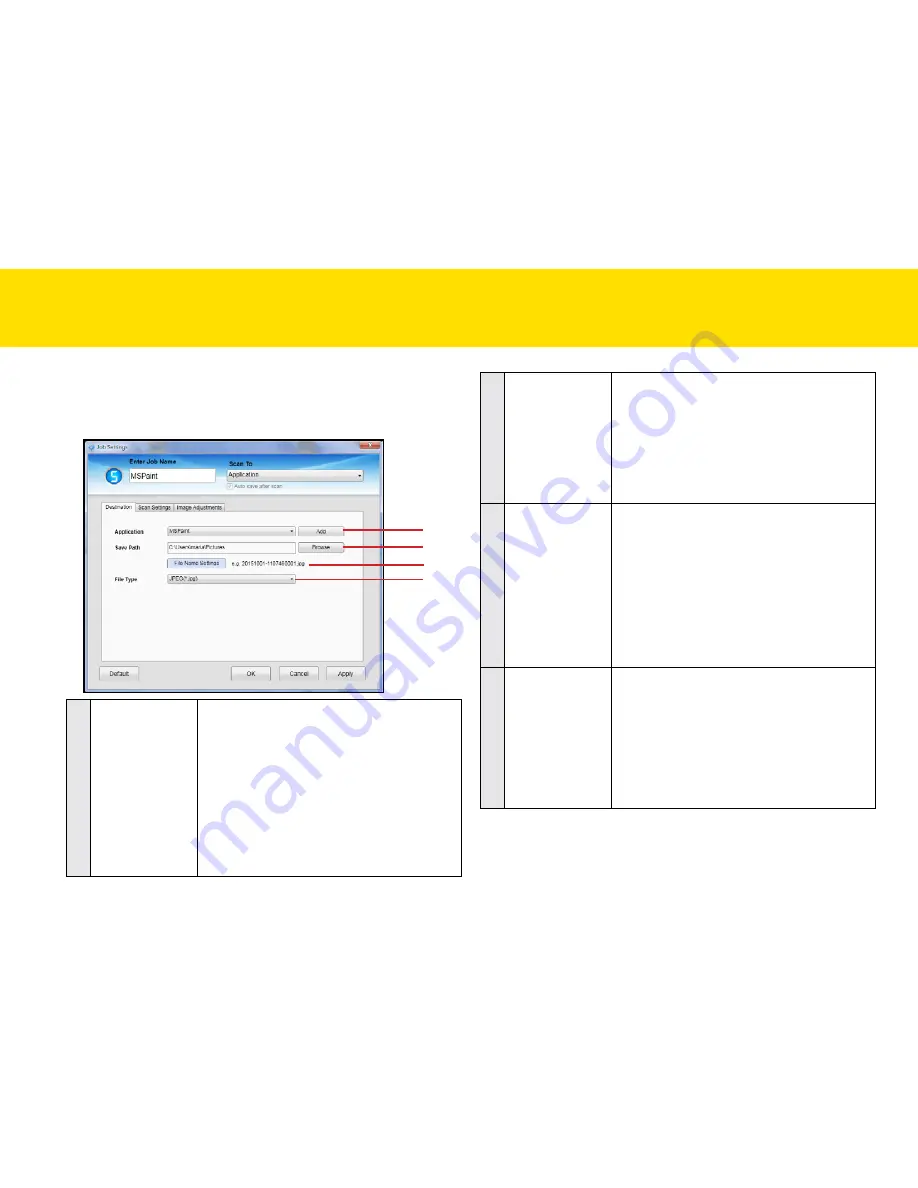
Destination (Scan to Application)
click the
Destination
tab to bring up the setting page for the Scan-to
option selected, and change the following settings:
1
2
3
4
1
Application
(Default: mSPaint)
this detects and displays the applications
installed in your computer which support to
open the File type.
to add a new application, click
Add
and
navigate to the .exe files in the Program folder,
then select it to add in the application list.
NOTES:
Please make sure the application
supports the File type selected.
NOTES:
the
Add
function allows only one new
application to be added and replaced.
2
Save Path
Indicates the folder where image files are
saved. click
Browse
to specify a file folder to
save the scanned image.
NOTES:
you cannot specify folders where root
privileges are required.
NOTES:
Save Path
cannot reset to the default
Save Path once changed.
3
File Name
Settings
you can create a filename format for the
scanned image with either one of this setting.
•
yyyymmddhhmmss: the filename is
created in the “yyyymmddhhmmss”
format with 4-digit serial number at the
end, i.e. 20150811-1546490001.jpg.
•
custom: the filename is created with a
prefix specified in the
File Name
up to
20 characters, i.e. Scanned000001.jpg
4
File type
Select a file format to save scanned image.
choices: “JPeG(*.jpg)”, “tIFF(*.tif)”, “multi-
tIFF(*.tif)”, “bmP(*.bmp)”, “PDF(*.pdf)”
NOTES:
tIFF is used for splitting the multi-page
originals into single files.
NOTES:
multi-tIFF is used for combining multiple
originals into one file.
SettING IDOcScAN tOUch
(cONtINUeD)
Summary of Contents for idocscan p100
Page 70: ...P100 P70 P45...


