20
4
Auto save after
scan
check to automatically save the scan image
to the specified folder after scanning finishes.
Uncheck to trigger the
Preview and Save
dialog box after scanning finishes (see
Preview
and Save Dialog
).
5
Destination tab
click the
Destination
tab to display the
settings options (see
Adjusting the Setting
tabs > Destination
).
6
Scan Settings tab
click the
Scan Settings
tab to display the
settings options (see
Adjusting the Setting
tabs > Scan Settings (For All Scan-to
Options)
).
7
Image
Adjustments tab
click the
Image Adjustments
tab to display
the settings options (see
Adjusting the Setting
tabs > Image Adjustments (For All Scan-to
Options)
).
8
Ok
click to save the settings you changed and
close the Settings window.
9
cancel
click to close the Settings window without
saving the changes.
10
Apply
click to apply the selected scan job with the
settings you changed.
11
Default
Reset both
Destination
,
Scan Settings,
and
Image Adjustments
to the default for all scan-
to options.
SettING IDOcScAN tOUch
(cONtINUeD)
Adjusting the Setting Tabs
there are 3 setting tabs including
Destination
,
Scan Settings
, and
Image Adjustments
to configure the Scan-to options. the following
table gives function details and examples of the available settings.
Note that some of these settings are automatically set or disabled
by the Scan-to option selected and other settings you choose.
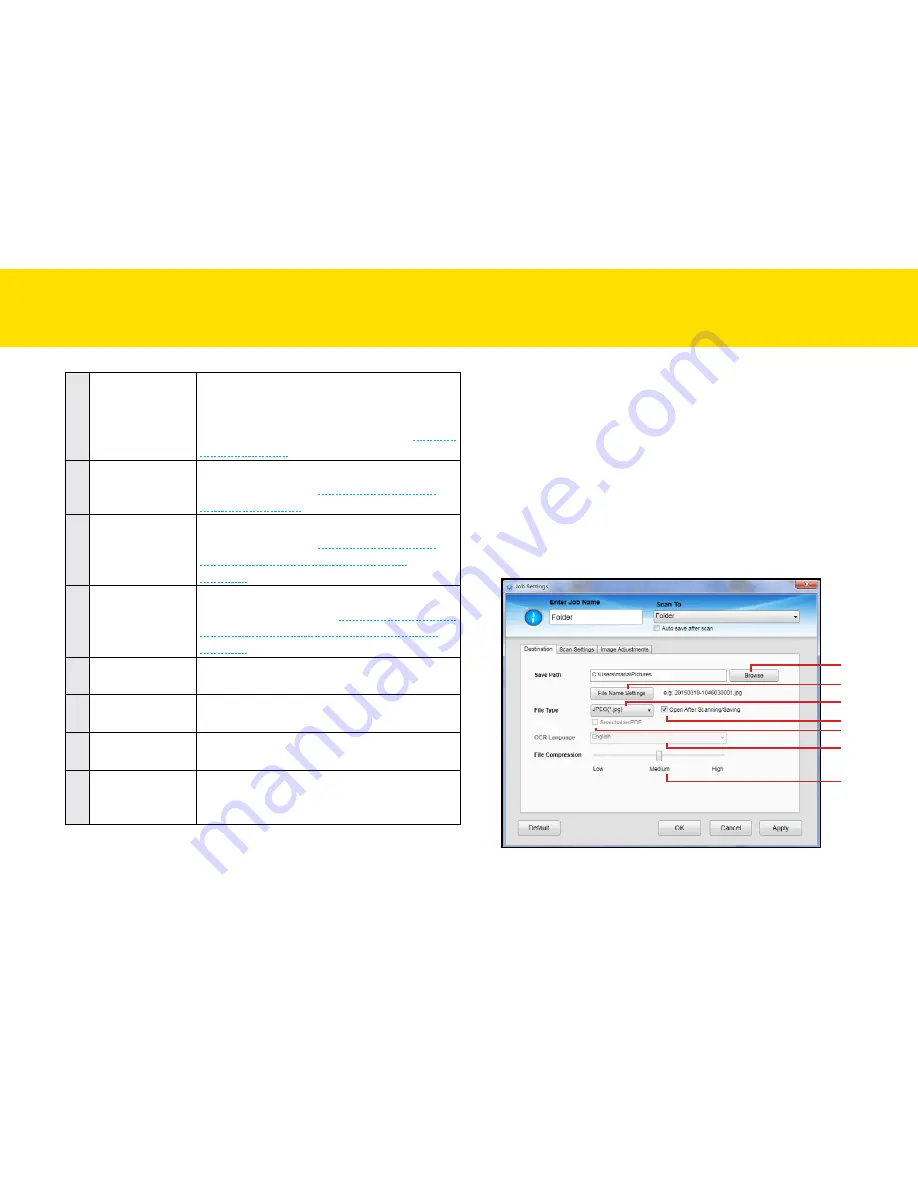
Destination (Scan to Folder)
click the
Destination
tab to bring up the setting page for the Scan-to
option selected, and change the following settings:
1
2
3
4
5
6
7
Summary of Contents for idocscan p100
Page 70: ...P100 P70 P45...


