


You can scan the originals and email the scanned image to several destinations from the machine by
email.
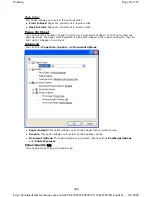
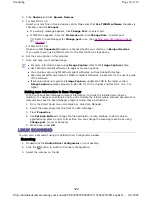
Setting up an email account
To scan and send an image as an email attachment, you need to set up network parameters using
SyncThru™ Web Service.
1. Turn your networked computer on and open the web browser.
2. Enter your machine's IP address as the URL in a browser.
3. Click
Machine Settings
and
E-mail Setup
.
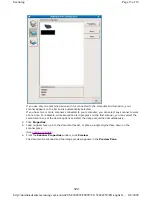
4. Select
IP Address
or
Host Name
.
5. Enter the IP address in dotted decimal notation or as a host name.
6. Enter the server port number, from 1 to 65535.
The default port number is 25.
7. Check the box next to
SMTP Requires Authentication
to require authentication.
8. Enter the SMTP server login name and password.
9. Click
Apply
.
Sending a scanned image to several destinations as an email attachment
1. Load originals face up into the document feeder, or place a single original face down on the
scanner glass.
(See
Loading originals
.)
2. Press
Scan/Email
on the control panel.
3. Press the up/down arrow to highlight
Scan To Email
and press
OK
.
4. When
From:
appears on the top line of the display, enter the sender’s email address and press
OK
.
5. When
Destination Email:
appears on the top line of the display, enter the recipient’s email
address and press
OK
.
6. To enter additional addresses, press the left/right arrow to highlight
Yes
and press
OK
.
To continue to the next step, press the left/right arrow to highlight
No
and press
OK
.
7. If the display asks if you want to see the recipient’s email address, press the left/right arrow to
highlight
Yes
or No and press
OK
.
If the authentication method of SMTP server is POP3 before SMTP, put a check mark of
SMTP
Requires POP3 Before SMTP Authentication
.
1. Enter the IP address in dotted decimal notation or as a host name.
2. Enter the server port number, from 1 to 65535. The default port number is 25.
If you registered
Auth ID
,
Password
and checked
Require Local Authentication
in
User
Authentication
on
SyncThru Web Service
,
Login Name
and
Enter Password
appear.
Enter the Auth ID and Password to your machine. Go to step 5.
Page 2 of 16
Scanning
8/4/2009
http://downloadcenter.samsung.com/content/UM/200907/20090721152022250/EN/english/...
112