


NeuroBlate® System Instructions for Use
80469 Rev D – Nov 16, 2018
- 62 -
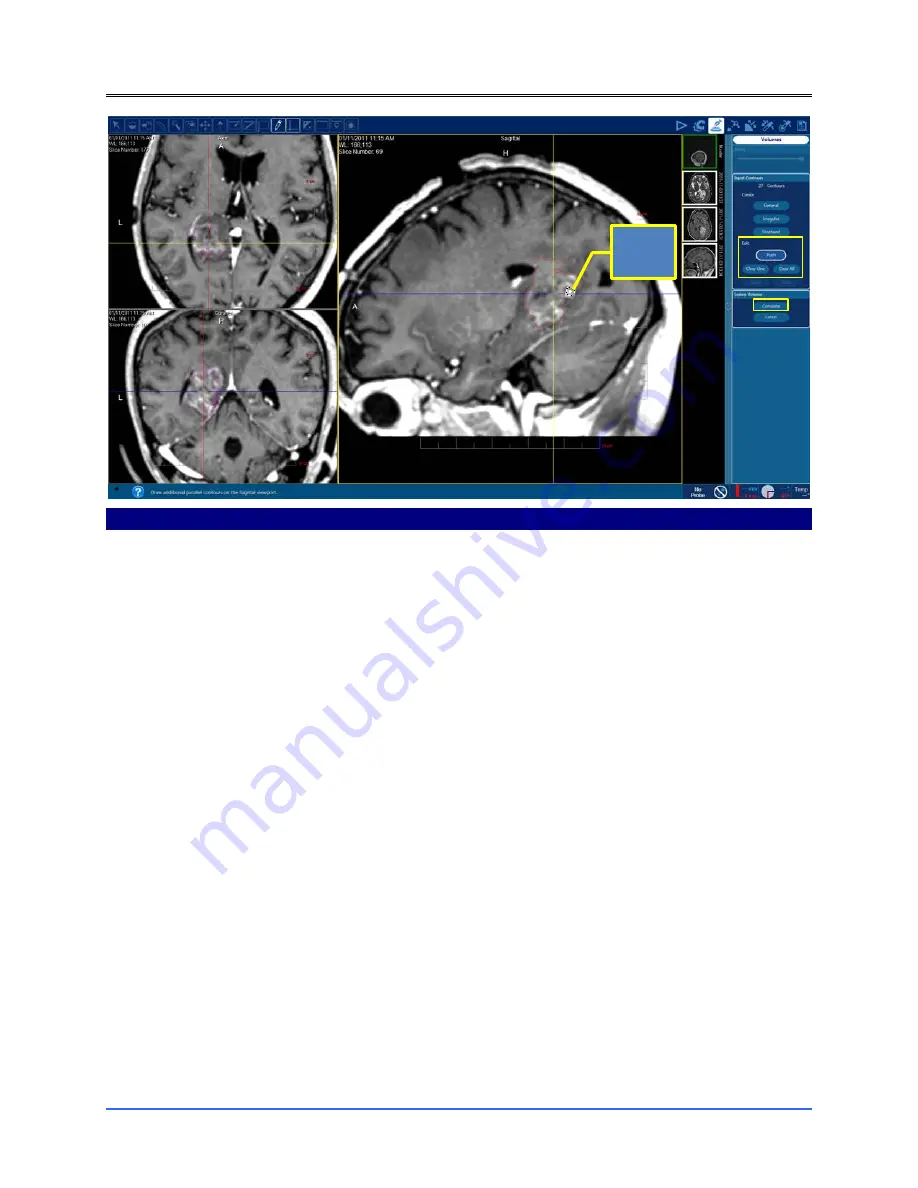
Figure 8.1.32: Edit the Generated Volume Contour
Once the volume is generated the created contours can be edited in the acquisition plane (right
side view pane only):
•
Select the
Push
icon under
Edit
the created contours with the
•
Use the Push Tool (Figure 8.1.32) to adjust the boundaries of the initially defined contour
- left click and hold while touching the boundaries of the contour with the Push Tool
•
Use the scroll wheel on the mouse to move from image to image in the acquisition plane
and continue to edit each slice as needed
Note:
The size of the push tool can be changed by holding the left mouse button and using the
Page Up and Page Down buttons, or by scrolling the middle mouse wheel to allow larger or
smaller manipulations.
Note:
All contour lines can be removed by selecting
Clear.
Note:
A single slice contour can be removed by selecting
Clear One.
Note:
If part of the intended structure is not outlined on any given slice, a new contour can be
drawn around the structure using any of the three contouring algorithms under
Create.
Note:
The Push Tool can also be used when creating the initial two outlines.
•
Select
Complete
when desired slices have been edited
•
To create additional contour volumes for anatomical structures or safety zones, follow the
same steps to select the Interactive Tool, followed by the Push Tool
Push
Tool
Summary of Contents for Neuroblate
Page 1: ...Instructions for Use ...
Page 24: ...NeuroBlate System Instructions for Use 80469 Rev D Nov 16 2018 24 NeuroBlate System ...
Page 152: ...NeuroBlate System Instructions for Use 80469 Rev D Nov 16 2018 152 ...
Page 153: ...NeuroBlate System Instructions for Use 80469 Rev D Nov 16 2018 153 ...
Page 154: ...NeuroBlate System Instructions for Use 80469 Rev D Nov 16 2018 154 ...


