Chapter 2
Chapter 6
Contents
Chapter 2
Chapter 5
System unit
Chapter 3
Chapter 2
LS PRO HARDWARE TECHNICAL REFERENCE 2/19
Installing an
1. Remove the system unit top cover.
80387SX
2. Remove the system board metalwork.
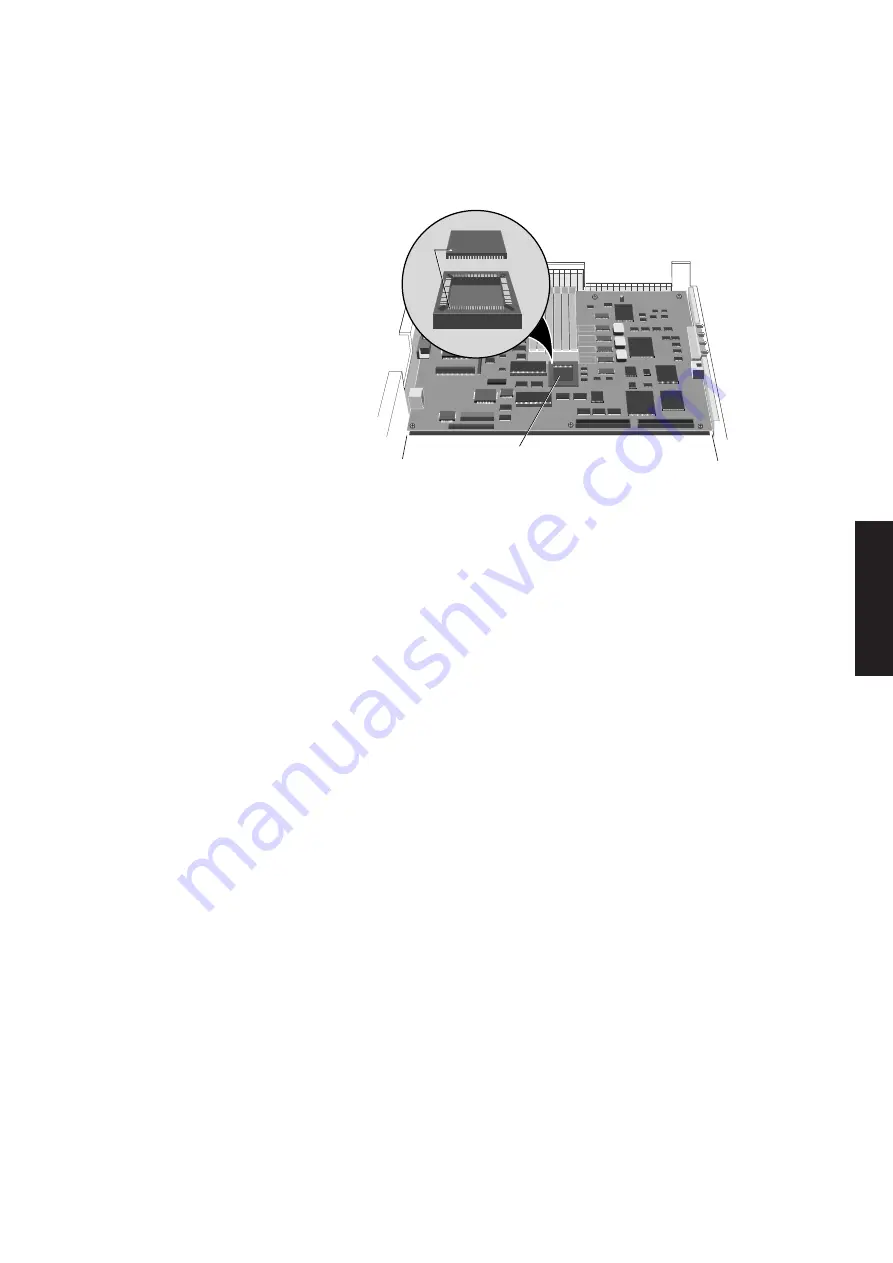
3. Locate the 80387SX socket from the following illustration.
PIN 1
80387SX
SOCKET
4. The 80387SX has a positioning guide in the form of a circular recess. Insert the
80387SX in the socket with the positioning guide at pin 1 making sure that you
do not bend or otherwise damage the pins.
Note
The 80387SX only fits in one orientation. Do not use excessive force or damage may
occur.
5. Reassemble the system.
Summary of Contents for Apricot LS Pro
Page 1: ...apricot HARDWARE TECHNICAL REFERENCE MITSUBISHI ELECTRIC LS Pro ...
Page 2: ...HARDWARE TECHNICAL REFERENCE ...
Page 6: ...CONTENTS ...
Page 9: ...Chapter 1 INTRODUCTION ...
Page 14: ...Chapter 2 SYSTEM UNIT ...
Page 37: ...Chapter 3 SYSTEM BOARD ...
Page 60: ...Chapter 4 PERIPHERAL ITEMS ...
Page 91: ...Chapter 5 MEMORY AND I O USAGE ...
Page 118: ...Appendix A SPECIFICATIONS ...
Page 125: ...Appendix B REVISION C SYSTEM BOARD ...
Page 130: ...ERROR BEEP CODES Appendix C ...
Page 134: ...INDEX ...


