10-8 Patient Data Management
[Add Catalog]: to add a catalog of files to the list.
[Delete]: to delete selected files or catalogs from the file list.
[Clear]: to clear all the files or catalogs in the file list.
[Export]: to export selected directories/files to external storage devices. Click [Export] to
bring up the Browse dialog box, select the path and click [OK].
Demonstration mode
The system automatically plays all the image files in the list one by one.
The time interval between images played is the same and can be changed.
Demo options
You can choose whether to repeat the demonstration or exit after a demonstration is complete.
10.2.12 Sending Image Files
NOTE:
Data saved this way can only be reviewed on the PC and cannot be restored to the
ultrasound system. See “10.4.3 Patient Data View & Management” chapter for details
about data backup.
On the image screen, select a stored image thumbnail and click
(Send To) in the top-right
corner of the image. Or you can touch
icon on the touch screen under touch screen
mapping mode (see “3.8.4 Touch Screen Operation” for details). The image can be sent to the
external device, DVD recorder, MedTouch/MedSight devices, DICOM storage server, DICOM
print server, system connected printer, etc.
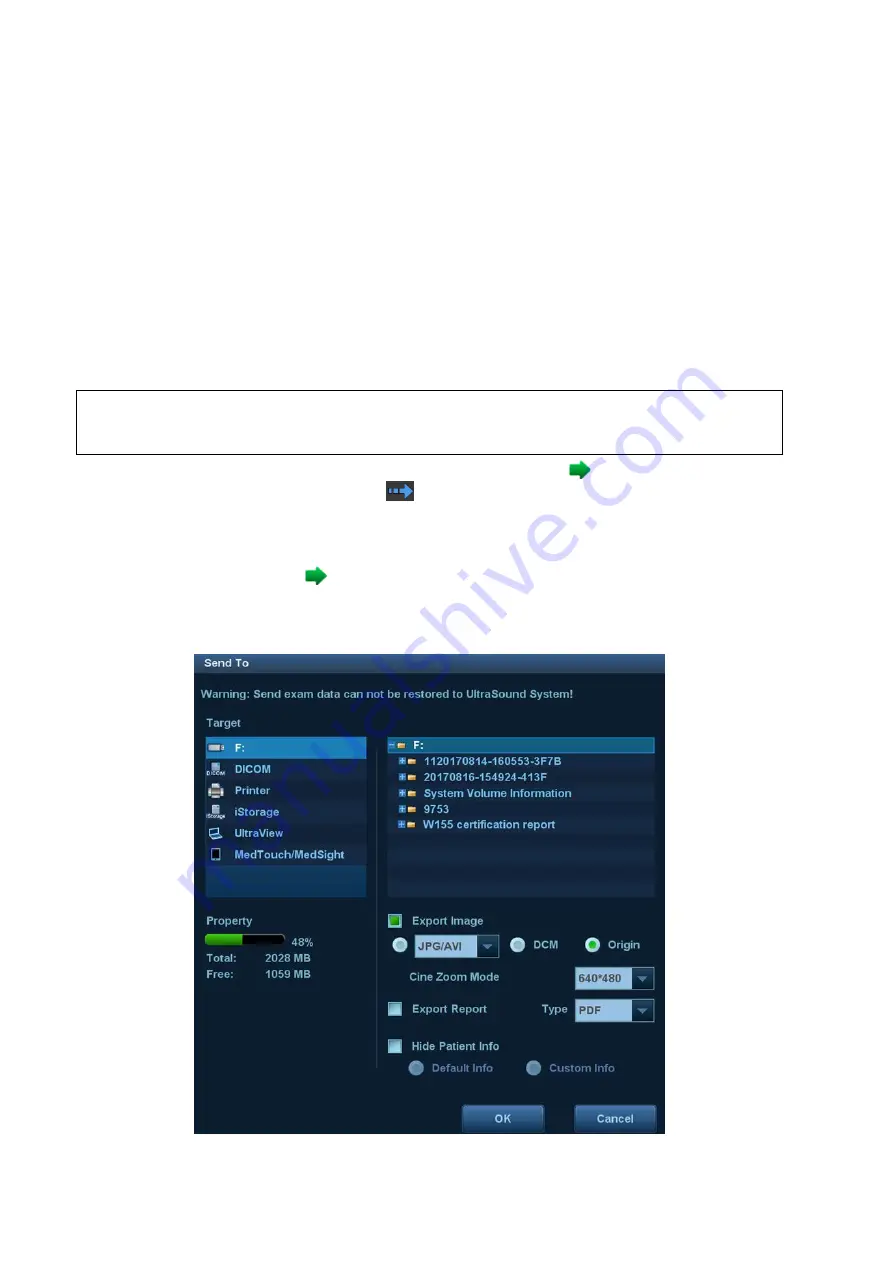
In the iStation screen, click
, or, in the Review screen, click [Send To] to send patient data to
an external memory device. You can choose whether reports are exported with images. See
the figure below.
See the figure below.
Summary of Contents for DC-80A
Page 2: ......
Page 24: ......
Page 44: ......
Page 59: ...System Preparation 3 15...
Page 67: ...System Preparation 3 23...
Page 68: ......
Page 80: ......
Page 299: ...Probes and Biopsy 13 19...
Page 304: ...13 24 Probes and Biopsy NGB 035 NGB 039...
Page 324: ......
Page 334: ......
Page 340: ......
Page 348: ......
Page 352: ......
Page 363: ...Barcode Reader B 11...
Page 368: ......
Page 382: ......
Page 391: ...P N 046 014137 00 3 0...


