Section 4 – Installation Procedure (Continued)
17
2.
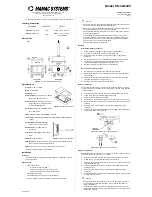
Position the receiver. Locate as far as possible from exposed trolley wire and sources of
electromagnetic or radiated noise. Cabinet mounting dimensions and mounting template is on next
page (see Figure 4-2A and B. Receiver Mounting Details). Antenna at top of unit should be kept as
clear as possible of any metal object.
3.
Mount the receiver. Mounting brackets are provided to accommodate mounting on to a metal strut
mounting system. The four deep mounting holes in corners of the receiver mounting brackets use
quantity four #10-24 combo drive round head screws 1 ½ “ in length, four #10 lock washers and four
#10-24 hex nuts to mount to the mounting brackets. Lock washers should be used in front of hex nuts.
Four flat washers, .400 I.D. x 1 ½” O.D., are supplied with use for mounting the mounting brackets to
a metal strut.
4.
Wire the unit using the appropriate electrical drawings for the specific transmitter and crane orientation
selected (see Section 6. Wiring). For the Membrane or Pendant transmitter, determine crane
orientation; if the direction pair labeled on the transmitter better describes the equipment movement,
use this pair to wire the motor directionals respectively. If you need to remove the main board (4
screws) the antenna unplugs from the RF Receiver, be sure to dress the antenna cable under the hook
on the RF Receiver when reinstalling the antenna cable.
5.
Wire the power to J1 input power connector. The connections are Ground (GND), Neutral (N) and 120
VAC 50-60 Hz (120V).
See Figure 4-1. Input Power Connections.
6.
Wiring of the system should now be complete.
7.
Stand clear of the crane and apply AC power to receiver unit. Turn switch SW2 OFF (MR relay
control) and SW1 ON (main power switch). Check to see if four LEDs are lit: three green (DS22,
DS23 and DS24) and one red (RF Receiver ON). If none are lit check AC power, power switch SW1
and fuse.
8.
Turn transmitter ON. Check to see if the yellow LED is now lit (DSMR1). At this point the MR relay
is disabled; the functions of the transmitter can be checked by noting the turning ON of the appropriate
red LEDs next to the control relays (DS7 to DS11). After checking out the functions, turn switch SW2
ON to enable the MR relay; check function and direction by jogging each motion. Installation should
now be complete.
9.
If there are any problems, see Section 9. Servicing.
Figure 4-1. Input Power Connections.
J1
1


