51
Leica RM 2145 Rotary Microtome
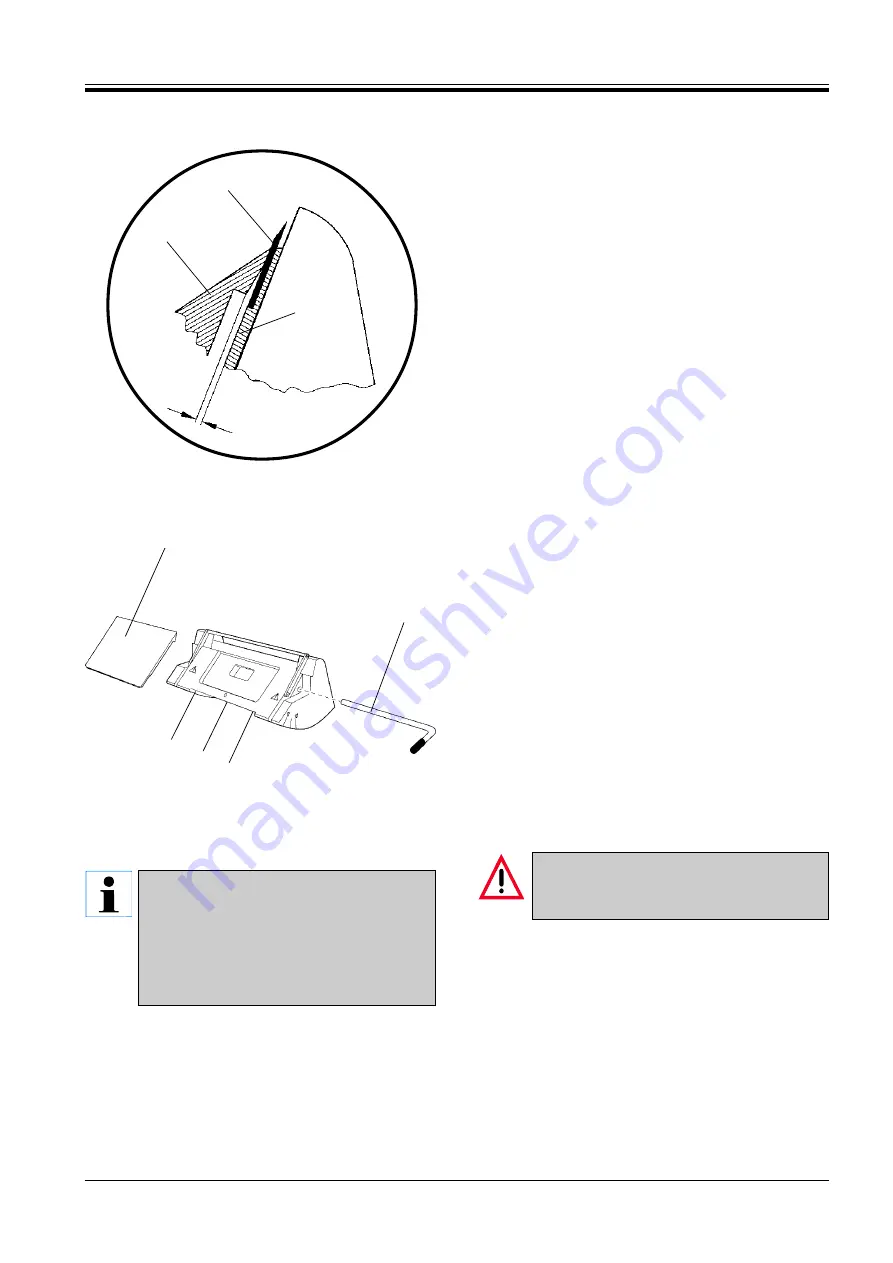
Fig. 51.1
7
5
3
7
Fig. 51.2
2
10
9
10
Convenient for left-handers:
The clamping lever can also be inserted into
the hole on the left side of the knife holder.
(This, however, changes the clamping direc-
tion of the lever).
To unlock, push the lever upward - to clamp,
tilt it downward.
12. Optional accessories
Adjusting the front pressure plate
Place the front pressure plate
(7)
in the correct po-
sition, insert the clamping lever
(2)
and tighten the
pressure plate just slightly with the clamping lever..
The screws
(10)
on the underside of the knife holder
are used to adjust the height of the pressure plate.
Use the screws
(10)
to adjust the height of the pres-
sure plate
(7)
. The upper edges of both pressure
plates
(5)
and
(7)
have to be at the same level and
parallel to one another.
The clearance angle of the front pressure plate
(7)
is
adjusted with screw
(9)
, which is located in a bore on
the underside of the knife holder and can be reached
from the rear side of the knife holder.
Insert a disposable blade, with the cutting edge fac-
ing downward to avoid injury, and clamp loosely
with clamping lever
(2)
.
Adjust the front pressure plate
(7)
with screw
(9)
so
that only the upper edge of the plate actually ex-
erts any pressure on the blade. An opening must
still be visible. Once the pressure plate is clamped
tightly this gap will disappear.
Cleaning
For the purpose of a thorough cleaning the front pres-
sure plate
(7)
can be removed.
To remove the blade, tilt the clamping lever down-
ward
(2)
.
Carefully remove the blade.
Pull out the clamping lever
(2)
sideways.
Remove the pressure plate
(7)
.
Only use mild household cleaners / soap for
cleaning. The varnish paint coat of the instru-
ment is not resistant to acetone or xylene!
Wipe with a damp (not wet!) cloth.
Reattach the pressure plate
(7)
. Reinsert the clamp-
ing lever
(2)
in the corresponding opening and
tighten slightly.
Summary of Contents for RM2145
Page 2: ......


