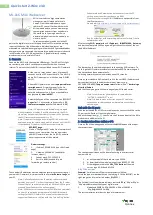
7.
Push
the
front
of
the
adapter
down,
onto
the
front
mounting
bracket,
until
it
snaps
into
place.
8.
If
you
have
other
options
to
install
or
remove,
do
so
now.
9.
Go
to
“Completing
the
installation”
on
page
47.
Hard
disk
drives
This
section
describes
how
to
install
a
hard
disk
drive
in
the
server.
Before
you
continue
with
the
hard
disk
drive
installation
procedures,
review
“Hard
disk
drive
considerations.”
Hard
disk
drive
considerations
The
following
notes
describe
the
types
of
hard
disk
drives
that
the
server
supports
and
other
information
that
you
must
consider
when
installing
a
hard
disk
drive:
v
The
server
supports
the
following
three
configurations:
–
Configuration
1
-
Four
2.5-inch
hot-swap
SCSI
hard
disk
drives
–
Configuration
2
-
Two
3.5-inch
slim
hot-swap
SCSI
hard
disk
drives
-
One
9.5-mm-high
DVD-ROM
drive
(optional)
–
Configuration
3
-
Two
3.5-inch
non-hot-swap
(simple
swap)
Serial
ATA
(SATA)
hard
disk
drives
-
One
9.5-mm-high
DVD-ROM
drive
(optional)
v
Both
SCSI
configuration
models
of
the
server
come
with
a
hot-swap
SCSI
backplane.
v
The
SCSI
server
models
support
low
voltage
differential
(LVD)
hot-swap
drives.
Each
hot-swap
drive
is
in
a
tray,
which
has
a
green
activity
LED
and
an
amber
status
LED
in
the
upper-right
corner.
These
LEDs
are
lit
if
the
drive
is
active
and,
in
some
cases,
if
the
drive
fails.
Rear mounting
bracket
Front mounting
bracket
Remote Supervisor
Adapter II
SlimLine connector
Remote Supervisor
Adapter II SlimLine assembly
Figure
17.
Installing
the
Remote
Supervisor
Adapter
II
SlimLine
26
xSeries
336
Type
1879
and
Type
8837:
Hardware
Maintenance
Manual
and
Troubleshooting
Guide
Summary of Contents for 88371RU
Page 1: ...xSeries 336 Type 1879 and Type 8837 Hardware Maintenance Manual and Troubleshooting Guide...
Page 2: ......
Page 3: ...xSeries 336 Type 1879 and Type 8837 Hardware Maintenance Manual and Troubleshooting Guide...
Page 15: ...Server on off 8 to 80 Shipment 5 to 100 Chapter 1 General information 5...
Page 22: ...12 xSeries 336 Type 1879 and Type 8837 Hardware Maintenance Manual and Troubleshooting Guide...
Page 24: ...14 xSeries 336 Type 1879 and Type 8837 Hardware Maintenance Manual and Troubleshooting Guide...
Page 92: ...82 xSeries 336 Type 1879 and Type 8837 Hardware Maintenance Manual and Troubleshooting Guide...
Page 149: ...Appendix B Safety information 139...
Page 150: ...140 xSeries 336 Type 1879 and Type 8837 Hardware Maintenance Manual and Troubleshooting Guide...
Page 151: ...Appendix B Safety information 141...
Page 152: ...142 xSeries 336 Type 1879 and Type 8837 Hardware Maintenance Manual and Troubleshooting Guide...
Page 153: ...Appendix B Safety information 143...
Page 154: ...144 xSeries 336 Type 1879 and Type 8837 Hardware Maintenance Manual and Troubleshooting Guide...
Page 155: ...Appendix B Safety information 145...
Page 165: ...Appendix B Safety information 155...
Page 166: ...156 xSeries 336 Type 1879 and Type 8837 Hardware Maintenance Manual and Troubleshooting Guide...
Page 167: ...Appendix B Safety information 157...
Page 168: ...158 xSeries 336 Type 1879 and Type 8837 Hardware Maintenance Manual and Troubleshooting Guide...
Page 172: ...162 xSeries 336 Type 1879 and Type 8837 Hardware Maintenance Manual and Troubleshooting Guide...
Page 185: ......
Page 186: ...Part Number 25K8109 1P P N 25K8109...


