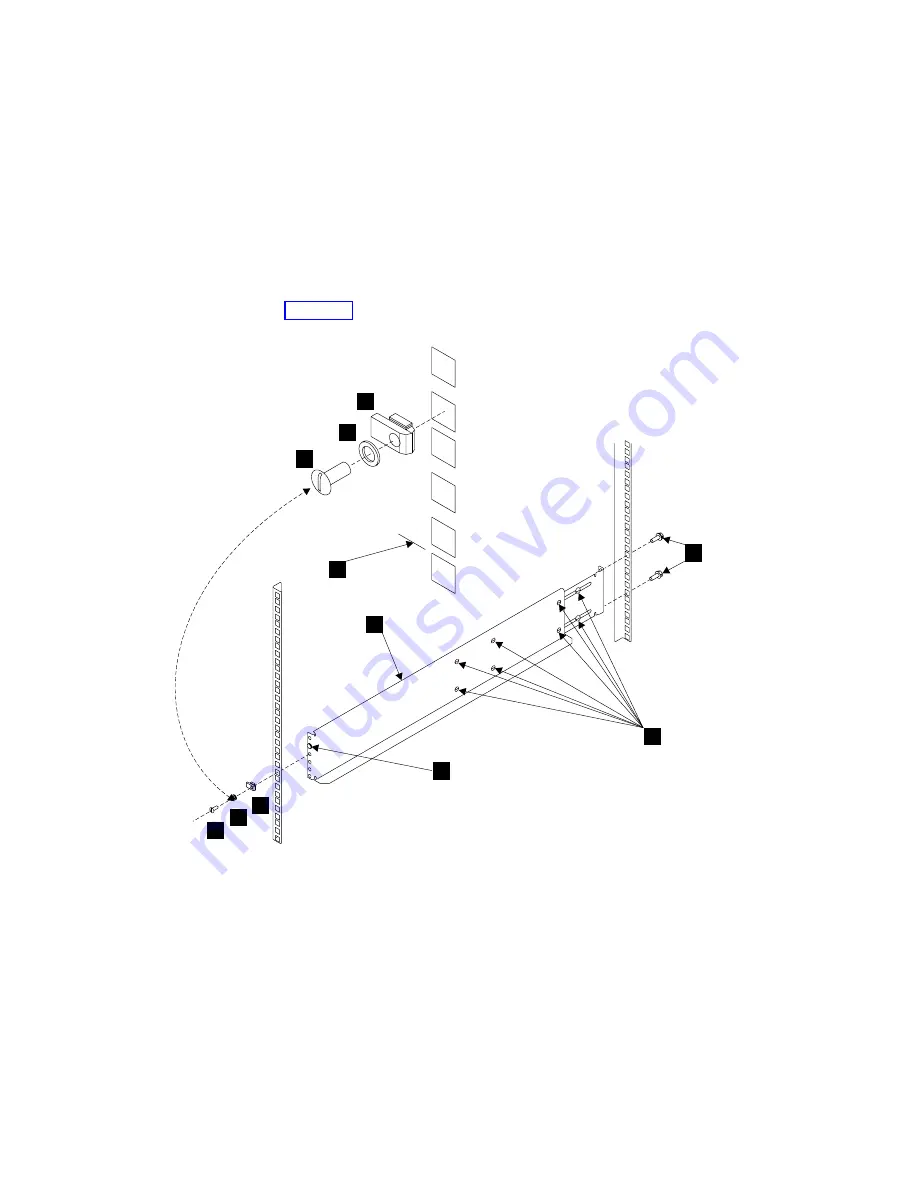
Step 12. Refer to Figure 139.
Step 13. Observe the EIA positions on the rack, and determine where you are going to
install the 7133. If appropriate, allow for possible future installation of other
subsystems.
Note: The bottom flange of the support rail must align with the EIA mark
8
(on a narrow bar of the rack).
Step 14. Find the left-hand support rail
1
.
Step 15. Loosen the eight adjustment screws
3
.
Step 16. Hold the support rail in position in the rack, then install and fully tighten the
two hexagonal M6 mounting screws
2
at the back of the rail.
1
2
3
4
5
7
5
6
7
6
8
Back
Front
Figure 139. Installing Support Rails into a Netfinity Rack
238
7133 Models D40 and T40 Service Guide
Summary of Contents for 7133 D40
Page 1: ...7133 Models D40 and T40 Serial Disk Systems Service Guide GY33 0192 07 ...
Page 2: ......
Page 3: ...7133 Models D40 and T40 Serial Disk Systems Service Guide GY33 0192 07 ...
Page 10: ...viii 7133 Models D40 and T40 Service Guide ...
Page 14: ...xii 7133 Models D40 and T40 Service Guide ...
Page 90: ...72 7133 Models D40 and T40 Service Guide ...
Page 260: ...Assembly 1 7133 Model D40 242 7133 Models D40 and T40 Service Guide ...
Page 262: ...Assembly 1 continued 244 7133 Models D40 and T40 Service Guide ...
Page 264: ...Assembly 1 continued 246 7133 Models D40 and T40 Service Guide ...
Page 292: ...274 7133 Models D40 and T40 Service Guide ...
Page 305: ......
Page 306: ...Part Number 18P6104 Printed in the U S A GY33 0192 07 1P P N 18P6104 ...


