


ENWW
Replacing the PIP 143
Replacing the PIP underlayer
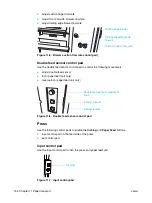
Special Tools and Jigs
z
PIP underlayer installation jig
z
PIP underlayer scraper
Procedure
1
Press the
Emergency Stop
button.
2
Remove the following:
a
Cleaning blade from the cleaning station
b
ITM hood
c
Cleaning station
d
Air knife
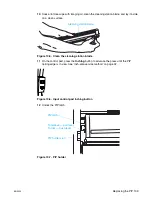
3
Lift up the scorotron bracket.
Note
Two persons will be required for this procedure.
4
While one person should slowly rotate the handwheel clockwise, a second person
should pull a PIP underlayer corner at the PIP holder slit and remove the PIP
underlayer from the PIP drum.
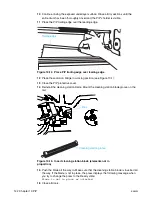
5
Prepare the PIP drum for cleaning:
a
Cover the PIP holder slit with masking tape.
b
Insert a sheet of print paper at the drum tray to catch the glue residue.
6
Use clean imaging oil to thoroughly “wet” the PIP drum.
7
While slowly rotating the drum clockwise, use a scraper tool to remove the adhesive
from the drum surface. Keep the drum “wet” with imaging oil.
CAUTION
Make sure that no glue residue falls into the machine. Take care not to damage the PIP drum
surface.
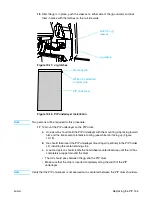
8
When all the glue has been removed, wipe the drum with the lint-free wipe soaked in
imaging oil.
9
Carefully wipe and clean the PIP drum thoroughly using a lint-free wipe soaked in IPA.
While holding the wet, lint-free wipe against the drum, inch
the machine forward.
Move the lint-free wipe in a forward diagonal direction.
If the drum is still not completely clean of glue, clean the drum with imaging oil, and
then wipe the drum with the lint-free wipe soaked in IPA.
10
Remove the masking tape from the PIP holder slit.
11
Using an A4 sheet of photocopy paper, dry the PIP holder slit.
12
Dry the PIP drum carefully and insert a sheet of cleaning paper to the PIP holder slit
to dry the slot (Figure 10-14).
CAUTION
Make sure that no imaging oil and glue residues remains on the drum and PIP holder slit. This
will prevent adhesion of the new PIP underlayer.
Summary of Contents for Indigo press 3050
Page 1: ...HP Indigo press 3050 User guide English version ...
Page 2: ...hp indigo press 3050 user guide ...
Page 13: ...12 Chapter 1 Preface ENWW ...
Page 23: ...22 Chapter 2 Getting started ENWW ...
Page 41: ...40 Chapter 4 HP Indigo press 3050 basics ENWW Figure 4 5 Related topics ...
Page 53: ...52 Chapter 5 The main windows ENWW ...
Page 83: ...82 Chapter 6 Operating the press ENWW ...
Page 91: ...90 Chapter 7 Operator routines ENWW Figure 7 7 Inner front wall O O O O ...
Page 99: ...98 Chapter 7 Operator routines ENWW ...
Page 136: ...ENWW 135 10PIP This chapter contains the following sections z Overview z Replacing the PIP ...
Page 189: ...188 Chapter 11 Paper transport ENWW ...
Page 219: ...218 Chapter 15 Scorotron ENWW ...
Page 257: ...256 Chapter 17 Pre transfer erase PTE ENWW ...
Page 271: ...270 Chapter 19 Chiller ENWW ...