8-64 SCSI and I/O
Configuration Switches
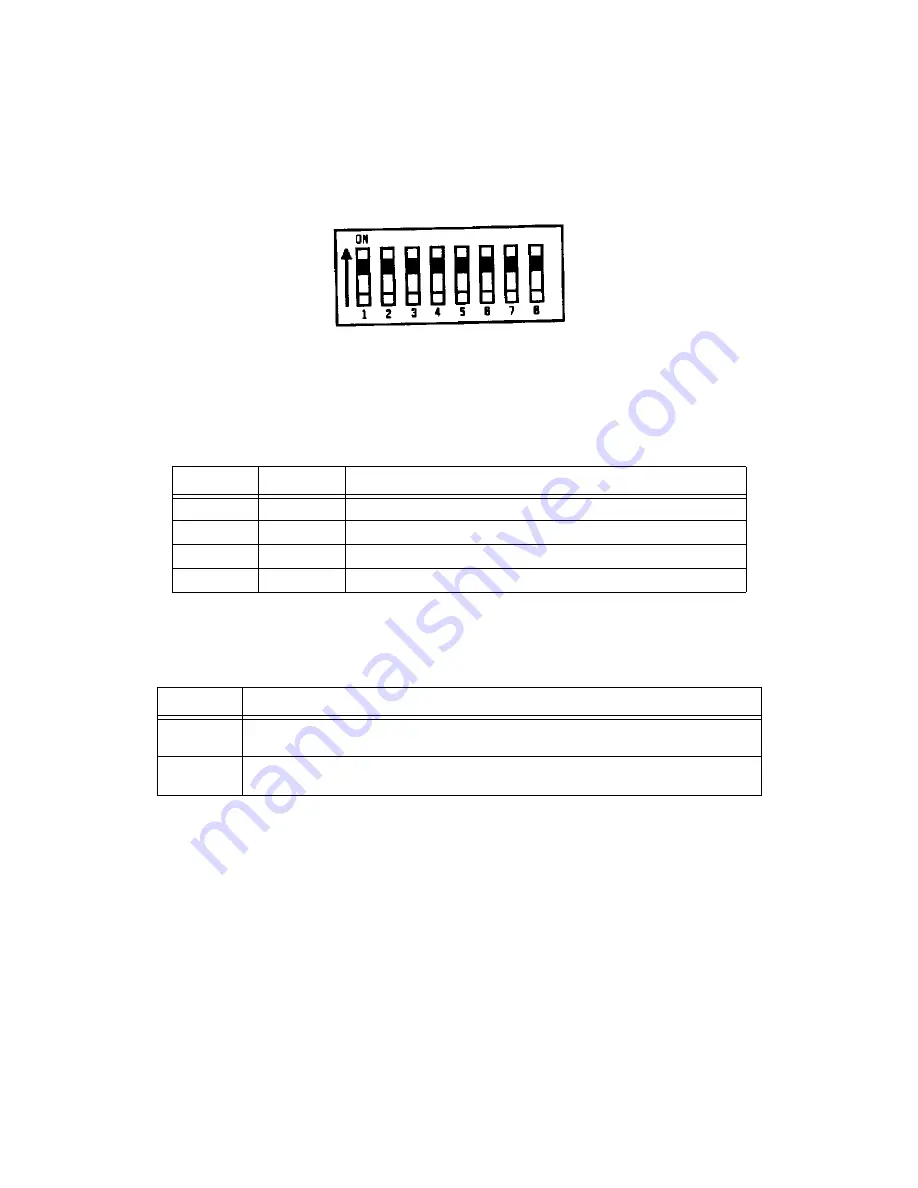
Figure 8-33 shows the configuration switches located on the bottom of the C2478SZ in their default
positions.
Figure 8-33. C2478SZ Switch Diagram
Switches 1 and 2 are used to configure the data compression operation mode for C2478SZ. The following
list shows the available options.
Note that with switch 1 on, data written to the tape will be compressed without the knowledge of the host.
Switch 3 is used to configure the drive to respond to DDS media recognition system tapes.
Switches 4 through 8 are used to specify drive connectivity and functionality according to host or customer
requirements. The default setting is all switches on.
Preventative Maintenance
Cleaning
Regular cleaning of the tape heads is essential to maintain the reliable operation and performance of the tape
drive. This procedure in NO WAY damages or shortens the life of either the drive mechanism or the tape
heads. The recommended cleaning frequency is every 25 hours of tape pulling time. You are advised not to
wait for the Media wear/caution signal to appear on the front panel before implementing the cleaning
procedure. By the time the indicator is present, the performance of the drive may already have been
impacted.
Switch 1
Switch 2
Meaning
Off
Off
Compression disabled, no host control
Off
On
Compression disabled, host is allowed to control compression
On
Off
Compression enabled, no host control
On
On
Compression enabled, with host control
Switch 3
Meaning
On
The media recognition system is disabled. This is the default. All DDS tapes will be
treated the same, whether they posses the media recognition stripes or not.
Off
The media recognition system is active. Non-media recognition system tapes are
treated as if they are write protected.
Summary of Contents for 3000/9x9KS Series
Page 14: ...xiv Contents E Sources of Information on the Web ...
Page 28: ...2 8 Install and Configuration Figure 2 4 HP PB I O Slot Location Diagram Kx70 Kx80 ...
Page 44: ...2 24 Install and Configuration ...
Page 68: ...3 24 Troubleshooting HP 3000 Core I O Figure 3 4 HP 3000 Core I O ...
Page 120: ...5 6 Diagnostics ...
Page 128: ...6 8 Replaceable Parts Figure 6 4 Peripheral Bay Expanded View ...
Page 136: ...6 16 Replaceable Parts ...
Page 150: ...7 14 Removal and Replacement Figure 7 11 Peripheral Bay Rear View ...
Page 180: ...7 44 Removal and Replacement Figure 7 35 Cabinet Exploded View Rear ...
Page 209: ...SCSI and I O 8 21 Figure 8 3 A3629A ST19171WD J2 and J6 Jumper Settings ...
Page 217: ...SCSI and I O 8 29 Figure 8 7 A3353A source 2 J3 Jumper Positions ...
Page 218: ...8 30 SCSI and I O Figure 8 8 A3353A source 2 Option Connector Jumper Positions ...
Page 280: ...8 92 SCSI and I O Diagnostics CSTM SCSIDDS SYSMAP IOMAP ...
Page 298: ...8 110 SCSI and I O Diagnostics SCSICD IOMAP SYSMAP ...
Page 302: ...8 114 SCSI and I O ...
Page 308: ...Support Information B 2 HP 9x9KS Block Diagram Figure B 1 HP 3000 9x9KS Block Diagram ...
Page 309: ...B 3 Support Information HP K100 Block Diagram Figure B 2 HP 9000 K100 Block Diagram ...
Page 310: ...Support Information B 4 HP K2x0 K4x0 Block Diagram Figure B 3 HP 9000 K2x0 K4x0 Block Diagram ...
Page 311: ...B 5 Support Information Kx70 Kx80 Block Diagram Figure B 4 HP9000 Kx70 Block Diagram ...
Page 342: ...Memory Configuration Guidelines C 16 ...
Page 350: ...D 8 New System Features ...


