


Fusion IV DVR User Guide
________________________________________________________________________________________________________
Document 800-05305 Rev A
35
11/09
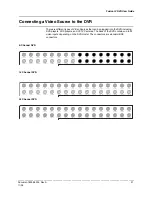
Connecting a PTZ Camera
Setting up a PTZ camera is simple. The DVR comes preassembled with an internal
PTZ adapter. Honeywell recommends using CAT 5 cable which typically can be run at
lengths up to 1500 feet.
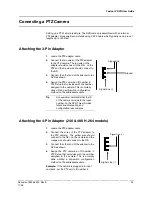
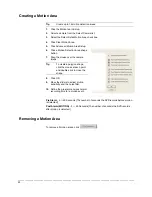
Attaching the 3-Pin Adapter
1.
Locate the PTZ adapter cable.
2.
Connect the two wires of the PTZ adapter
to the PTZ camera. The red wire on the
adapter should connect to the RX+ on the
PTZ and the brown wire should connect to
the RX-.
3.
Connect the other end of the adapter to the
DVR as shown.
4.
Assign the PTZ camera an ID number in
PTZ Setup that coincides with the number
assigned to the camera. This is normally
done utilizing a dip-switch configuration
method on the addressable dome.
Tip
Honeywell recommends that the ID
of the camera coincide to the input
number on the DVR. This will make
future troubleshooting and
configuration less complex.
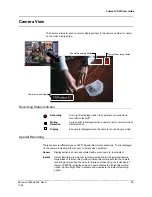
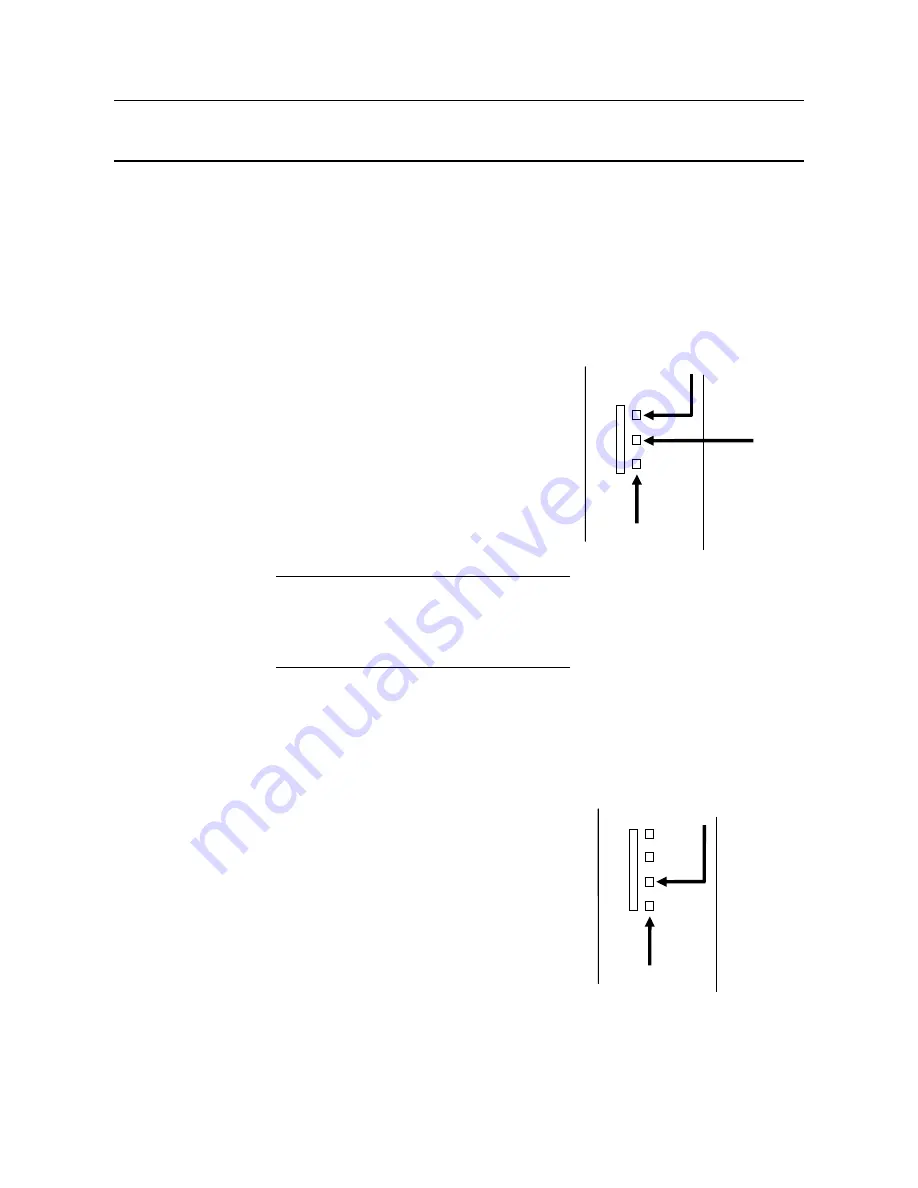
Attaching the 4-Pin Adapter (240 & 480 H.264 models)
1.
Locate the PTZ adapter cable
2.
Connect the wires of the PTZ adapter to
the PTZ camera. The yellow wire should
connect to the RX+ on the camera and the
orange wire should connect to the RX-.
3.
Connect the other end of the adapter to the
DVR as shown.
4.
Assign the PTZ camera an ID number in
PTZ Setup that coincides with the number
assigned to the camera. This is normally
done utilizing a dip-switch configuration
method on the addressable dome.
Example:
If the camera is plugged into input
number 5, set the PTZ unit to ID number 5.
Signal Line (+)
Signal Line (-)
Signal Line
Signal Line (-)
Ground
Summary of Contents for Fusion IV
Page 146: ......