


FAXITRON CT USER
MANUAL
| HOLOGIC | REVISION 002
SECTION
Faxitron CT
Quick Start
4
4-5
•
Press the “Accept” button. Note that this does not take an X-Ray, but activates the system so
it is ready to take an image.
•
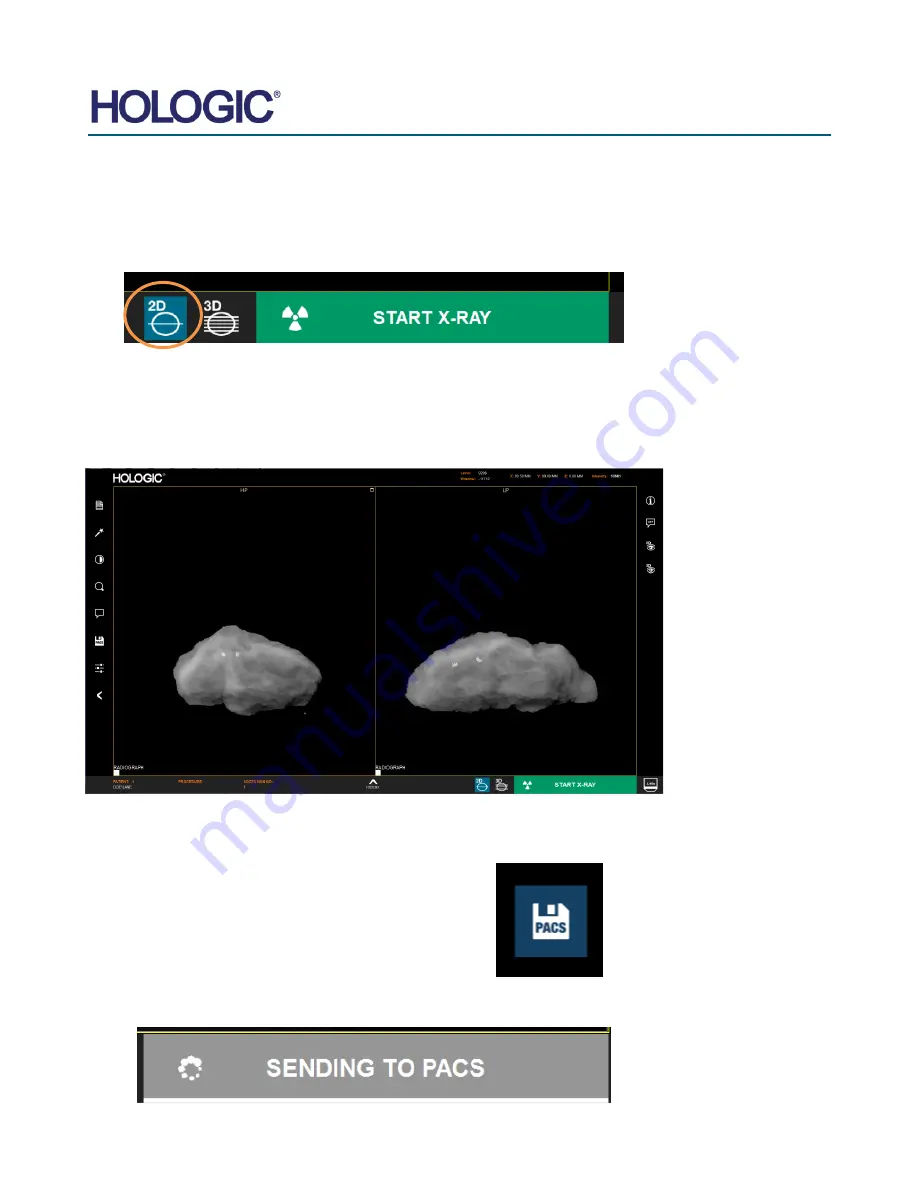
The CT systems has 2 modes - 2D imaging and 3D Imaging. The system defaults to 2D
mode initially and this is shown by the icon below. You can switch and go to 3D mode by
clicking the 3D icon.
•
With a sample in the X-Ray chamber, click the green X-Ray button in the bottom right-hand
corner of the software (shown above) or press the green X-Ray button on the touch panel to
start the exposure.
•
In 2D mode, when the exposure is complete the computer will process the data and after a
few seconds display two orthogonal images.
•
The 2D image series can then be sent to the PACS network by clicking the PACS Store icon,
assuming a PACS connection has been configured on the system. All images are
automatically
“save local”.
•
The button in the bottom left will show the send status. Do not shut down the system while the
images are still sending.
Figure 4.1.7
2D Mode
Figure 4.1.8
Image Screen
Figure 4.1.9
Save to PACS
Figure 4.1.10
Sending to PACS
Summary of Contents for Faxitron CT
Page 1: ...User s Manual from Hologic Document 5081 9544 Revision 002 Issued March 2020...
Page 5: ...FAXITRON CT USER MANUAL HOLOGIC REVISION 002 1 SECTION 1 Introduction...
Page 14: ...FAXITRON CT USER MANUAL HOLOGIC REVISION 002 2 SECTION 2 Installation and Set up...
Page 21: ...FAXITRON CT USER MANUAL HOLOGIC REVISION 002 3 SECTION 3 Calibration...
Page 33: ...FAXITRON CT USER MANUAL HOLOGIC REVISION 002 5 SECTION 5 Faxitron CT Software Operation...
Page 63: ...FAXITRON CT USER MANUAL HOLOGIC REVISION 002 7 SECTION 7 Service and Troubleshooting...
Page 65: ...FAXITRON CT USER MANUAL HOLOGIC REVISION 002 8 SECTION 8 Schedule of Maintenance...
Page 78: ...FAXITRON CT USER MANUAL HOLOGIC REVISION 002 9 SECTION 9 Revision History...


