


3-5
●
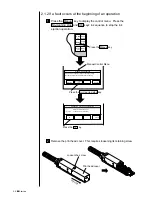
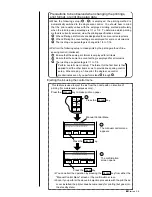
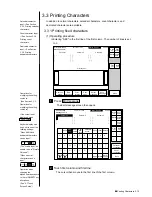
Setting Print Lines
3
2
1
4
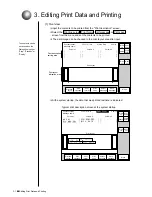
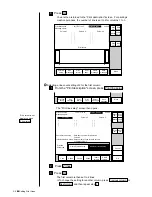
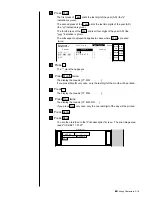
Press OK .
You are then returned to the "Print description" screen. For printings
creation purposes, the number of line is set to 4 for columns 1 to 3.
》
《
Column 1
Column 2
Column 3
[・・・・・・・・・・] [・・・・・・・・・・] [・・・・・・・・・・]
[・・・・・・・・・・] [・・・・・・・・・・] [・・・・・・・・・・]
[・・・・・・・・・・] [・・・・・・・・・・] [・・・・・・・・・・]
[・・・・・・・・・・] [・・・・・・・・・・] [・・・・・・・・・・]
2011.07.07 12:45
Manual
Menu
Status: Ready
Com=0
Prev.
col.
Next
col.
Select
message
Message name
[ ]
Start
up
Shut
down
Print line
setup
Edit
message
format
Print
spec.
Comm
On/Off
Save
message
Print layout
Print description
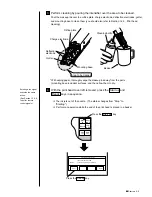
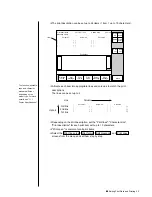
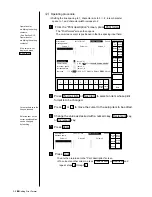
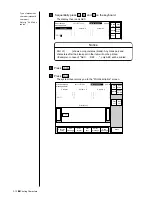
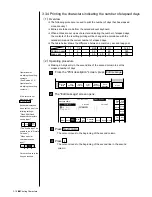
2 Selecting a line count setting of 2 for the first column
From the "Print description" screen, press Print line setup .
Menu
Select
message
Print line
setup
Edit
message
format
Print
spec.
Save
message
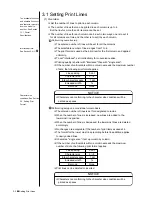
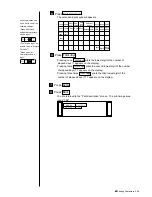
The "Print line setup" screen then opens.
Press 2 lines .
Print line
setup type
Print line setup
2011.07.07 12:45
Manual
OK
1 line
2 lines
3 lines
4 lines
Individual column setup
Overall column setup
Cancel
Insert
column
Delete
column
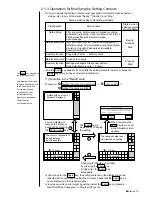
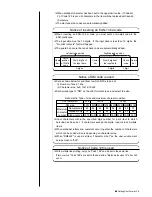
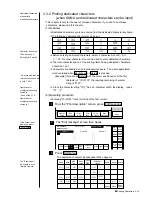
Overall column setup : Sets same number of lines for all
columns.
Individual column setup : Sets number of lines for each column,
or deletes column.
Column 1
Column 2
Column 3
[
・・・・・・・・・・
] [
・・・・・・・・・・
] [
・・・・・・・・・・
]
[
・・・・・・・・・・
]
[
・・・・・・・・・・
] [
・・・・・・・・・・
]
[
・・・・・・・・・・
]
[
・・・・・・・・・・
] [
・・・・・・・・・・
]
Status: Ready
Com=0
Prev.
col.
Next
col.
Message name
[ ]
Start
up
Shut
down
Comm
On/Off
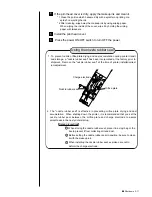
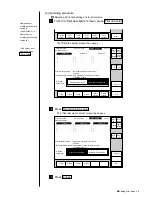
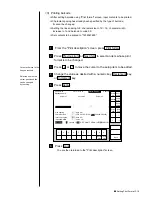
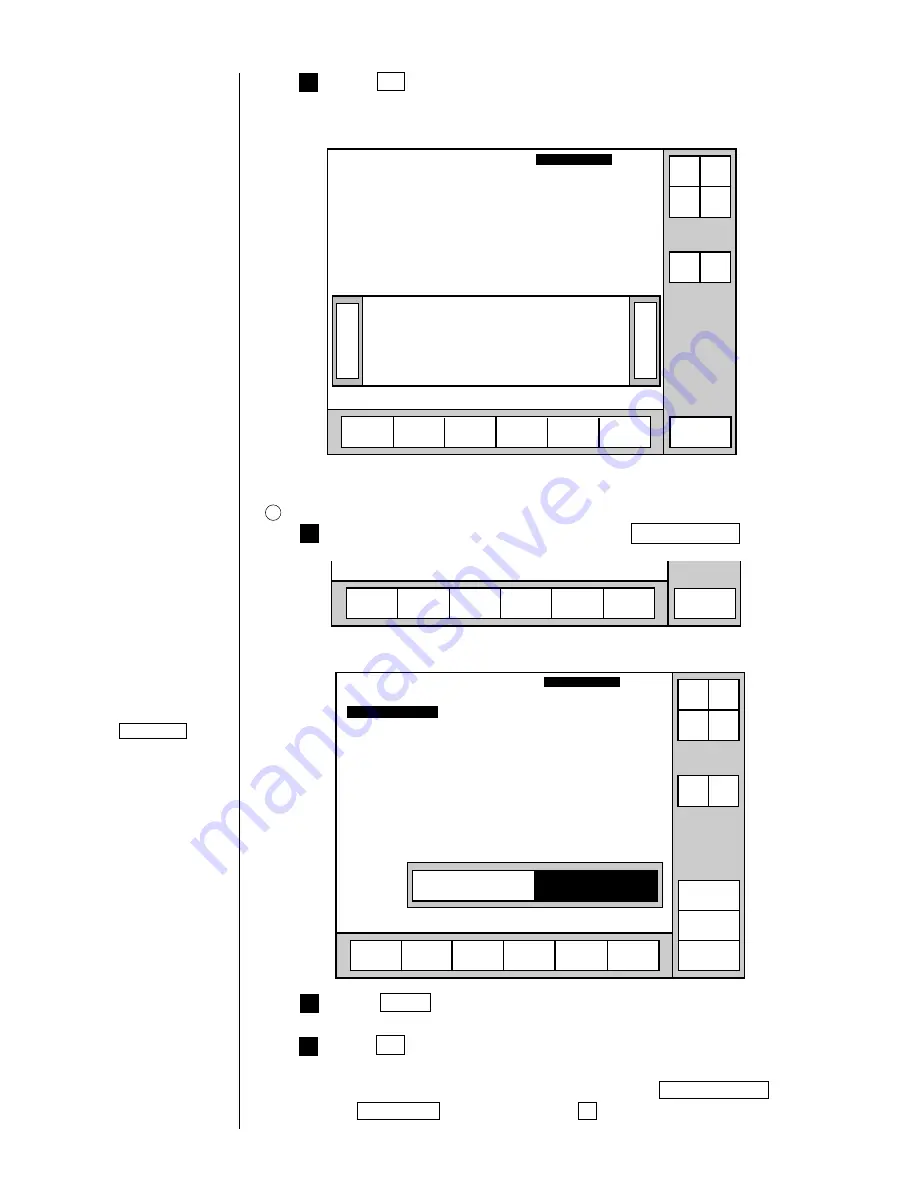
Press OK .
The first column is then set to 2 lines.
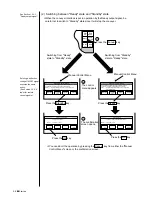
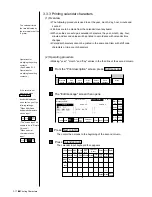
¡
To change the setting for another column, press Previous column or
Next column and then repeat step 2 .
If the cursor is not
displayed, press
Show cursor .
Summary of Contents for PXR-D
Page 319: ...3S23L1307 3B PXR D E7 HEC ...


